1REQUIREMENT - Back to top
At the basic level, this module will require the following conditions:
- Support Magento 1.7.x; 1.8.x and 1.9.x
2INSTALLATION - Back to top
2.1 Extension Installation
There are two ways to install extension:
- Step 1: Download and unzip extension contents on your computer and navigate inside the extracted folder.
-
Step 2: Upload folders skin and app from our download package to your Web server’s document root (from here on, referenced as {docroot}). You should see a directory layout like this:
{docroot} /magento/
app/
index.php
js/
lib/
LICENSE.txt
media/
pear/
skin/
var/
- Step 3: Login your Magento Admin
- Step 4: Navigate to System => Configuration => find SM Amazing Slideshow module (in the left of column) to configure module

- Step 5: You will see installed extension, click extension’s name tab to go to extension configuration page.
OR you also install the steps as following:
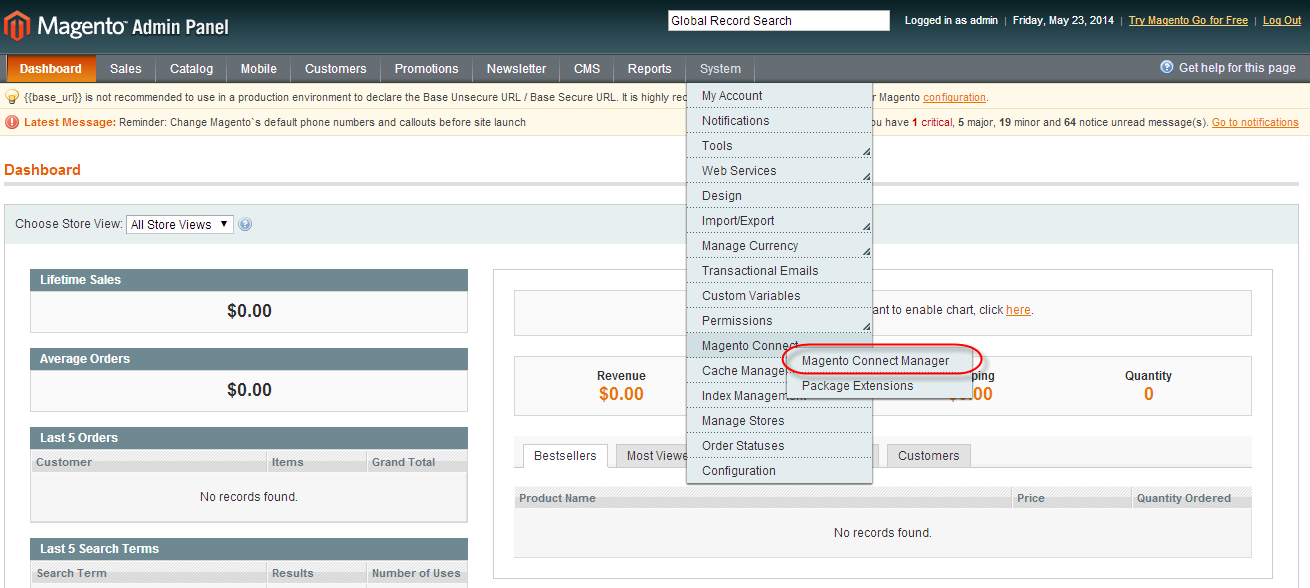
Step 1: In the Administrator page, Navigate to System >> Magento Connect >> Magento Connect Management

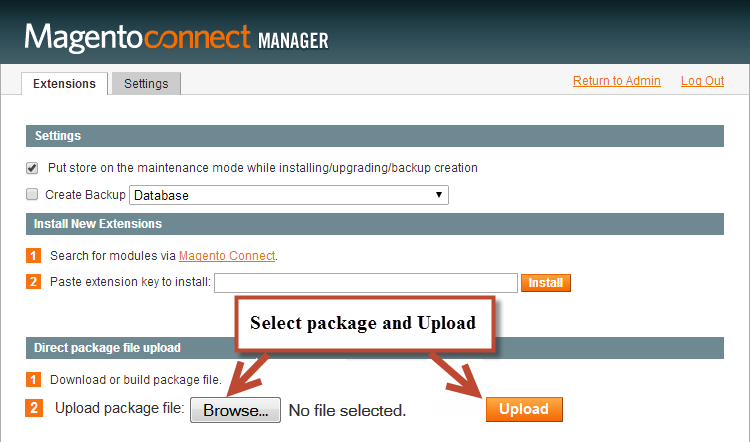
Step 2: Click Browse and Upload package file

Important Note:
- After installing extension, you should logout first and then login Admin Panel to ensure all functions work normally.
- You should disable all caches in cache management in the installation and configuration process.
2.2 Page Configuration
- If you want to display this module on any page that you want, Please go to CMS > Page > Edit SM Amazing Slideshow > Tab Content and add this code:
|
1
|
{{block type="amazingslideshow/list" name="amazingslideshow.list.default" template="sm/amazingslideshow/default.phtml"}}
|
3EXTENSION CONFIGURATION - Back to top
3.1 Below is module layout

3.2 Module Configuration
Note:We used the images of module’s installtion on Magento 1.9.x to illustrate
After installing, go to System -> Configuration and find SM Amazing Slideshow (in the left of column) to configure.
The parameters are divided into the following groups:
- General settings
- Source Options
- Product Options
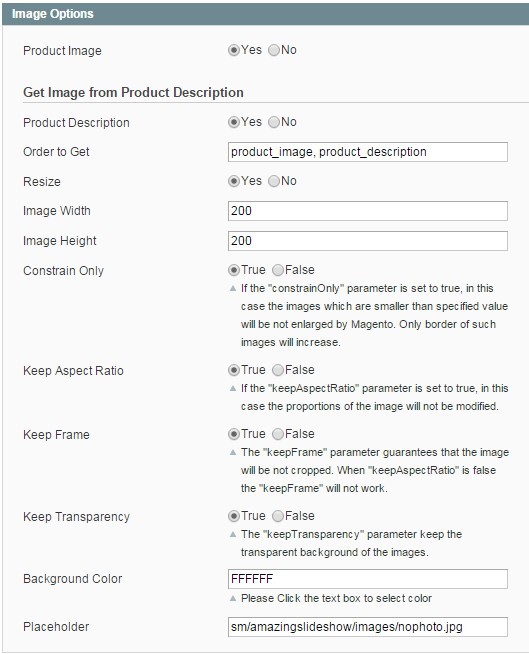
- Image Options
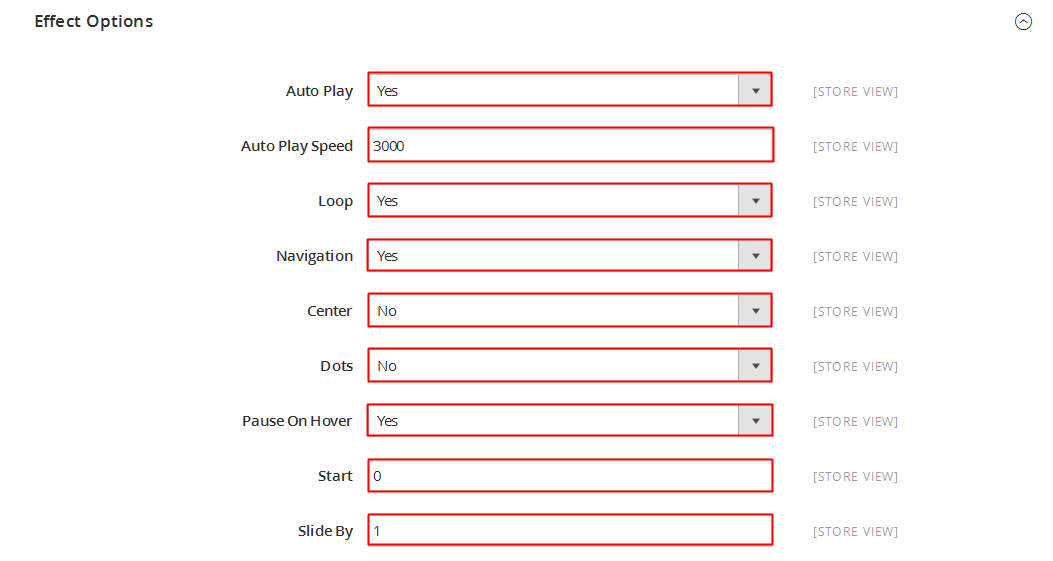
- Effect Options
- Advanced Options
Let’s look at the parameters in detail:
4SUPPORT - Back to top
Thank you so much for purchasing this module. If you have any questions that are beyond the scope of this help file, please send us via: Support Tickets System
Thanks so much!


