When you buy the module the first time, you will have the newest version.
1REQUIREMENT - Back to top
At the basic level, this module will require the following conditions:
- Compatible with Magento 1.9.x
- Responsive with any smart devices such as desktop, mobile, tablet, etc.
2INSTALLATION - Back to top
2.1 Extension Installation
There are two ways to install Magento extension:
First One:
- Step 1: Download and unzip extension contents on your computer and navigate inside the extracted folder.
-
Step 2: Upload folders skin, app and js from our download package to your Web server’s document root (from here on, referenced as {docroot}). You should see a directory layout like this:
{docroot} /magento/
app/
index.php
js/
lib/
LICENSE.txt
media/
pear/
skin/
var/
Note: In case, you are using one of our Magento templates, after uploading the above files, you can see a message that those three directories already exist on the server. Because this will not overwrite any Magento core files, this will only add the theme to your Magento. So please confirm that you want to merge directories.
Second way: You also install the steps as following:
Step 1: In the Administrator page, Navigate to System >> Magento Connect >> Magento Connect Management
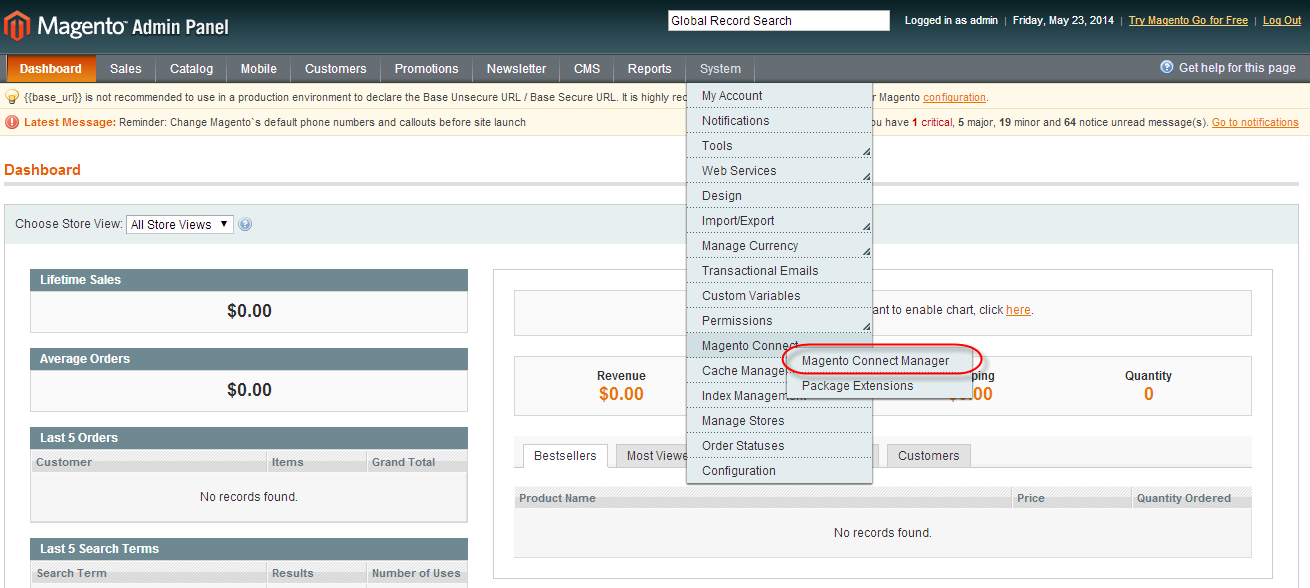
Step 2: Click Browse and Upload package file

2.2 Refresh Cache
After installing this extension, it is recommended to refresh cache.
- If the cache is enabled, after each configuration change, extension installation, upgrade or uninstall always refresh the cache. To do this, go to System >> Cache Management
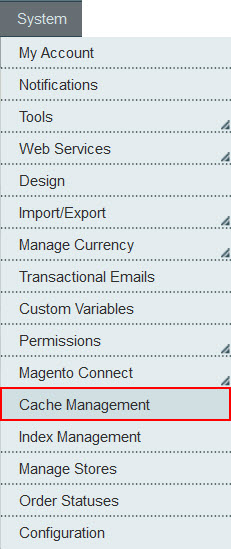
- Click Flush Magento Cache button:

- Don’t forget to log out from the admin panel, and log in again to conduct other tasks.
3SM Camera Slide Editing - Back to top
With SM Camera Slide version 1.0, you can now add a custom Slider to any or every page on your website, easily show your quality produts for your customers. It also means that you can also add as many slider as you like. Please, read carefully the Written instructions and screen-shots which are outlined below:
3.1 Create Slider
- In Admin Panel, navigate to SM Camera Slide >> Manage Slide.
.png)
- click Add Slide button to create slide. This Slide called Parents Slide because it inside contains other sliders( images).
.png)
3.2 Main Settings
when you add or create a new slide ( parents slide), the process includes 2 parts to complete a slide.
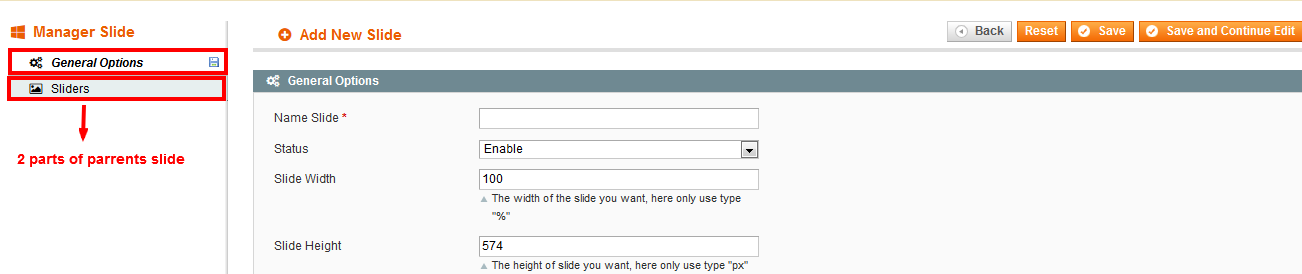
- General Options
- Sliders
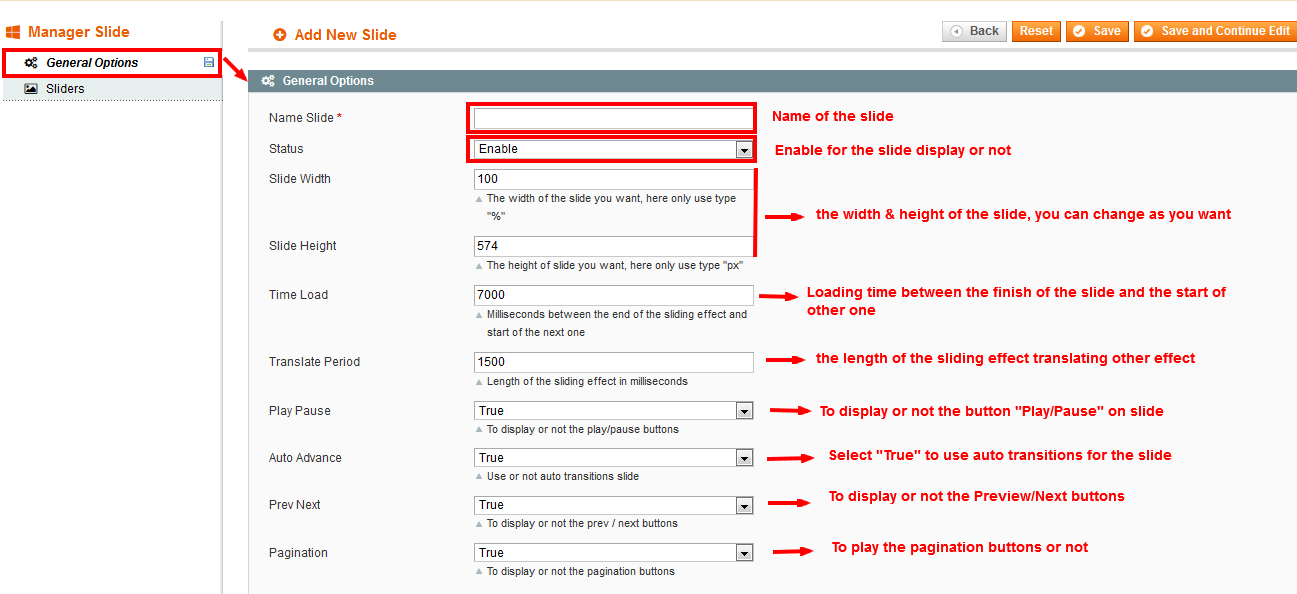
- Name Slide: This is required. A Internal used Name for the Slider. Only for Backend Usage.
- Status: Enable orr Disabled state will decide the slide which is shown orr not on Frontend area.
- Slide Width/Height: It regulates the dimensions of the slide.
- Time Load: loading time when finishing a slide (image) and starting a new one.
- Translate period: It customizes the length of sliding effect(calculated by miliseconds).
- Play Pause: Set the Play/Pause button is displayed or not.
- Auto Advance False options you select, when you click on the slide, it will stop or not.
- Transition Slide: Use or not the auto transition slide.
- Preview / Next : To display or not the preview/ next buttons on the slide.
- Pagination: Set the pagination of the Slide.
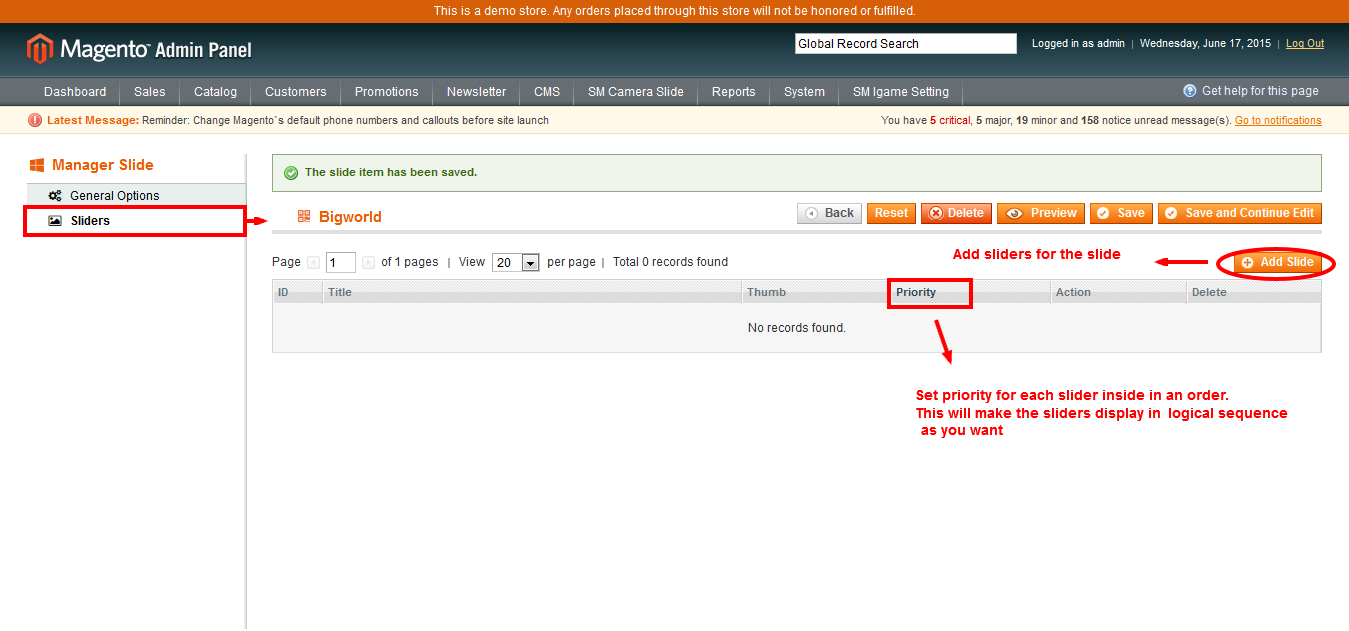
- Add sliders on the slide: Click to “Add Slide” to add sliders inside parents slide. It may be 1 or more sliders, you can add as much as you want.
- Priority: Set Priority for sliders in order.
3.3 Edit Slider
In this part, you will know how to create or edit a slider inside the Slide (or parents slide).
In the “Sliders” part of ” Manage slide”, by clicking on Add Slide button on the right conner of screen and start to edit new slider which is inside the slide. ( Each the slide may contain many sliders as you want).
The New Slide tab automatically appears, as shown on the following screenshots.
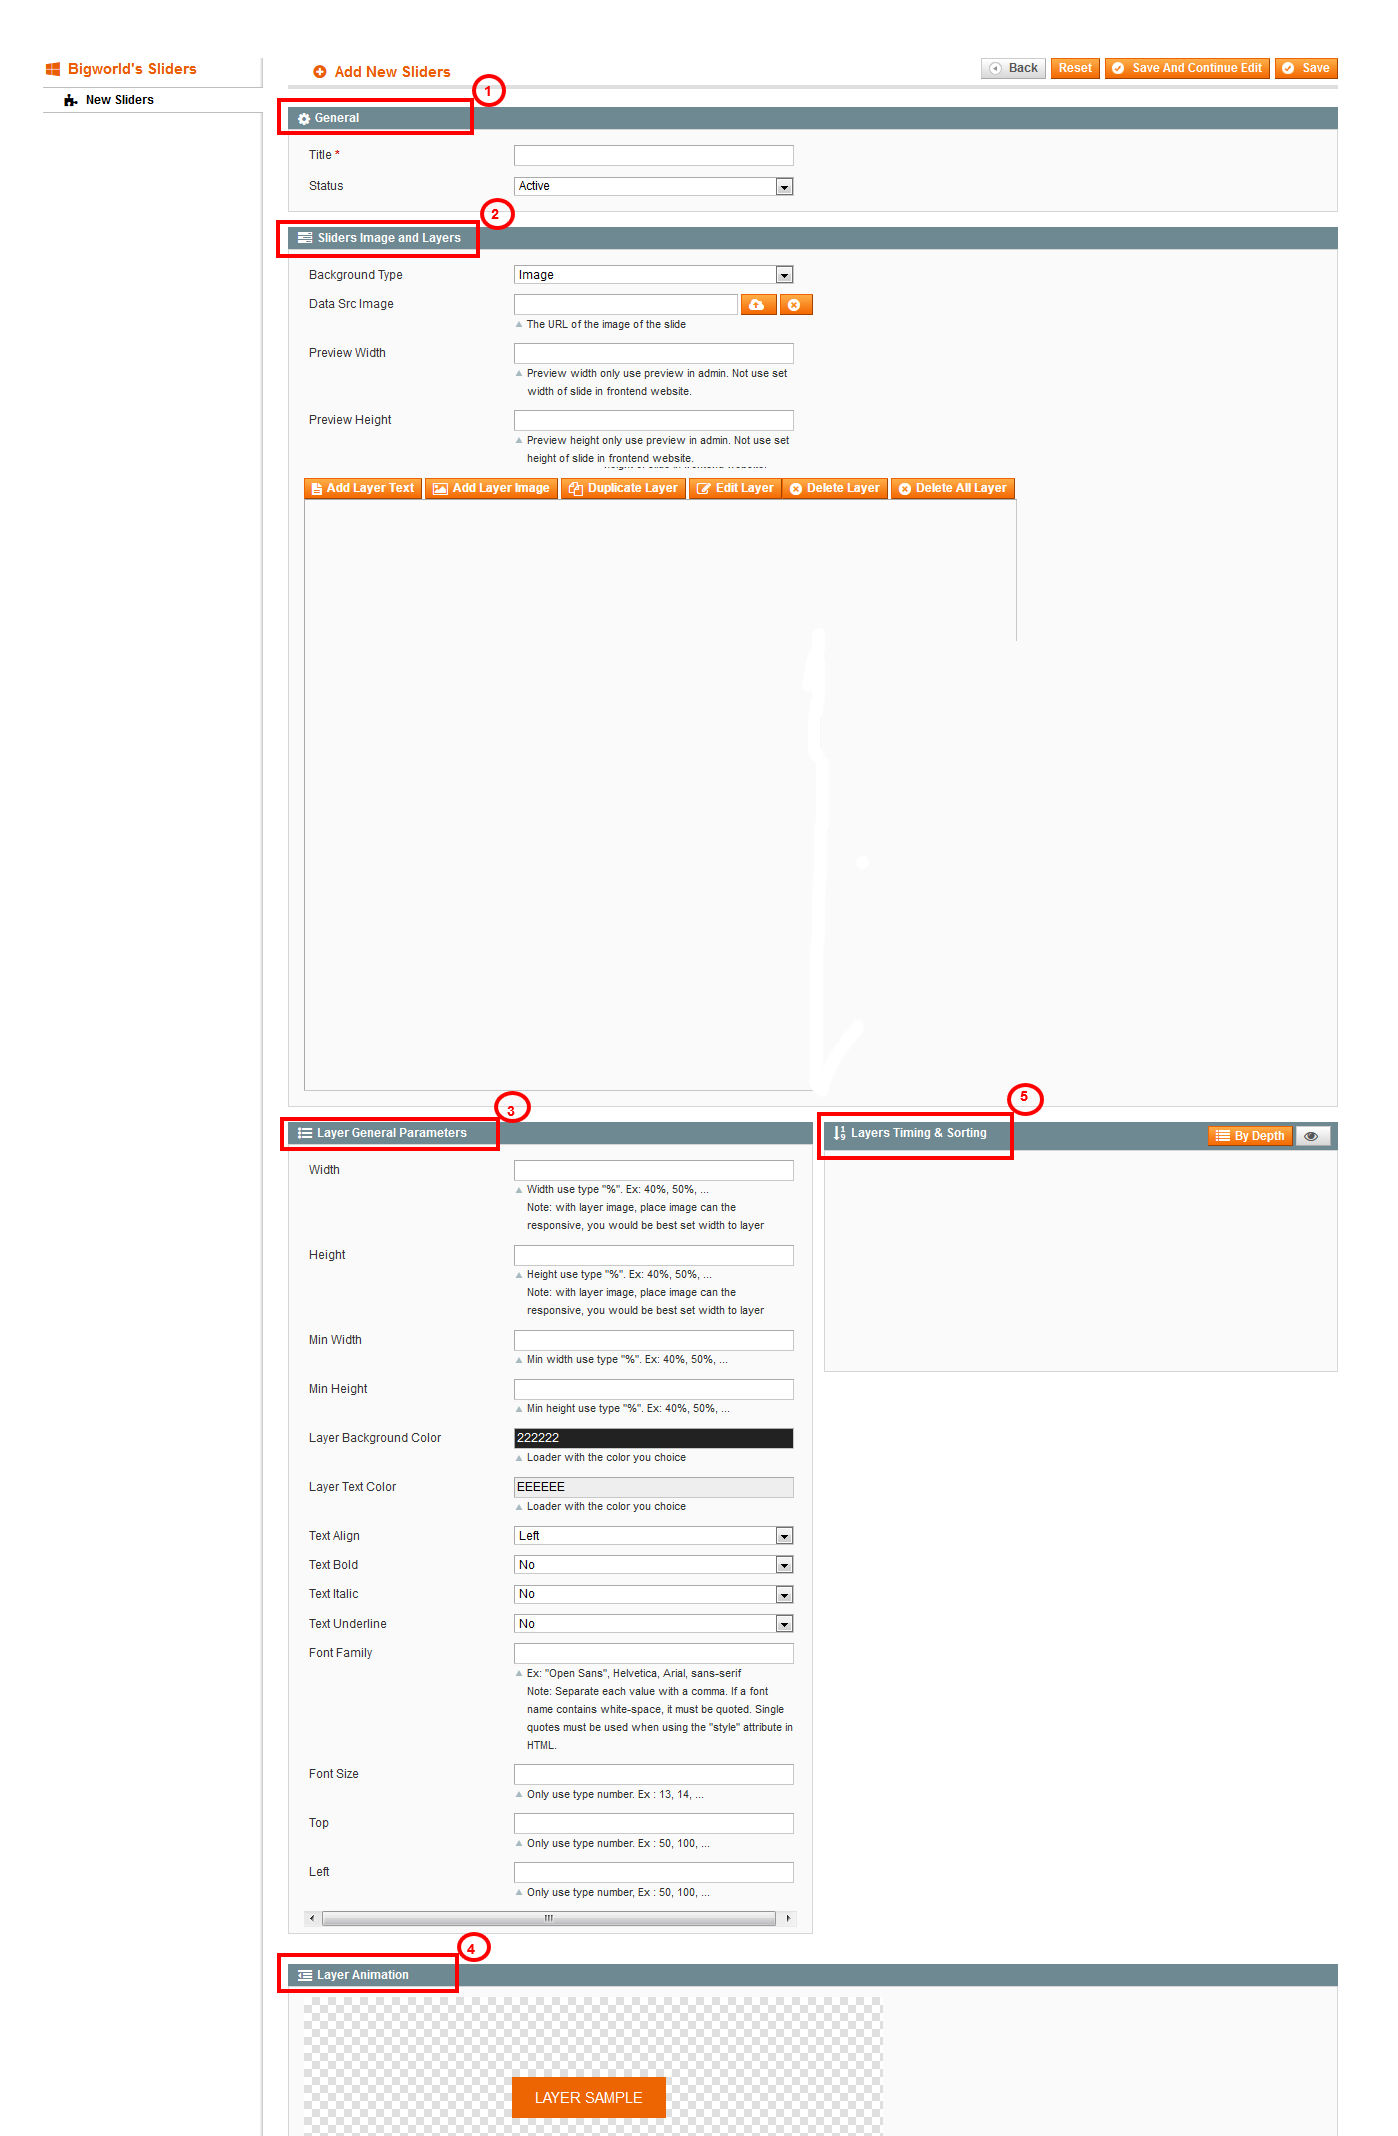
The General Settings will help you change 2 items such as Title and Status. That make your slide is displayed on frontend or not .

- Title: Used only for the slider in the Slide and it only called in Backend setting.
- Status: Active/ Not Active - used for Editing, modifying the slide. If it is not active, Frontend wont show this slide at all.
In this part, the column “Background Type” appears, you can choose “Image” or “Color” to set their layers.
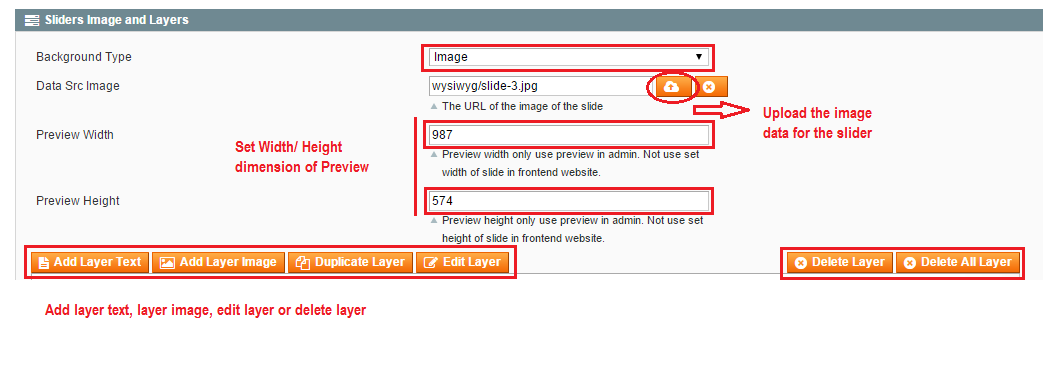
- Background Type:: Select “Image”.
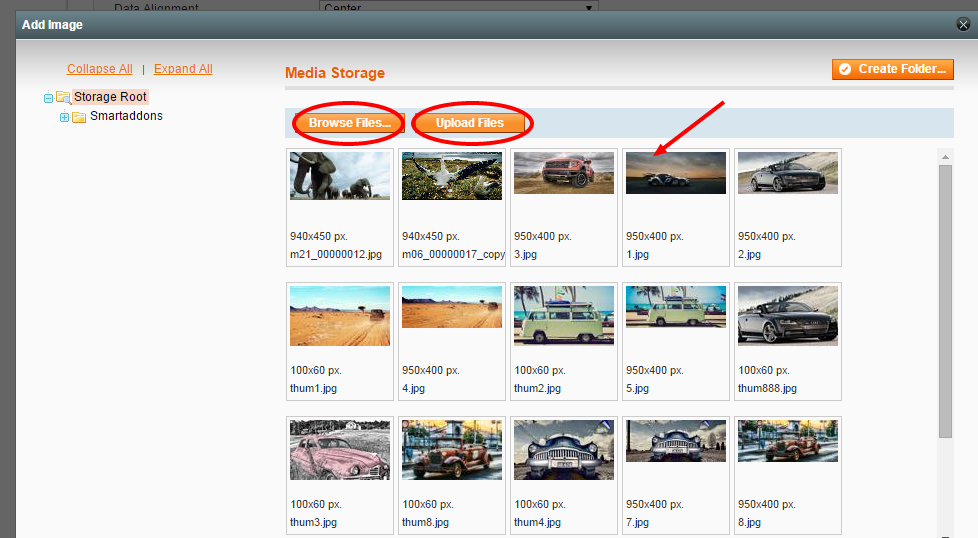
- Data Src Image: Upload the image of the slider.
- Preview Width/Height:: Set the Width/Height dimensions of Preview.
- You can choose from following layers / captions: Text/layer/or delete layers:

- Add Layer text: Add the text for the slider, you can add one text or more.
- Add Image layer: Set the background repeat.
For this part, you can adjust general parameters as the following settings:
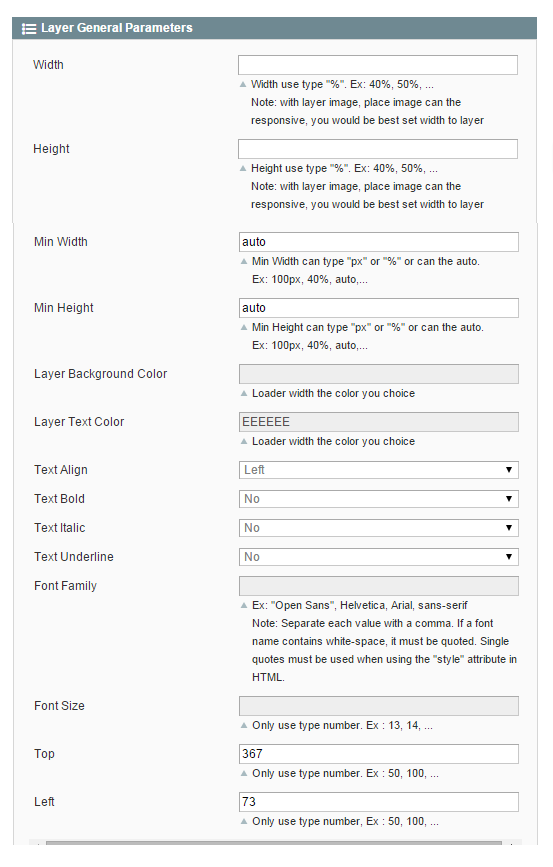
To Text Layer: The Layer General Parameters will be easily edited with following values:
- Width/Height/Min Width/Min Height: These fields will be set the dimension of text layer.
- Layer Background Color: Set color for background of text layer.
- Layer Text Color: Choose the color of text
- Text Align/Text Bold/Text Italic/Text Underline: To align the text, bold, italic or underline text.
- Font Size: Select the font size for the text.
- Top/Left: Control the position of text layer on the slide.
To Image Layer: The Layer General Parameters of image layer will be easily edited with following values:
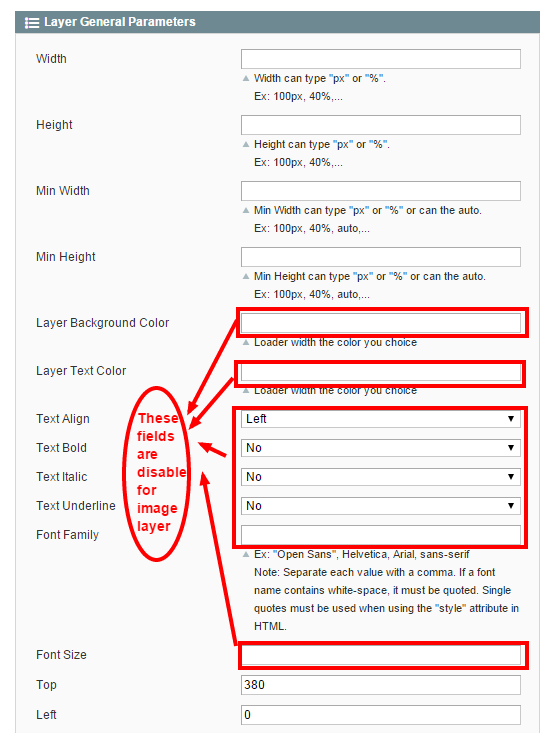
- Width/Height/Min Width/Min Height: These fields will be set the dimension of image layer.
- Layer Background Color/Layer Text color/Text Align/Text Bold/Text Italic/Text Underline/Font Size: These fields are disable for image layer, only for text layer.
- Top/Left: Control the position of image layer on the slide.
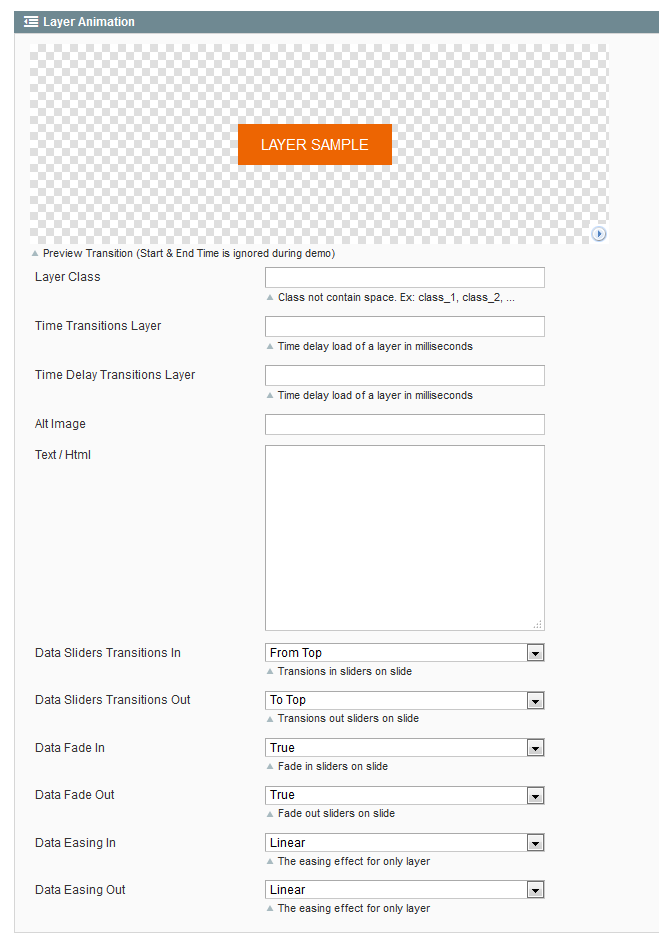
- Layer Class: Add class for layer to keep editing or customizing easily.
- Time transition layer: time for transition layer loading.
- Time Delay Layer: Loading delay time of a layer in milliseconds.
- Alt Image
- Text/Html: This field is completed by text or a code chain of html, it’s also only for Text Layer, not for Image Layer.
- Data Silders Transition in: Create data sliders transition in the slide
- Data Silders Transition out: Create data sliders transition out the slide
- Data fade in:Create data sliders transition fade in the slide
- Data fade out:Create data sliders transition fade out the slide
- Data Easing in: Select the data easing effects in.
- Data Easing out: Select the data easing effects out.
In case the slide should stay all the time on the slide, but end animation should be different then Start animation, please select your End animation, and set End Time to the same as the Slide Delay. If no End Time set, End animation will be ignored !
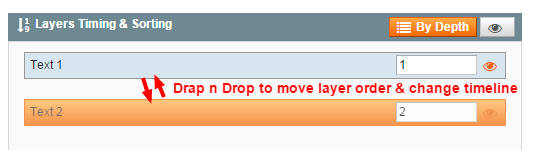
By Depth, you can see the layers in order:
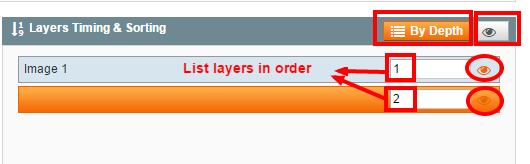
Use drag’n’drop to move layers, change timeline
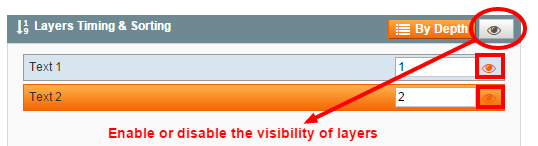
Edit visibility: click on the “eye” icon to hide / show the Layer from the Drag & Drop Section above, for easy Editing of the captions.
3.4 SM Camera Slide Configuration
Please follow the instructions below to display SM Camera Slide Module on Frontend Area.
You have 2 options A or B to display the SM Camera Slide on User’s Interface, administrator only use one of both ways below to display the module SM Camera Slide on Frontend.
This option allows you to set the slide to be displayed on the homepage and other pages.
Note: Before doing “Add widget”on any pages, you should navigate to SM Camera Slide >> Settings . In the “General Settings”, in ” Use Widget”, select “Yes” and then,click to “Save Config”
Now, you need to do the following tasks.
- Go to your admin panel > CMS > Pages.
- Click on the page or add a new page where you would like the SM Camera Slide widget to appear, open the Content section and click on the Insert Widget icon.

A new pop-up will be opened. You can pick the Widget Type: SM Camera Slide from the drop-down menu, and select Slider ID you want to display. Then click the Insert Widget button at the top right corner.
.png)
After that, click the Save Page button to save and show SM Camera Slide on the front-end.
As the same beginning steps as option A, Option B helps admin can update XML code chain (insert the available code chain or create an other) to customize any position for displaying their slider:
However, before doing “Add widget”on any pages, you should navigate to SM Camera Slide >> Setting. In the “General Settings”, in ” Use Widget”, select
“No”
and then,click to “Save Config”.
Now, you need to do the following tasks.
- Go to your admin panel > CMS > Pages.
- Click on the page or add a new page where you would like the SM Camera Slide widget to appear, open the Design section, coppy & paste the code chain.
-
Layout Update XML :
12345<reference name="content"><block type="sm_cameraslide/slide_preview" name="sm_cameraslide" as="cameraslide" before="" after=""></block></reference>Note: in Layout update XML, you should pay attention that:
- “name=”…” : Fill the position you want to display the slide
- “before=”…”: Write the name of position you want your slide is before it.
- “after=”…”: Complete the name of position you want your slide is after it.
However, “before=”…” or “after=”…”" : you can fill both of them, or one of both, not necessary.
Finally, back to frontend and see the SM Camera Slide displaying.
4SUPPORT – Back to top
Thank you so much for purchasing this extension. If you have any questions that are beyond the scope of this help file, please send us via: Support Tickets System
Thanks so much!