1REQUIREMENT - Back to top
At the basic level, this module will require the following conditions:
- Support Magento 1.7.x; 1.8.x and 1.9.x
2INSTALLATION - Back to top
2.1 Extension Installation
There are two ways to install extension:
- Step 1: Download and unzip extension contents on your computer and navigate inside the extracted folder.
-
Step 2: Upload folders skin and app from our download package to your Web server’s document root (from here on, referenced as {docroot}). You should see a directory layout like this:
{docroot} /magento/
app/
index.php
js/
lib/
LICENSE.txt
media/
pear/
skin/
var/
- Step 3: Login your Magento Admin
- Step 4: Navigate to System => Configuration => find SM Cart Pro module (in the left of column) to configure this module
- Step 5: You will see installed extension, click extension’s name tab to go to extension configuration page.
OR you also install the steps as following:
Step 1: In the Administrator page, Navigate to System >> Magento Connect >> Magento Connect Management
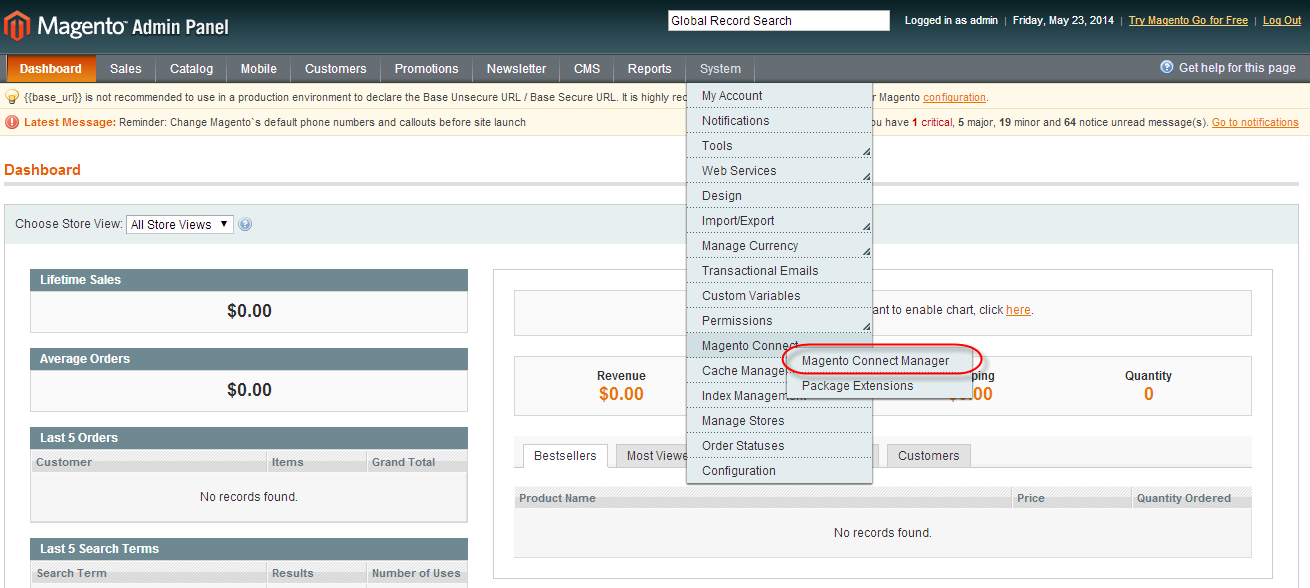
Step 2: Click Browse and Upload package file

Important Note:
- After installing extension, you should logout first and then login Admin Panel to ensure all functions work normally.
- You should disable all caches in cache management in the installation and configuration process.
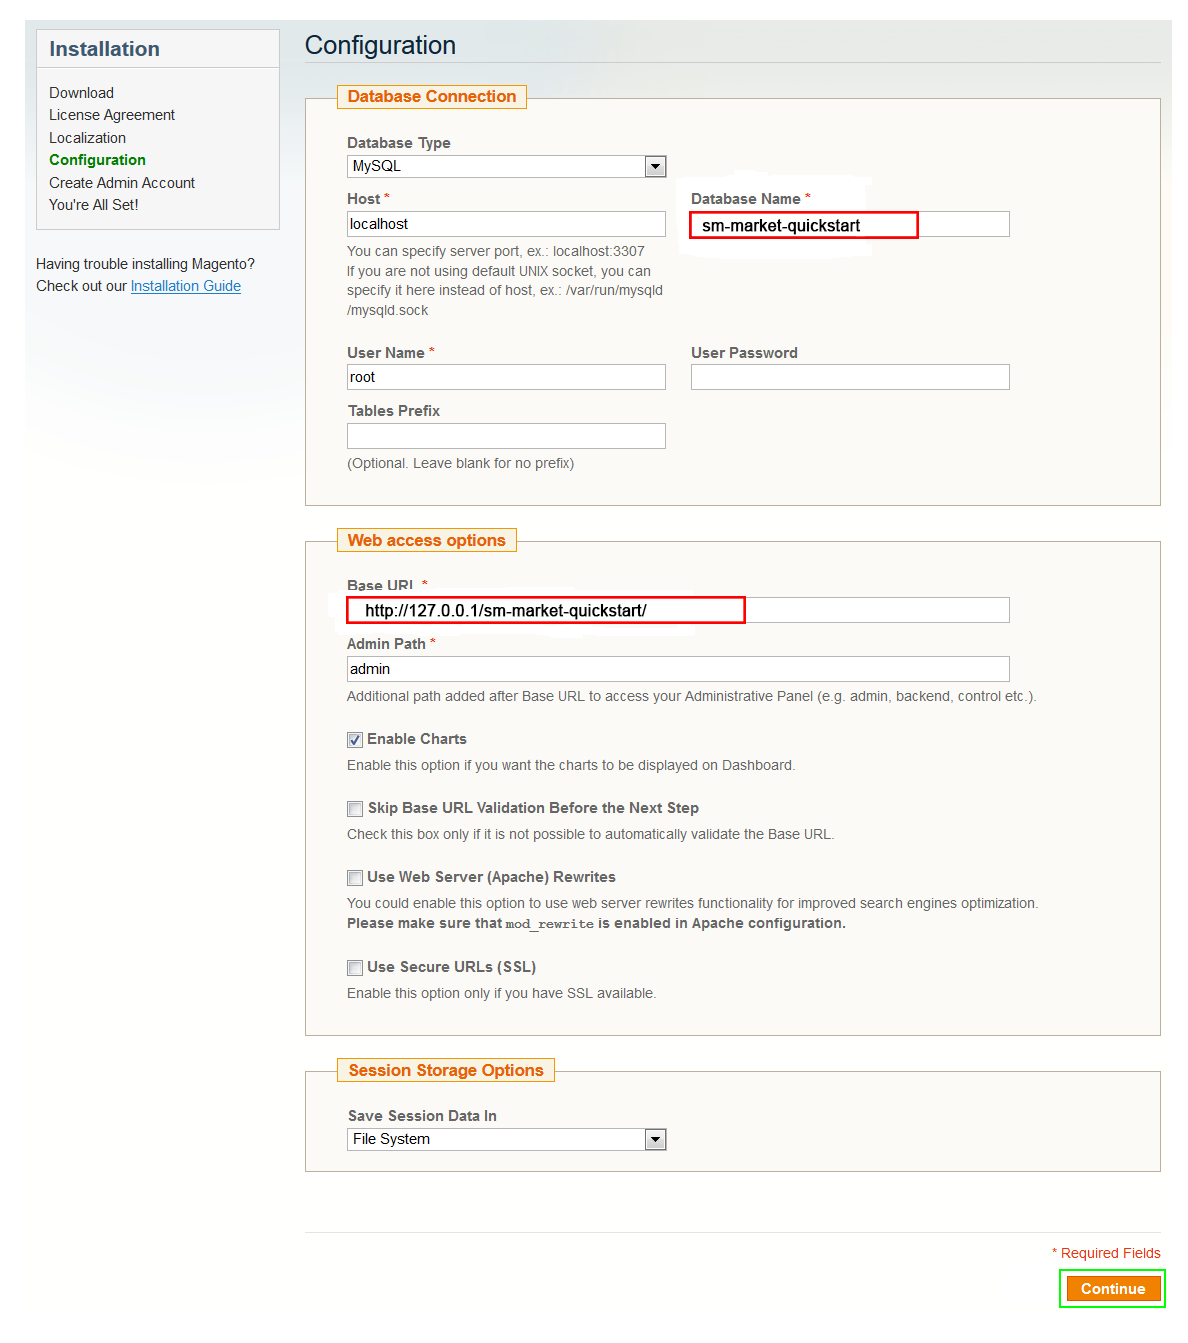
3EXTENSION CONFIGURATION - Back to top
3.1 Below is module layout
3.2 Module Configuration
Note:We used the images of module’s installtion on Magento 1.9.x to illustrate
After installing, go to System -> Configuration and find SM Cart Pro (in the left of column) to configure.
Let’s look at the parameter in detail:
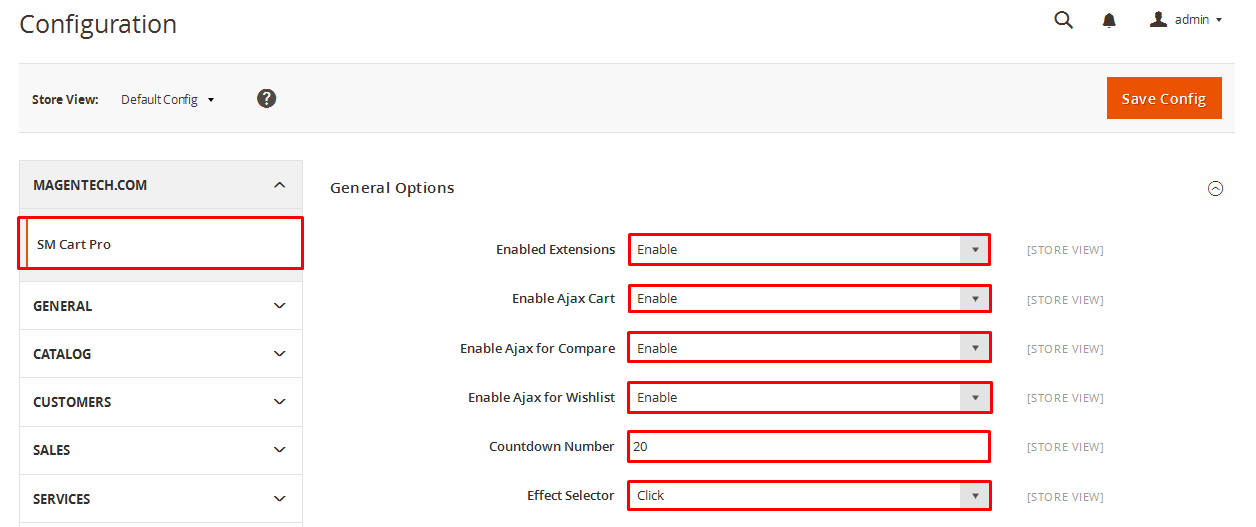
General settings
- Enable CartPro Module: Enable or disable the CartPro module displaying on Frontend area.
- Enable Ajax Cart: To Display Ajax cart for the module or not.
- Enable Ajax for Compare: Enable or disable the Ajax box for Compare button.
- Enable Ajax for Wishlist: Enable or disable the Ajax box for Wishlist button.
- Countdown Number: The time of ajax box displaying on the screen.
- Effect Selector: User can “Click” or ” Hover” when selecting.
After “Enable” these above parameters, to display them on Frontend, you need change inside code file as following link:
Root/app/design/frontend/rwd/default/template/page/html/header.phtml
Then, find the code chain “cart”:See more clearly as the below image:
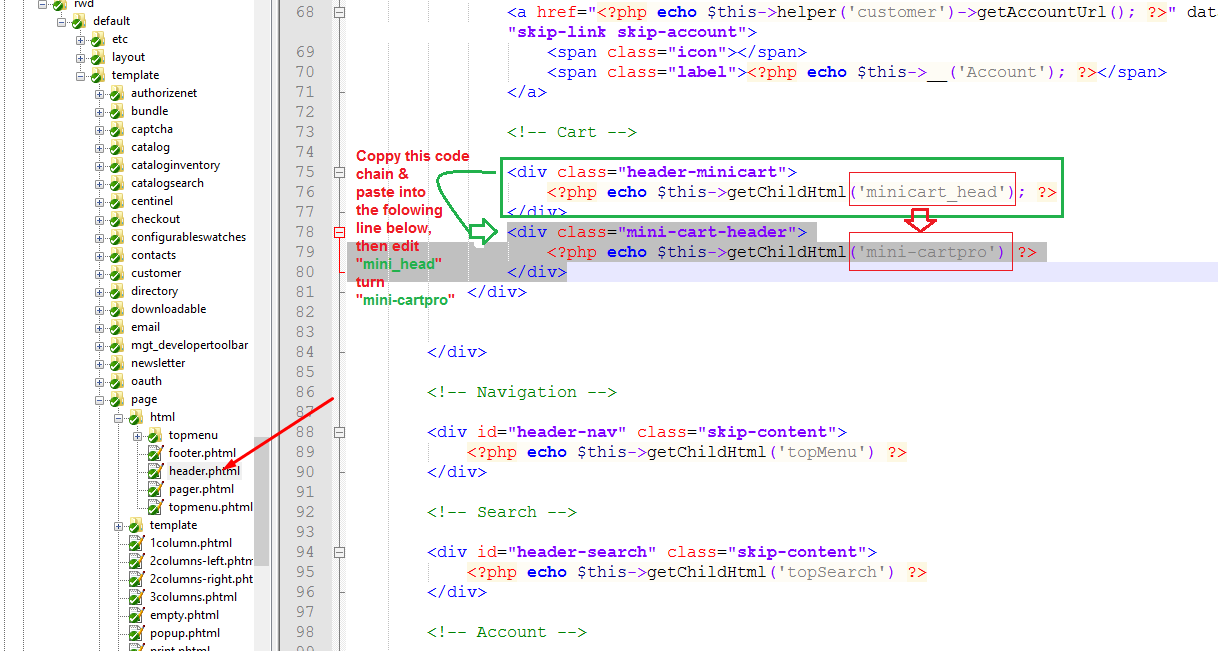
Coppy this code:
|
1
2
3
|
<div class="header-minicart">
<?php echo $this->getChildHtml('mini-cartpro'); ?>
</div>
|
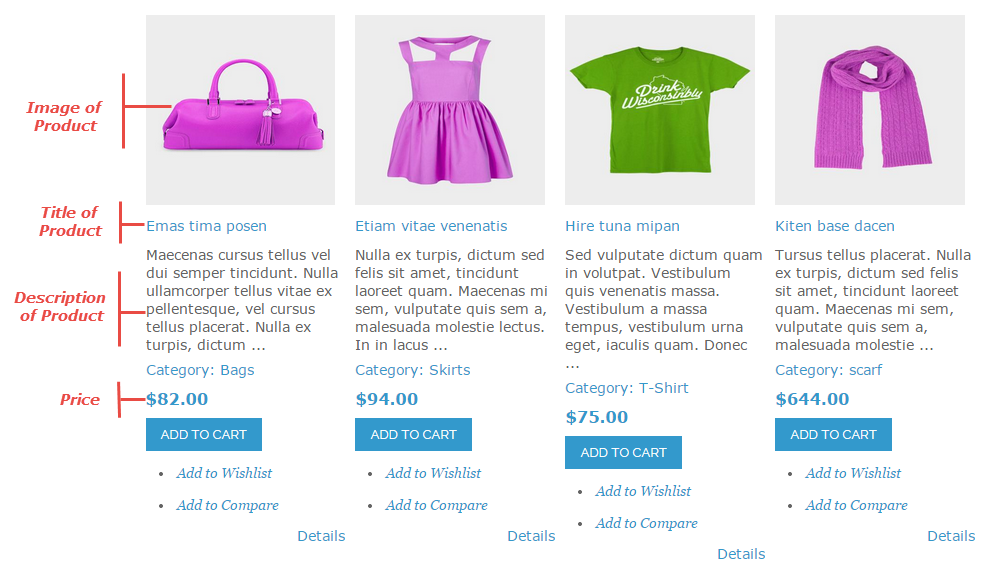
Atter that, paste into the following line which is under right these codes,and finally, save it. Now the SM CartPro Module with Ajax cart, Ajax for Wishlist running on frontend area as the following images.
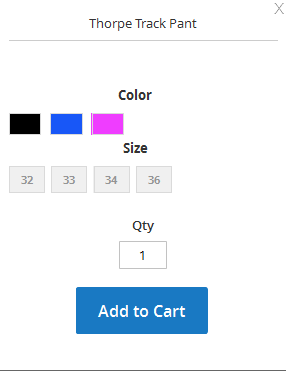
- Add To cart Ajax box on Frontend
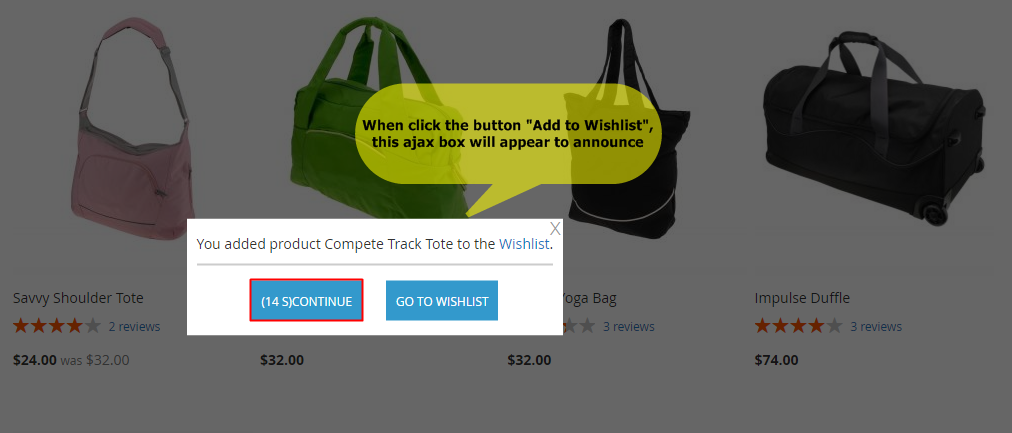
- Add to Wishlist Ajax box on Frontend: However, user need register before clicking the “Add to Wishlist” button.
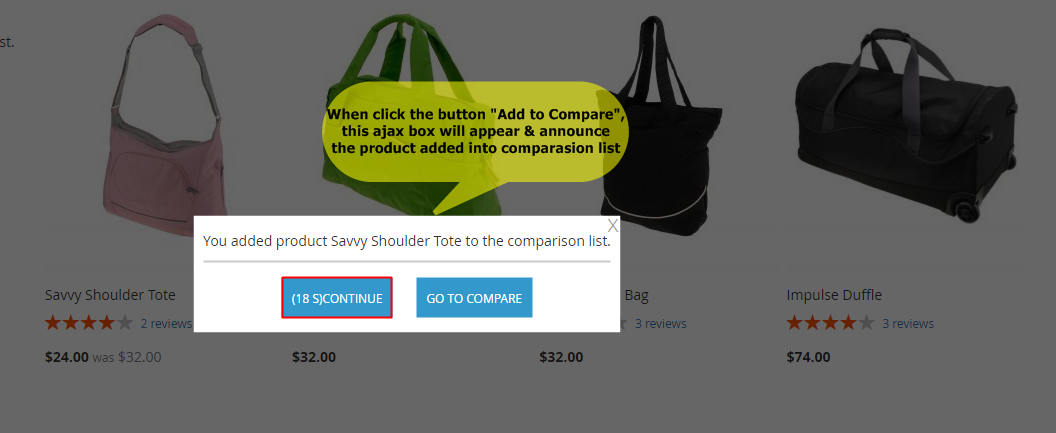
- Add to Compare Ajax box on Frontend
4SUPPORT - Back to top
Thank you so much for purchasing this module. If you have any questions that are beyond the scope of this help file, please send us via: Support Tickets System
Thanks so much!