When you buy the module the first time, you will have the latest version.
1REQUIREMENT - Back to top
At the basic level, this module will require the following conditions:
- Compatible with Magento 1.8.x and 1.9.x
2INSTALLATION - Back to top
2.1 Extension Installation
There are two ways to install extension:
- Step 1: Download and unzip extension contents on your computer and navigate inside the extracted folder.
-
Step 2: Upload folders skin and app from our download package to your Web server’s document root (from here on, referenced as {docroot}). You should see a directory layout like this:
{docroot} /magento/
app/
index.php
js/
lib/
LICENSE.txt
media/
pear/
skin/
var/
Note: In case, you are using one of our Magento templates, after uploading the above files, you can see a message that those three directories already exist on the server. Because this will not overwrite any Magento core files, this will only add the theme to your Magento. So please confirm that you want to merge directories.
OR you also install the steps as following:
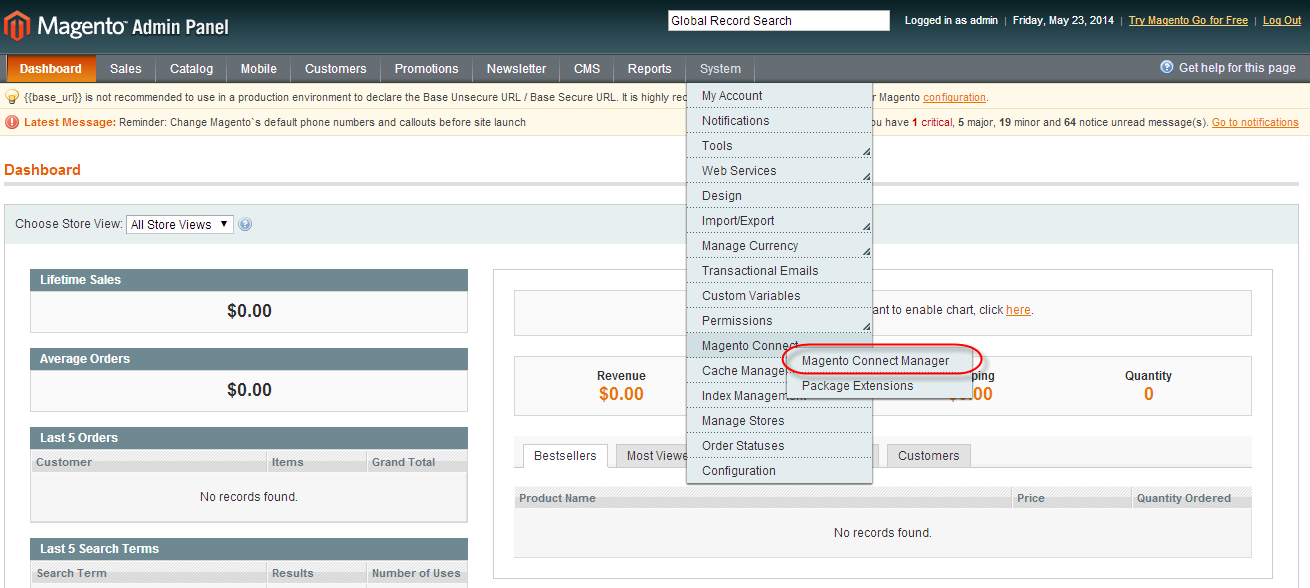
Step 1: In the Administrator page, Navigate to System >> Magento Connect >> Magento Connect Management
Step 2: Click Browse and Upload package file

2.2 Refresh Cache
After installing this extension, it is recommended to refresh cache.
- If the cache is enabled, after each configuration change, extension installation, upgrade or uninstall always refresh the cache. To do this, go to System >> Cache Management
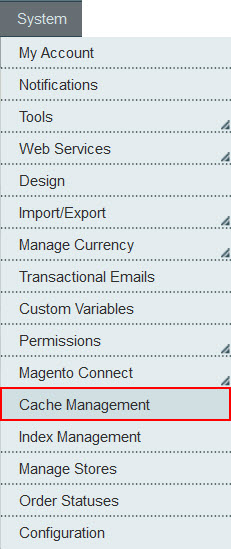
- Click Flush Magento Cache button:

- Don’t forget to log out from the admin panel, and log in again.
3SM Dynamic Slideshow Editing - Back to top
With SM Dynamic Slideshow version 2.0.0, you can now add a custom Slider to any or every page on your website. Equally, you can also add as many slider as you like. Written instructions and screenshots are outlined below:
3.1 Create Slider
- In Admin Panel, navigate to SM Dynamic Slideshow >> Manage Slider.

- click Add New Slider button to create slider.

3.2 Main Settings
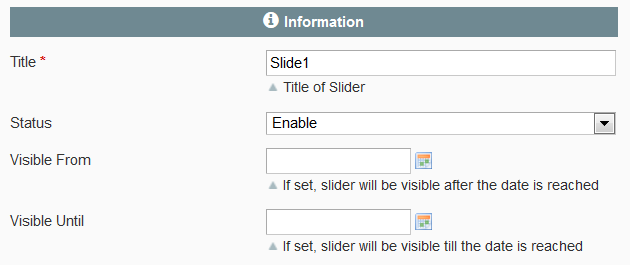
- Title: A Internal used Name for the Slider. Only for Backend Usage
- Status: Disabled will not shown on frontend
- Visible From: Slider will shown from this date
- Visible Until: Slider will shown until this date
- Slider Type: The Style / Art of the Slider
- Slide Width: Set the width of slide
- Slide Height: Set the height of slide
- Unlimited Height: On/Off the unlimited height
- Force Full Width: On/Off the force full width
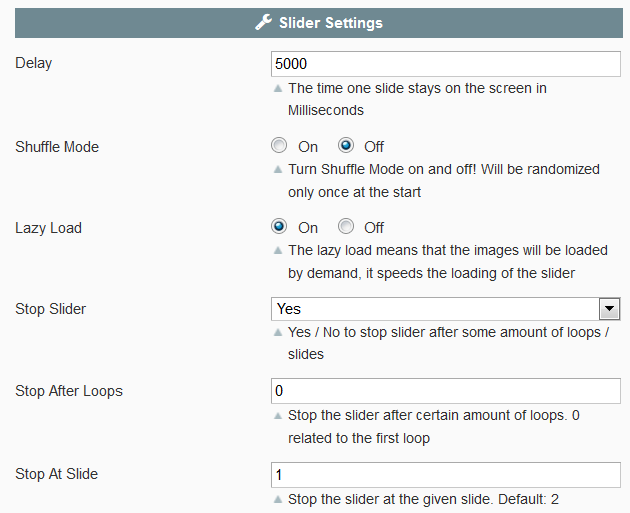
- Delay: Set the Delay Global for each slide. You can modify the Delay Time per Slide under the Edit Slide function.
- Shuffle Mode: Random Order of Slides on/off.
- Lazy Load: Use Dummy images during Document Load. Main images per slider are loaded on Demand when the slide is shown first time.
- Stop Slider: Use this setting to stop the Slider after a predefined Loop and at a predefined Slide. Loops 0 means in the first loop to stop and Stop At Slide 1 would stop directly at First slide. i.e. Stop After Loops 2 and Stop At Slide 3 would stop the slider after 2 Loops at the 3thd slide.
- Stop After Loops: Stop the slider after certain amount of loops. 0 related to the first loop
- Stop At Slide: Stop the slider at the given slide. Default: 2

- Load Google Font: Set Yes/No to Load Google Font.
- The Position of the Slider within the Container which is wrapping the slider.
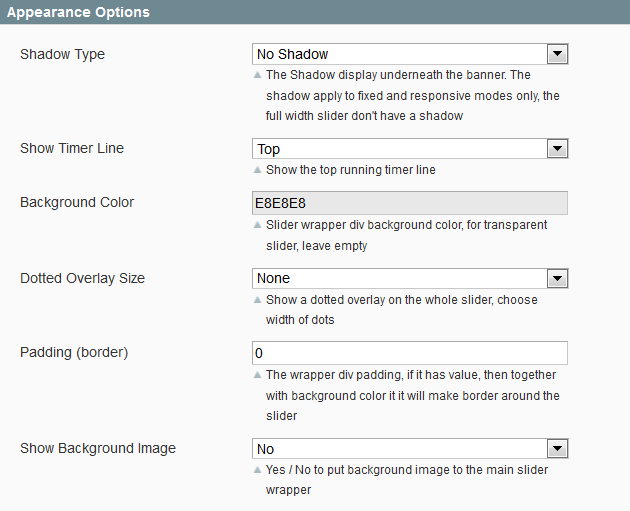
- Shadow Type: Choose between different Shadow Effects under the slider. Shadow Height is excluded of the Slide Height ! You may need to set extra margin bottom via the Position Settings!
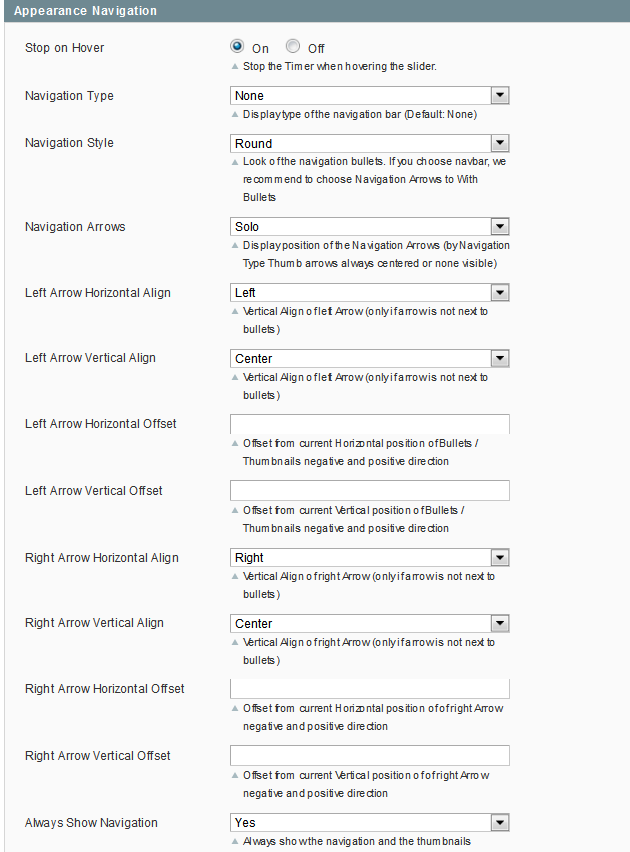
- Stop on Hover: Stops the Main slide Timer on Mouse Hover. Captions are still playing within the slide.
- Navigation Type: Set the Layout of navigation. Only Bullets, Bullets and Arrow, Thumbnails or None.
- Navigation Style: The Style / Art of the Navigation.
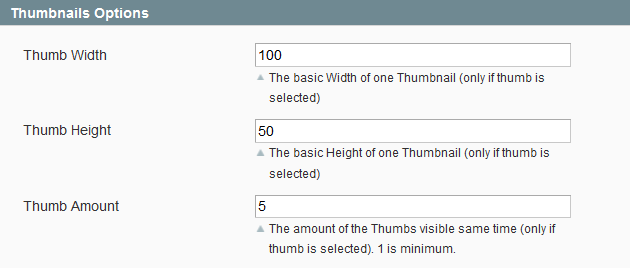
- Thumbnail Width and Height and shown Amount of Thumbs in same time. On Hover the Thumbs are scrolled
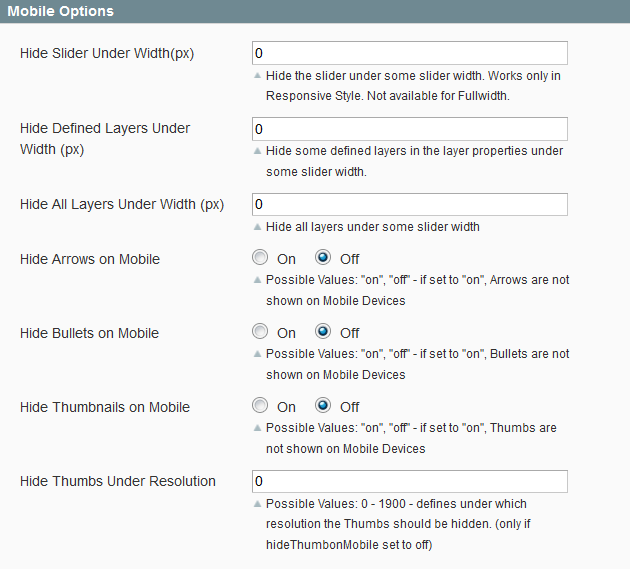
- Hide Slider Under Width: The Slider will be hidden and stopped if the Browser Size goes under this preset-ted Size. Works only if Custom Sizes set to Slider.
- Hide Defined Layers under Width: Hides predefined Captions if the Browser Size is smaller then this predefined size. To select Captions to hide, go in the Slide Editor and turn on / off the option on the Captions one by one.
- Hide All Layers Under Width: Hides All Captions if the Browser Size is smaller then this predefined size.
- Hide Arrows/Bullets/Thumbnails on Mobile: Hides chosen navigation type if the Slider is viewed on a Mobile device.
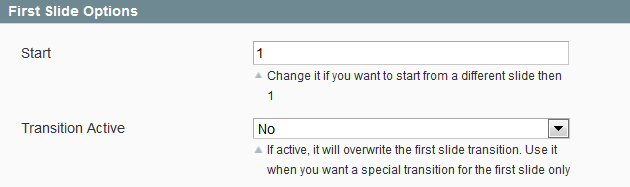
- You can set a different First Slide than the Slides Order use. You can set also a different First Transition then it defined in the Slide Editor to make sure that the first Transition is some Eye Catching animation, but later only use the Slide transitions i.e
3.3 Edit Slider
The next step is creating/editing slides. You get there by just clicking on Slides in the Revolution Slider Form window. And press Add Slide when you want to create a new slide.
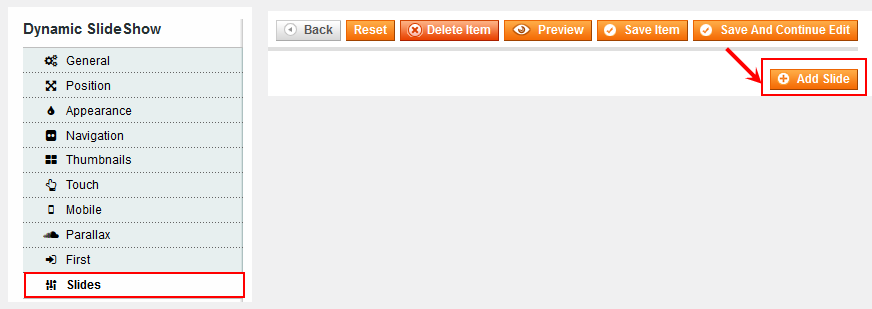
The New Slide tab automatically appears, as shown on the following screenshots.
The General Slide Settings let you change many of the items that control how your slide is displayed, such as the title, Transitions, Slot Amount, Rotation, Thumbnail and Full Width Centering, etc.
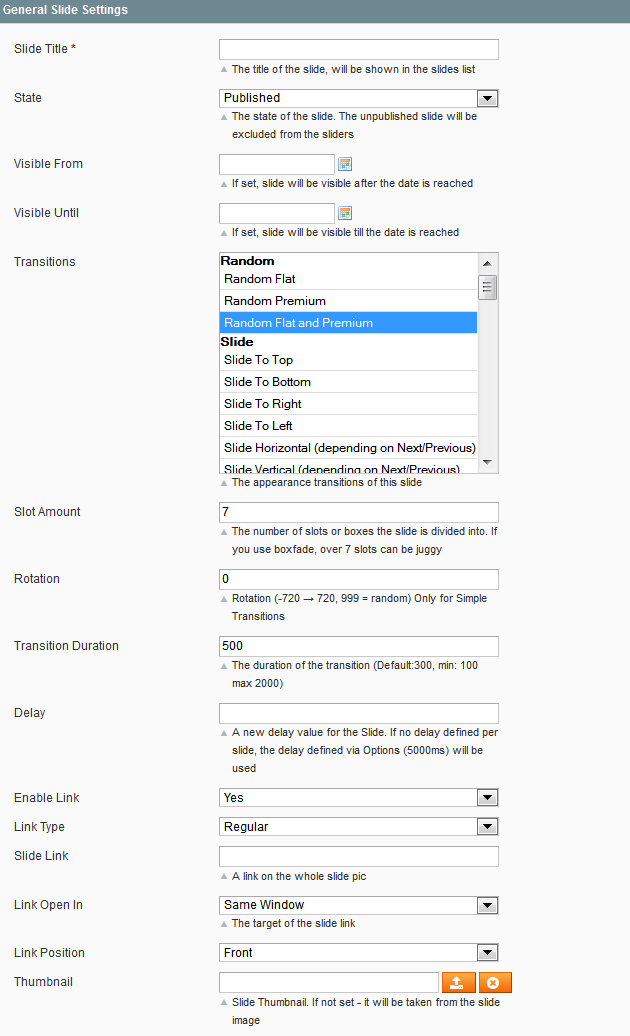
- You can set a different First Slide than the Slides Order use. You can set also a different First Transition then it defined in the Slide Editor to make sure that the first Transition is some Eye Catching animation, but later only use the Slide transitions i.e
- Slide Title: Used only Internal Naming of the slides.
- State: Published / Unpublished - used for Editing, modifying the slide. If it is Unpublished, frontend wont show this slide at all.
-
Visible From/Until:
- If set, the Slide will only be visible between the set times.
- If Visible Until is not set, the Slide will be visible as soon as the Visible From date is reached.
- If Visible From is not set, the Slide will be visible until the Visible Until date is reached.
- Transitions: The Animation Style how the Slide appearance. You can select more than one from a multiple choice drop down list.Every new loop will use an other Transition if you selected more then one.
- Slot Amount: The Amount of Boxes / Slots the slides divided into during the animation.
- Rotation: The Rotation Degree on Simple Transitions. (-720 - 720, 999 = random)
- Transition Duration: The Duration of the Transition. (Default 300, min 100 max 2000 ms).
- Enable Link: It allows a Full width/height link on the Slide. You can set Link Target and Link URL here, or a Built in function like swap to slide X, previous Slide, Next Slide
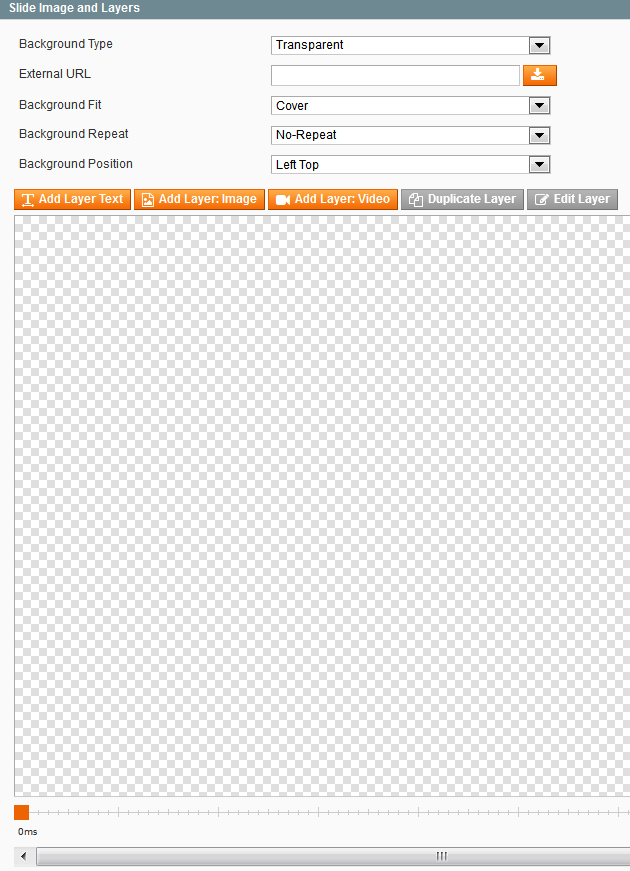
- Background Type: Select the background type.
- External URL : Get the External URL.
- Background Fit: Set the background fit
- Background Repeat: Set the background repeat.
- Background Position: Select the background position.
You can choose from following layers / captions: Text/HTML Markup, Image, Video

For individual TEXT / HTML Markup Layer click on Add Layer and follow the following settings:
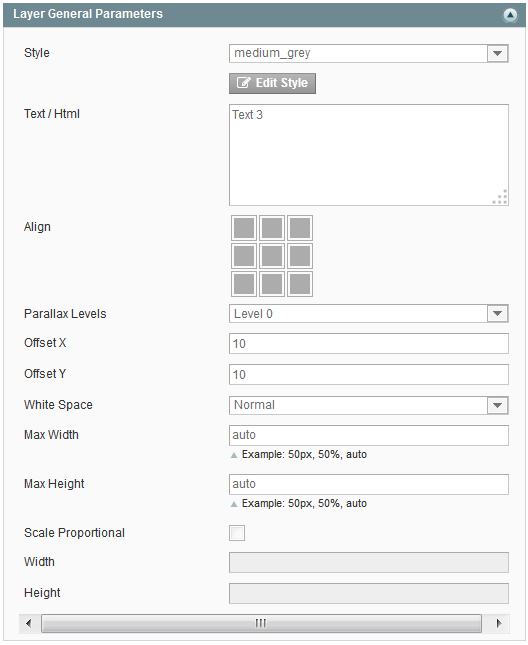
- To define a predefined Style or add your own Style use the Style Drop Down list.
- Use HTML5 Standard markups in case you wish to embed paragraphs, headings, buttons etc.
- Align: Set the Align of the Layers / Captions. Left Top is default. Drag and Drop move of the Layer will based on the Align. If you set the Align to Center Center, the Drag And drop will be based on this aligned position and use an Offset.
i.e. Center Center Offset X -100px Offset Y -100px will be used in every responsive size linear calculated. If the Screen size is scaled to 50% than the Item is still in the middle of the grid and offset is -50px -50px (linear calculated).
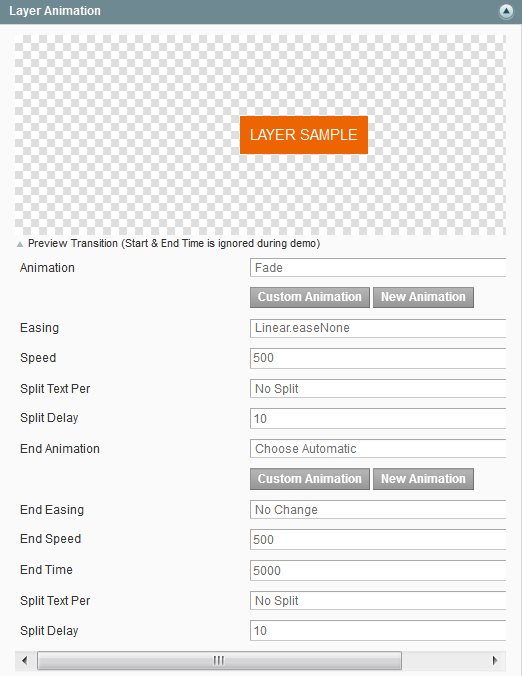
- Animation: The way the Caption appear on the screen. Select one of the Animation, Easing and Speed.
- End Animation: Optional. If not set, the Reverse Animation will be used as set in the Start Transition.
In case the slide should stay all the time on the slide, but end animation should be different then Start animation, please select your End animation, and set End Time to the same as the Slide Delay. If no End Time set, End animation will be ignored !
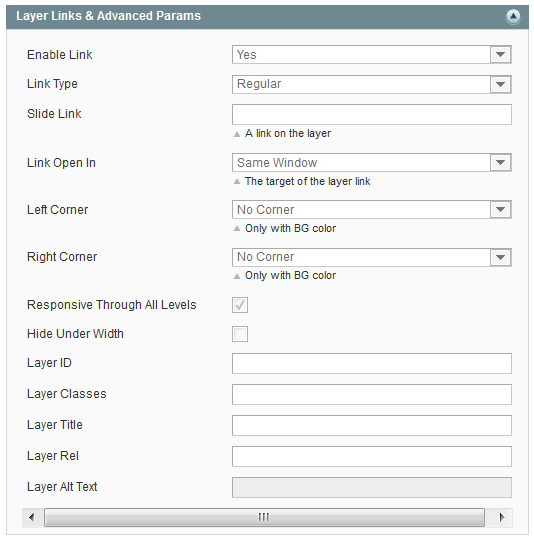
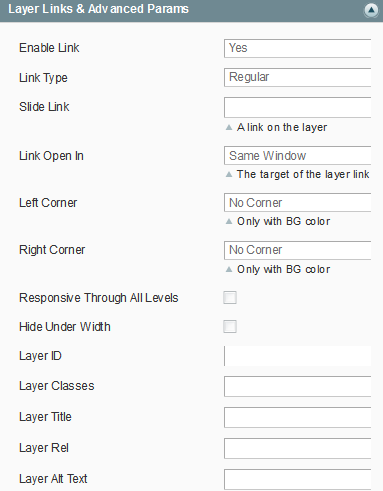
- Left Corner / Right Corner: Draw a Sharp Corner of the Caption. Only works if Background Color has been set for Caption.
- Responsive Through All Levels: If set, all HTML Containers within this Caption are resized linear to Slider Sizes. Default turned off, and only top level markup within Caption is resized.
- Hide Under With: Hide Caption under a certain width. This is useful, to have a more clear slide on mobile devices i.e.
For an individual Image Layer, click on Add Layer: Image and follow the following settings:
- Upload an image: If you choose Image as a type of layer, click into the input of Image and upload an image or choose it from Media Library. After that you can add a link to this sublayer if you want.
- Change Image Source: Click on layer, you can use Edit Layer button to change image.
- Image Scaling: Change the Width/Height of the image, you can also scale the image proportional.
Here are layer Params for the Image:

You can also add a layer video by clicking into the input of Video Add Layer: Video. When using a Video Layer you should specify Youtube or Vimeo ID.
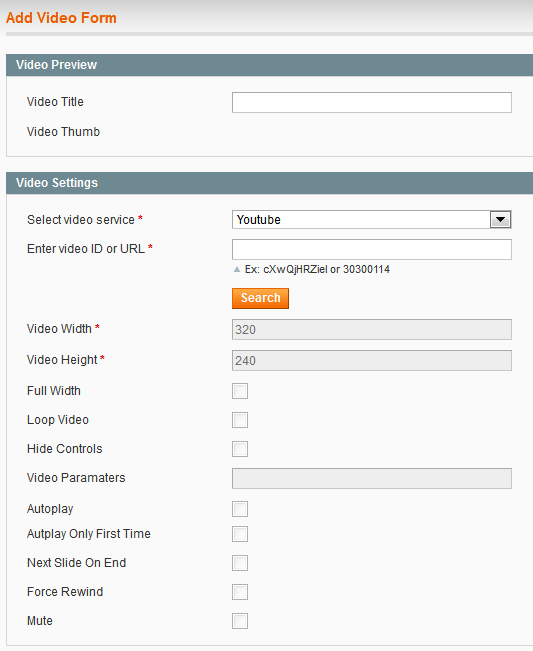
- Select video service: Select youtube or vimeo video.
- Enter Video ID or URL: Set the Vimeo / YouTuve Video ID here and Click the Search button.


- Width / Height: Set the Video Width and Height you wish to present your Embeded Video in the Slider
- FullWidth: If selected, Video will be Shown in FullWidth Mode (within the Grid !) on the Slider
- AutoPlay: If Slide is loaded, video will play automatically.
- Autplay Only First Time: The video will only played one single time automatically
- Hide Controls: If selected, the Video will not have control buttons. This should be used with the autoplay option or the will probably not see that this is an video, that can be played.
- Force Rewind: Video will always play from the beginning each time the Slide is shown.
- Next Slide on End: After Video has been played, next slide Transition starts automatically.
- Mute: Video will be muted.
Open the Video Setting Window as by Adding the Video Layer.
- Layer General Parameters:
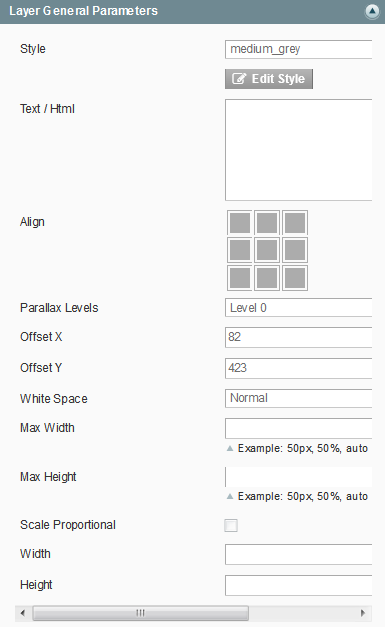
Align: Set the Align of the Layers / Captions. Left Top is default. Drag and Drop move of the Layer will based on the Align. If you set the Align to Center Center, the Drag And drop will be based on this aligned position and use an Offset.
- Layer Animation:
Animation: The way the Caption appear on the screen. Select one of 10 Aniamtions from the drop-down list.
End Transition: Optional. If not set, the Reverse Aniamtion will be used as set in the Start Transtion.
In case the slide sould stay all the time on the slide, but end animation should be different then Start animation, please select your End animation, and set End Time to the same as the Slide Delay. If no End Time set, End animation will be ignored!
- Layer Links & Advanced Params
Use drag’n’drop to move layers, change timeline
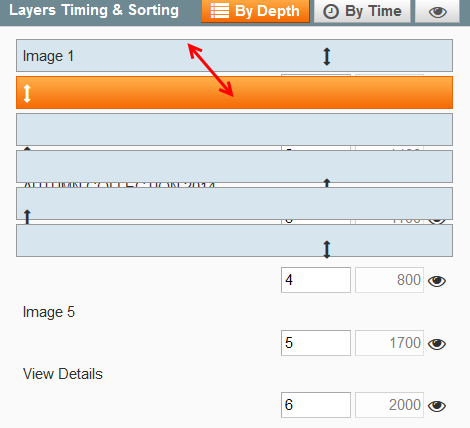
Edit visibility: click on the “eye” icon to hide / show the Layer from the Drag & Drop Section above, for easy Editing of the captions.
![]()
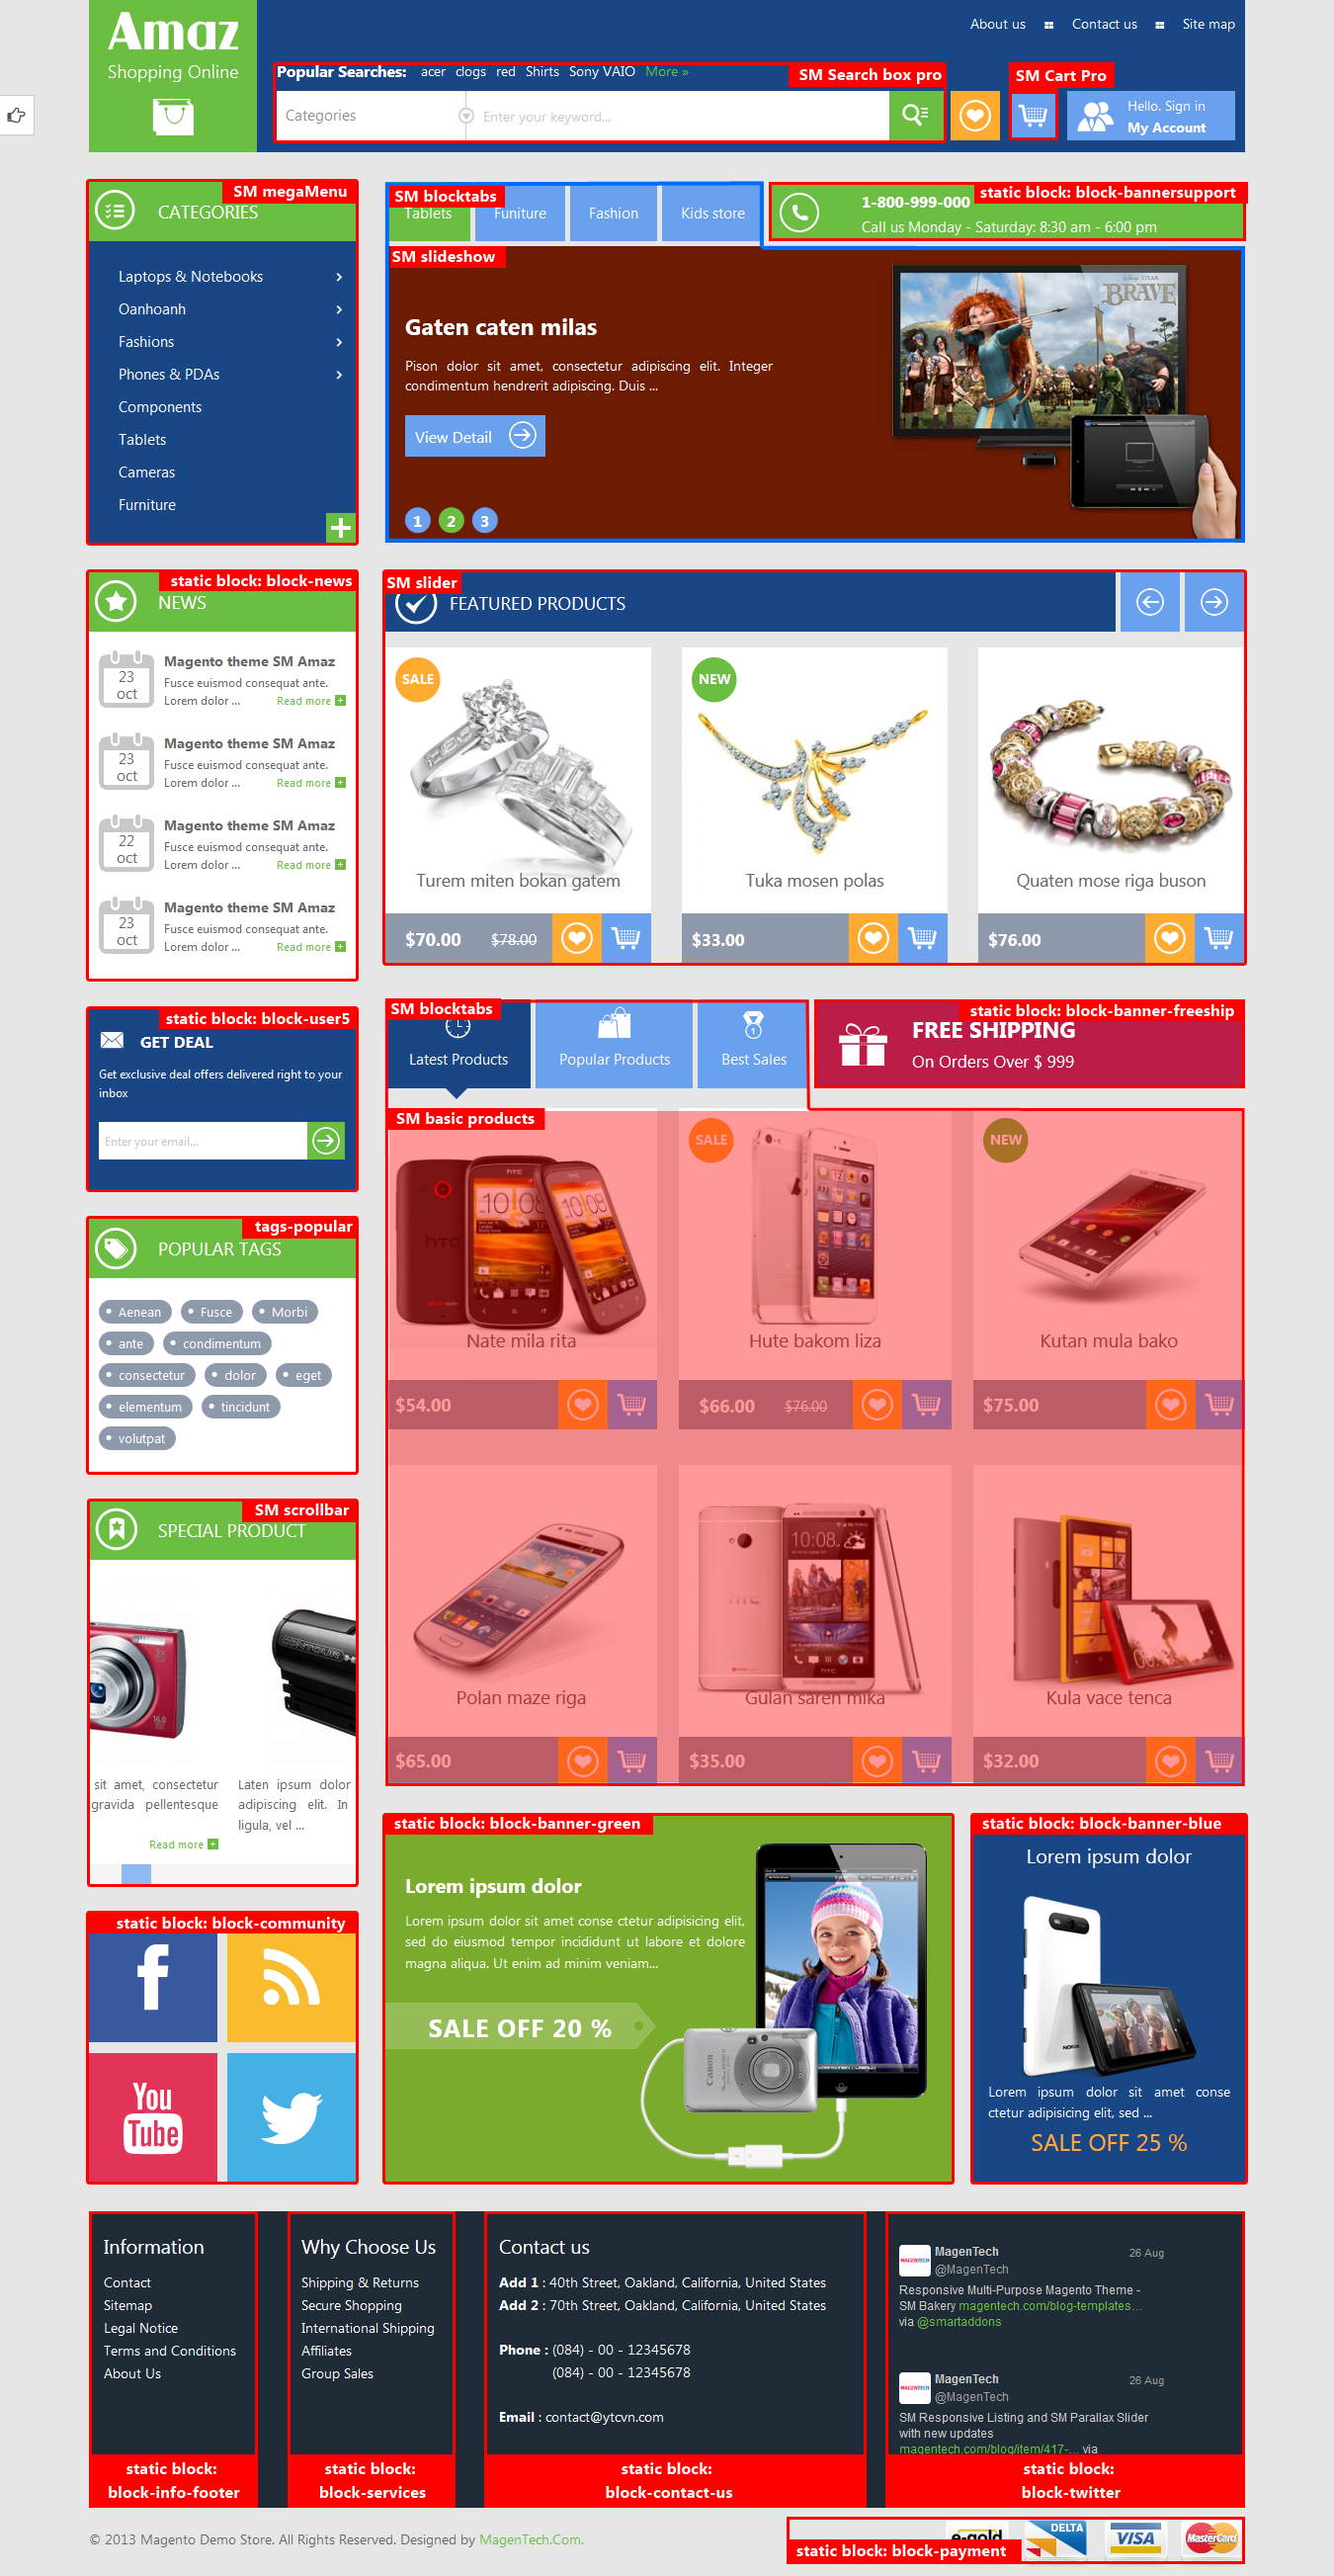
3.4 SM Dynamic Slideshow Configuration
Please follow the instructions below to display SM Dynamic Slideshow Module.
You have 2 options A or B to install the SM Dynamic Slideshow:
This option allows you to set slideshow to be displayed on the homepage and other pages.
- Go to your admin panel > CMS > Pages.
- Click on the page or add a new page where you would like the SM Dynamic Slideshow widget to appear, open the Content section and click on the Insert Widget icon.

A new pop-up will be opened. You can pick the Widget Type: SM Dynamic Slideshow from the drop-down menu, and select Slider ID you want to display. Then click the Insert Widget button at the right side.
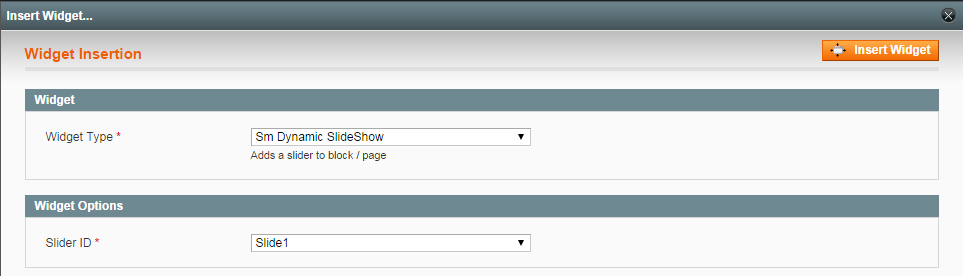
After that, click the Save Page button to save and show SM Dynamic Slideshow on the front-end.
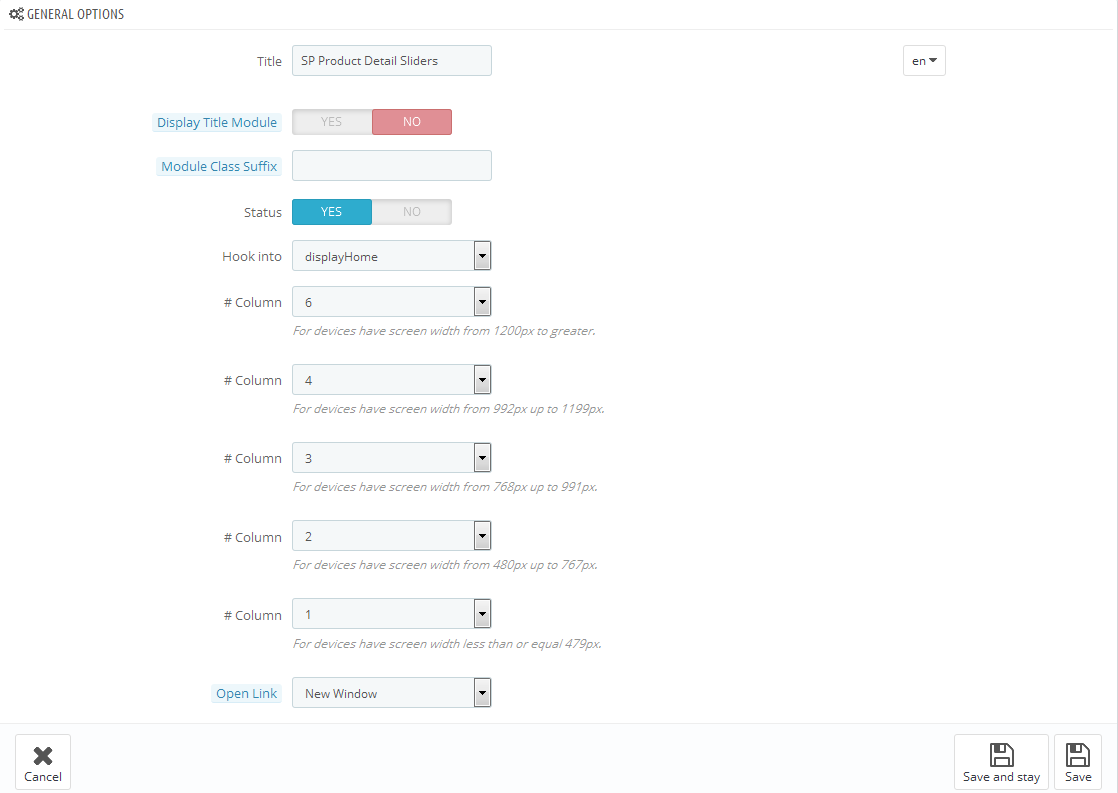
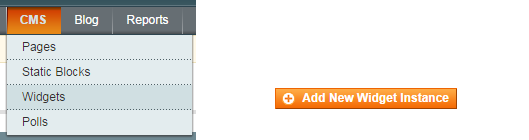
- Now, to display SM Dynamic Slideshow on any Block, Go to the Widget admin under CMS > Widgets and Add NewWidget Instance.
- First, you will need to select SM Dynamic Slideshow from the drop-down of Widget Type . Then you need to specify the design you want the widget to show up in. We chose default/default.
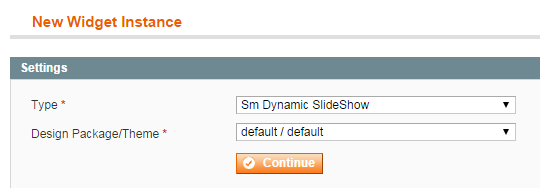
- Click the Continue button, then use settings specified in Frontend Properties and Widget Options.
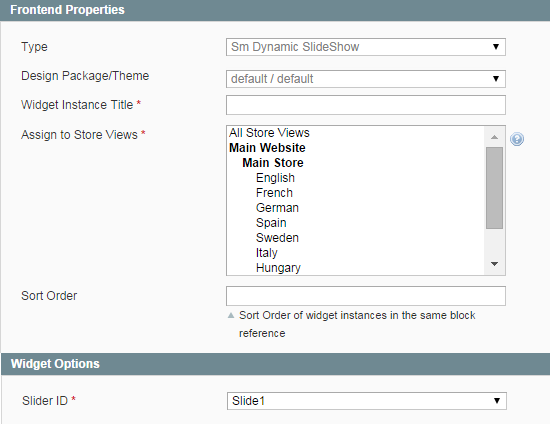
Some options you need to know:
- Widget Instance Title: Title of Widget
- Sort Order: Refers to the order the widget displays in if you have assigned several widgets to the same position in the template.
- Slider ID: The slider you want to display
Click on the Add Layout Update button and a new configuration section will appear. The first choice is the Display On drop-down.

By default you have a general choice of Category, Products, Generic (CMS) pages and many sub-selections. You can select All Pages or one or more Specified Page where you want your widget instance to appear.
- The next choice is the block reference of the layout block, please select one of the block that is listed box below OR create a block at position that you want:
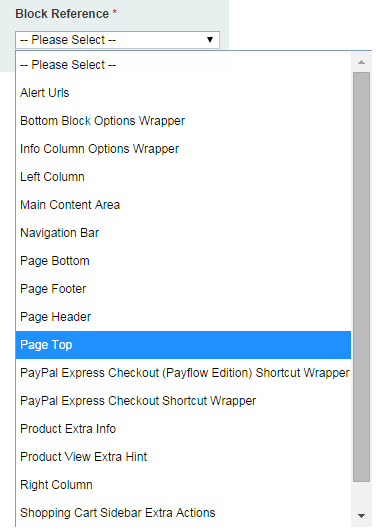
- Click the Save to finish and go to your front-end to see how SM Dynamic Slideshow is working!
3.5 Google Fonts
- Open the Slider Settings
- Click on the tab Google Font Settings
- Check “Yes” at Load Google Font
- Visit The Google Font Page and search for your Font (Screenshot)
- Click on Quick Use and look at the Select Tab. Add this code to your Google Font Settings Field (The google font families to load).
- Click on “Add New” to add unlimited fonts to the Slider.
- To integrate the font, copy the font-family settings from Google Font page and edit a Style, open the advanced tab and put it into there. For further details look at the CSS Editor part later on.
3.6 CSS Editor
To access the CSS Editor:
- Edit a slide
- Select a text layer
- Open the Layer General Parameters Tab
- Select the Edit Style button.
Now you will see the style editor:
- Basic Styles can be easily changed through the Simple Option.
- Under Font - Family you will find here the earlier mentioned Fonts, you inserted at the Slider Settings Panel.
- For Advanced Settings, you can always open the Advanced Option and put all your CSS Styles for this CSS Class in here.
- Every change you do, will be directly visible at the top. The example text will show how your style will be at the end!.
Delete Styles:
- To delete a Style, select it and click on Edit Style.
- Select a text layer
- Now click on Delete and confirm your deletion.
4SUPPORT – Back to top
Thank you so much for purchasing this extension. If you have any questions that are beyond the scope of this help file, please send us via: Support Tickets System
Thanks so much!