1 SYSTEM REQUIREMENT - Back to top
At the basic level, this theme will require the following conditions:
- Compatible with Magento Community Edition 1.7.x; 1.8.x and 1.9.x (require: php 5.4 and Memory_limit no less than 256Mb)
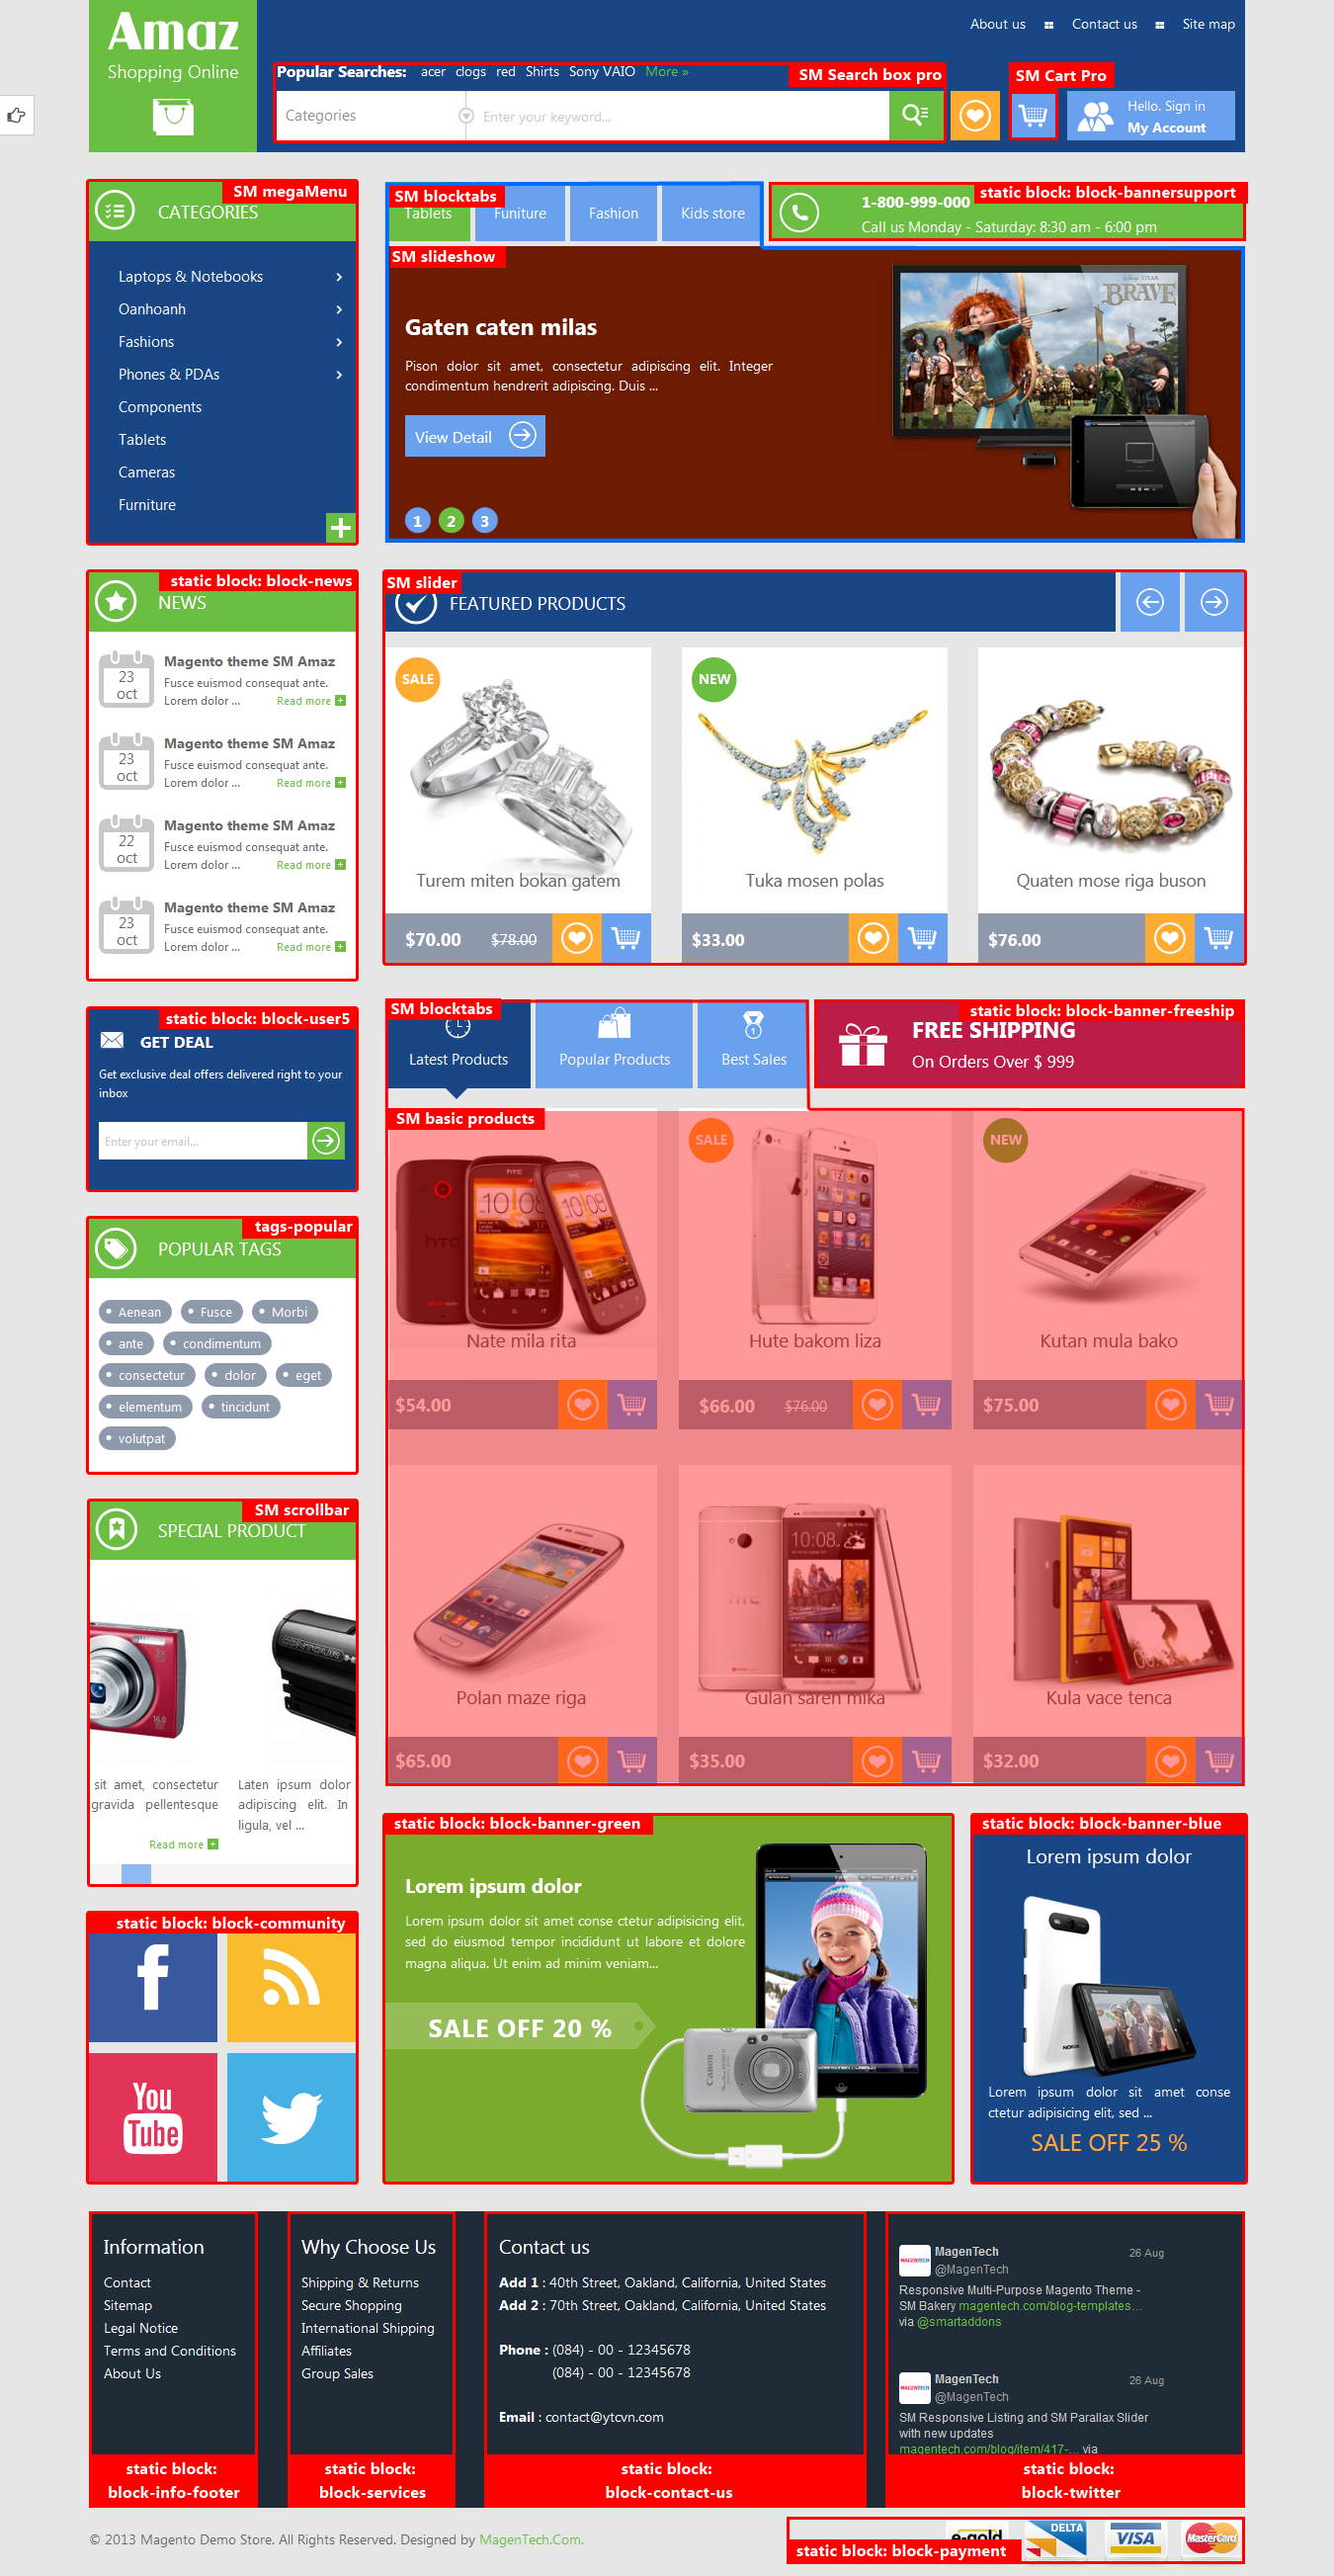
2LAYOUT POSITION - Back to top
3INSTALLATION - Back to top
There are two ways to install a Magento Theme:
- Quickstart Installation: By using this package, you will set the theme exactly as our Demo with sample data.
- Manual Installation (include of Theme Installation and Extension Installation): You will need only be using the zipped files in “Extensions” and “Theme” folders.
3.1 Quickstart Installation :
Magentech provides SM Quickstart package for each theme which aims to ease the installation for users. It will help you save much time of installing and configuring if you plan to start your site from the beginning. Please following steps below:
- Step 1: Download the quickstart package
- Step 2: Extract and Upload the whole Quickstart package to your server. In Quickstart folder you will see the extracted folder that include all sample data
- Step 3: Create a Database for your Magento

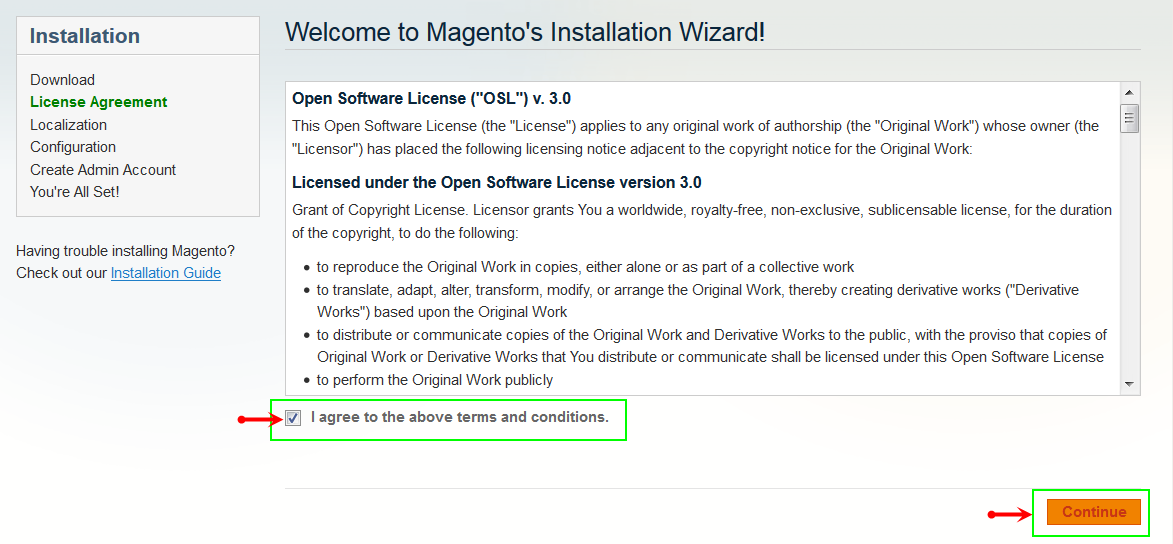
- Step 4: Start installation by opening browser and navigate to your URL (where the Quickstart uploaded) to load default Magento installer. Please follow each step of the Installer so that the installation process can be set.
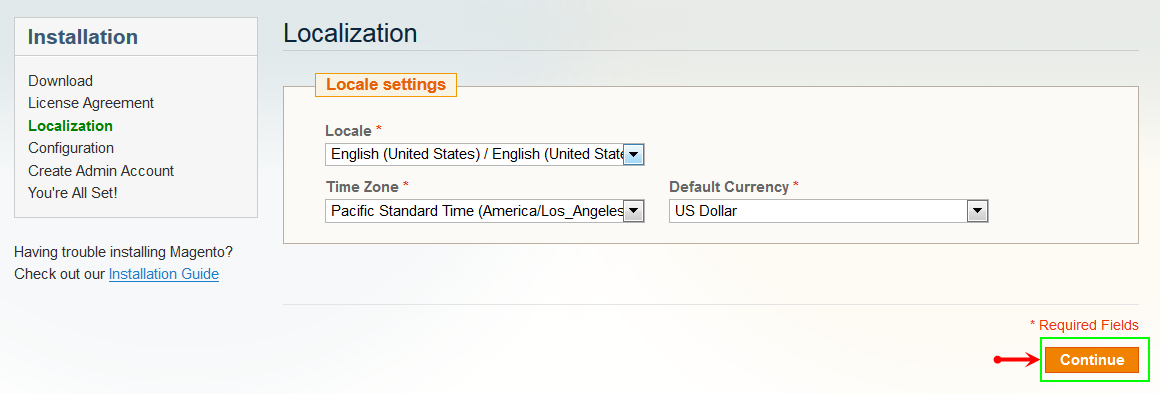
- Step 5: Locale Settings. Please fill fully into Required Fields (“Locale; Time Zone and Default Currency”.)
-
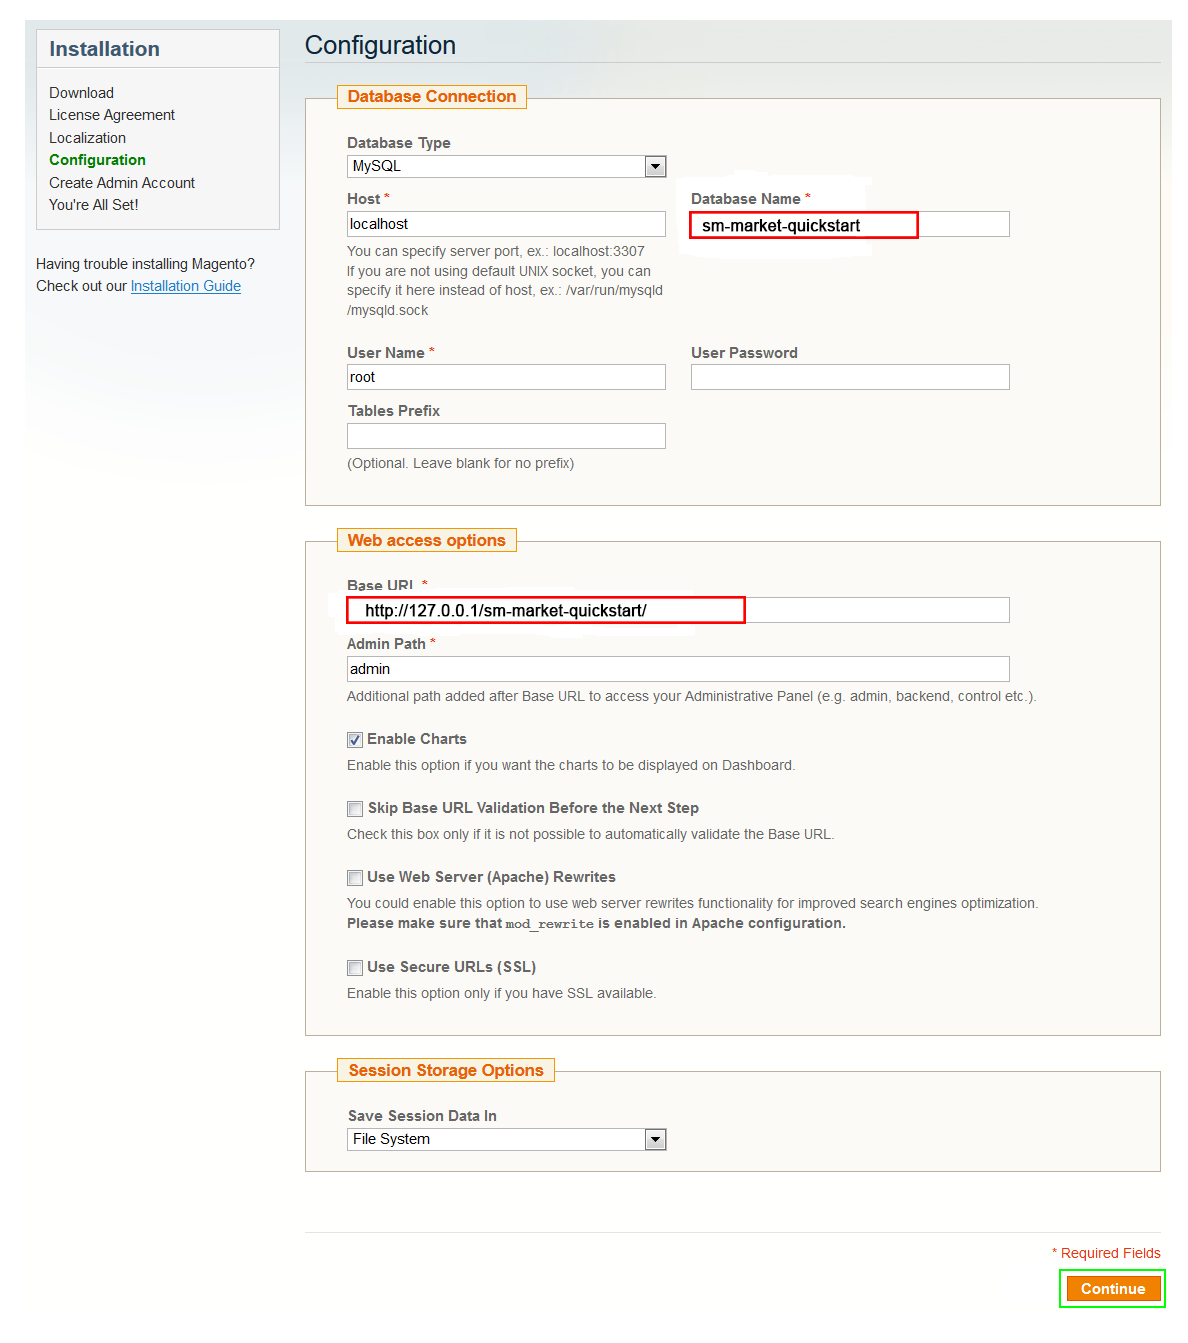
Step 6: In the Configuration step, input the required fields as below.
- Do not use “localhost” in URL, otherwise you could not log in to your Admin area (you should use your local IP in case of installing on your computer).
- Leave Tables prefix field blank.
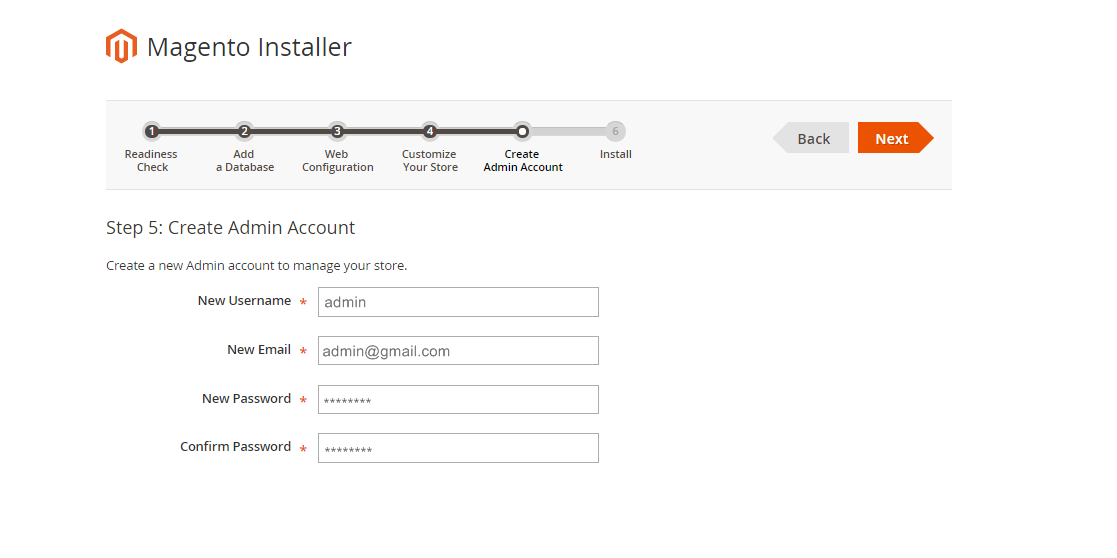
- Step 7: Create Admin Account. Please fill fully into Required Fields (“First Name; Last Name; Email; Username; password and confirm password”.)
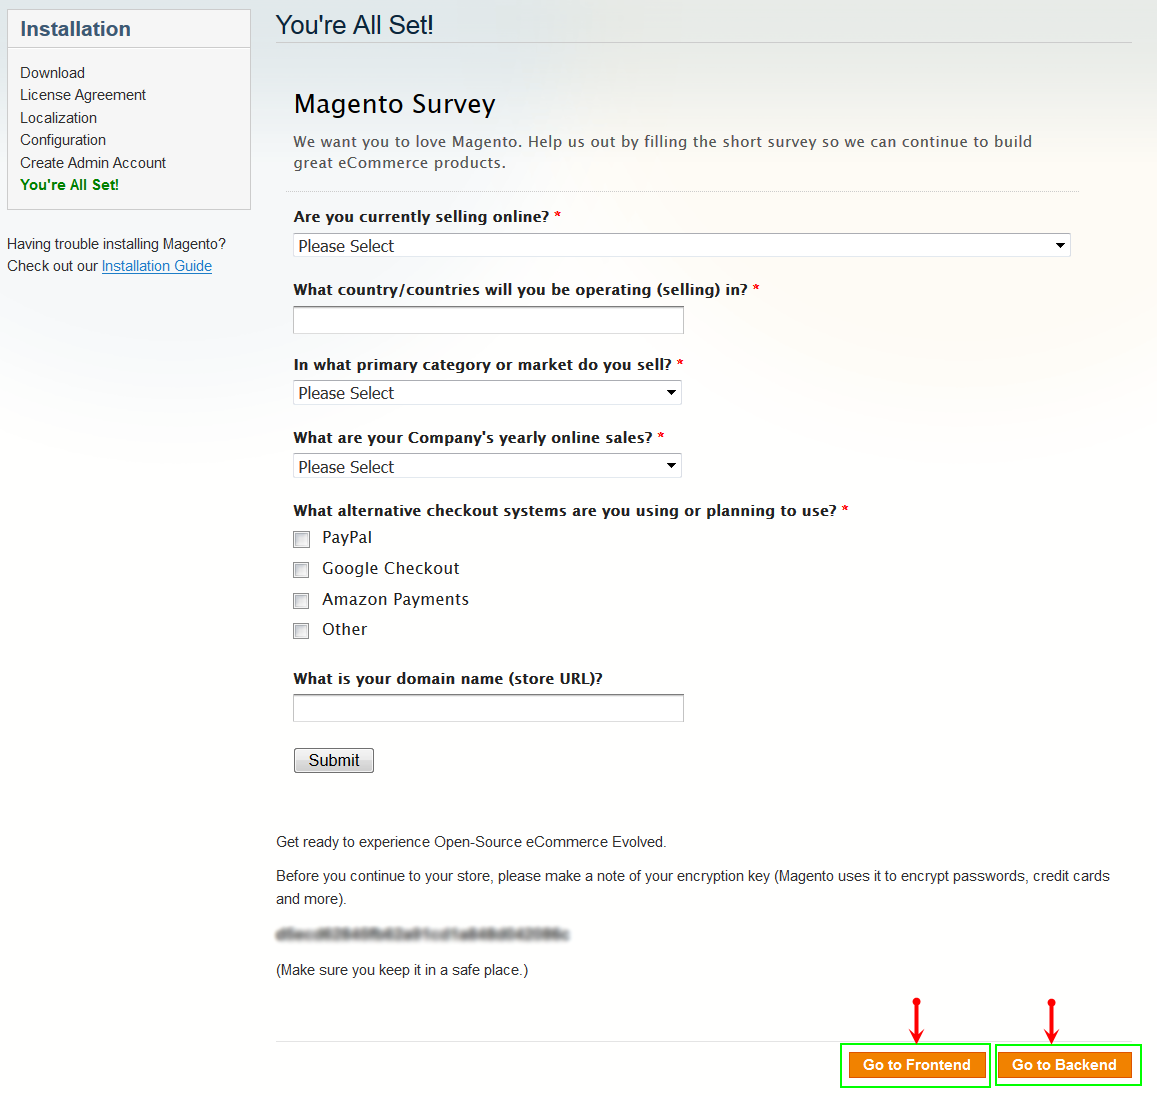
- Step 8: Finish Installation and now you can Go to Frontend or Go to Backend.
3.2 Manual Installation
- Step 1: Extract “sm_g3shop_theme.zip” file and Copy folders skin; app; images; media to your site root folder.
- Step 2: Log in to your Admin Panel (e.g. Access Magento Admin area: https://yourdomain/index.php/admin/). Log out and log in back.
- Step 3: Navigate to System >> Cache Management, Sellect All the cache types, take Action as Refresh and Submit.
- Step 4: Navigate to System >> Configuration >> Design.
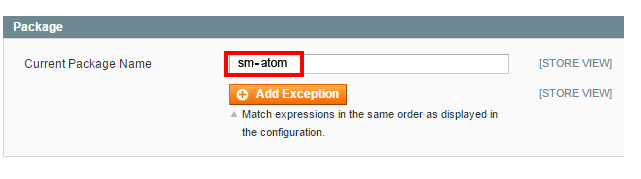
- Step 5: In Package tab, input the parameter Current Package Name with the actual theme name.
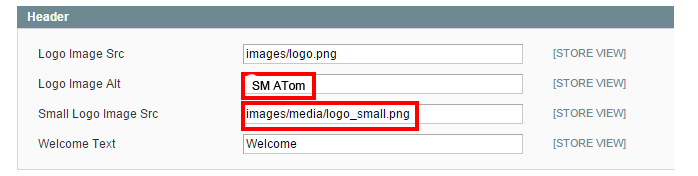
- Step 6: You can also change the settings for Header .
4CONFIGURATION - Back to top
4.1 Page Configuration
4.1.1 Home Style 1 - with 1 Column Layout
To configure this page, in the Admin Panel, navigate to CMS >> Pages. Create a new page in Page Management section.
- Page Information Tab: Please click to see the Backend Settings.
- Content Tab: Please click to see the Backend Settings.
- Design Tab: Please click to see the Backend Settings.
Copy and paste the following code into the parameter “Layout Update XML”:
|
1
2
3
4
5
6
7
8
9
10
11
12
13
14
15
16
17
18
19
20
21
22
23
24
25
26
27
28
29
30
31
32
33
34
35
36
37
38
39
|
<reference name="yt-slidershow">
<block type="imageslider/list" name="imageslider.list.default" template="sm/imageslider/default.phtml"></block>
</reference>
<reference name="content">
<remove name="breadcrumbs" />
<block type="categories/list" name="categories.list.default" template="sm/categories/default.phtml"></block>
<block type="listingtabs/list" name="listingtabs.list.1" template="sm/listingtabs/default.phtml"></block>
<block type="cms/block" name="img-hompage">
<action method="setBlockId"><block_id>img-hompage</block_id></action>
</block>
<block type="deal/list" name="deal.list.default" template="sm/deal/default.phtml"></block>
<block type="listingtabs/list" name="listingtabs.list.2" template="sm/listingtabs/default.phtml">
<action method="_setConfig">
<values>
<listingtabs_title_text>fashion</listingtabs_title_text>
<product_category>10,11,12,13,111,131,129,130,132,116,135</product_category>
<product_order_by>date_created</product_order_by>
<product_order_dir>DESC</product_order_dir>
</values>
</action>
</block>
<block type="cms/block" name="img-content">
<action method="setBlockId"><block_id>img-content</block_id></action>
</block>
<block type="cms/block" name="brand-logo">
<action method="setBlockId"><block_id>brand-left</block_id></action>
</block>
</reference>
<reference name="homeblog">
<block type="blog/blog" name="latest-blog" template="aw_blog/latest-blog.phtml"></block>
</reference>
<reference name="testimonials">
<block type="cms/block" name="block-client-say">
<action method="setBlockId"><block_id>slider-client-say</block_id></action>
</block>
</reference>
|
4.1.2 Homepage Style 2 - 2 columns with left bar Layout
To configure this page, in the Admin Panel, navigate to CMS >> Pages. Create a new page in Page Management section.
- Page Information Tab: Please click to see the Backend Settings.
- Content Tab: Please click to see the Backend Settings.
- Design Tab: Please click to see the Backend Settings.
Copy and paste the following code into the parameter “Layout Update XML”:
|
1
2
3
4
5
6
7
8
9
10
11
12
13
14
15
16
17
18
19
20
21
22
23
24
25
26
27
28
29
30
31
32
33
34
35
36
37
38
39
40
41
42
|
<reference name="left">
<block type="slider/list" name="slider.list.default" template="sm/slider/default.phtml"></block>
<block type="cms/block" name="img-left">
<action method="setBlockId"><block_id>img-left</block_id></action>
</block>
<block type="facebook/list" name="facebook.list.default" template="sm/facebook/default.phtml"></block>
<block type="tag/popular" name="tags_popular" template="tag/popular.phtml"/>
</reference>
<reference name="content">
<remove name="breadcrumbs" />
<block type="listingtabs/list" name="listingtabs.list.3" template="sm/listingtabs/default2.phtml"></block>
<block type="cms/block" name="img-hompage">
<action method="setBlockId"><block_id>img-hompage</block_id></action>
</block>
<block type="deal/list" name="deal.list.default" template="sm/deal/default.phtml"></block>
<block type="listingtabs/list" name="listingtabs.list.4" template="sm/listingtabs/default2.phtml">
<action method="_setConfig">
<values>
<product_category>10,11,12,13,111,131,129,130,132,116,135</product_category>
<product_order_by>top_rating</product_order_by>
<product_order_dir>DESC</product_order_dir>
</values>
</action>
</block>
<block type="cms/block" name="img-content">
<action method="setBlockId"><block_id>img-content</block_id></action>
</block>
<block type="cms/block" name="brand-logo2">
<action method="setBlockId"><block_id>brand-v2</block_id></action>
</block>
</reference>
<reference name="homeblog">
<block type="blog/blog" name="latest-blog" template="aw_blog/latest-blog.phtml"></block>
</reference>
<reference name="testimonials">
<block type="cms/block" name="block-client-say">
<action method="setBlockId"><block_id>slider-client-say</block_id></action>
</block>
</reference>
|
4.1.3 Homepage Style 3 - with 1 column
To configure this page, in the Admin Panel, navigate to CMS >> Pages. Create a new page in Page Management section.
- Page Information Tab: Please click to see the Backend Settings.
- Content Tab: Please click to see the Backend Settings.
- Design Tab: Please click to see the Backend Settings.
Copy and paste the following code into the parameter “Layout Update XML”:
|
1
2
3
4
5
6
7
8
9
10
11
12
13
14
15
16
17
18
19
20
21
22
23
24
25
26
27
28
29
30
31
32
33
34
35
36
37
38
39
40
41
42
43
44
45
|
<reference name="content">
<remove name="breadcrumbs" />
<block type="listingtabs/list" name="listingtabs.list.1" template="sm/listingtabs/default.phtml"></block>
<block type="cms/block" name="img-hompage">
<action method="setBlockId"><block_id>img-hompage</block_id></action>
</block>
<block type="deal/list" name="deal.list.default" template="sm/deal/default.phtml"></block>
<block type="listingtabs/list" name="listingtabs.list.2" template="sm/listingtabs/default.phtml">
<action method="_setConfig">
<values>
<product_category>10,11,12,13,111,131,129,130,132</product_category>
<product_order_by>top_rating</product_order_by>
<product_order_dir>DESC</product_order_dir>
</values>
</action>
</block>
<block type="supercategories/list" name="supercategories.list.1" template="sm/supercategories/default.phtml"></block>
<block type="supercategories/list" name="supercategories.list.1" template="sm/supercategories/default.phtml">
<action method="_setConfig">
<values>
<product_category>5</product_category>
<filter_order_by>top_rating</filter_order_by>
<product_order_dir>DESC</product_order_dir>
</values>
</action>
</block>
<block type="cms/block" name="img-content">
<action method="setBlockId"><block_id>img-content</block_id></action>
</block>
<block type="cms/block" name="brand-logo">
<action method="setBlockId"><block_id>brand-left</block_id></action>
</block>
</reference>
<reference name="homeblog">
<block type="blog/blog" name="latest-blog" template="aw_blog/latest-blog.phtml"></block>
</reference>
<reference name="testimonials">
<block type="cms/block" name="block-client-say">
<action method="setBlockId"><block_id>slider-client-say</block_id></action>
</block>
</reference>
|
4.1.4 Homepage Style 4 - with 1 column
To configure this page, in the Admin Panel, navigate to CMS >> Pages. Create a new page in Page Management section.
- Page Information Tab: Please click to see the Backend Settings.
- Content Tab: Please click to see the Backend Settings.
- Design Tab: Please click to see the Backend Settings.
Copy and paste the following code into the parameter “Layout Update XML”:
|
1
2
3
4
5
6
7
8
9
10
11
12
13
14
15
16
17
18
19
20
21
22
23
24
25
26
27
28
29
30
31
32
33
34
35
36
37
38
39
40
41
42
43
44
45
|
<reference name="content">
<remove name="breadcrumbs" />
<block type="supercategories/list" name="supercategories.list.default2" template="sm/supercategories/default.phtml">
<action method="_setConfig">
<values>
<nbi_column1>10</nbi_column1>
<product_category>4</product_category>
<product_order_by>top_rating</product_order_by>
<product_order_dir>DESC</product_order_dir>
</values>
</action>
</block>
<block type="listingtabs/list" name="listingtabs.list.3" template="sm/listingtabs/default3.phtml"></block>
<block type="cms/block" name="img-hompage">
<action method="setBlockId"><block_id>img-hompage</block_id></action>
</block>
<block type="deal/list" name="deal.list.default" template="sm/deal/default.phtml"></block>
<block type="listingtabs/list" name="listingtabs.list.3" template="sm/listingtabs/default3.phtml">
<action method="_setConfig">
<values>
<product_category>10,11,12,13,111,131,129,130,132</product_category>
<product_order_by>top_rating</product_order_by>
<product_order_dir>DESC</product_order_dir>
</values>
</action>
</block>
<block type="cms/block" name="img-content">
<action method="setBlockId"><block_id>img-content</block_id></action>
</block>
<block type="cms/block" name="brand-logo">
<action method="setBlockId"><block_id>brand-left</block_id></action>
</block>
</reference>
<reference name="homeblog">
<block type="blog/blog" name="latest-blog" template="aw_blog/latest-blog.phtml"></block>
</reference>
<reference name="testimonials">
<block type="cms/block" name="block-client-say">
<action method="setBlockId"><block_id>slider-client-say</block_id></action>
</block>
</reference>
|
4.1.5 Deals Page Configuration - with 1 column Layout
To configure this page, in the Admin Panel, navigate to CMS >> Pages. Create a new page in Page Management section.
- Page Information Tab: Please click to see the Backend Settings.
- Content Tab: Please click to see the Backend Settings.
- Design Tab: Please click to see the Backend Settings.
Copy and paste the following code into the parameter “Layout Update XML”:
|
1
2
3
|
<reference name="content">
<block type="listingdeals/list" name="listingdeals.list.default" template="sm/listingdeals/default.phtml"></block>
</reference>
|
4.2 Configure Mega Menu
- Step 1: You need to create Menu group. In Admin Panel, navigate to SM Mega Menu >> Menu Manager >> Add group (add 2 groups: “Default Category” - have id 1 and “Megamenu Left” - have id 2).
- Step 2: Navigate to SM Mega Menu >> Configuration
- Step 3: In order to add menu items, Go to SM Mega Menu >> Menu items Manager to add items as you want.
With Horizontal Menu:
SHOP Menu
Frontend Appearance
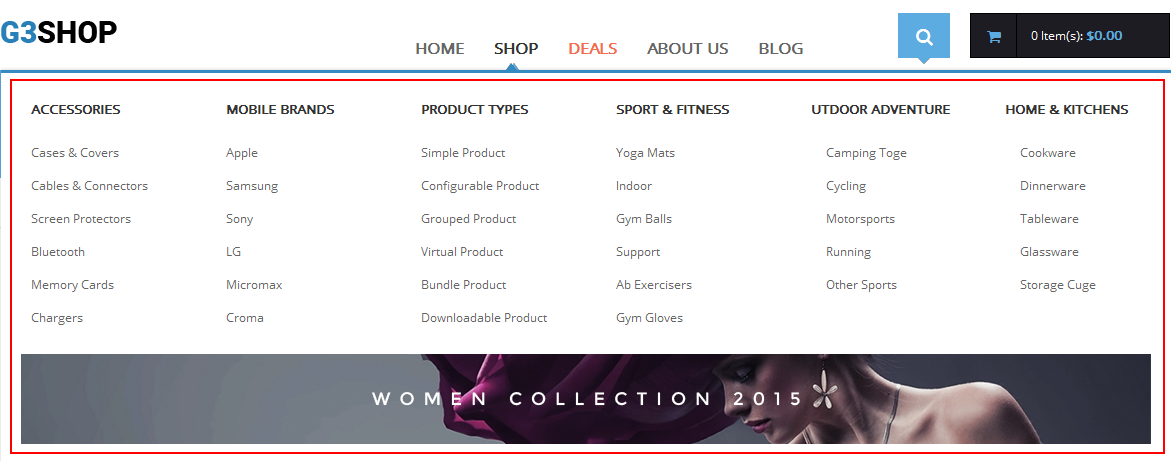
Tree of New Arrivals menu:
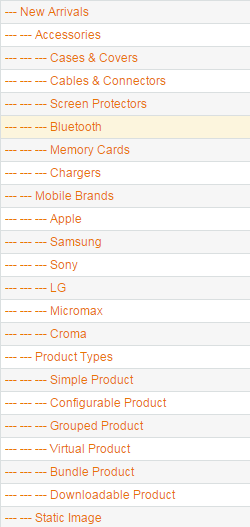
- Link show Shop Menu’s backend. Please click Here to view.
- Item: “Accessories” Item - Menu Backend Settings
- Item: “Cases & Covers” Item - Menu Backend Settings
- Item: “Mobile Brands” Item - Menu Backend Settings
- Item: “Apple” Item - Menu Backend Settings
- Item: “Product Types” Item - Menu Backend Settings
- Item: “Simple Product” Item - Menu Backend Settings
- Item: “Sport & Fitness” Item - Menu Backend Settings
- Item: “Yoga Mats” Item - Menu Backend Settings
- Item: “UTDoor Adventure” Item - Menu Backend Settings
- Item: “Camping Toge” Item - Menu Backend Settings
- Item: “Home & Kitchen” Item - Menu Backend Settings
- Item: “CookWare” Item - Menu Backend Settings
- Item: “Static Image” Item - Menu Backend Settings
ABOUT US Menu
Frontend Appearance

Note: About Us Menu has “Menu Type: Category” & “Data Type: category/43″. To config this page, please navigate to Catalog >> Manager Categories >> About Us category:
- General Information Tab: Please click to see the Backend Settings.
- Display Settings Tab: Please click to see the Backend Settings.
- Custom Design Tab: Please click to see the Backend Settings.
BLOG Menu
Frontend Appearance

Note: Blog Menu has “Menu Type: Category” & “Data Type: category/133″. To config this page, please navigate to Catalog >> Manager Categories >> Blog category:
- General Information Tab: Please click to see the Backend Settings.
- Display Settings Tab: Please click to see the Backend Settings.
- Custom Design Tab: Please click to see the Backend Settings.
Copy & Paste code into the parameter “Custom Layout Update” in Custom Design Tab:
With Vertical Menu:
Computer & Accessories Menu
Frontend Appearance
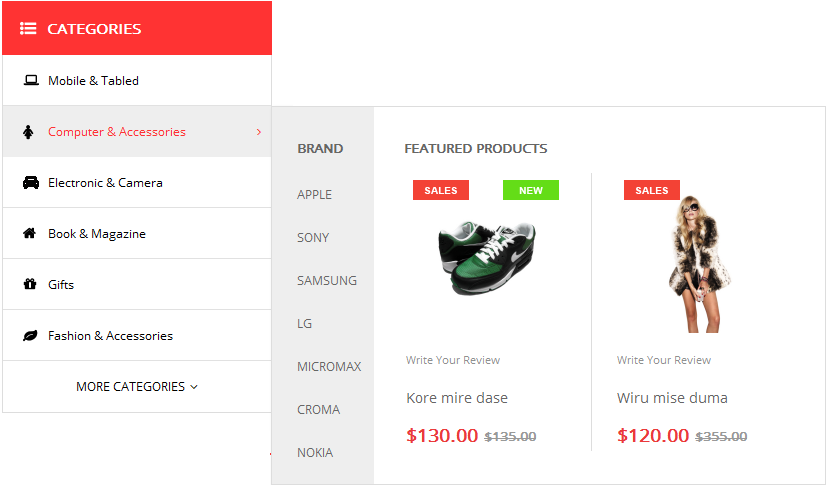
Tree of Computer & Accessories Menu:
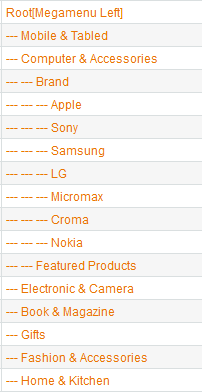
- Link show Computer & Accessories Menu’s backend. Please click Here to view.
- Item: “Brand” Item - Menu Backend Settings
- Item: “Apple” Item - Menu Backend Settings
- Item: “Featured Products” Item - Menu Backend Settings
Copy and Paste the Content code into editor:
|
1
|
<div class="megamenu-product">{{block type="basicproducts/list" template="sm/basicproducts/product-megamenu.phtml" basicproducts_title_text="" product_source="ids" product_ids="892,893" cat_title_display="0" category_title_max_characs="50" product_description_display="0" product_price_display="1" product_reviews_count="1" product_addcart_display="0" product_addwishlist_display="0" product_addcompare_display="0" product_readmore_display="0" imgcfg_from_product_image="1" imgcfg_width="160" imgcfg_height="160"}}</div>
|
4.3 Configure Extensions
I. SM Cart Pro
- Position: SM Cart Pro
- Frontend Appearance
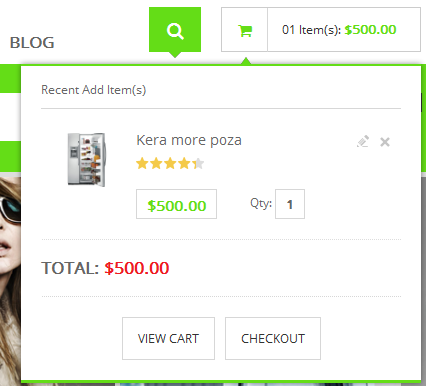
- Backend of SM Cart Pro: Click Here
II. SM Search Box Pro
- Position: SM Search Box Pro
- Frontend Appearance

- Backend of SM Search Box Pro: Click Here
III. SM Image Slider
- Position: SM Image Slider
- Frontend Appearance
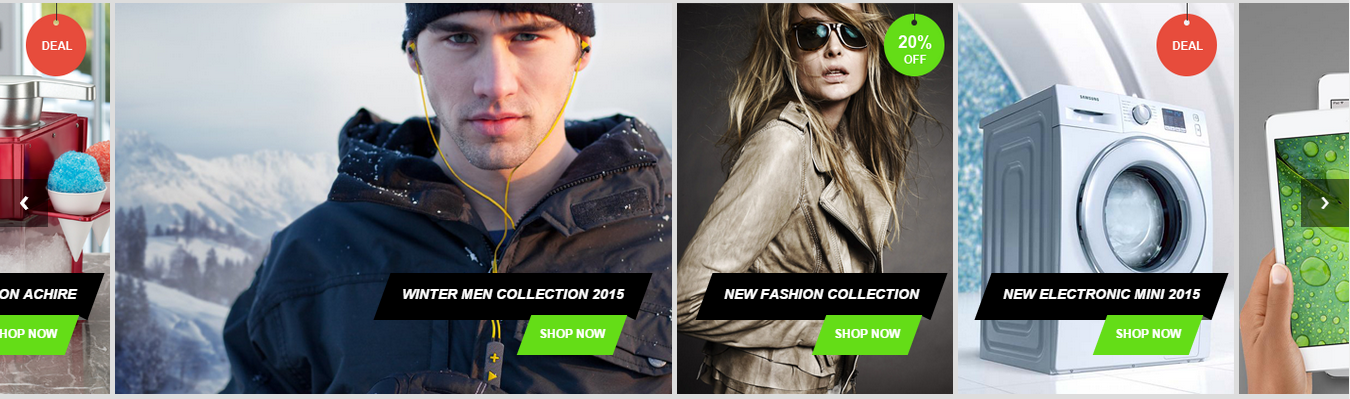
- Backend of SM Image Slider: Click Here
IV. SM Categories
- Position: SM Categories
- Frontend Appearance
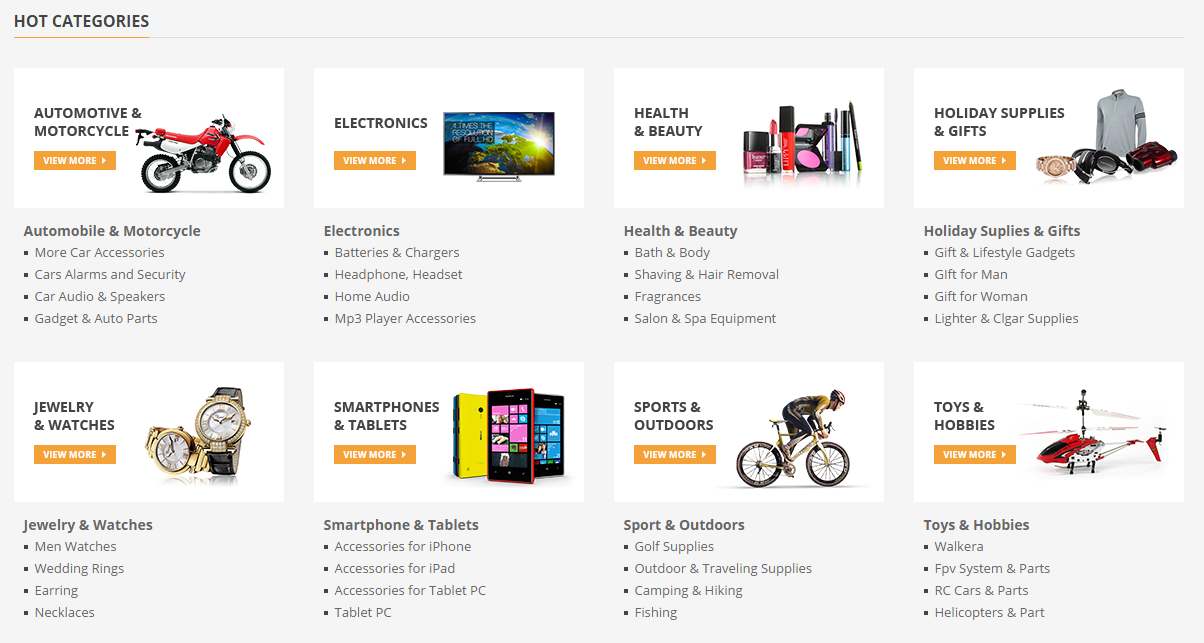
- Backend of SM Categories: Click Here
V. SM Listing Tabs
- Position: SM Listing Tabs
- Frontend Appearance
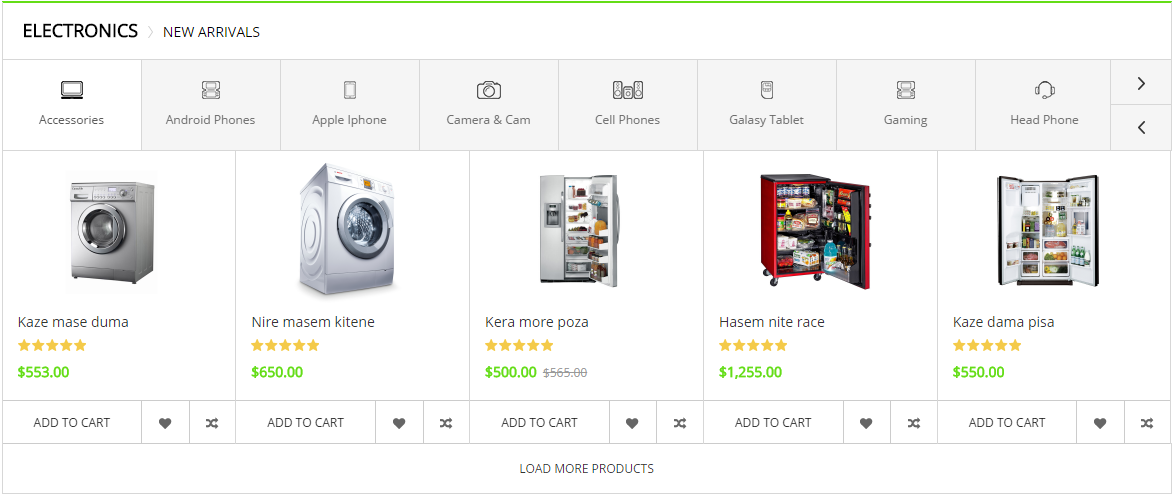
- Backend of SM Listing Tabs: Click Here
VI. SM Deal
- Position: SM Deal
- Frontend Appearance

- Backend of SM Deal: Click Here
VII. SM Deal
- Position: SM Deal
- Frontend Appearance
- Backend of SM Deal: Click Here
VIII. SM Listing Tabs
- Position: SM Listing Tabs
- Frontend Appearance
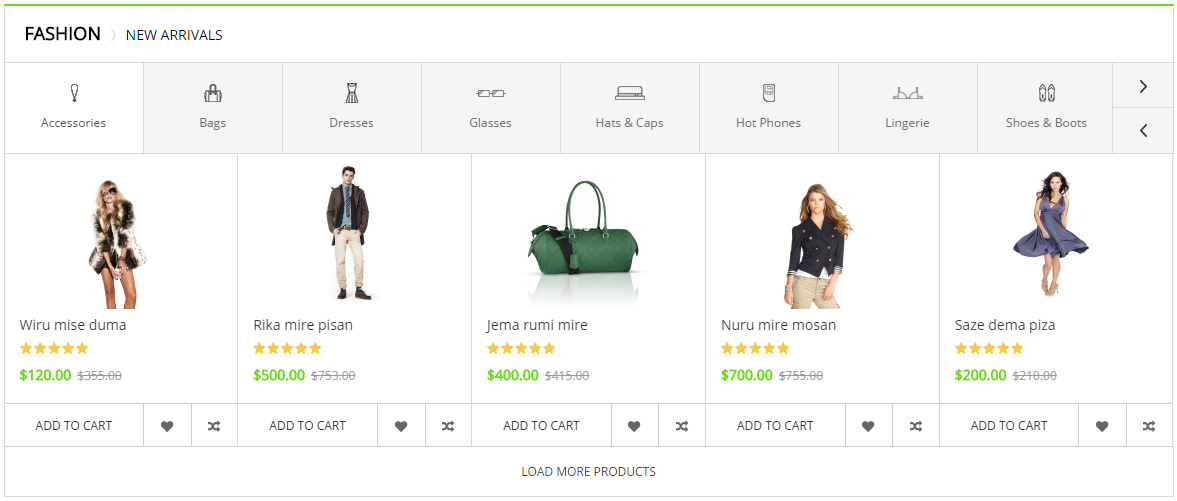
To configure this position, in your Admin Panel, please navigate to CMS >> Pages >> select “your homepage” >> copy and paste the code below into the parameter “Layout Update XML” of Design tab:
|
1
2
3
4
5
6
7
8
9
10
11
12
|
<reference name="content">
<block type="listingtabs/list" name="listingtabs.list.2" template="sm/listingtabs/default.phtml">
<action method="_setConfig">
<values>
<listingtabs_title_text>fashion</listingtabs_title_text>
<product_category>10,11,12,13,111,131,129,130,132,116,135</product_category>
<product_order_by>date_created</product_order_by>
<product_order_dir>DESC</product_order_dir>
</values>
</action>
</block>
</reference>
|
4.4 Configure Static Blocks
The SM G3shop front-page has static blocks in the Theme:
- Static-Homepage
- Static-Images content
- Static-Brand
- Static-Slider Testimonial
- Static-Bottom services
- Static-About Footer + Tool Footer + Help Footer + Information
To create static blocks, go to CMS >> Static Blocks >> Add new block
Static-Homepage
To create static blocks, go to CMS >> Static Blocks with Identifier * : “img-homepage”
Frontend

Backend
- Content Code of Static-Homepage:
|
1
2
3
4
5
|
<div class="img-homepage">
<div class="block-image-statics img-hompage1"><a href="#" title="Image Static"><img src="{{media url="wysiwyg/static-image-home/img-hp3.png"}}" alt="Left Image" /></a></div>
<div class="block-image-statics img-hompage2"><a href="#" title="Image Static"><img src="{{media url="wysiwyg/static-image-home/img-hp1.png"}}" alt="Left Image" /></a></div>
<div class="block-image-statics img-hompage3"><a href="#" title="Image Static"><img src="{{media url="wysiwyg/static-image-home/img-hp2.png"}}" alt="Left Image" /></a></div>
</div>
|
Static-Image Content
To create static blocks, go to CMS >> Static Blocks with Identifier * : “img-content”
Frontend

Backend
- Content Code of Static-Homepage:
|
1
|
<div class="block-image-static img-content"><a href="#" title="Image Static"><img src="{{media url="wysiwyg/img-content.png"}}" alt=" Image" /></a></div>
|
Static-Brand
To create static blocks, go to CMS >> Static Blocks with Identifier * : “brand-left”
Frontend

Backend
- Content Code of Static-Brand:
|
1
2
3
4
5
6
7
8
9
10
11
12
13
14
15
16
17
18
19
20
21
22
23
24
25
26
27
28
29
30
31
32
33
34
35
36
37
38
39
40
41
42
43
44
45
46
47
48
49
50
51
52
53
54
55
56
57
58
59
60
61
62
63
64
65
66
67
68
69
70
|
<div class="block block-brand">
<div class="block-title">
<strong>
<span>Top Brands</span>
</strong>
</div>
<div class="block-content">
<div class="brand-wrapper">
<a title="brand3"><img src="{{media url="wysiwyg/brand-image/brand-logo-1.png"}}" alt="Static Image" /></a>
<a title="brand3"><img src="{{media url="wysiwyg/brand-image/brand-logo-2.png"}}" alt="Static Image" /></a>
<a title="brand3"><img src="{{media url="wysiwyg/brand-image/brand-logo-3.png"}}" alt="Static Image" /></a>
<a title="brand3"><img src="{{media url="wysiwyg/brand-image/brand-logo-4.png"}}" alt="Static Image" /></a>
<a title="brand3"><img src="{{media url="wysiwyg/brand-image/brand-logo-5.png"}}" alt="Static Image" /></a>
<a title="brand3"><img src="{{media url="wysiwyg/brand-image/brand-logo-6.png"}}" alt="Static Image" /></a>
<a title="brand3"><img src="{{media url="wysiwyg/brand-image/brand-logo-3.png"}}" alt="Static Image" /></a>
<a title="brand3"><img src="{{media url="wysiwyg/brand-image/brand-logo-4.png"}}" alt="Static Image" /></a>
<a title="brand3"><img src="{{media url="wysiwyg/brand-image/brand-logo-5.png"}}" alt="Static Image" /></a>
<a title="brand3"><img src="{{media url="wysiwyg/brand-image/brand-logo-2.png"}}" alt="Static Image" /></a>
</div>
</div>
<script type="text/javascript">
jQuery(document).ready(function ($) {
$(".brand-wrapper").owlCarousel({
// Most important owl features
items : 6,
itemsCustom : false,
itemsDesktop : [1199,6],
itemsDesktopSmall : [980,4],
itemsTablet: [768,3],
itemsTabletSmall: false,
itemsMobile : [479,1],
singleItem : false,
itemsScaleUp : false,
//Basic Speeds
slideSpeed : 200,
paginationSpeed : 800,
rewindSpeed : 1000,
//Autoplay
autoPlay : false,
stopOnHover : false,
// Navigation
navigation : true,
navigationText : ["prev","next"],
rewindNav : true,
scrollPerPage : false,
//Pagination
pagination : false,
paginationNumbers: false,
// Responsive
responsive: true,
responsiveRefreshRate : 200,
responsiveBaseWidth: window,
})
});
</script>
</div>
|
Static-Slider Testimonial
To create static blocks, go to CMS >> Static Blocks with Identifier * : “slider-client-say”
Frontend
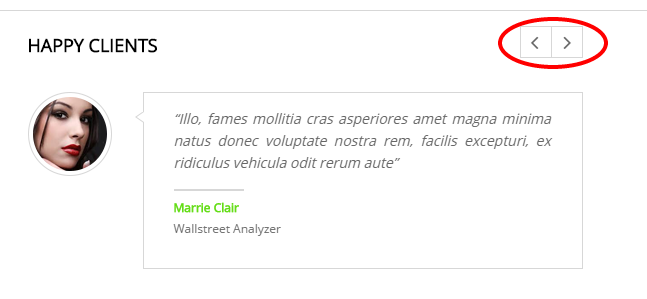
Backend
- Content Code of Static-Slider Testimonial:
|
1
2
3
4
5
6
7
8
9
10
11
12
13
14
15
16
17
18
19
20
21
22
23
24
25
26
27
28
29
30
31
32
33
34
35
36
37
38
39
40
41
42
43
44
45
46
47
48
49
50
51
52
53
54
55
56
57
58
59
60
61
62
63
64
65
66
67
68
69
70
71
72
73
74
75
76
77
78
79
80
81
82
83
84
85
86
87
88
89
90
91
92
93
94
95
96
97
98
99
100
101
102
103
104
105
106
107
108
109
110
111
112
113
114
115
116
117
118
119
120
121
122
123
124
125
126
127
128
129
130
131
|
<ul class="yt-client-say">
<li>
<div class="block client-say">
<div class="block-title">
<strong>
<span>Happy clients</span>
</strong>
</div>
<div class="block-content">
<div class="client-say-slider">
<div class="item item-client-say">
<div class="image-client block-image-static">
<a href="#" title="Jack Andrson"><img src="{{media url="wysiwyg/image-client/img-client-1.png"}}" alt="Image Client" /></a>
</div>
<div class="client-say-info">
<div class="client-comment">
“Illo, fames mollitia cras asperiores amet magna minima natus donec voluptate nostra rem, facilis excepturi, ex ridiculus vehicula odit rerum aute”
</div>
<div class="name-diot"></div>
<div class="name-client">
<h2><a href="#" title="Marrie Clair">Marrie Clair</a></h2>
<p>Wallstreet Analyzer</p>
</div>
</div>
</div>
</div>
</div>
</div>
</li>
<li>
<div class="block client-say">
<div class="block-title">
<strong>
<span>Happy clients</span>
</strong>
</div>
<div class="block-content">
<div class="client-say-slider">
<div class="item item-client-say">
<div class="image-client block-image-static">
<a href="#" title="Jack Andrson"><img src="{{media url="wysiwyg/image-client/img-client-3.png"}}" alt="Image Client" /></a>
</div>
<div class="client-say-info">
<div class="client-comment">
“ Vehicula odit rerum aute Illo, fames mollitia cras asperiores amet magna minima natus donec voluptate nostra rem, facilis excepturi, ex ridiculus”
</div>
<div class="name-diot"></div>
<div class="name-client">
<h2><a href="#" title="Marrie Clair">Mirter SinZhao</a></h2>
<p>Milak Malphil</p>
</div>
</div>
</div>
</div>
</div>
</div>
</li>
<li>
<div class="block client-say">
<div class="block-title">
<strong>
<span>Happy clients</span>
</strong>
</div>
<div class="block-content">
<div class="client-say-slider">
<div class="item item-client-say">
<div class="image-client block-image-static">
<a href="#" title="Jack Andrson"><img src="{{media url="wysiwyg/image-client/img-client-2.png"}}" alt="Image Client" /></a>
</div>
<div class="client-say-info">
<div class="client-comment">
“ Amet magna minima natus donec voluptate Illo, fames mollitia cras asperiores nostra rem, facilis excepturi, ex ridiculus vehicula odit rerum aute”
</div>
<div class="name-diot"></div>
<div class="name-client">
<h2><a href="#" title="Marrie Clair">Marrie Sona</a></h2>
<p>Pental Kathus</p>
</div>
</div>
</div>
</div>
</div>
</div>
</li>
</ul>
<script type="text/javascript">
jQuery(document).ready(function ($) {
$(".yt-client-say").owlCarousel({
// Most important owl features
items : 1,
itemsCustom : false,
itemsDesktop : [1199,1],
itemsDesktopSmall : [980,1],
itemsTablet: [768,1],
itemsTabletSmall: false,
itemsMobile : [479,1],
singleItem : false,
itemsScaleUp : false,
//Basic Speeds
slideSpeed : 200,
paginationSpeed : 800,
rewindSpeed : 1000,
//Autoplay
autoPlay : false,
stopOnHover : false,
// Navigation
navigation : true,
navigationText : ["prev","next"],
rewindNav : true,
scrollPerPage : false,
//Pagination
pagination : false,
paginationNumbers: false,
// Responsive
responsive: true,
responsiveRefreshRate : 200,
responsiveBaseWidth: window,
})
});
</script>
|
Static-Bottom Services
To create static blocks, go to CMS >> Static Blocks with Identifier * : “bottom-service”
Frontend

Backend
- Content Code of Static-Bottom Services:
|
1
2
3
4
5
6
7
8
9
10
11
12
13
14
15
16
17
18
19
20
21
22
23
24
25
26
27
28
29
30
31
32
33
34
35
36
37
38
39
40
41
42
43
44
45
46
47
48
49
50
51
52
53
54
55
56
57
58
59
60
61
62
63
64
65
66
67
68
69
70
71
72
73
74
75
76
77
78
79
80
81
82
83
84
85
86
87
88
89
90
91
92
93
94
95
96
97
98
99
100
101
102
103
104
105
106
107
108
109
110
111
112
113
114
115
116
117
118
119
120
|
<div id="sevice-g3">
<div class="title-box">
<div class="container">
<h2> 6 REASONS WHY SHOP AT G3SHOP </h2>
<div class="btn-close"></div>
</div>
</div>
<div class="container">
<ul class="g3-services">
<li class="item-service1 col-lg-4 col-md-4 col-sm-6">
<div class="content-box">
<div class="image-cat">
<a title="img" href="#">
<img src="{{media url="wysiwyg/static-image-home/free-shipping.png"}}" alt="Free Shipping" />
</a>
</div>
<div class="cat-title">
<a title="aaa" href="#">The Best Merchandise</a>
</div>
<div class="child-cat">
<span>Hac habitant eius lacinia harum, repellat aperiam ex hac consequatur lectus per, metus ullam</span>
</div>
</div>
</li>
<li class="item-service1 col-lg-4 col-md-4 col-sm-6">
<div class="content-box">
<div class="image-cat">
<a title="img" href="#">
<img src="{{media url="wysiwyg/static-image-home/free-shipping2.png"}}" alt="Free Shipping" />
</a>
</div>
<div class="cat-title">
<a title="aaa" href="#">Easy to Order</a>
</div>
<div class="child-cat">
<span>Hac habitant eius lacinia harum, repellat aperiam ex hac consequatur lectus per, metus ullam</span>
</div>
</div>
</li>
<li class="item-service1 col-lg-4 col-md-4 col-sm-6">
<div class="content-box">
<div class="image-cat">
<a title="img" href="#">
<img src="{{media url="wysiwyg/static-image-home/free-shipping3.png"}}" alt="Free Shipping" />
</a>
</div>
<div class="cat-title">
<a title="aaa" href="#">Free delivery for all our stock</a>
</div>
<div class="child-cat">
<span>Hac habitant eius lacinia harum, repellat aperiam ex hac consequatur lectus per, metus ullam facilis suscipit curae eaque gravida hac</span>
</div>
</div>
</li>
<li class="item-service col-lg-4 col-md-4 col-sm-6">
<div class="content-box">
<div class="image-cat">
<a title="img" href="#">
<img src="{{media url="wysiwyg/static-image-home/free-shipping4.png"}}" alt="Free Shipping" />
</a>
</div>
<div class="cat-title">
<a title="aaa" href="#">Easy to Order</a>
</div>
<div class="child-cat">
<span>ac habitant eius lacinia harum, repellat aperiam ex hac consequatur lectus per, metus ullam facilis suscipit curae eaque gravida hac</span>
</div>
</div>
</li>
<li class="item-service col-lg-4 col-md-4 col-sm-6">
<div class="content-box">
<div class="image-cat">
<a title="img" href="#">
<img src="{{media url="wysiwyg/static-image-home/free-shipping5.png"}}" alt="Free Shipping" />
</a>
</div>
<div class="cat-title">
<a title="aaa" href="#">Support online 24/7</a>
</div>
<div class="child-cat">
<span>ac habitant eius lacinia harum, repellat aperiam ex hac consequatur lectus per, metus ullam facilis suscipit curae eaque gravida hac</span>
</div>
</div>
</li>
<li class="item-service col-lg-4 col-md-4 col-sm-6">
<div class="content-box">
<div class="image-cat">
<a title="img" href="#">
<img src="{{media url="wysiwyg/static-image-home/free-shipping6.png"}}" alt="Free Shipping" />
</a>
</div>
<div class="cat-title">
<a title="aaa" href="#">Secure Online Shopping</a>
</div>
<div class="child-cat">
<span>ac habitant eius lacinia harum, repellat aperiam ex hac consequatur lectus per, metus ullam facilis suscipit curae eaque gravida hac</span>
</div>
</div>
</li>
</ul>
</div>
<script type="text/javascript">
// <![CDATA[
jQuery(document).ready(function($){
$("#sevice-g3 .btn-close").click(function(){
$('#sevice-g3').toggleClass('bpr-show');
$this = $(this);
$("#sevice-g3 .g3-services").slideToggle("fast");
$this.toggleClass("closed");
});
});
// ]]>
</script>
</div>
|
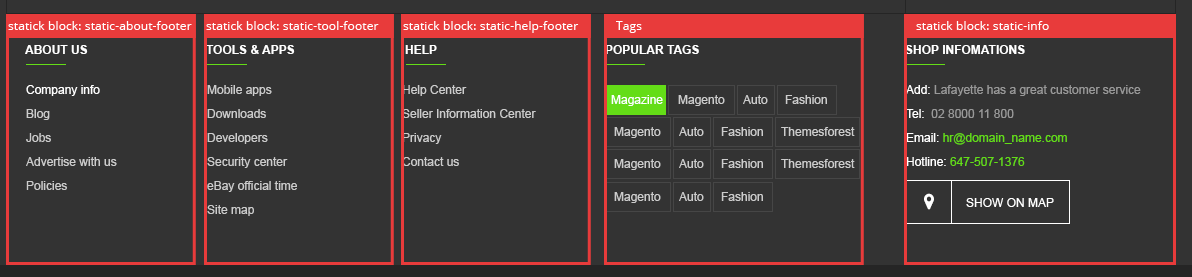
Static-About Footer + Tool Footer + Help Footer + Information
Frontend
Static-About Footer
Frontend
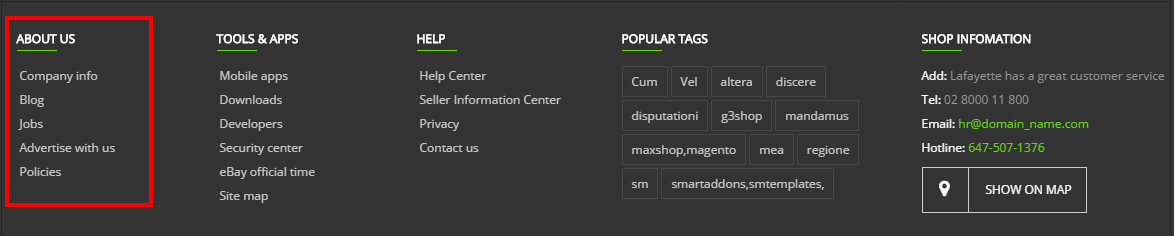
To create static blocks, go to CMS >> Static Blocks with Identifier * : “about-footer”
Backend
- Content Code of Static-About Footer:
|
1
2
3
4
5
6
7
8
9
10
11
12
13
|
<div class="footer-title">
<h2>ABOUT US</h2>
<div class="border-pen"></div>
</div>
<div class="content-block-footer">
<ul>
<li><a href="#"><span class="icon-Help"> </span>Company info</a></li>
<li><a href="#"><span class="icon-Help"> </span>Blog</a></li>
<li><a href="#"><span class="icon-Help"> </span>Jobs</a></li>
<li><a href="#"><span class="icon-Help"> </span>Advertise with us</a></li>
<li><a href="#"><span class="icon-Help"> </span>Policies</a></li>
</ul>
</div>
|
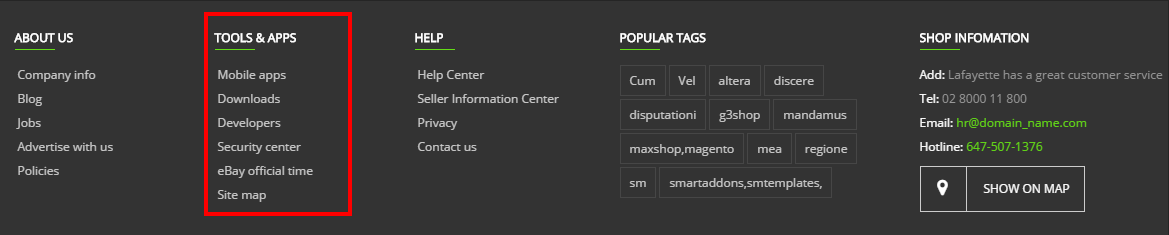
Static-Tool Footer
To create static blocks, go to CMS >> Static Blocks with Identifier * : “tools-footer”
Frontend
Backend
- Content Code of Static-Tool Footer:
|
1
2
3
4
5
6
7
8
9
10
11
12
13
14
15
|
<div class="footer-title">
<h2>TOOLS & APPS</h2>
<div class="border-pen"></div>
</div>
<div class="content-block-footer">
<ul>
<li><a href="#"><span class="icon-doublet"> </span>Mobile apps</a></li>
<li><a href="#"><span class="icon-double"> </span>Downloads</a></li>
<li><a href="#"><span class="icon-double"> </span>Developers</a></li>
<li><a href="#"><span class="icon-double\"> </span>Security center</a></li>
<li><a href="#"><span class="icon-double\"> </span>eBay official time</a></li>
<li><a href="#"><span class="icon-double\"> </span>Site map</a></li>
</ul>
</div>
|
Static-Help Footer
To create static blocks, go to CMS >> Static Blocks with Identifier * : “help-footer”
Frontend

Backend
- Content Code of Static-Help Footer:
|
1
2
3
4
5
6
7
8
9
10
11
12
|
<div class="footer-title">
<h2>HELP</h2>
<div class="border-pen"></div>
</div>
<div class="content-block-footer">
<ul>
<li><a href="#"><span class="icon-Help"> </span>Help Center</a></li>
<li><a href="#"><span class="icon-Help"> </span>Seller Information Center</a></li>
<li><a href="#"><span class="icon-Help"> </span>Privacy</a></li>
<li><a href="{{store url="contact-us.html"}}"><span class="icon-Help"> </span>Contact us</a></li>
</ul>
</div>
|
Static-Information Footer
To create static blocks, go to CMS >> Static Blocks with Identifier * : “information-footer”
Frontend

Backend
- Content Code of Static-Info Footer:
To create static blocks, go to CMS >> Static-Brand Homepage V2 with Identifier * : “brand-v2″
Frontend

Backend
- Content Code of Static-Brand Homepage V2:
|
1
2
3
4
5
6
7
8
9
10
11
12
13
14
15
16
17
18
19
20
21
22
23
24
25
26
27
28
29
30
31
32
33
34
35
36
37
38
39
40
41
42
43
44
45
46
47
48
49
50
51
52
53
54
55
56
57
58
59
60
61
62
63
64
65
|
<div class="block block-brand">
<div class="block-title">
<strong>
<span>Top Brands</span>
</strong>
</div>
<div class="block-content">
<div class="brand-wrapper">
<a title="brand3"><img src="{{media url="wysiwyg/brand-image/brand-logo-1.png"}}" alt="Static Image" /></a>
<a title="brand3"><img src="{{media url="wysiwyg/brand-image/brand-logo-2.png"}}" alt="Static Image" /></a>
<a title="brand3"><img src="{{media url="wysiwyg/brand-image/brand-logo-3.png"}}" alt="Static Image" /></a>
<a title="brand3"><img src="{{media url="wysiwyg/brand-image/brand-logo-4.png"}}" alt="Static Image" /></a>
<a title="brand3"><img src="{{media url="wysiwyg/brand-image/brand-logo-5.png"}}" alt="Static Image" /></a>
<a title="brand3"><img src="{{media url="wysiwyg/brand-image/brand-logo-6.png"}}" alt="Static Image" /></a>
<a title="brand3"><img src="{{media url="wysiwyg/brand-image/brand-logo-3.png"}}" alt="Static Image" /></a>
<a title="brand3"><img src="{{media url="wysiwyg/brand-image/brand-logo-4.png"}}" alt="Static Image" /></a>
<a title="brand3"><img src="{{media url="wysiwyg/brand-image/brand-logo-5.png"}}" alt="Static Image" /></a>
<a title="brand3"><img src="{{media url="wysiwyg/brand-image/brand-logo-2.png"}}" alt="Static Image" /></a>
</div>
</div>
<script type="text/javascript">
jQuery(document).ready(function ($) {
$(".brand-wrapper").owlCarousel({
// Most important owl features
items : 4,
itemsCustom : false,
itemsDesktop : [1199,4],
itemsDesktopSmall : [980,4],
itemsTablet: [768,3],
itemsTabletSmall: false,
itemsMobile : [479,1],
singleItem : false,
itemsScaleUp : false,
//Basic Speeds
slideSpeed : 200,
paginationSpeed : 800,
rewindSpeed : 1000,
//Autoplay
autoPlay : false,
stopOnHover : false,
// Navigation
navigation : true,
navigationText : ["prev","next"],
rewindNav : true,
scrollPerPage : false,
//Pagination
pagination : false,
paginationNumbers: false,
// Responsive
responsive: true,
responsiveRefreshRate : 200,
responsiveBaseWidth: window,
})
});
</script>
</div>
|
4.5 How To Edit Copyright in admin
Frontend Appearance

In the Administrator page, Please navigate to System >> Configuration >> find SM G3Shop Setting Module to configure the “Custom Copyright” parameter as image below:
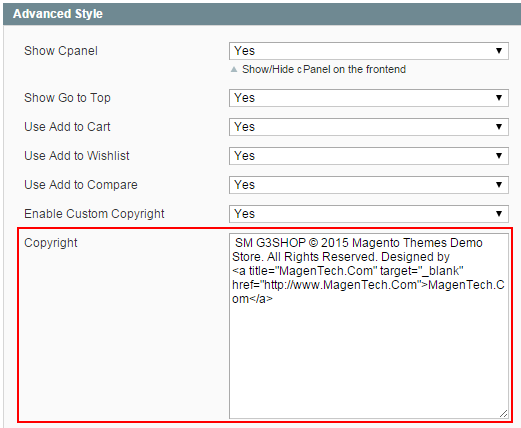
Advanced Style
- Show Cpanel - Allow to Enable/Disable Cpanel
- Show Go to Top - Allow to Enable/Disable Go to Top
- Use Add to Cart - Allow to Enable/Disable Cart
- Use Add to Wishlist - Allow to Enable/Disable Wishlist
- Use Add to Compare - Allow to Enable/Disable Compare
- Enable Custom Copyright - Allow to Enable/Disable Custom Copyright
- Copyright - If you select “Yes”, please custom copyright here, or else “No” will display the default copyright of Magento.
- Custom Css - Allow to custom css
- Custom Javascript - Allow to custom Javascript
Note: Please click Here to view more about How To Set Default Language and Currency in Magento.
4.6 Blog Extension Installation
We have used Blog Extension in this theme. Please go Here to Download & readmore information about this extension.
5SUPPORT – Back to top
Thank you so much for purchasing this theme. If you have any questions that are beyond the scope of this help file, please send us via: Support Tickets System
Thanks so much!