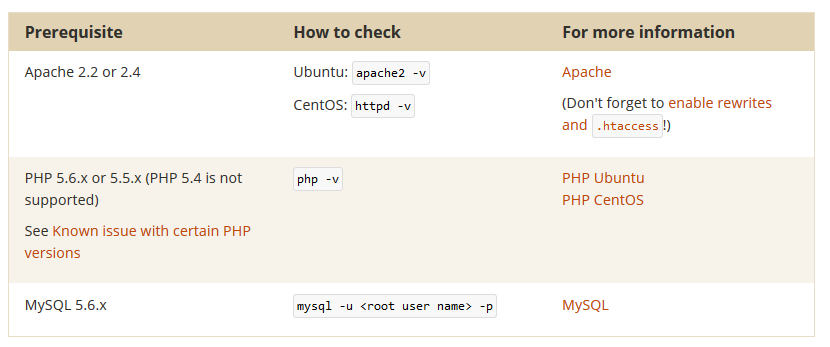
1REQUIREMENT
At the basic level, this module will require the following condition:
- Compatible with Magento Community Edition 2.0: Please follow Magento 2.0 Installation Guide to install if you do not have one.
- Composer (latest stable version)
- Apache 2.2 or late
- PHP: 5.5.x,5.6.x and Memory_limit no less than 256Mb)
- In the future if the conditions change, please check the Magento 2 documentation
2INSTALLATION
- Step 1: Download and extract the extension’s package on your computer and navigate inside the folder.
- Step 2: Upload the folder named as app from the package to the root of your Magento site on your server
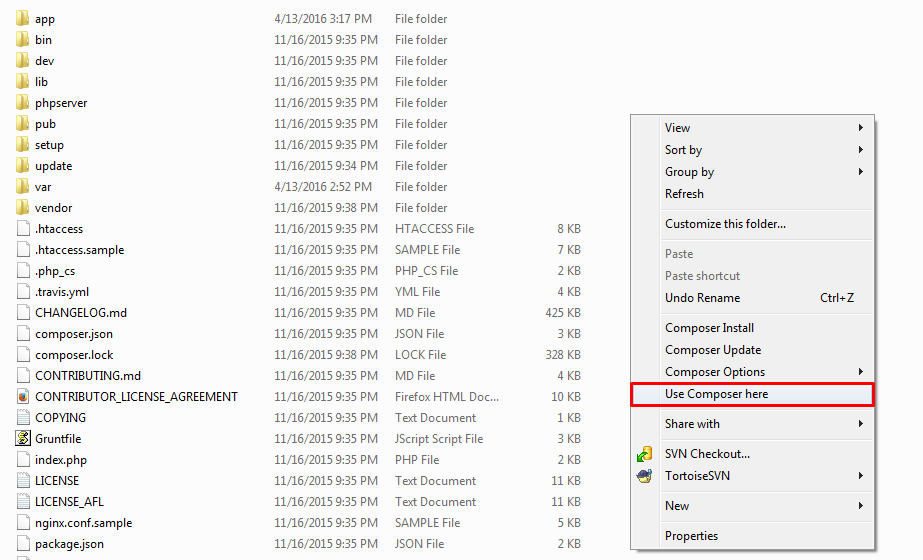
- Step 3: On your server, right click and select ‘Use composer here’ to open Command Prompt
-
1. Please type the following command into the dialog to clear the compiled code and cache:
1php bin\magento setup:upgrade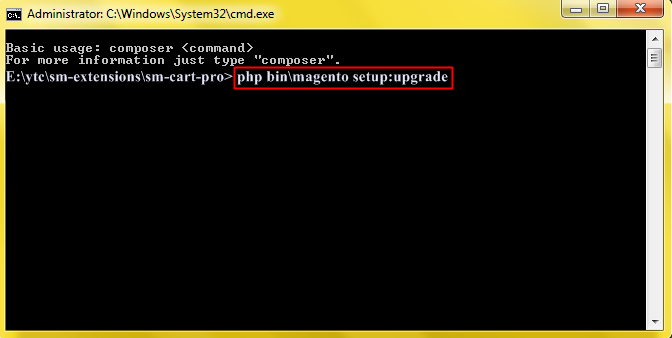
-
2. After running successfully the first command, type the following command into the dialog to set up fresh static content to deploy on our Magento store
1php bin/magento setup:static-content:deploy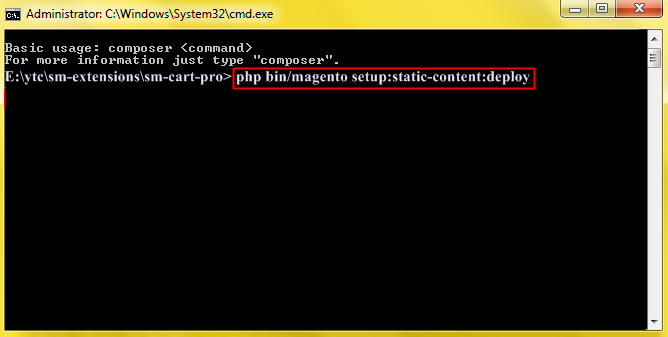
- Step 4: Go to Administration page to configure the extension
- After installing extension, you should logout first and then login Admin Panel to ensure all functions work normally.
- You should disable all caches in cache management in the installation and configuration process.
Important Note:
3CONFIGURATION
3.1 Module Demo
You could see the appearance of SM Image Slider module as following:
3.2 Module Configuration
Notes: We used the images of module’s installation on Magento 2.0.x to illustrate
In the Administrator Page, navigate to Stores -> Settings -> Configuration and find SM Image Slider to configure.
The parameters are divided into the following groups:
- General settings
- Source Options
- Product Options - For Theme 2
- Image Options
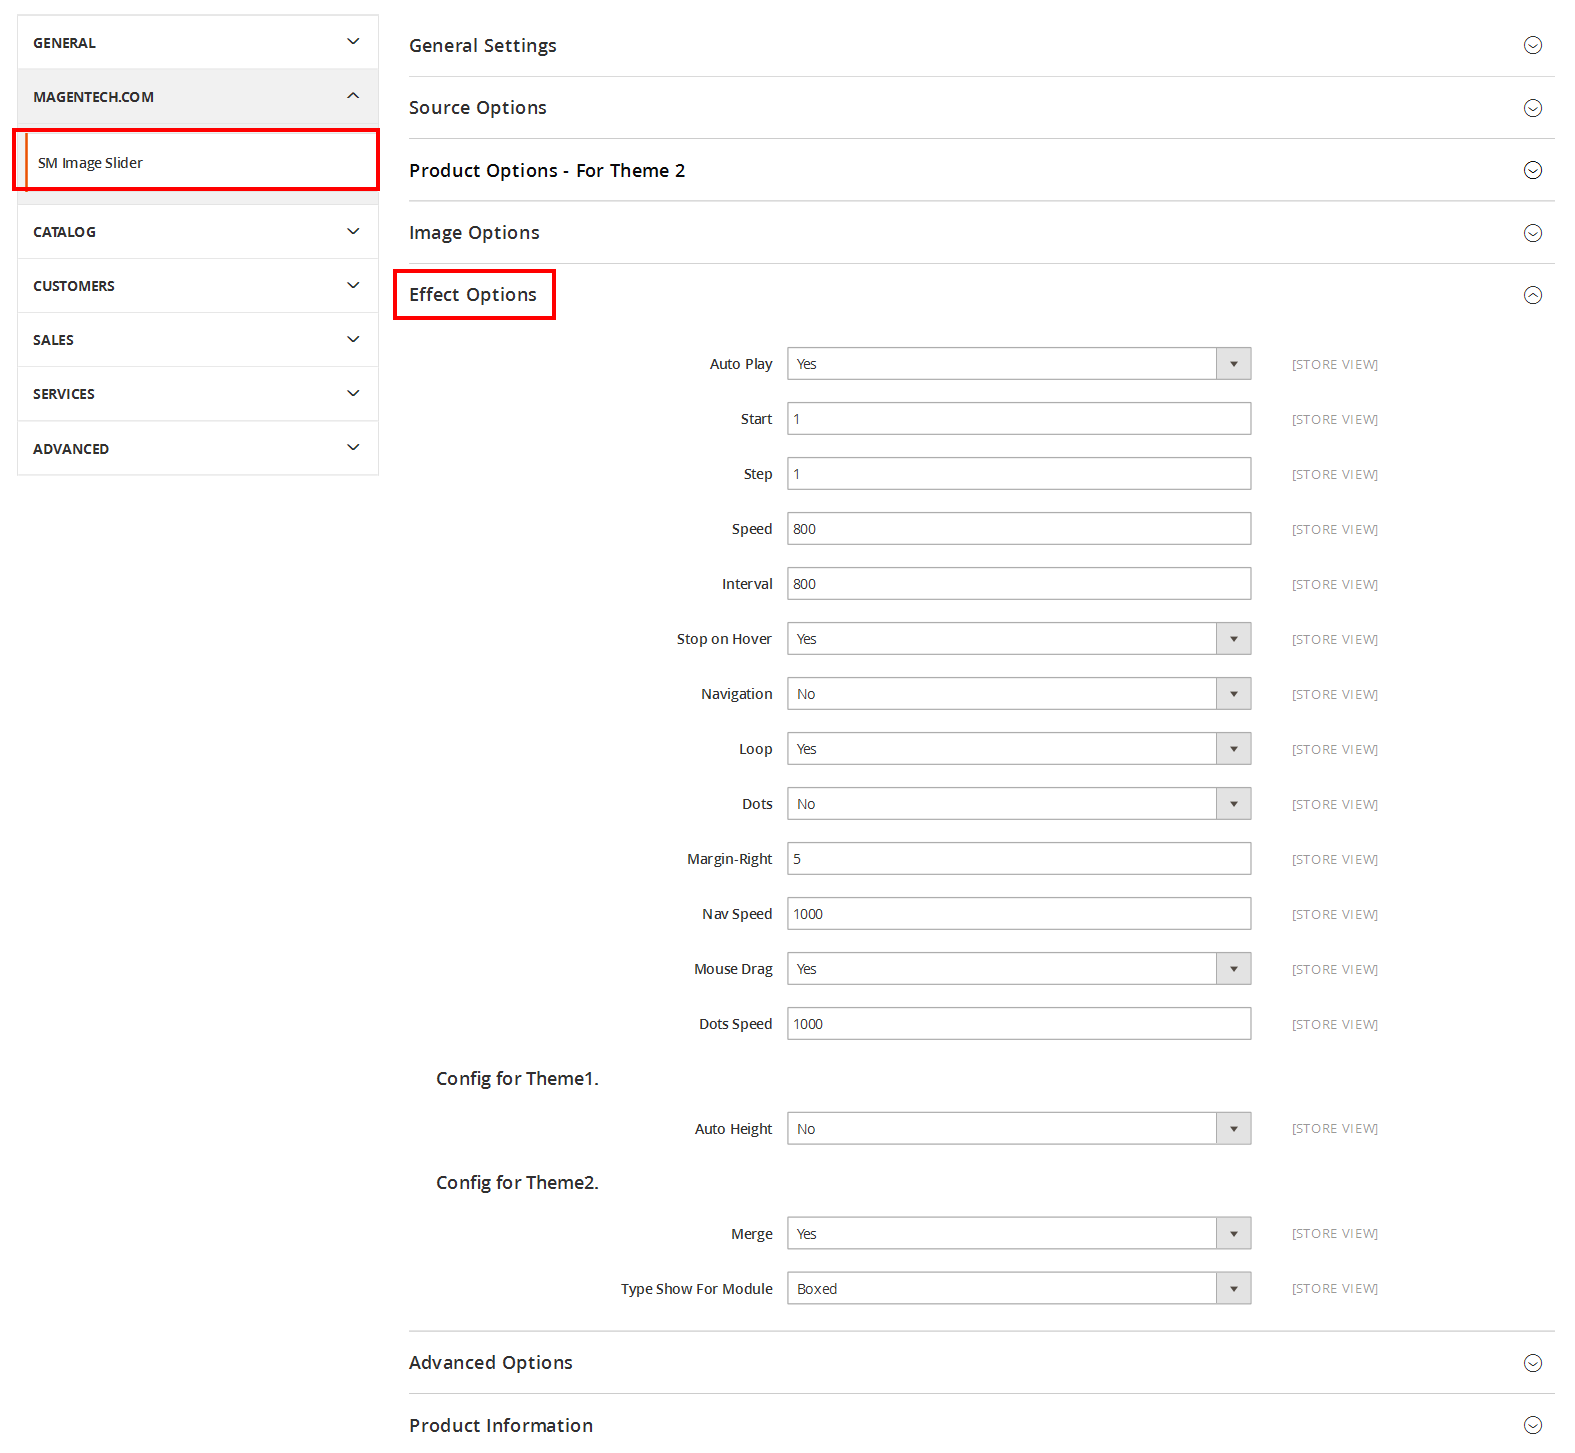
- Effect Options
- Advanced Options
Let’s look at the parameters in detail:
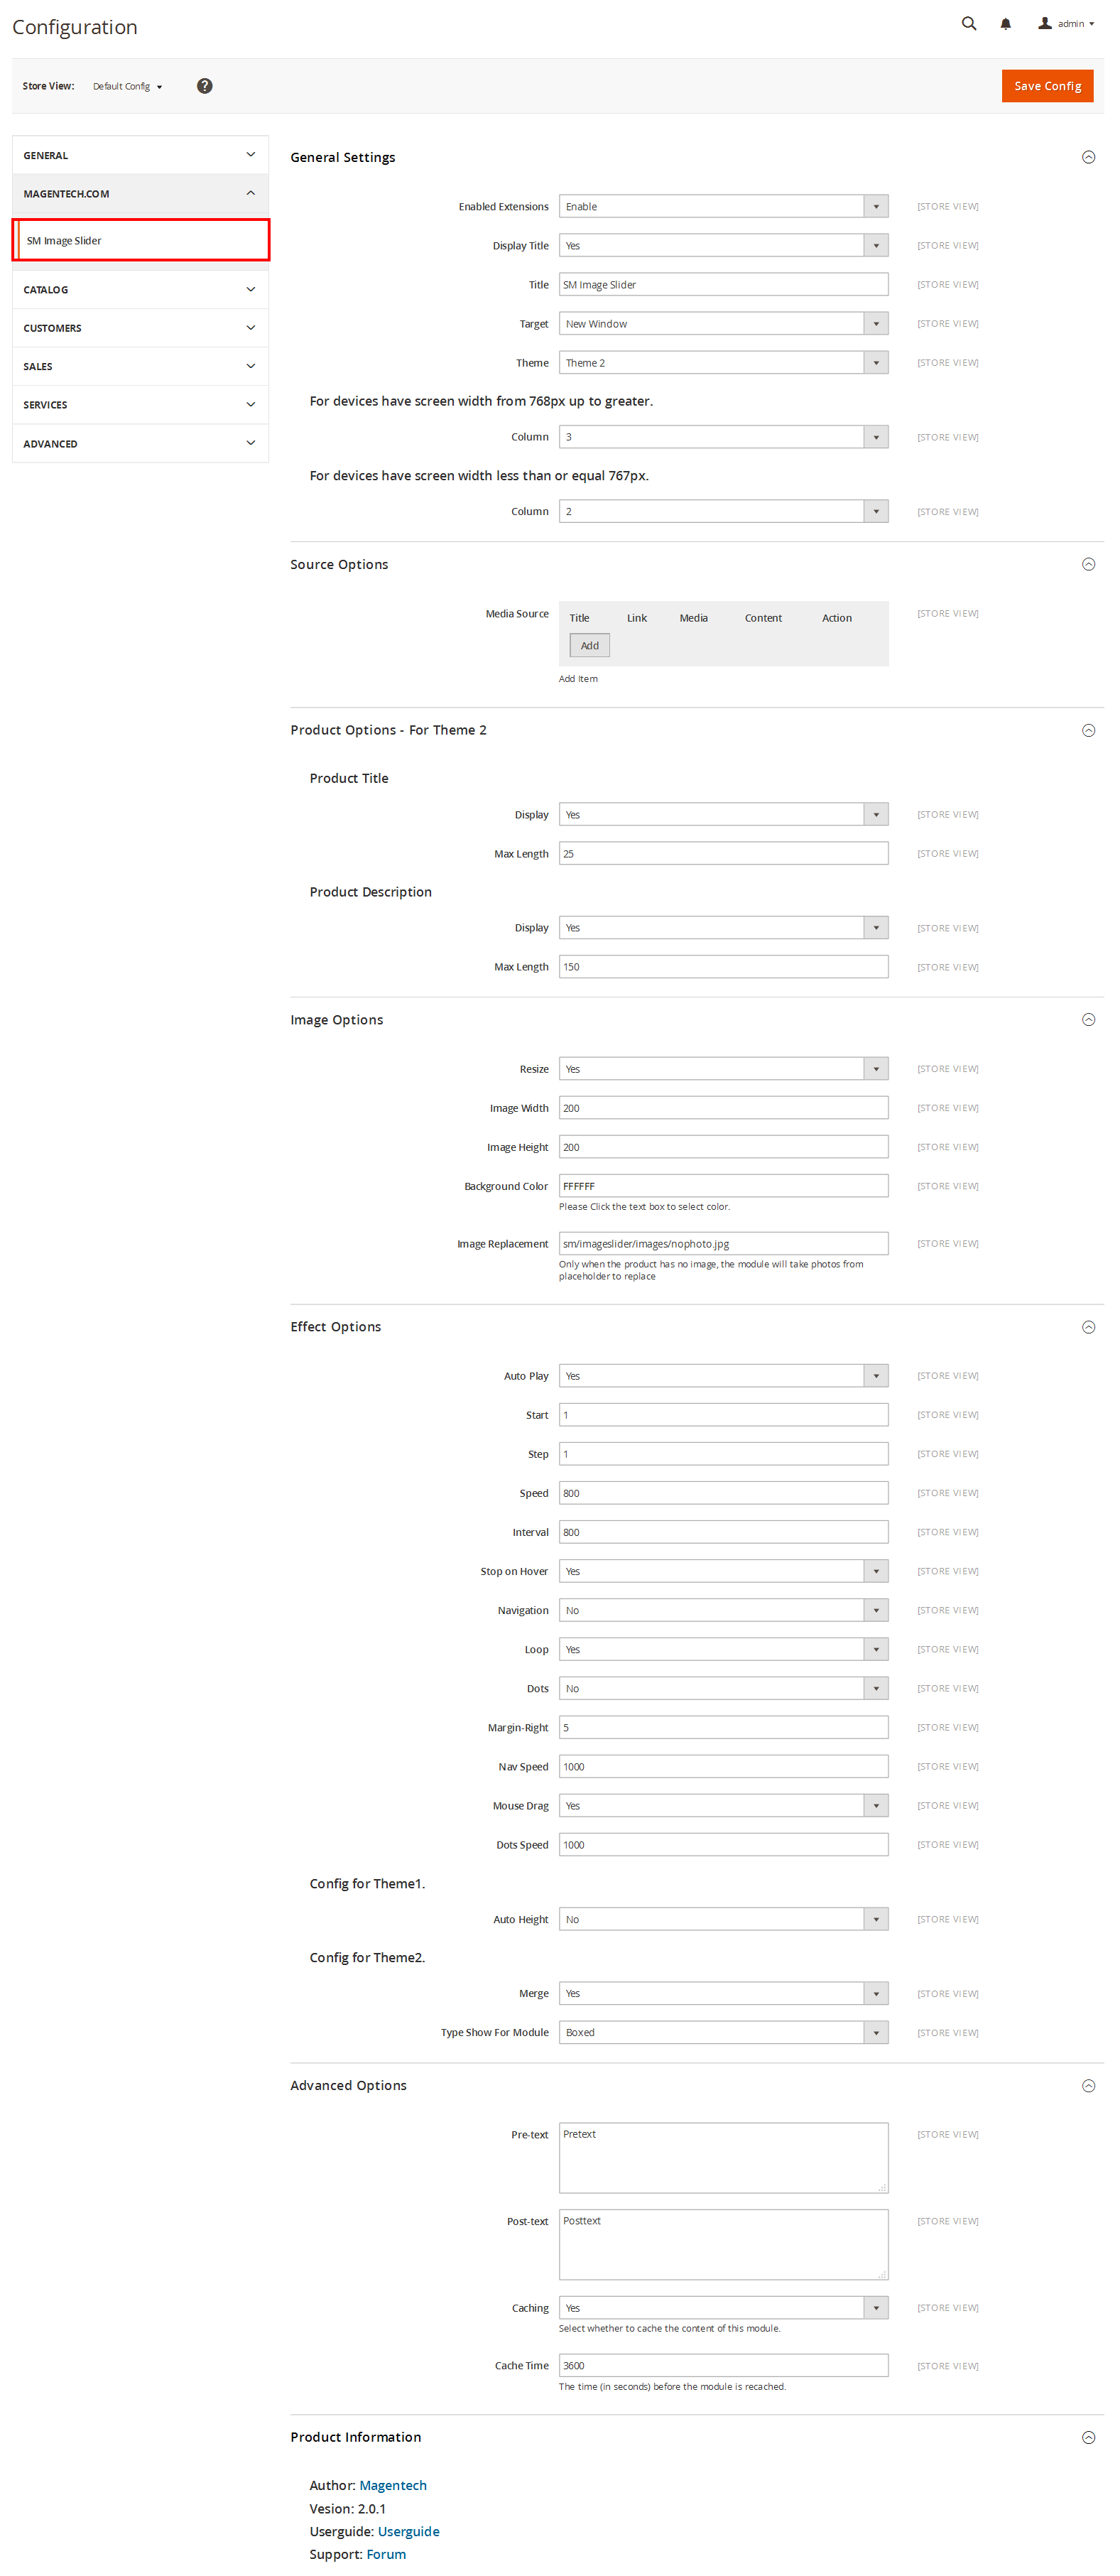
General settings
- Enable/Disable - Choose to publish/unpublish the module parameter.
- Display Title - Allow to show/hide title of the module.
- Title - Enter the title of the module.
- Target - Allow to display the target link in Same Window/ New Window/ Popup Window
- Theme - Choose theme which displays this module
-
Column - Set the number of columns for devices:
- For devices having screen width from 768px up to greater.
- For devices having screen width less than or equal 767px.
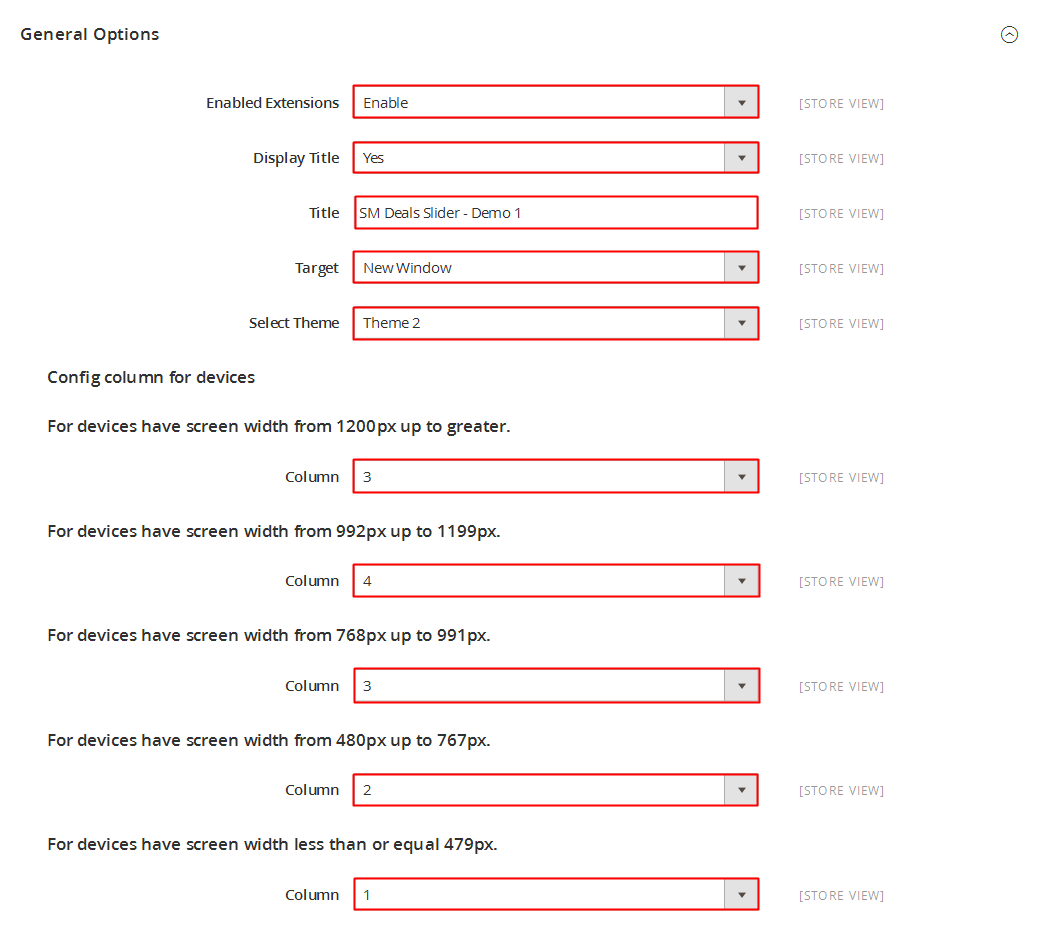
- Media Source - Input “Title, Link, Media, Content, Action”.
- Auto Play - Allow to Enable/Disable auto play mode
- Start - Allow to set page that is displayed at first when you run slideshow.
- Step - Set the number of items for each slide transition
- Speed - Allow to set the speed of slide.
- Interval - The duration to change to next slide.
- Stop on Hover - Allow to Stop effects when users hover Or not
- Navigation - Allow to Enable/Disable the next/previous button
- Loop - Allow to Enable/Disable to loop products
- Dot - Allow to Enable/Disable one page scroll with dot navigation style.
- Margin Right - Allow to set right margin of the image
- Nav Speed - Allow to set the speed of Navigation
- Mouse Drag - Allow to use the cursor to navigate pages of products in this module
- Dots Speed - Allow to set the speed of dot navigation style
-
Config for Theme 1.
- Auto Height - Set the value for the height
-
Config for Theme 2.
- Merge - Allow to double the size of an image to the others in this module
- Type Show For Module - Allow to choose Wide/Boxed for slides
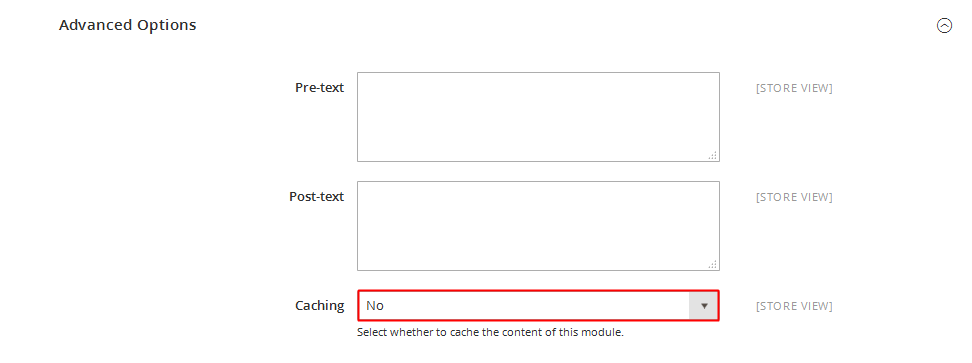
- Pre-text - The content to show at the top of module
- Post-text - The content to show at the end of module
- Caching - Allow to choose to cache the content of module
- Cache Time - Allow to choose the time (in seconds) before the module is recached
- Page Information Tab: Please click to see the Backend Settings.
- Content Tab: Please click to see the Backend Settings.
- Design Tab: Please click to see the Backend Settings .
Source Options
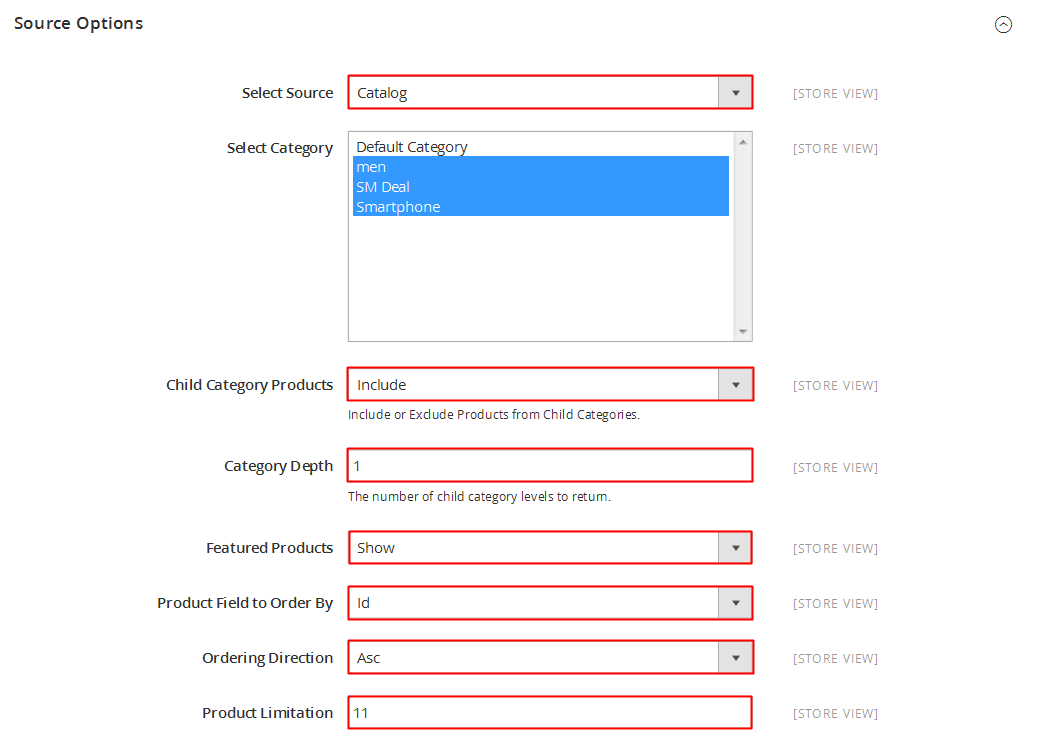
Note: Please go to the installation directory to get the image’s source as you want. For example: “C:\xampp\htdocs\magento-2.0\magento\media\wysiwyg\image.jpg”
Effect Option
Advanced Options
3.3 Page Configuration
To display this module on front page, go to Content >>Elements >> Pages.
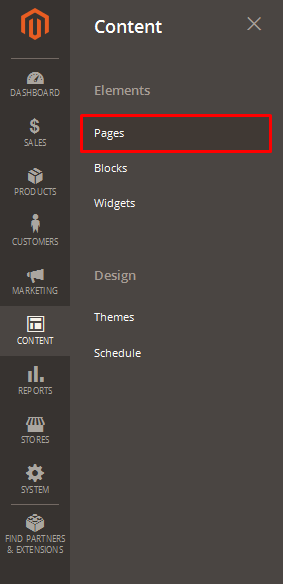
Create a new page in Page Management section, go to
Content>> Elements>> Pages

Copy and paste the following code into the Content field:
|
1
|
{{block class="Sm\ImageSlider\Block\ImageSlider" name="imageslider" template="Sm_ImageSlider::default.phtml"}}
|
4SUPPORT
Thank you so much for using this module, your support is truly appreciated. If you have any questions that are beyond the scope of this document, please feel free to contact us via our Support Tickets System