When you buy the module the first time, you will have the latest version.
1REQUIREMENT - Back to top
At the basic level, this module will require the following conditions:
- Compatible with Magento 1.9.x ( the latest version 1.9.2.0 ).
2INSTALLATION - Back to top
Extension Installation
There are two ways to install extension:
- Step 1: Download and unzip extension contents on your computer and navigate inside the extracted folder.
-
Step 2: Upload folders skin and app from our download package to your Web server’s document root (from here on, referenced as {docroot}). You should see a directory layout like this:
{docroot} /magento/
app/
index.php
js/
lib/
LICENSE.txt
media/
pear/
skin/
var/ - Step 3: Log into your Admin Panel on the stage localhost: https://localhost/magento/index.php/admin/.
OR you also install the steps as following:
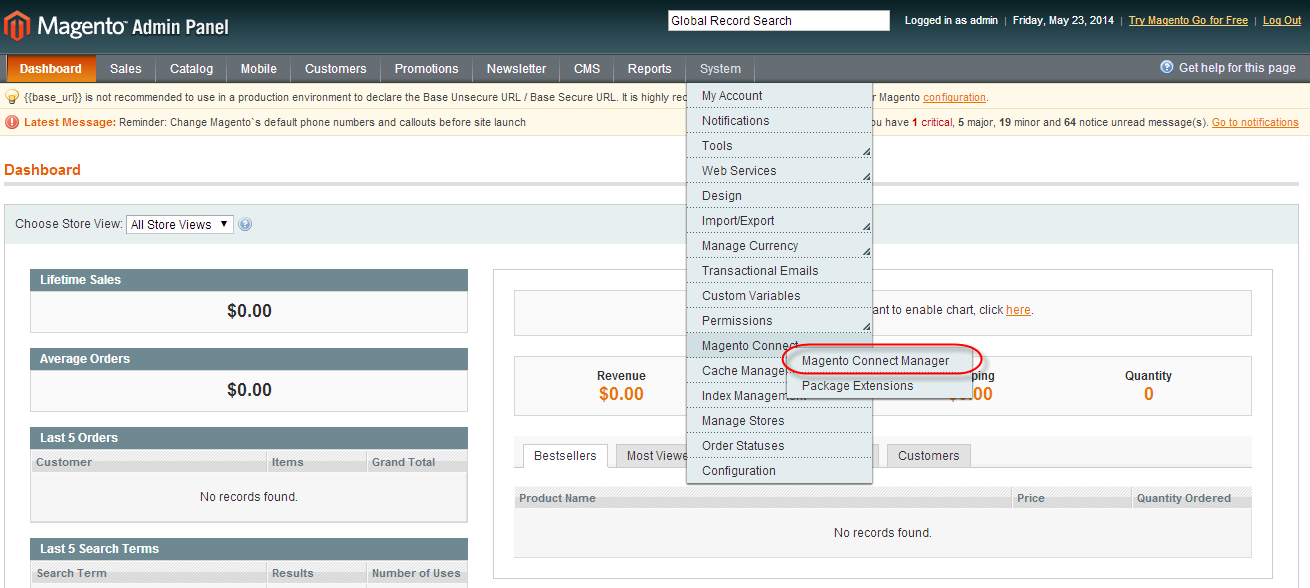
Step 1: In the Administrator page, Navigate to System >> Magento Connect >> Magento Connect Management
Step 2: Click Browse and Upload package file

Important Note:
- After installing extension, you should logout first and then login Admin Panel to ensure all functions work normally.
- You should disable all caches in cache management in the installation and configuration process.
3EXTENSION CONFIGURATION - Back to top
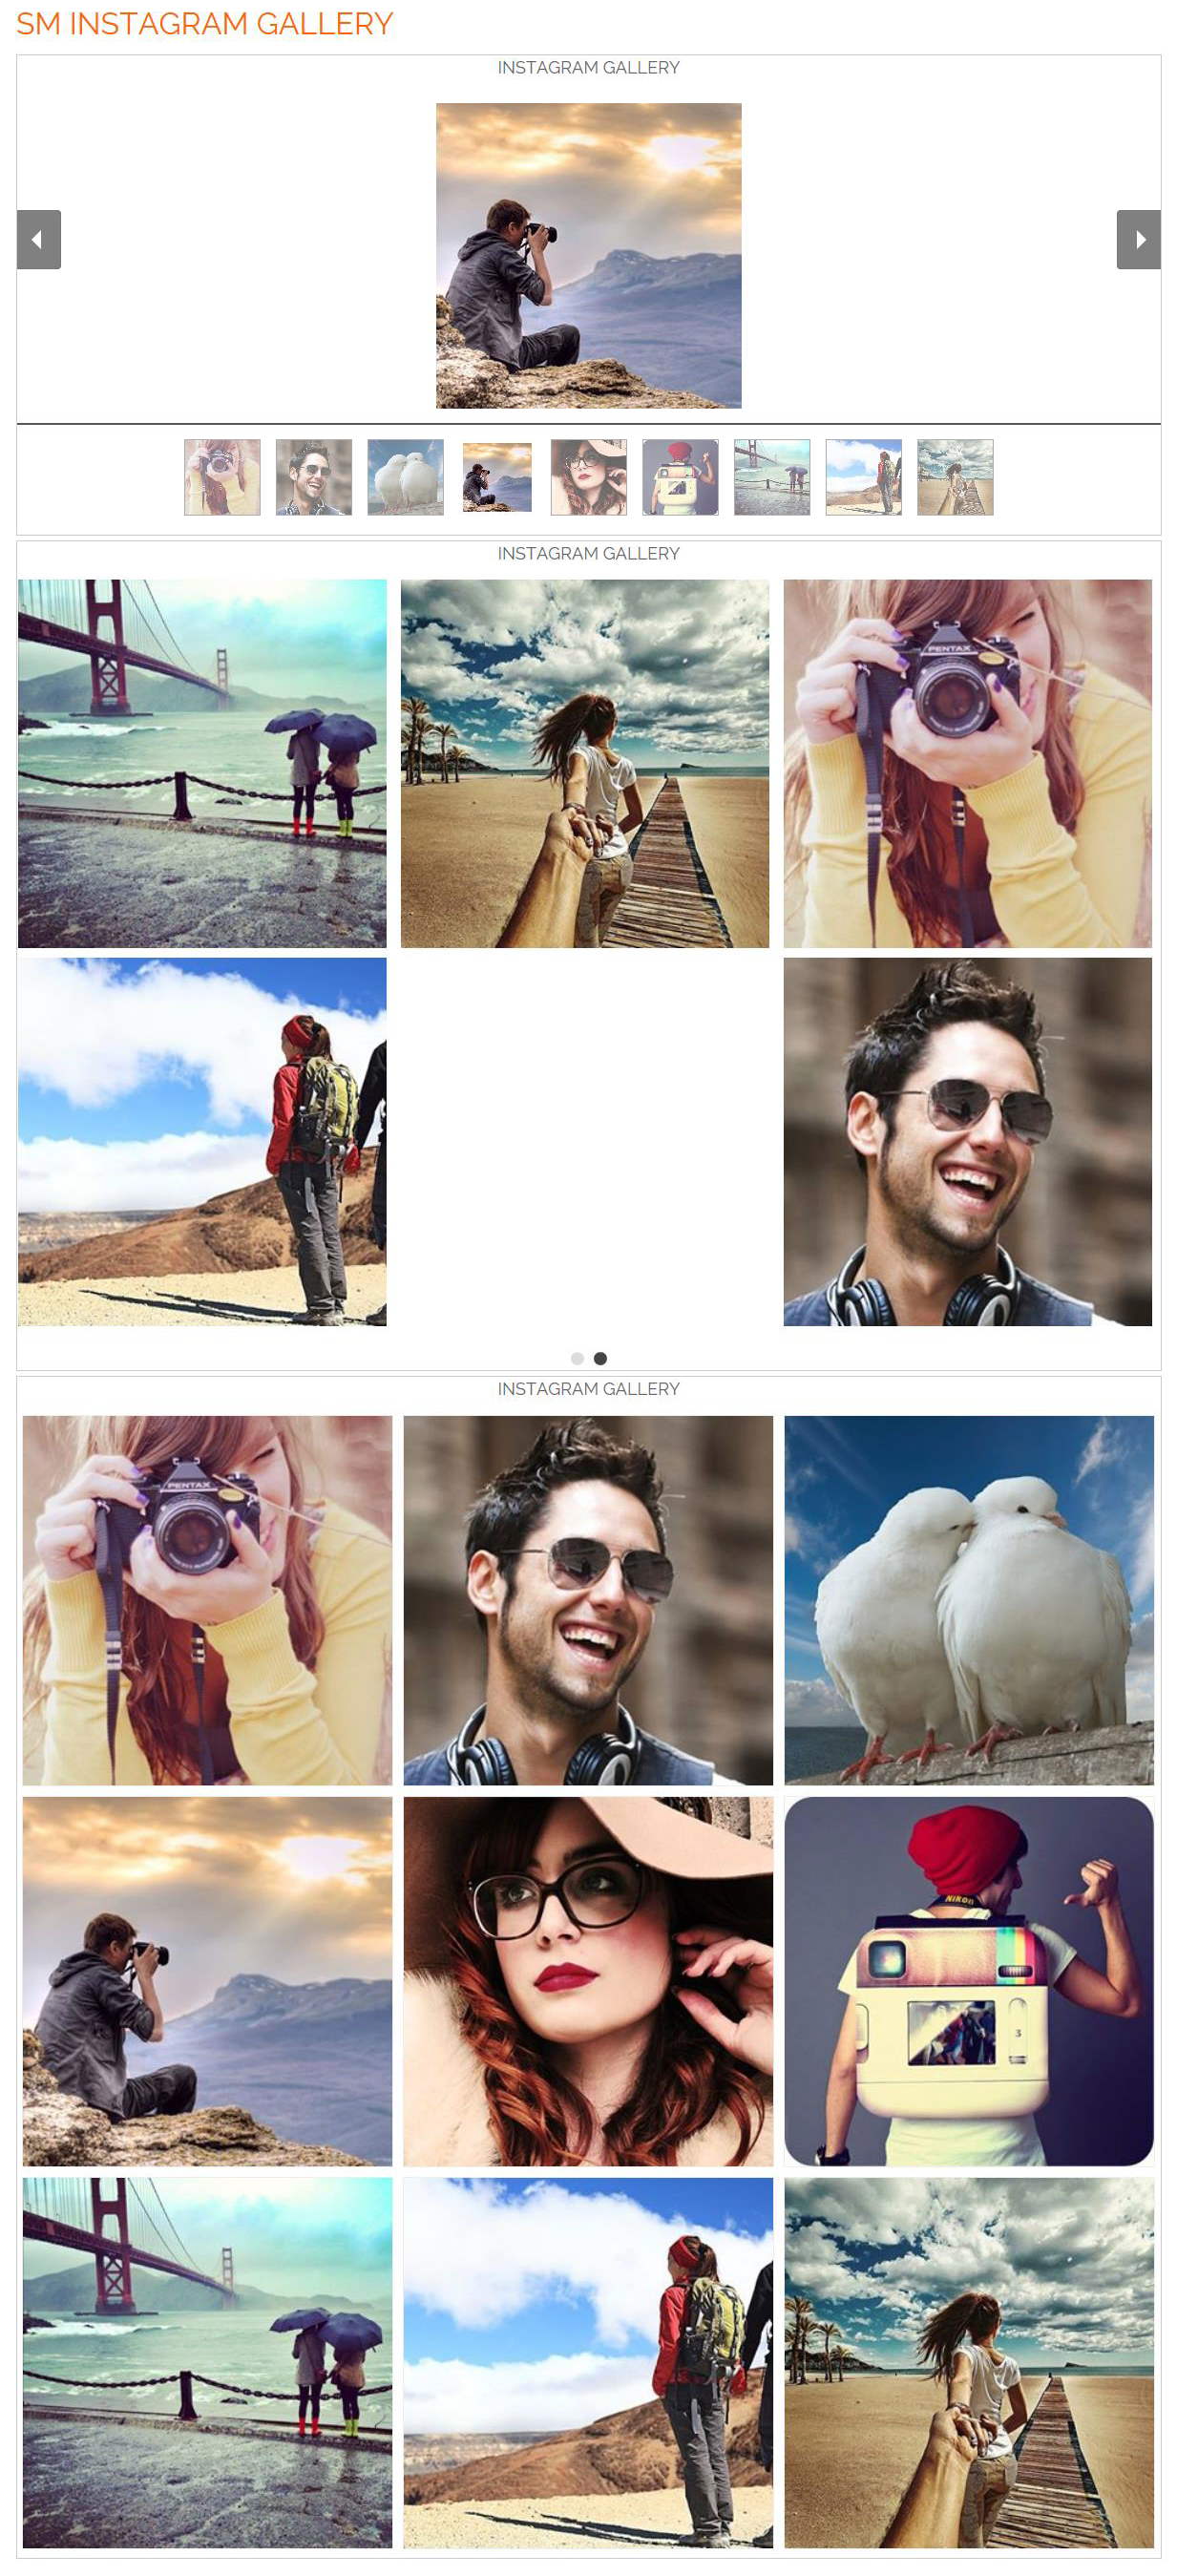
3.1 Below is module layout
3.2 Module Configuration
Notes: We used the images of module’s installation on Magento 1.9.x to illustrate
In the Administrator Page, navigate to System -> Configuration and find SM Instagram Gallery (in the left hand column) to configure.
The parameters are divided into the following groups:
- General settings
- Configure number column for Devices
- Include Jquery
Let’s look at the parameters in detail:
General settings
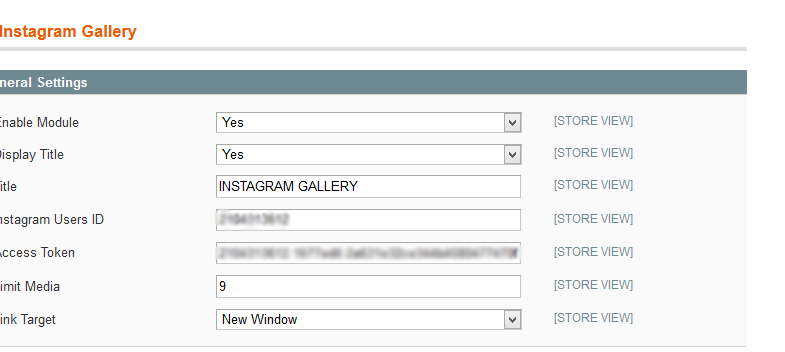
- Enable/Disable - Choose to publish/unpublished the module parameter.
- Title - Fill in the Title of Module.
- Instagram Users - When you access the link: after that you fill your Use Name/ Password of your Instagram Account , you will receive Instagram User and Access Token.
- Access Token - Set access token as Instagram User above.
- Limit Image - Set the limitation of image quantity in the module
-
Link target - Target to open links:
- New window - Open the link in the new window/tab
- Same window - Open the link in the same window/tab
- Popup window - Open links in new pop-up window
Configure number column for Devices
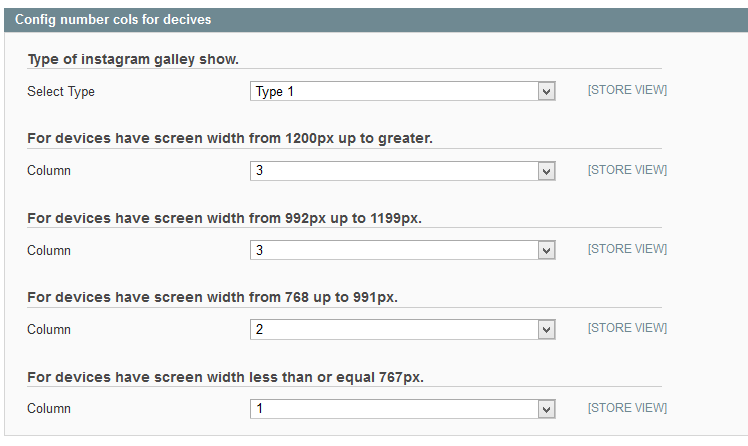
Type of instagram galley show.
- Select Type - Allow to chose type of module.
Note: With Type 1
To the different screen of devices, the displaying column number of this module on front-end area will be set based on dimension of screen:
- For devices have screen width from 1200px up to greater.
- For devices have screen width from 992px up to 1199px.
- For devices have screen width from 768px up to 991px.
-
For devices have screen width less than or equal 767px.
With Type 2
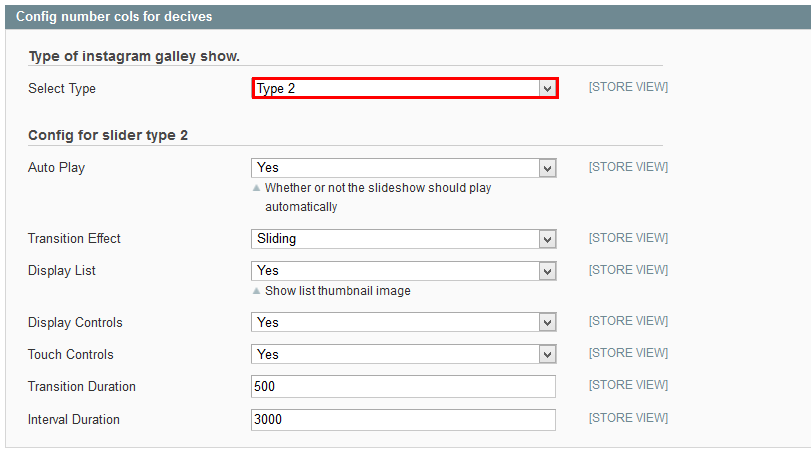
- Auto Play - Allow to Enable/Disable auto play mode.
- Transition Effect - Allow to select effect of module in list box.
- Display List - Allow to Show/Hide list thumbnail image.
- Display Controls - Allow to Enable/Disable Control of module
- Touch controls - Touch Drag – Allow to Enable/Disable touch control.
- Transition Duration – Allow to set how long animation will run (Lager = Slower).
- Interal Duration– Allow to set auto interval timeout of slider or not.
With Type 3
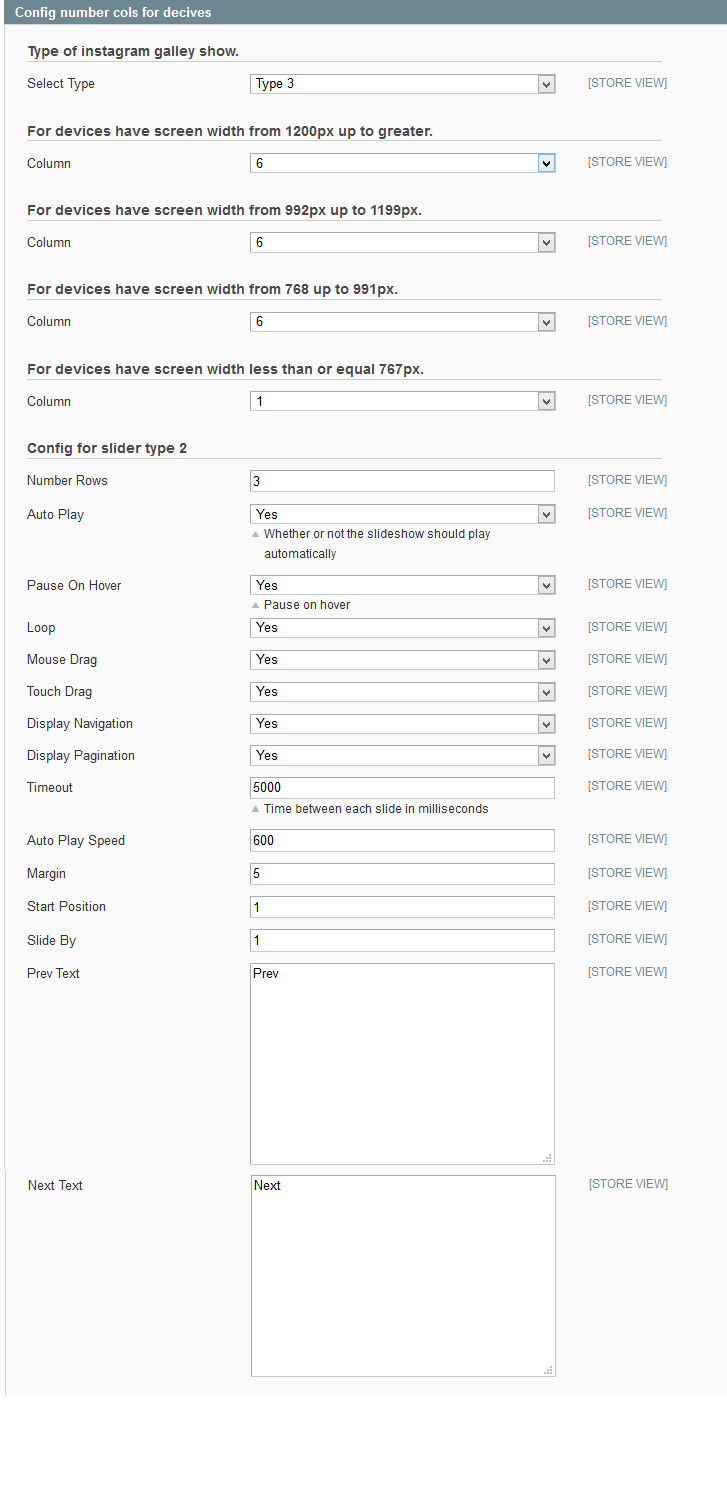
- For devices have screen width from 1200px up to greater.
- For devices have screen width from 992px up to 1199px.
- For devices have screen width from 768px up to 991px.
- For devices have screen width less than or equal 767px.
- Number Rows - Allow to set number of row for slider
- Auto Play - Allow to Enable/Disable auto play mode.
- Pause on Hover – Allow to pause effect when the user hovers.
- Loop – Allow to run a loop or not.
- Mouse Drag – Allow to Enable/Disable mouse drag.
- Touch Drag – Allow to Enable/Disable touch drag
- Display Navigation – Allow to show/hide navigation for slider.
- Display Pagination – Allow to show/hide pagination for slider.
- Time out – Time between each slide in milliseconds
- Auto Play Speed – Allow to set speed of auto play.
- Margin – Allow to set margin for image
- Start Position – Allow to set Start position .
- Pre-text – The content to show at the left of module.
- Next-text – The content to show at the right of module.

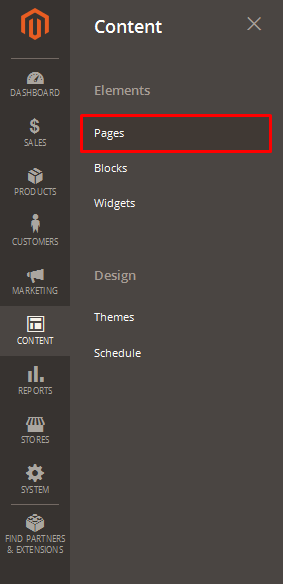
4PAGE CONFIGURATION - Back to top
To display this module on front page, go to CMS >> Pages.
Create a new page in Page Management section, then edit as the following instruction:
- Page Information Tab: Please click to see the Backend Settings.
- Content Tab: Please click to see the Backend Settings.
Copy and paste the following code into the Content field:
|
1
2
3
|
<div style="width: 100%; overflow: hidden; margin: 0px auto; text-align: left;">
<h3><span style="font-size: xx-large; color: #ff6600;">SM Instagram Gallery</span></h3>
</div>
|
- Design Tab: Please click to see the Backend Settings .
Copy and paste the following code into the Design field:
|
1
2
3
4
|
<reference name="content">
<block type="instagramgallery/instagramusers_viewlist" name="instagramgallery" as="instagramgallery">
</block>
</reference>
|
5SUPPORT - Back to top
Thank you so much for purchasing this module. If you have any questions that are beyond the scope of this help file, please send us via: Support Tickets System
Thanks so much!