1 SYSTEM REQUIREMENT - Back to top
At the basic level, this theme will require the following conditions:
- Compatible with Magento Community Edition 1.7.x; 1.8.x and 1.9.x ( latest version 1.9.2.0 ) (require: php 5.4 and Memory_limit no less than 256Mb)
2INSTALLATION - Back to top
There are two ways to install a Magento Theme:
- Quickstart Installation: By using this package, you will set the theme exactly as our Demo with sample data.
- Manual Installation (include of Theme Installation).
2.1 Quickstart Installation :
Magentech provides SM Quickstart package for each theme which aims to ease the installation for users. It will help you save much time of installing and configuring if you plan to start your site from the beginning. Please following steps below:
- Step 1: Download the quickstart package
- Step 2: Extract and Upload the whole Quickstart package to your server. In Quickstart folder you will see the extracted folder that include all sample data
- Step 3: Create a Database for your Magento

- Step 4: Start installation by opening browser and navigate to your URL (where the Quickstart uploaded) to load default Magento installer. Please follow each step of the Installer so that the installation process can be set.
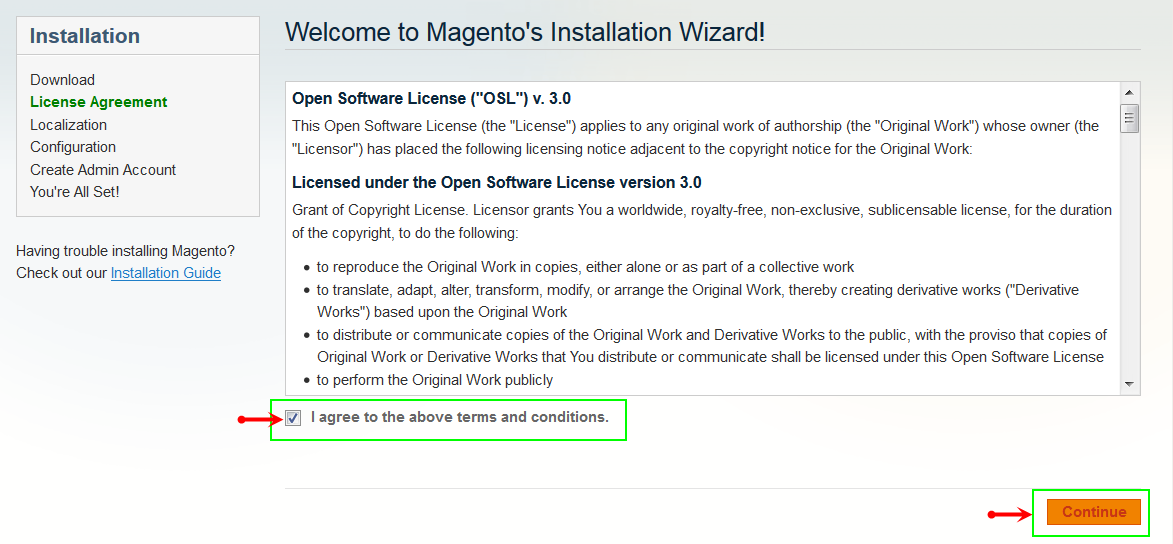
- Step 5: Locale Settings. Please fill fully into Required Fields (“Locale; Time Zone and Default Currency”.)
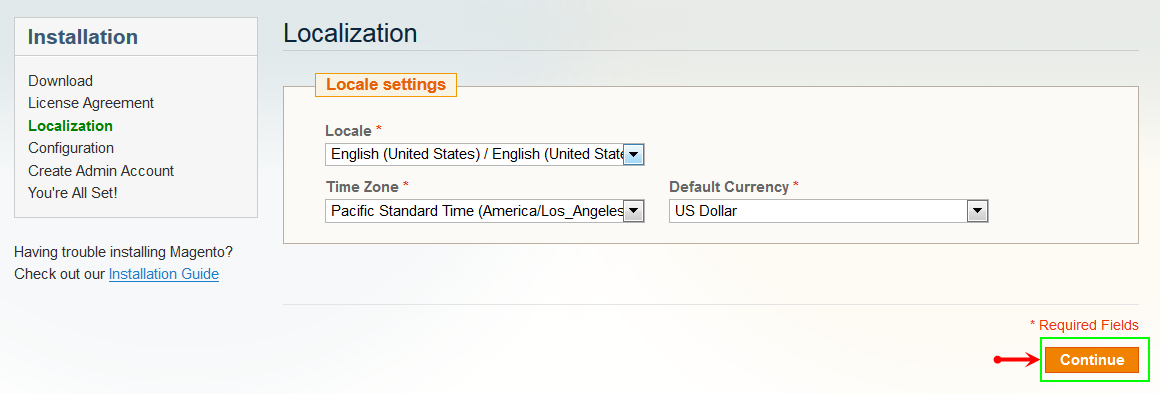
-
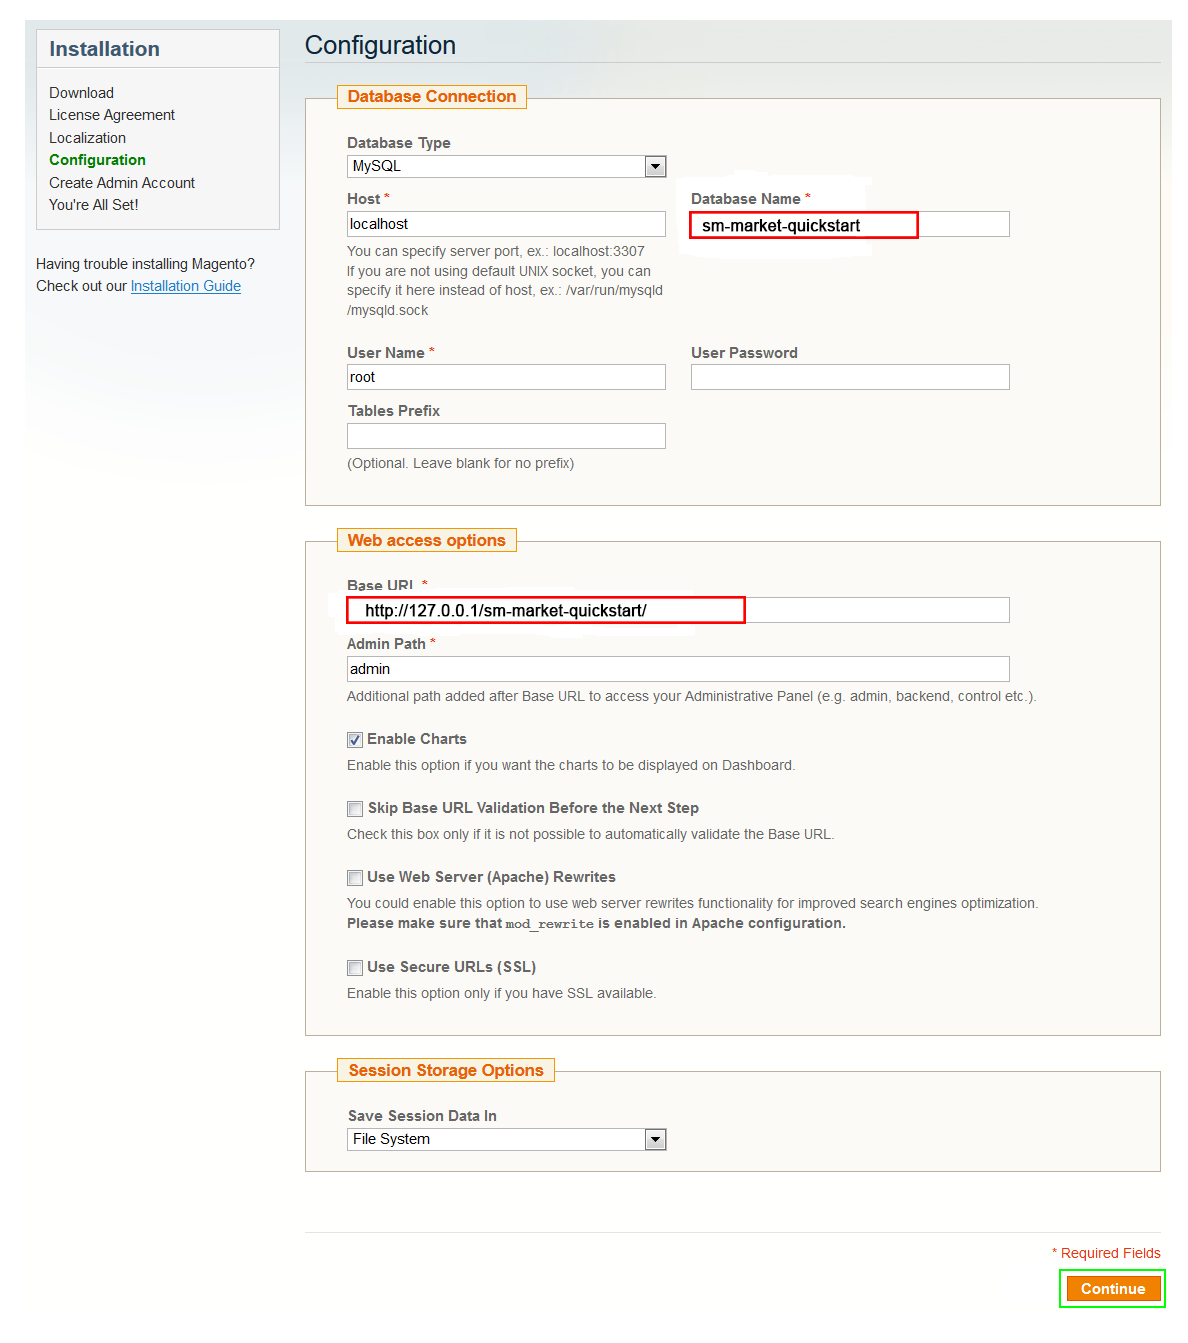
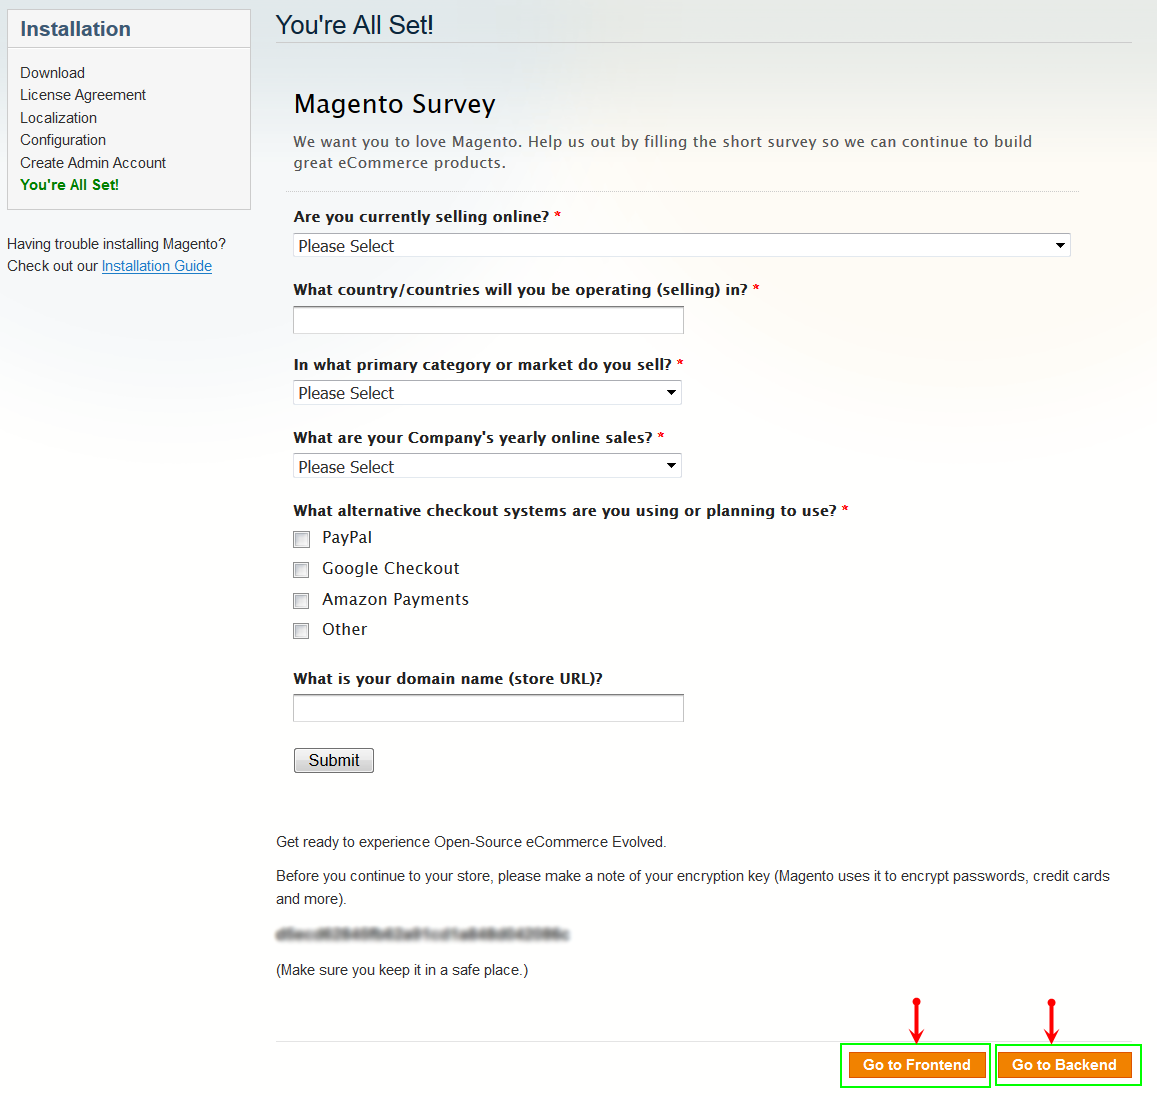
Step 6: In the Configuration step, input the required fields as below.
- Do not use “localhost” in URL, otherwise you could not log in to your Admin area (you should use your local IP in case of installing on your computer).
- Leave Tables prefix field blank.
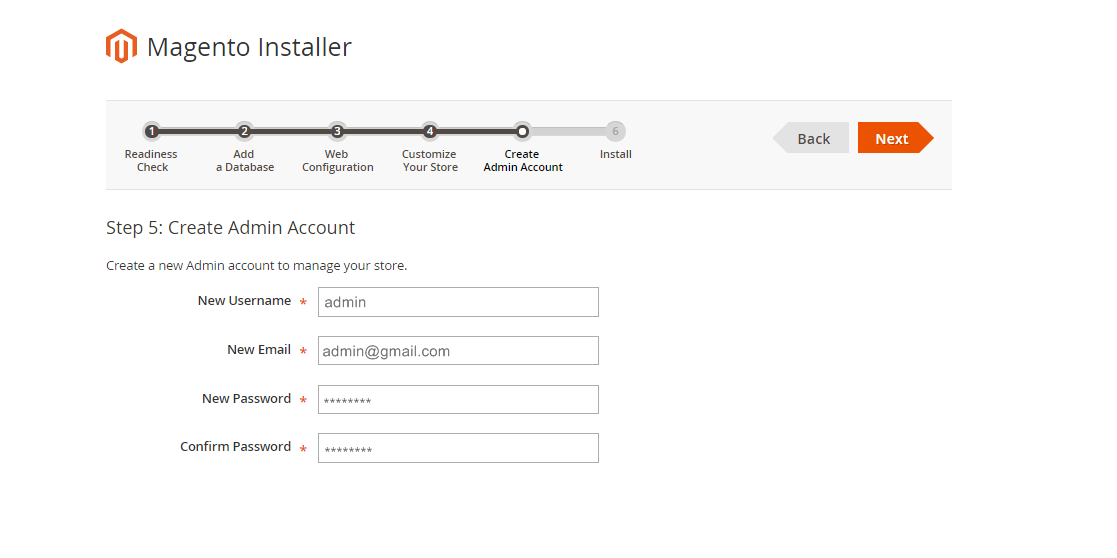
- Step 7: Create Admin Account. Please fill fully into Required Fields (“First Name; Last Name; Email; Username; password and confirm password”.)
- Step 8: Finish Installation and now you can Go to Frontend or Go to Backend.
2.2 Manual Installation
- Step 1: Extract “sm_atom_theme.zip” file and Copy folders skin; app; media, lib to your site root folder.
- Step 2: Log in to your Admin Panel (e.g. Access Magento Admin area: https://yourdomain/index.php/admin/). Log out and log in back.
- Step 3: Navigate to System >> Cache Management, Sellect All the cache types, take Action as Refresh and Submit.
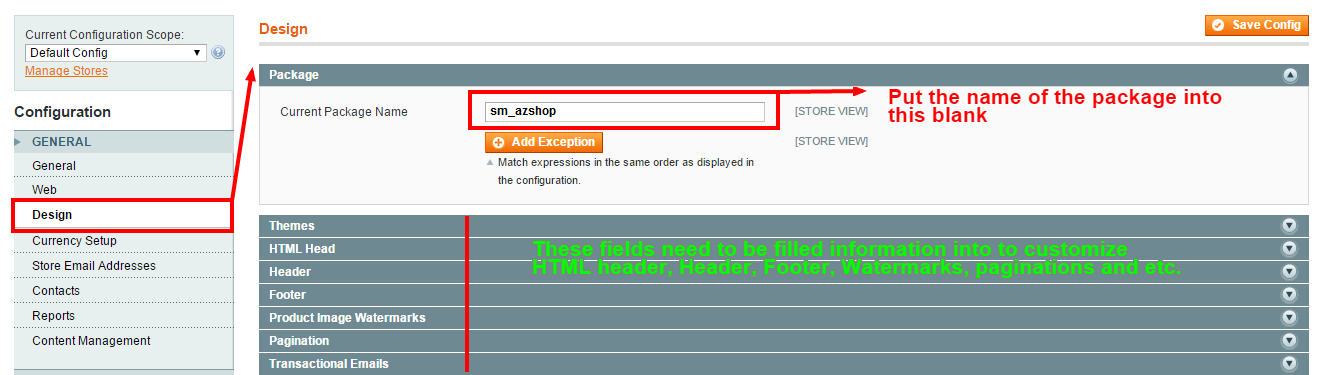
- Step 4: Navigate to System >> Configuration >> Design.
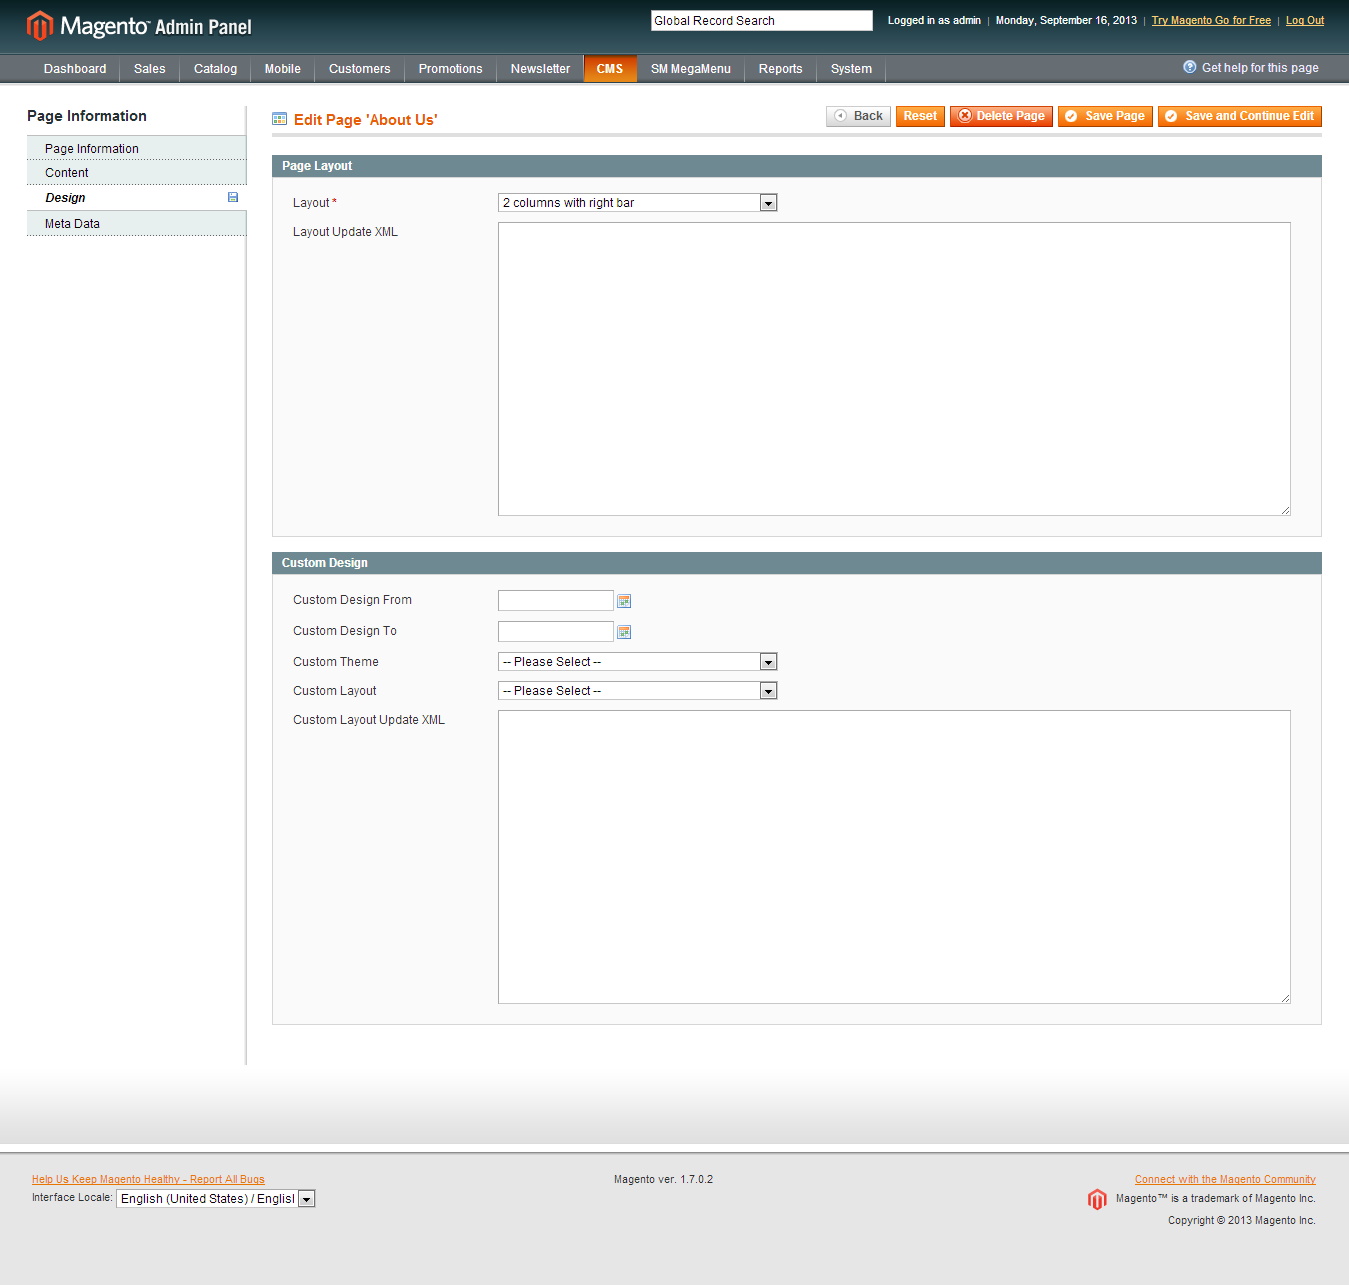
- Step 5: In Package tab of Design Section, input the parameter Current Package Name with the actual theme name.
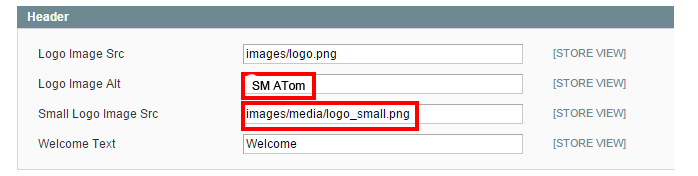
- Step 6: You can also change the settings for Header .
2.3 Theme Setting
Configure SM Madives General Setting Theme In Magento admin panel, navigate to SM Madives Setting and configure theme as you want.

- Configure General with Theme color, Font size, color for the link, hover buttons, page, text, title, background … for any store.
- Configure Theme Layout with Layout style, Header style& Homepage style ( depend on Default pages on Web tab), Layout Group 1,2,3,4,5,6 to configure
- Configure theProduct To zoom image of product, adjust Zoom Mode, Custom tab, and content, etc..
- Configure Rich Snippets
- Configure Socials Setting: To connect with social networks such as Facebook, Twitter, Google Plus, Linkedin
- Configure Advanced Setting: To show popup, Cpanel, use “Add to cart, Add to wishlist, Add to Compare
- Configure Theme Insatallation
: To import Static blocks data and Pages data, users don’t need navigate co CMS and create one static block or page step by step.

Note:To “Theme Installation”, pay attention that after clicking“Import Static Block” or “Import Pages”, the below notification will appear to announce that you import data successfully.
However, you have to come back CMS >> Static Block ( or Pages) to configure and select Store View for each Block or Page.

Configure Extensions In SM Madives Setting area, below the General and Catalog fields, navigate toMagentech field in the left hand column to configure extensions as you want.
- SM Search Box Pro Module
- SM Cart Pro Module
- SM Camera Slide
- SM QuickView
- SM Shopby
- SM Listing Tab
- SM Mega Menu
- SM Basic Product
3CONFIGURATION - Back to top
3.1 Page Configuration
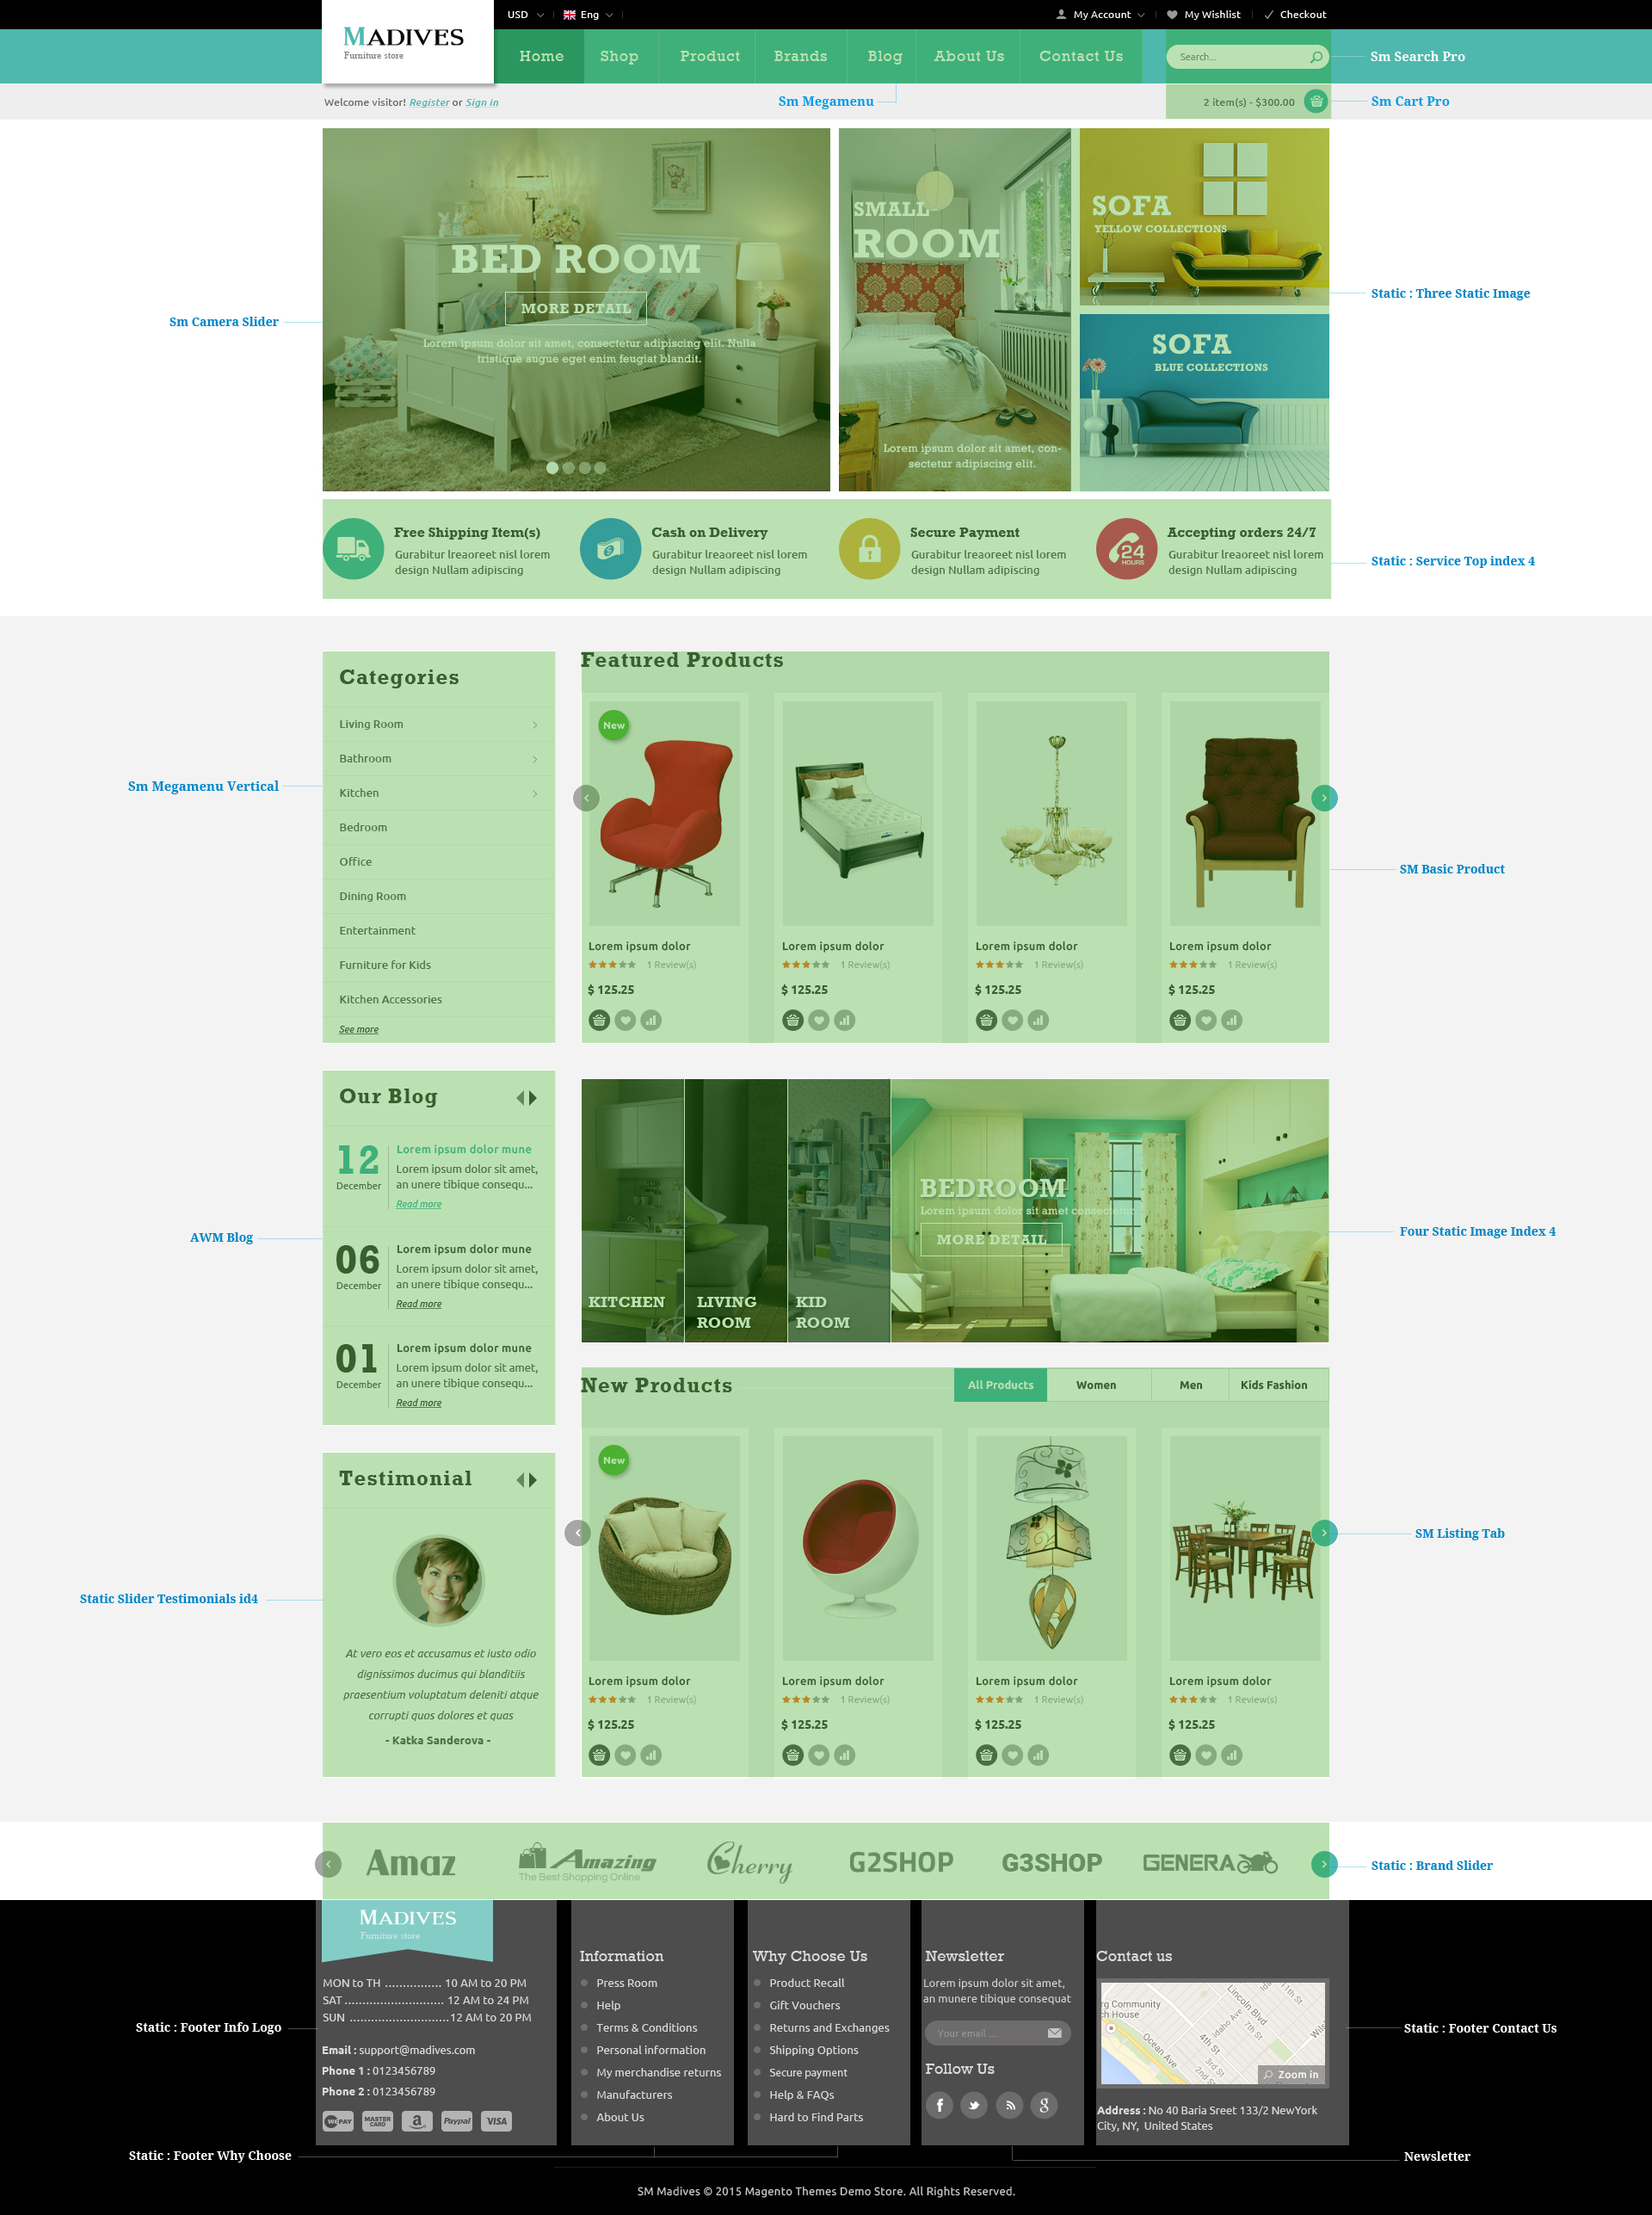
3.1.1 Homepage Style 1
Frontend of Homepage-1 Layout Position
To configure this page, in the Admin Panel, navigate to CMS >> Pages. Create a new page in Page Management section. Here are list of configuration process for this style:
- Page Information Tab: Please click to see the Backend Settings.
- Content Tab: Please click to see the Backend Settings.
- Design Tab: Please click to see the Backend Settings.
Copy and paste the following code into the parameter “Layout Update XML”:
|
1
2
3
4
5
6
7
8
9
10
11
12
13
14
15
16
17
18
19
20
21
22
23
24
25
26
27
28
29
30
31
32
33
34
35
36
37
38
39
40
41
42
43
44
45
46
47
48
49
50
51
52
53
54
55
56
57
58
59
60
61
62
63
64
65
66
67
68
69
70
71
72
73
74
75
76
77
78
79
80
81
82
83
84
85
86
87
88
89
90
91
92
93
94
95
96
97
98
99
100
101
102
103
104
105
106
107
108
109
110
111
112
113
114
115
116
117
118
119
120
121
122
123
124
125
126
127
128
129
130
131
132
133
134
135
136
137
138
139
140
141
142
143
144
145
146
147
148
149
150
151
152
153
154
155
156
157
158
159
160
161
162
163
164
165
166
167
168
169
170
171
172
173
174
175
176
177
178
179
180
181
182
183
184
185
|
<!--GROUP 1-->
<reference name="group1_col1">
<block type="sm_cameraslide/slide_preview" name="sm_cameraslide" as="cameraslide" ></block>
</reference>
<reference name="group1_col2">
</reference>
<reference name="group1_col3">
</reference>
<reference name="group1_col4">
</reference>
<reference name="group1_col5">
</reference>
<reference name="group1_col6">
</reference>
<!--GROUP 2-->
<reference name="group2_col1">
<block type="cms/block" name="service-home">
<action method="setBlockId"><block_id>service-home</block_id></action>
</block>
</reference>
<reference name="group2_col2">
</reference>
<reference name="group2_col3">
</reference>
<reference name="group2_col4">
</reference>
<reference name="group2_col5">
</reference>
<reference name="group2_col6">
</reference>
<!--GROUP 3-->
<reference name="group3_col1">
<block type="basicproducts/list" name="basicproducts.list.custom1" template="sm/basicproducts/custom-default.phtml">
<action method="_setConfig">
<values>
<product_limitation>10</product_limitation>
<basicproducts_title_text>Featured Products</basicproducts_title_text>
<product_order_dir>ASC</product_order_dir>
<product_order_by>best_sales</product_order_by>
<product_title_maxlength>50</product_title_maxlength>
<nb_column1>6</nb_column1>
<nb_column2>4</nb_column2>
<nb_column3>2</nb_column3>
<nb_column4>1</nb_column4>
<product_title_display>1</product_title_display>
<product_price_display>1</product_price_display>
<product_reviews_count>1</product_reviews_count>
<product_addcart_display>1</product_addcart_display>
<product_addwishlist_display>1</product_addwishlist_display>
<product_addcompare_display>1</product_addcompare_display>
<product_readmore_display>0</product_readmore_display>
<product_description_display>0</product_description_display>
</values>
</action>
</block>
</reference>
<reference name="group3_col2">
<block type="cms/block" name="content-static-image">
<action method="setBlockId"><block_id>content-static-image</block_id></action>
</block>
</reference>
<reference name="group3_col3">
</reference>
<reference name="group3_col4">
</reference>
<reference name="group3_col5">
</reference>
<reference name="group3_col6">
</reference>
<!--GROUP 4-->
<reference name="group4_col1">
<block type="listingtabs/list" name="listingtabs_list_default_1" template="sm/listingtabs/default.phtml"></block>
</reference>
<reference name="group4_col2">
<block type="cms/block" name="static_image_home_center">
<action method="setBlockId"><block_id>static-image-home-center</block_id></action>
</block>
</reference>
<reference name="group4_col3">
<block type="cms/block" name="static_image_home_center_2">
<action method="setBlockId"><block_id>static-image-home-center-2</block_id></action>
</block>
</reference>
<reference name="group4_col4">
</reference>
<reference name="group4_col5">
</reference>
<reference name="group4_col6">
</reference>
<!--GROUP 5-->
<reference name="group5_col1">
<block type="blog/menu_sidebar" name="latest_post_index2">
<action method="setTemplate" >
<template>aw_blog/latest_post_index2.phtml</template>
</action>
</block>
</reference>
<reference name="group5_col2">
</reference>
<reference name="group5_col3">
</reference>
<reference name="group5_col4">
</reference>
<reference name="group5_col5">
</reference>
<reference name="group5_col6">
</reference>
<reference name="group6_col1">
<block type="cms/block" name="sevicer-bottom">
<action method="setBlockId"><block_id>sevicer-bottom</block_id></action>
</block>
</reference>
<reference name="group6_col2">
</reference>
<reference name="group6_col3">
</reference>
<reference name="group6_col4">
</reference>
<reference name="group6_col5">
</reference>
<reference name="group6_col6">
</reference>
|
3.1.2 Homepage Style 2
Frontend of Homepage-2 Layout Position
To configure this Homepage Style 2, in the Admin Panel, navigate to CMS >> Pages. Create a new page in Page Management section. Including 3 tabs:
- Page Information Tab: Please click to see the Backend Settings.
- Content Tab: Please click to see the Backend Settings.
- Design Tab: Please click to see the Backend Settings.
Copy and paste the following code into the parameter “Layout Update XML”:
|
1
2
3
4
5
6
7
8
9
10
11
12
13
14
15
16
17
18
19
20
21
22
23
24
25
26
27
28
29
30
31
32
33
34
35
36
37
38
39
40
41
42
43
44
45
46
47
48
49
50
51
52
53
54
55
56
57
58
59
60
61
62
63
64
65
66
67
68
69
70
71
72
73
74
75
76
77
78
79
80
81
82
83
84
85
86
87
88
89
90
91
92
93
94
95
96
97
98
99
100
101
102
103
104
105
106
107
108
109
110
111
112
113
114
115
116
117
118
119
120
121
122
123
124
125
126
127
128
129
130
131
132
133
134
135
136
137
138
139
140
141
142
143
144
145
146
147
148
149
150
151
152
153
154
155
156
157
158
159
160
161
162
163
164
165
166
167
168
169
|
<!--GROUP 1-->
<reference name="group1_col1">
<block type="sm_cameraslide/slide_preview" name="sm_cameraslide" as="cameraslide" ></block>
</reference>
<reference name="group1_col2">
</reference>
<reference name="group1_col3">
</reference>
<reference name="group1_col4">
</reference>
<reference name="group1_col5">
</reference>
<reference name="group1_col6">
</reference>
<!--GROUP 2-->
<reference name="group2_col1">
<block type="cms/block" name="sevicer-top">
<action method="setBlockId"><block_id>sevicer-top</block_id></action>
</block>
</reference>
<reference name="group2_col2">
</reference>
<reference name="group2_col3">
</reference>
<reference name="group2_col4">
</reference>
<reference name="group2_col5">
</reference>
<reference name="group2_col6">
</reference>
<!--GROUP 3-->
<reference name="group3_col1">
<block type="cms/block" name="static-image-1-index2">
<action method="setBlockId"><block_id>static-image-1-index2</block_id></action>
</block>
</reference>
<reference name="group3_col2">
<block type="basicproducts/list" name="basicproducts.list.custom1" template="sm/basicproducts/custom-default.phtml">
</block>
</reference>
<reference name="group3_col3">
<block type="cms/block" name="static-image-2-index2">
<action method="setBlockId"><block_id>static-image-2-index2</block_id></action>
</block>
</reference>
<reference name="group3_col4">
<block type="cms/block" name="static-image-center-index2">
<action method="setBlockId"><block_id>static-image-center-index2</block_id></action>
</block>
</reference>
<reference name="group3_col5">
<block type="cms/block" name="static-image-3-index2">
<action method="setBlockId"><block_id>static-image-3-index2</block_id></action>
</block>
</reference>
<reference name="group3_col6">
<block type="listingtabs/list" name="listingtabs_list_default_1" template="sm/listingtabs/default.phtml"></block>
</reference>
<!--GROUP 4-->
<reference name="group4_col1">
<block type="cms/block" name="testimonial">
<action method="setBlockId"><block_id>slider-testimonials</block_id></action>
</block>
</reference>
<reference name="group4_col2">
</reference>
<reference name="group4_col3">
</reference>
<reference name="group4_col4">
</reference>
<reference name="group4_col5">
</reference>
<reference name="group4_col6">
</reference>
<!--GROUP 5-->
<reference name="group5_col1">
<block type="blog/menu_sidebar" name="latest_post_index2">
<action method="setTemplate" >
<template>aw_blog/latest_post_index2.phtml</template>
</action>
</block>
</reference>
<reference name="group5_col2">
</reference>
<reference name="group5_col3">
</reference>
<reference name="group5_col4">
</reference>
<reference name="group5_col5">
</reference>
<reference name="group5_col6">
</reference>
<!--GROUP 6-->
<reference name="group6_col1">
<block type="cms/block" name="brand-slider">
<action method="setBlockId"><block_id>brand-slider</block_id></action>
</block>
</reference>
<reference name="group6_col2">
</reference>
<reference name="group6_col3">
</reference>
<reference name="group6_col4">
</reference>
<reference name="group6_col5">
</reference>
<reference name="group6_col6">
</reference>
|
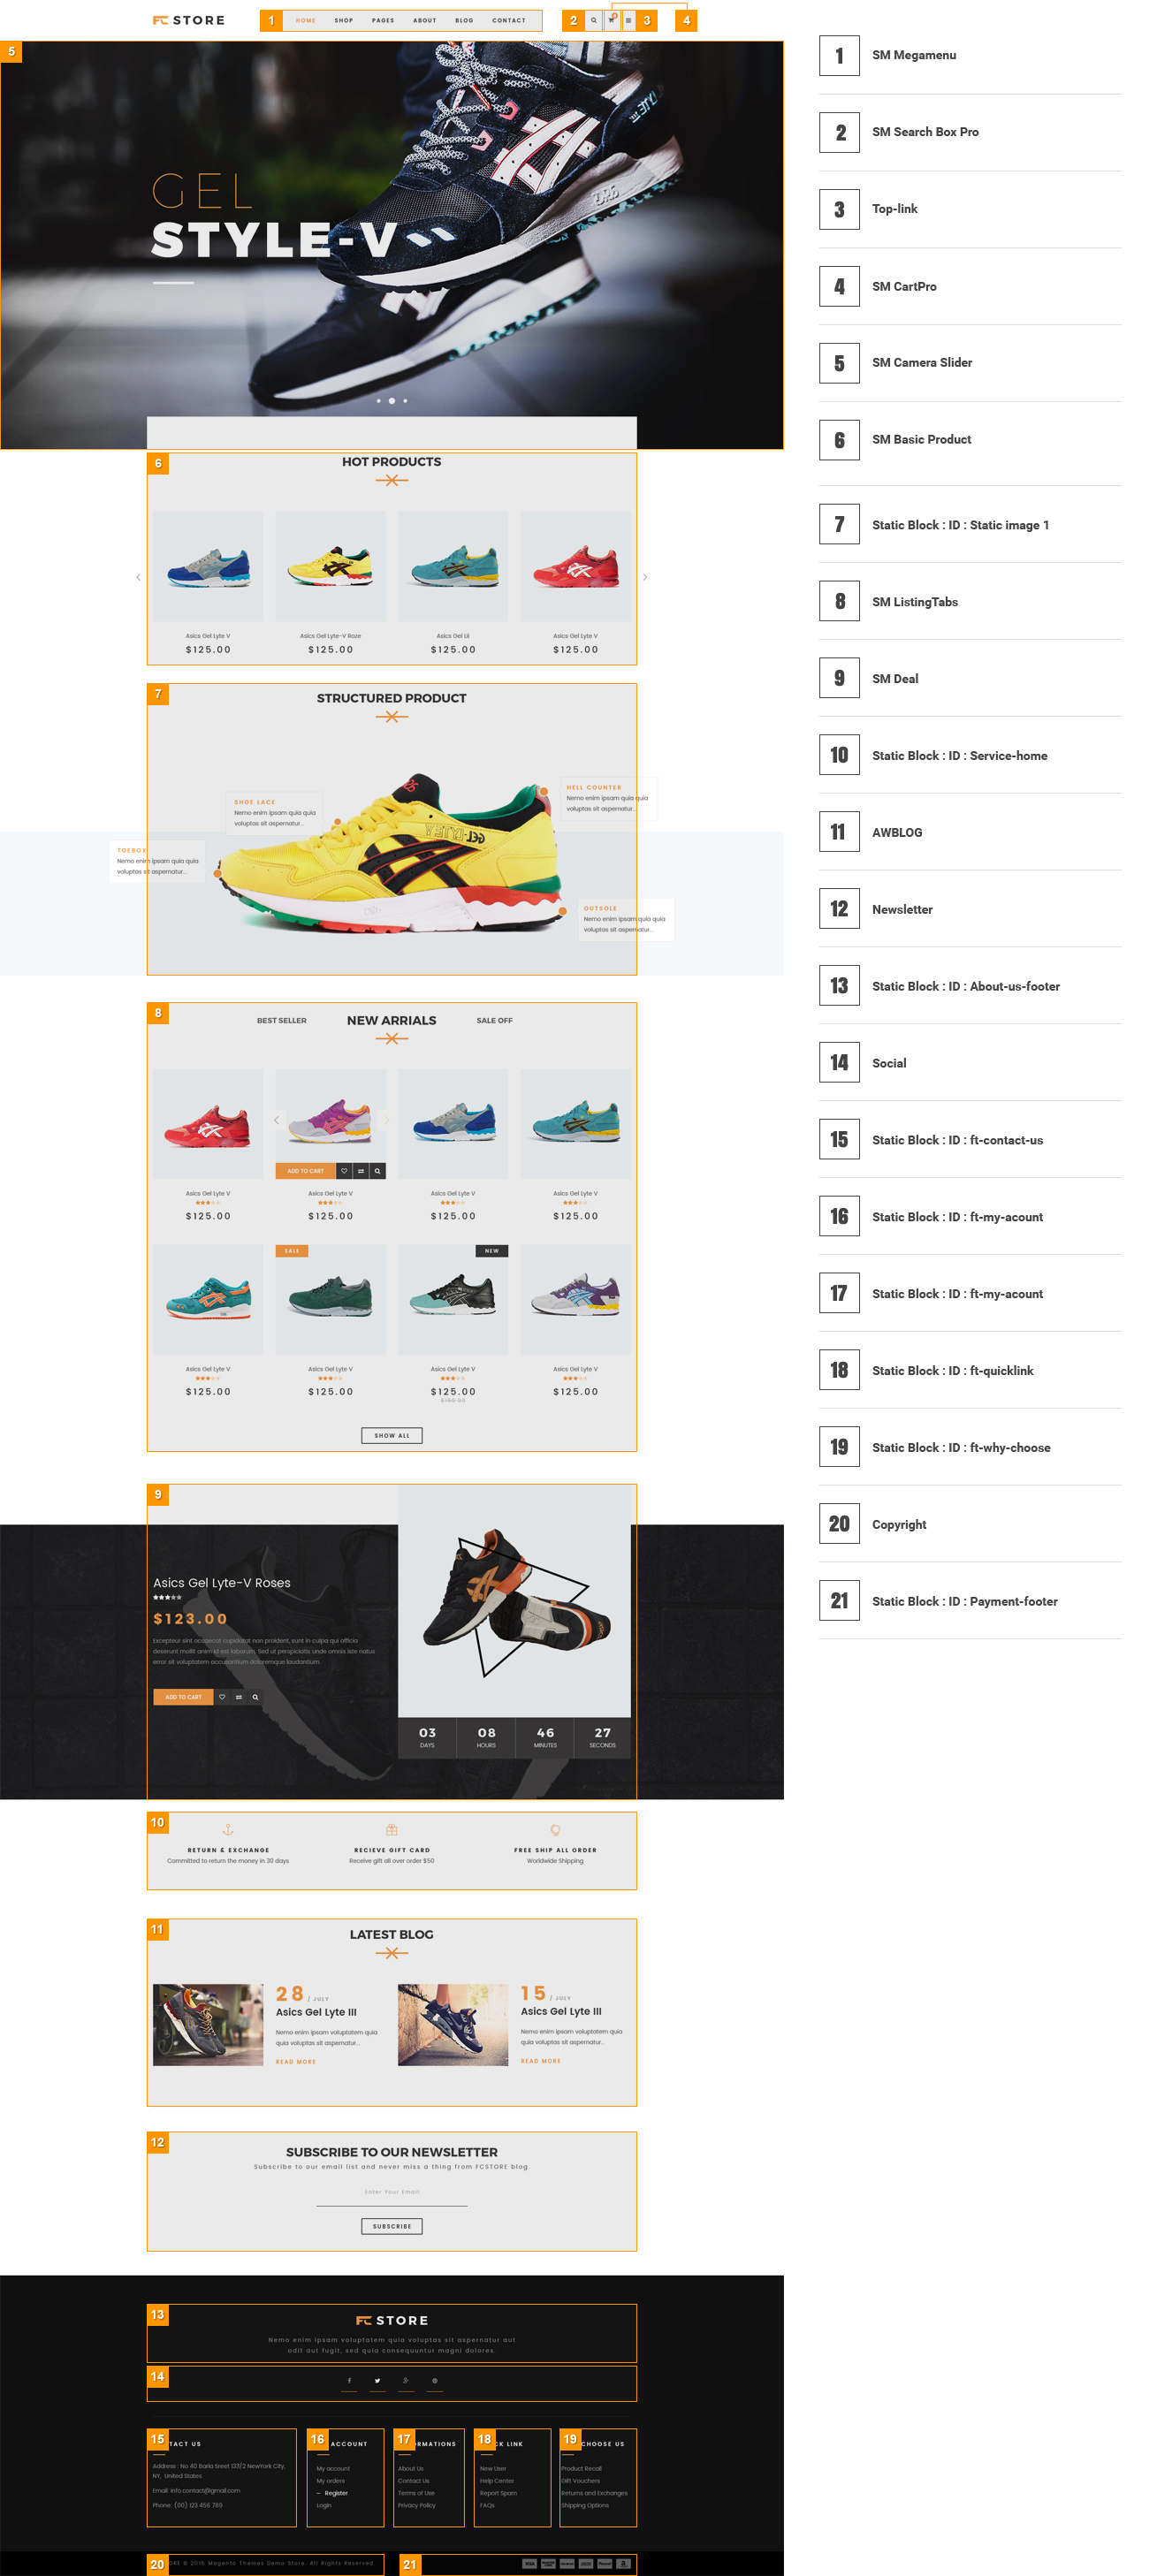
3.1.3 Homepage Style 3
Frontend of Homepage-4 Layout Position
To configure this page, in the Admin Panel, navigate to CMS >> Pages. Create a new page in Page Management section with the following tabs:
- Page Information Tab: Please click to see the Backend Settings.
- Content Tab: Please click to see the Backend Settings.
- Design Tab: Please click to see the Backend Settings.
Copy and paste the following code into the parameter “Layout Update XML”:
|
1
2
3
4
5
6
7
8
9
10
11
12
13
14
15
16
17
18
19
20
21
22
23
24
25
26
27
28
29
30
31
32
33
34
35
36
37
38
39
40
41
42
43
44
45
46
47
48
49
50
51
52
53
54
55
56
57
58
59
60
61
62
63
64
65
66
67
68
69
70
71
72
73
74
75
76
77
78
79
80
81
82
83
84
85
86
87
88
89
90
91
92
93
94
95
96
97
98
99
100
101
102
103
104
105
106
107
108
109
110
111
112
113
114
115
116
117
118
119
120
121
122
123
124
125
126
127
128
129
130
131
132
133
134
135
136
137
138
139
140
141
142
143
144
145
146
147
148
149
150
151
152
153
154
155
156
157
158
159
160
161
162
163
164
165
166
167
168
169
170
171
172
173
174
175
176
177
178
179
180
181
182
183
|
<!--GROUP 1-->
<reference name="group1_col1">
<block type="megamenu/list" name="megamenu.list.theme.content1" as="megaMenuLeft" template="sm/megamenu/megamenu-left.phtml">
<action method="setConfig">
<values>
<title>Categories</title>
<group_id>3</group_id>
<theme>2</theme>
</values>
</action>
</block>
</reference>
<reference name="group1_col2">
<block type="sm_cameraslide/slide_preview" name="sm_cameraslide" as="cameraslide" ></block>
</reference>
<reference name="group1_col3">
</reference>
<reference name="group1_col4">
</reference>
<reference name="group1_col5">
</reference>
<reference name="group1_col6">
</reference>
<!--GROUP 2-->
<reference name="group2_col1">
<block type="cms/block" after="image-sidebar" name="product-sidebar-index3">
<action method="setBlockId"><block_id>product-sidebar-index3</block_id></action>
</block>
<block type="cms/block" name="left-image-index3">
<action method="setBlockId"><block_id>left-image-index3</block_id></action>
</block>
<block type="blog/menu_sidebar" name="latest_post">
<action method="setTemplate" >
<template>aw_blog/latest_post_index3.phtml</template>
</action>
</block>
</reference>
<reference name="group2_col2">
<block type="cms/block" name="service-top">
<action method="setBlockId"><block_id>service-top-index3</block_id></action>
</block>
<block type="basicproducts/list" name="basicproducts.list.custom1" template="sm/basicproducts/custom-default-index3.phtml"></block>
<block type="cms/block" name="static-image-center-index3">
<action method="setBlockId"><block_id>static-image-center-index3</block_id></action>
</block>
<block type="listingtabs/list" name="listingtabs_list_default_1" template="sm/listingtabs/default-index3.phtml"></block>
<block type="cms/block" name="brand-slider-index3">
<action method="setBlockId"><block_id>brand-slider-index3</block_id></action>
</block>
</reference>
<reference name="group2_col3">
</reference>
<reference name="group2_col4">
</reference>
<reference name="group2_col5">
</reference>
<reference name="group2_col6">
</reference>
<!--GROUP 3-->
<reference name="group3_col1">
</reference>
<reference name="group3_col2">
</reference>
<reference name="group3_col3">
</reference>
<reference name="group3_col4">
</reference>
<reference name="group3_col5">
</reference>
<reference name="group3_col6">
</reference>
<!--GROUP 4-->
<reference name="group4_col1">
</reference>
<reference name="group4_col2">
</reference>
<reference name="group4_col3">
</reference>
<reference name="group4_col4">
</reference>
<reference name="group4_col5">
</reference>
<reference name="group4_col6">
</reference>
<!--GROUP 5-->
<reference name="group5_col1">
</reference>
<reference name="group5_col2">
</reference>
<reference name="group5_col3">
</reference>
<reference name="group5_col4">
</reference>
<reference name="group5_col5">
</reference>
<reference name="group5_col6">
</reference>
<reference name="group6_col1">
</reference>
<reference name="group6_col2">
</reference>
<reference name="group6_col3">
</reference>
<reference name="group6_col4">
</reference>
<reference name="group6_col5">
</reference>
<reference name="group6_col6">
</reference>
|
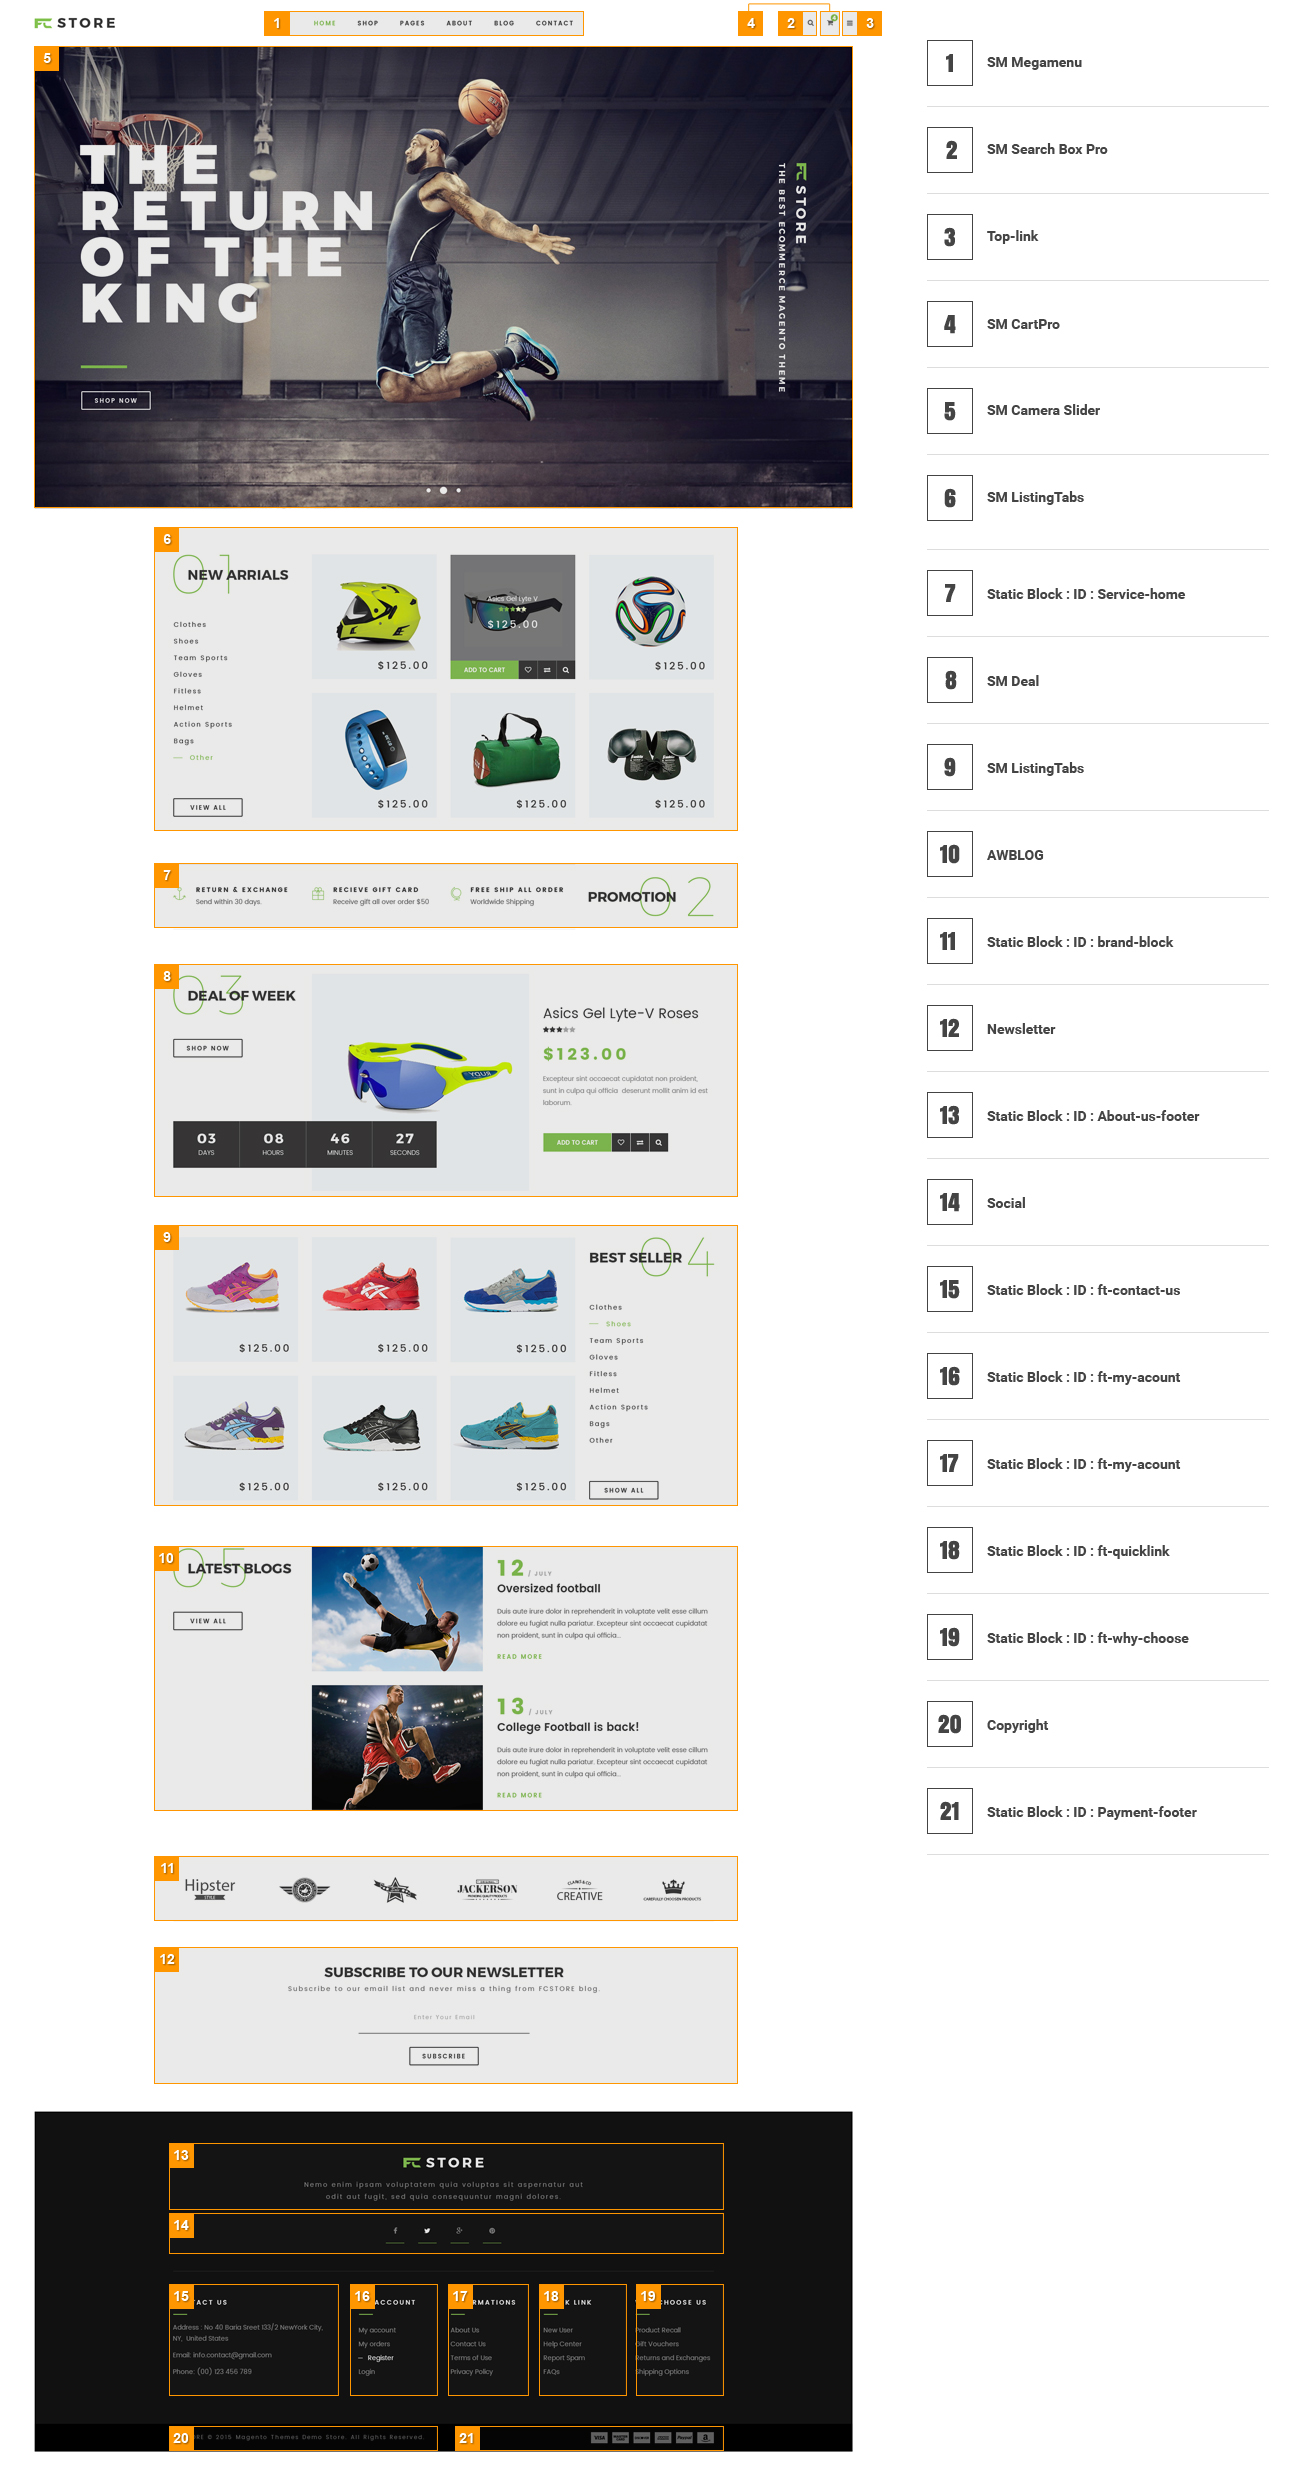
3.1.4 Homepage Style 4
Frontend of Homepage-4 Layout Position
Similarly to Homepage style 3, to configure this page, in the Admin Panel, navigate to CMS >> Pages. Create a new page in Page Management section with the following tabs:
- Page Information Tab: Please click to see the Backend Settings.
- Content Tab: Please click to see the Backend Settings.
- Design Tab: Please click to see the Backend Settings.
Copy and paste the following code into the parameter “Layout Update XML”:
|
1
2
3
4
5
6
7
8
9
10
11
12
13
14
15
16
17
18
19
20
21
22
23
24
25
26
27
28
29
30
31
32
33
34
35
36
37
38
39
40
41
42
43
44
45
46
47
48
49
50
51
52
53
54
55
56
57
58
59
60
61
62
63
64
65
66
67
68
69
70
71
72
73
74
75
76
77
78
79
80
81
82
83
84
85
86
87
88
89
90
91
92
93
94
95
96
97
98
99
100
101
102
103
104
105
106
107
108
109
110
111
112
113
114
115
116
117
118
119
120
121
122
123
124
125
126
127
128
129
130
131
132
133
134
135
136
137
138
139
140
141
142
143
144
145
146
147
148
149
150
151
152
153
154
155
156
157
158
159
160
161
162
163
164
165
166
167
168
169
170
171
172
173
174
175
176
177
178
179
180
|
<!--GROUP 1-->
<reference name="group1_col1">
<block type="sm_cameraslide/slide_preview" name="sm_cameraslide" as="cameraslide" ></block>
</reference>
<reference name="group1_col2">
<block type="cms/block" name="three-static-image">
<action method="setBlockId"><block_id>three-static-image</block_id></action>
</block>
</reference>
<reference name="group1_col3">
<block type="cms/block" name="service-top-index4">
<action method="setBlockId"><block_id>service-top-index4</block_id></action>
</block>
</reference>
<reference name="group1_col4">
</reference>
<reference name="group1_col5">
</reference>
<reference name="group1_col6">
</reference>
<!--GROUP 2-->
<reference name="group2_col1">
<block type="megamenu/list" name="megamenu.list.theme.content" as="megaMenuLeft" template="sm/megamenu/megamenu-left.phtml">
<action method="setConfig">
<values>
<title>Categories</title>
<group_id>3</group_id>
<theme>2</theme>
</values>
</action>
</block>
<block type="blog/menu_sidebar" name="latest_post">
<action method="setTemplate" >
<template>aw_blog/latest_post_index4.phtml</template>
</action>
</block>
<block type="cms/block" name="testimonial">
<action method="setBlockId"><block_id>slider-testimonials-id4</block_id></action>
</block>
</reference>
<reference name="group2_col2">
<block type="basicproducts/list" name="basicproducts.list.custom1" template="sm/basicproducts/custom-default.phtml"></block>
<block type="cms/block" name="four_static_image_index4">
<action method="setBlockId"><block_id>four-static-image-index4</block_id></action>
</block>
<block type="listingtabs/list" name="listingtabs_list_default_2" template="sm/listingtabs/default.phtml">
</block>
</reference>
<reference name="group2_col3">
</reference>
<reference name="group2_col4">
</reference>
<reference name="group2_col5">
</reference>
<reference name="group2_col6">
</reference>
<!--GROUP 3-->
<reference name="group3_col1">
<block type="cms/block" name="brand-slider">
<action method="setBlockId"><block_id>brand-slider</block_id></action>
</block>
</reference>
<reference name="group3_col2">
</reference>
<reference name="group3_col3">
</reference>
<reference name="group3_col4">
</reference>
<reference name="group3_col5">
</reference>
<reference name="group3_col6">
</reference>
<!--GROUP 4-->
<reference name="group4_col1">
</reference>
<reference name="group4_col2">
</reference>
<reference name="group4_col3">
</reference>
<reference name="group4_col4">
</reference>
<reference name="group4_col5">
</reference>
<reference name="group4_col6">
</reference>
<!--GROUP 5-->
<reference name="group5_col1">
</reference>
<reference name="group5_col2">
</reference>
<reference name="group5_col3">
</reference>
<reference name="group5_col4">
</reference>
<reference name="group5_col5">
</reference>
<reference name="group5_col6">
</reference>
<reference name="group6_col1">
</reference>
<reference name="group6_col2">
</reference>
<reference name="group6_col3">
</reference>
<reference name="group6_col4">
</reference>
<reference name="group6_col5">
</reference>
<reference name="group6_col6">
</reference>
|
3.1.5 Homepage Style 5
Frontend of Homepage-5 Layout Position

To configure this page, in the Admin Panel, navigate to CMS >> Pages. Create a new page in Page Management section with the following tabs:
- Page Information Tab: Please click to see the Backend Settings.
- Content Tab: Please click to see the Backend Settings.
- Design Tab: Please click to see the Backend Settings.
Copy and paste the following code into the parameter “Layout Update XML”:
|
1
2
3
4
5
6
7
8
9
10
11
12
13
14
15
16
17
18
19
20
21
22
23
24
25
26
27
28
29
30
31
32
33
34
35
36
37
38
39
40
41
42
43
44
45
46
47
48
49
50
51
52
53
54
55
56
57
58
59
60
61
62
63
64
65
66
67
68
69
70
71
72
73
74
75
76
77
78
79
80
81
82
83
84
85
86
87
88
89
90
91
92
93
94
95
96
97
98
99
100
101
102
103
104
105
106
107
108
109
110
111
112
113
114
115
116
117
118
119
120
121
122
123
124
125
126
127
128
129
130
131
132
133
134
135
136
137
138
139
140
141
142
143
144
145
146
147
148
149
150
151
152
153
154
155
156
157
158
159
160
161
|
<!--GROUP 1-->
<reference name="group1_col1">
<block type="sm_cameraslide/slide_preview" name="sm_cameraslide" as="cameraslide" ></block>
</reference>
<reference name="group1_col2">
</reference>
<reference name="group1_col3">
</reference>
<reference name="group1_col4">
</reference>
<reference name="group1_col5">
</reference>
<reference name="group1_col6">
</reference>
<!--GROUP 2-->
<reference name="group2_col1">
<block type="basicproducts/list" name="basicproducts.list.custom1" template="sm/basicproducts/custom-default-index5.phtml"></block>
</reference>
<reference name="group2_col2">
<block type="cms/block" name="six-static-image-index5">
<action method="setBlockId"><block_id>six-static-image-index5</block_id></action>
</block>
</reference>
<reference name="group2_col3">
</reference>
<reference name="group2_col4">
</reference>
<reference name="group2_col5">
</reference>
<reference name="group2_col6">
</reference>
<!--GROUP 3-->
<reference name="group3_col1">
<block type="listingtabs/list" name="listingtabs_list_default_2" template="sm/listingtabs/default.phtml">
</block>
</reference>
<reference name="group3_col2">
</reference>
<reference name="group3_col3">
</reference>
<reference name="group3_col4">
</reference>
<reference name="group3_col5">
</reference>
<reference name="group3_col6">
</reference>
<!--GROUP 4-->
<reference name="group4_col1">
<block type="cms/block" name="service-center-index5">
<action method="setBlockId"><block_id>service-center-index5</block_id></action>
</block>
</reference>
<reference name="group4_col2">
</reference>
<reference name="group4_col3">
</reference>
<reference name="group4_col4">
</reference>
<reference name="group4_col5">
</reference>
<reference name="group4_col6">
</reference>
<!--GROUP 5-->
<reference name="group5_col1">
<block type="cms/block" name="service-bottom-index5">
<action method="setBlockId"><block_id>service-bottom-index5</block_id></action>
</block>
</reference>
<reference name="group5_col2">
<block type="blog/menu_sidebar" name="latest_post">
<action method="setTemplate" >
<template>aw_blog/latest_post_index5.phtml</template>
</action>
</block>
</reference>
<reference name="group5_col3">
<block type="cms/block" name="testimonial">
<action method="setBlockId"><block_id>slider-testimonials-home5</block_id></action>
</block>
</reference>
<reference name="group5_col4">
</reference>
<reference name="group5_col5">
</reference>
<reference name="group5_col6">
</reference>
<reference name="group6_col1">
</reference>
<reference name="group6_col2">
</reference>
<reference name="group6_col3">
</reference>
<reference name="group6_col4">
</reference>
<reference name="group6_col5">
</reference>
<reference name="group6_col6">
</reference>
|
3.1.6 Homepage Style 6
Frontend of Homepage-6 Layout Position
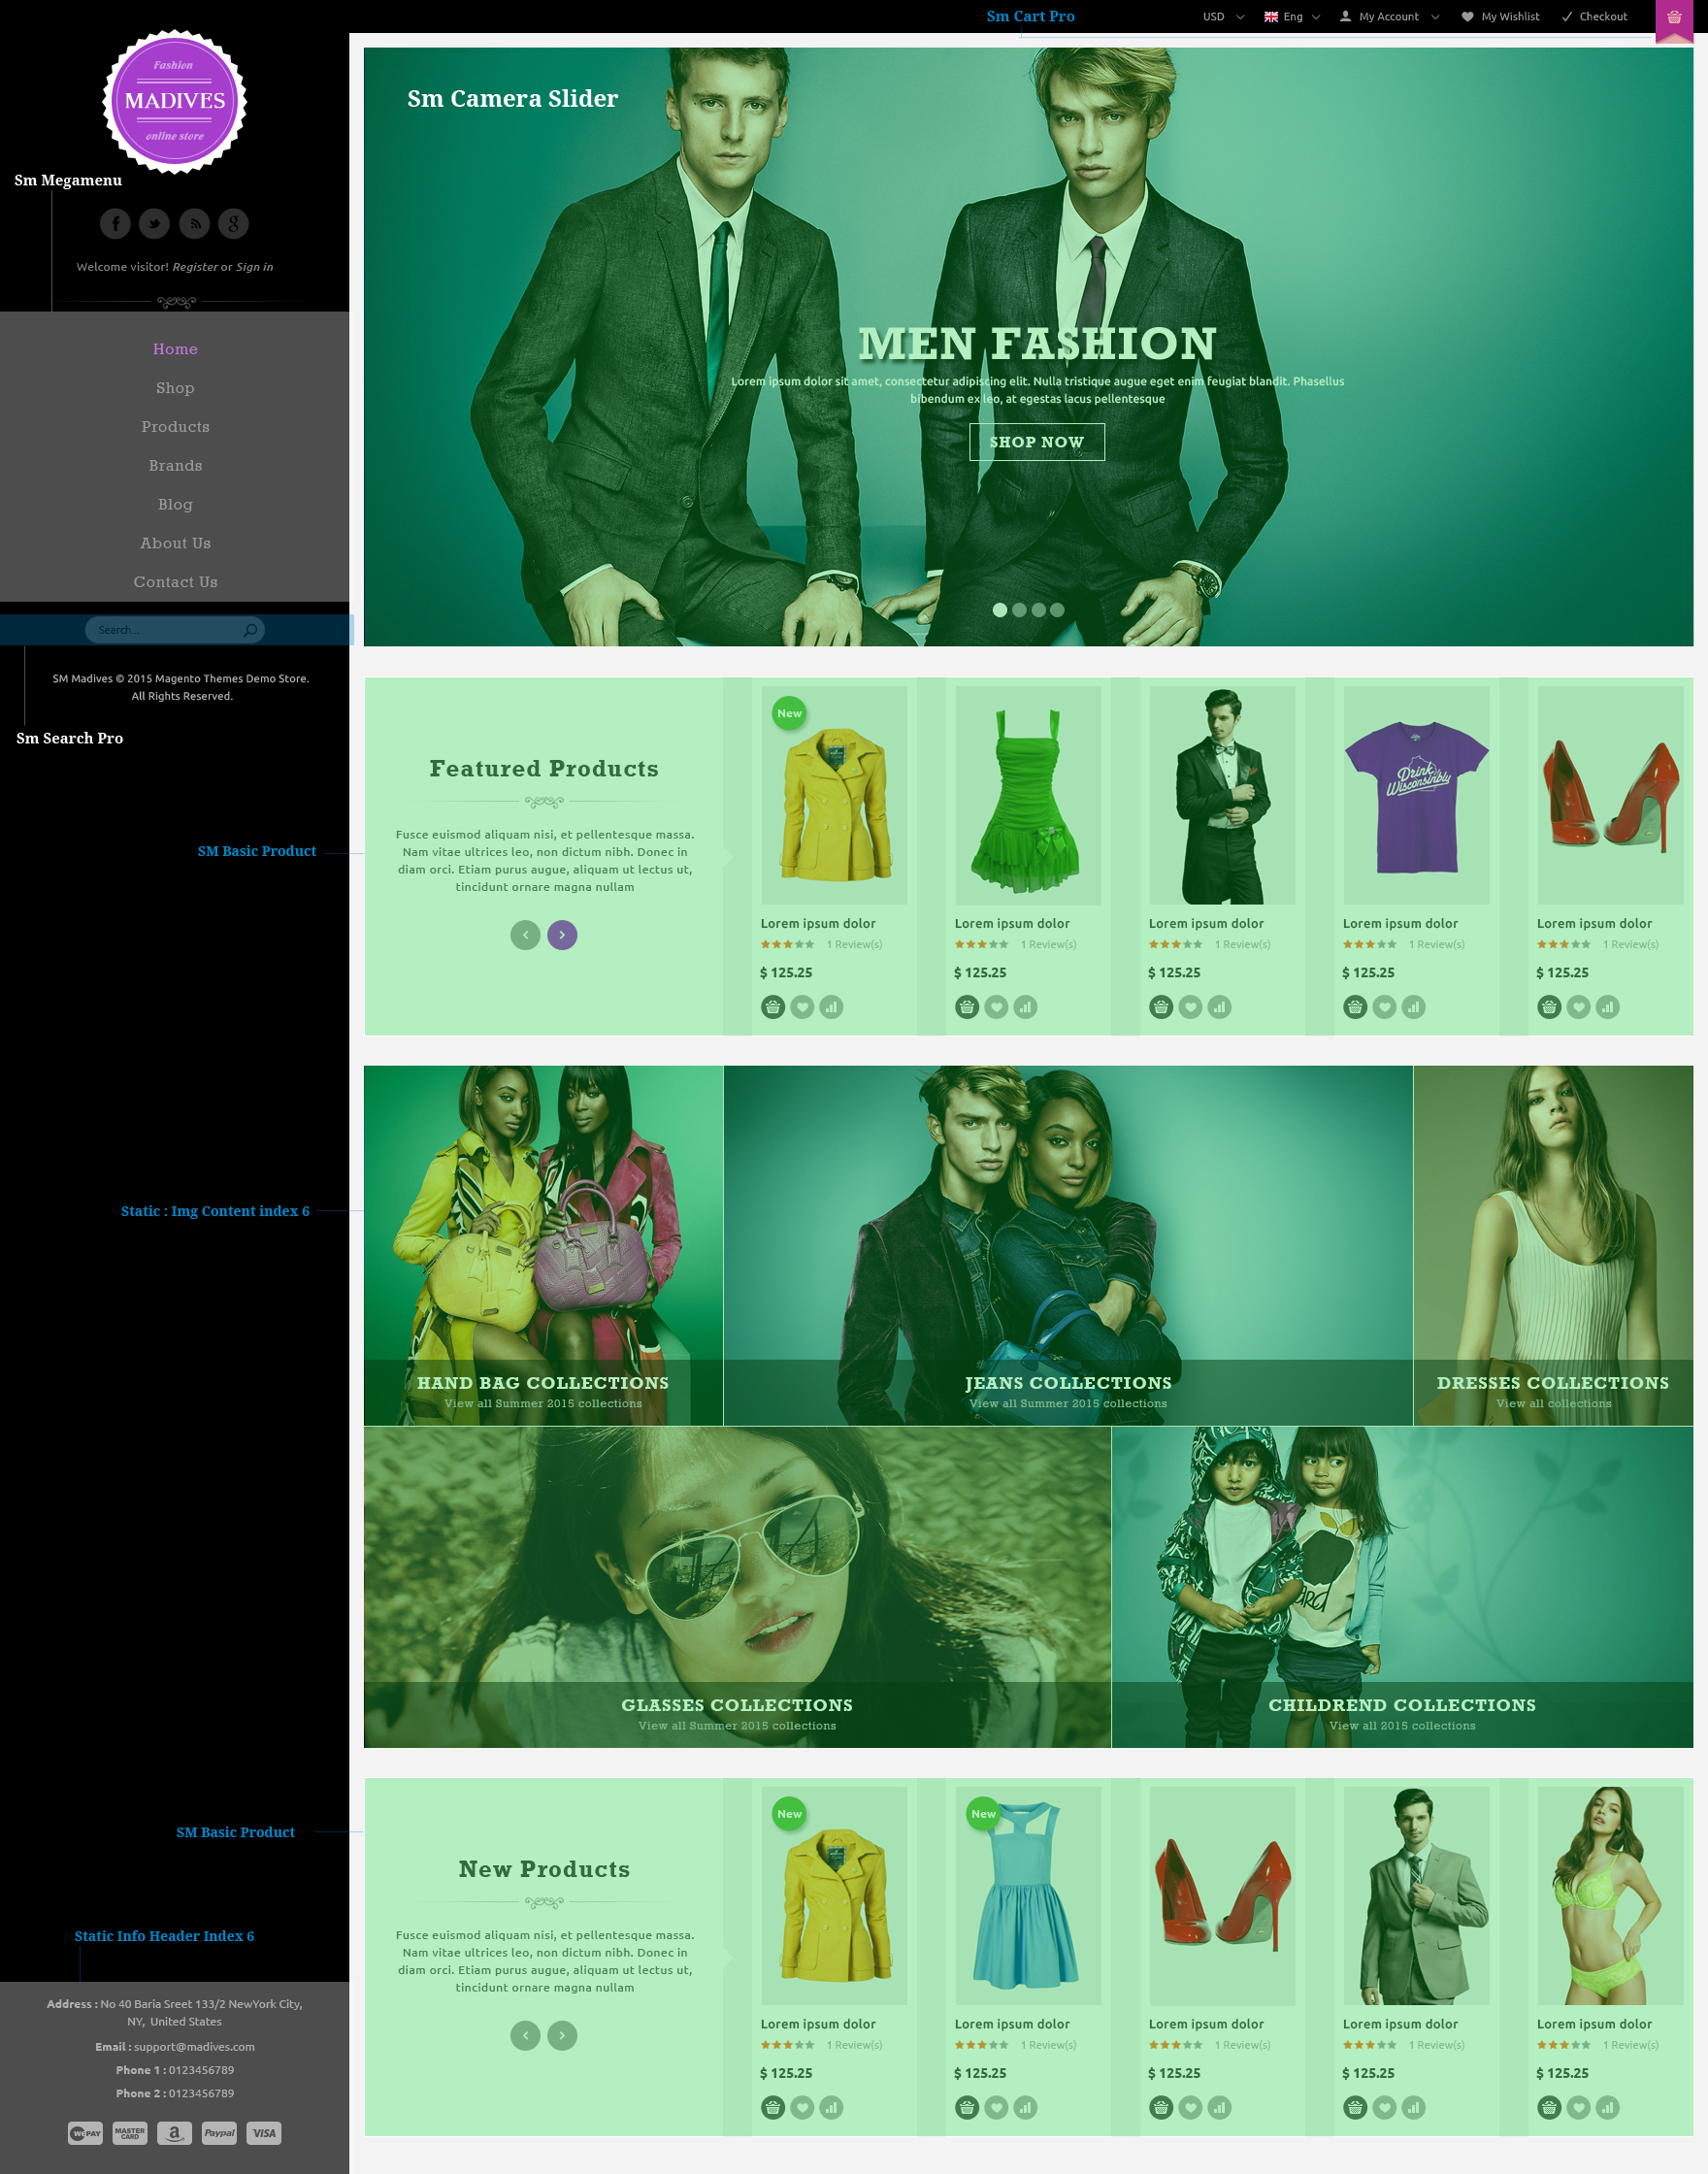
To configure this page, in the Admin Panel, navigate to CMS >> Pages. Create a new page in Page Management section with the following tabs:
- Page Information Tab: Please click to see the Backend Settings.
- Content Tab: Please click to see the Backend Settings.
- Design Tab: Please click to see the Backend Settings.
Copy and paste the following code into the parameter “Layout Update XML”:
|
1
2
3
4
5
6
7
8
9
10
11
12
13
14
15
16
17
18
19
20
21
22
23
24
25
26
27
28
29
30
31
32
33
34
35
36
37
38
39
40
41
42
43
44
45
46
47
48
49
50
51
52
53
54
55
56
57
58
59
60
61
62
63
64
65
66
67
68
69
70
71
72
73
74
75
76
77
78
79
80
81
82
83
84
85
86
87
88
89
90
91
92
93
94
95
96
97
98
99
100
101
102
103
104
105
106
107
108
109
110
111
112
113
114
115
116
117
118
119
120
121
122
123
124
125
126
127
128
129
130
131
132
133
134
135
136
137
138
139
140
141
142
143
144
145
146
147
148
149
150
151
152
153
154
155
156
157
158
|
<!--GROUP 1-->
<reference name="group1_col1">
</reference>
<reference name="group1_col2">
<block type="sm_cameraslide/slide_preview" name="sm_cameraslide" as="cameraslide" ></block>
</reference>
<reference name="group1_col3">
</reference>
<reference name="group1_col4">
</reference>
<reference name="group1_col5">
</reference>
<reference name="group1_col6">
</reference>
<!--GROUP 2-->
<reference name="group2_col1">
</reference>
<reference name="group2_col2">
<block type="basicproducts/list" name="basicproducts.list.custom1" template="sm/basicproducts/custom-default-index6.phtml"> </block>
</reference>
<reference name="group2_col3">
</reference>
<reference name="group2_col4">
</reference>
<reference name="group2_col5">
</reference>
<reference name="group2_col6">
</reference>
<!--GROUP 3-->
<reference name="group3_col1">
<block type="cms/block" name="content-static-image-Index6">
<action method="setBlockId"><block_id>content-static-image-Index6</block_id></action>
</block>
</reference>
<reference name="group3_col2">
</reference>
<reference name="group3_col3">
</reference>
<reference name="group3_col4">
</reference>
<reference name="group3_col5">
</reference>
<reference name="group3_col6">
</reference>
<!--GROUP 4-->
<reference name="group4_col1">
<block type="basicproducts/list" name="basicproducts.list.custom2" template="sm/basicproducts/custom-default-index6-2.phtml">
<action method="_setConfig">
<values>
<product_category>69</product_category>
</values>
</action>
</block>
</reference>
<reference name="group4_col2">
</reference>
<reference name="group4_col3">
</reference>
<reference name="group4_col4">
</reference>
<reference name="group4_col5">
</reference>
<reference name="group4_col6">
</reference>
<!--GROUP 5-->
<reference name="group5_col1">
</reference>
<reference name="group5_col2">
</reference>
<reference name="group5_col3">
</reference>
<reference name="group5_col4">
</reference>
<reference name="group5_col5">
</reference>
<reference name="group5_col6">
</reference>
<reference name="group6_col1">
</reference>
<reference name="group6_col2">
</reference>
<reference name="group6_col3">
</reference>
<reference name="group6_col4">
</reference>
<reference name="group6_col5">
</reference>
<reference name="group6_col6">
</reference>
<remove name="footer" />
|
3.2 Configure Mega Menu
- Step 1: You need to create Menu group. In Admin Panel, navigate to SM Mega Menu >> Menu Manager >> Add group (add 2 groups: “Group - Horizontal” - have id 1 and “Group - Vertical” - have id 3), Two id is automatically created, and they will be shown in Configuration of SM Mega Menu.
- Step 2: Navigate to SM Mega Menu >> Configuration & fill the id number for two above groups in step 1
- Step 3: In order to add menu items, Go to SM Mega Menu >> Menu items Manager to add items as you want.
Note: To this theme, this guide will tutorial how to configure Menu, detailed here: Mega Menu. We only instruct you configure the homepage default, other page done the same.
3.2.1 With Horizontal Mega Menu:

In the Horizontal Mega Menu, it concludes 7 main items:
- Home
- Shop
- Features
- Brand
- Blog
- About Us
- Contact Us
Home
Frontend Appearance 
Backend 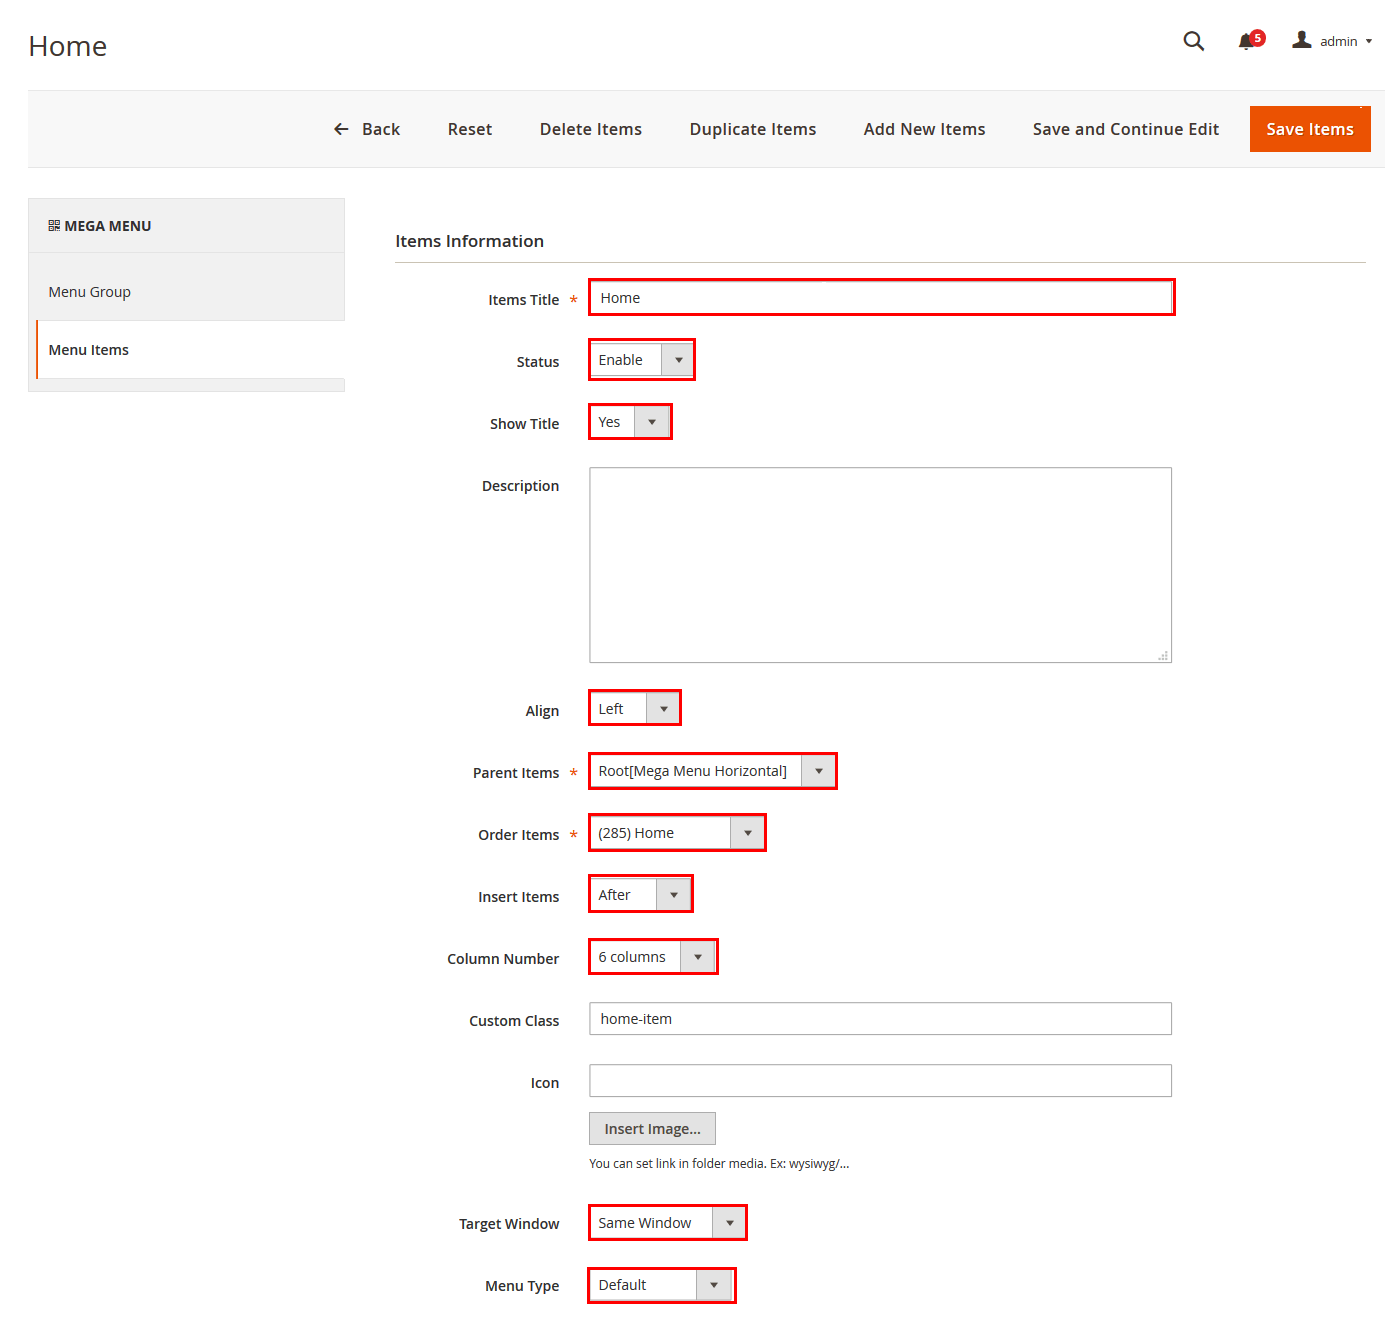
Shop Menu ( Shop-tree form)
Frontend Appearance 
Tree of Shop:
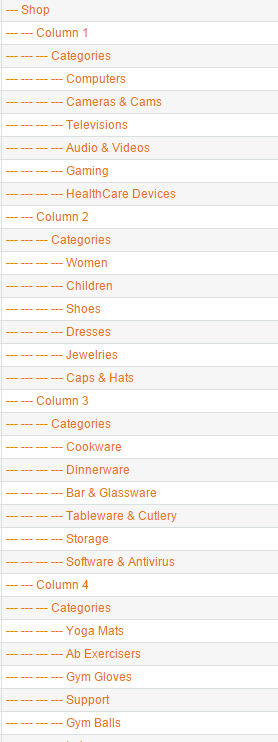
- Shop Menu’s backend. - Here to view.
- Item: “Column 1″- Menu Backend Settings
- Item: “Categories 1″ which belongs to Column 1- Menu Backend Settings
- Item: “Column 2″- Menu Backend Settings
- Other Items are configured the same as above ones.
Features Menu
Frontend Appearance 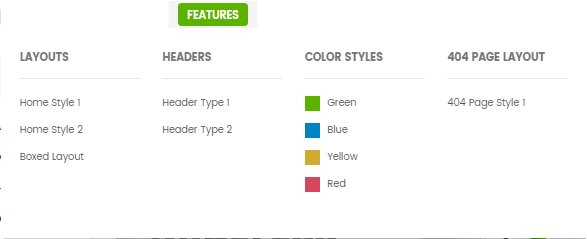
Note: Features Menu: To config this page, please navigate to SM Madives setting >> SM Mega Menu >> Menu Items Manager, then coppy & paste the following code chain into Content Tab:
Brand Menu
Frontend Appearance
- Backend Settings of Brand Menu
- Item: “Brand 1″- Menu Backend Settings
Note:Because “Brand 1″ belongs to “content” Menu Categories, so Coppy & Paste the following code chain into content tab:
- Item: “Brand 2″- Menu Backend Settings
Note:Because “Brand 2″ belongs to “content” Menu Categories, so Coppy & Paste the following code chain into content tab:
- Item: “Brand 3″- Menu Backend Settings
Note:Because “Brand 3″ belongs to “content” Menu Categories, so Coppy & Paste the following code chain into content tab:
Blog
Frontend Appearance
- Backend Settings of Blog
- Item: “Categories 1″- Menu Backend Settings
Note:Because “Categories 1″ belongs to “content” Menu Categories, so Coppy & Paste the following code chain into content tab:
- Item: “Categories 2″- Menu Backend Settings
Note:Because “Categories 2″ belongs to “content” Menu Categories, so Coppy & Paste the following code chain into content tab:
- Item: “Image blog”- Menu Backend Settings
Note:Because “Image blog” belongs to “content” Menu Categories, so Coppy & Paste the following code chain into content tab:
About Us
Frontend Appearance
Backend Settings of About Us Menu
Contact Menu
Frontend Appearance
Backend Settings of Staff Pick Menu
Note:All data of Mega Menu, if you want it like demo, all you need to do is that: Navigate to SM Madives Setting, then go to Theme installation ,aand import data. However, after importing data, you comeback to SM Mega Menu >> Menu Item Manager and “Enable” all items in Menu.
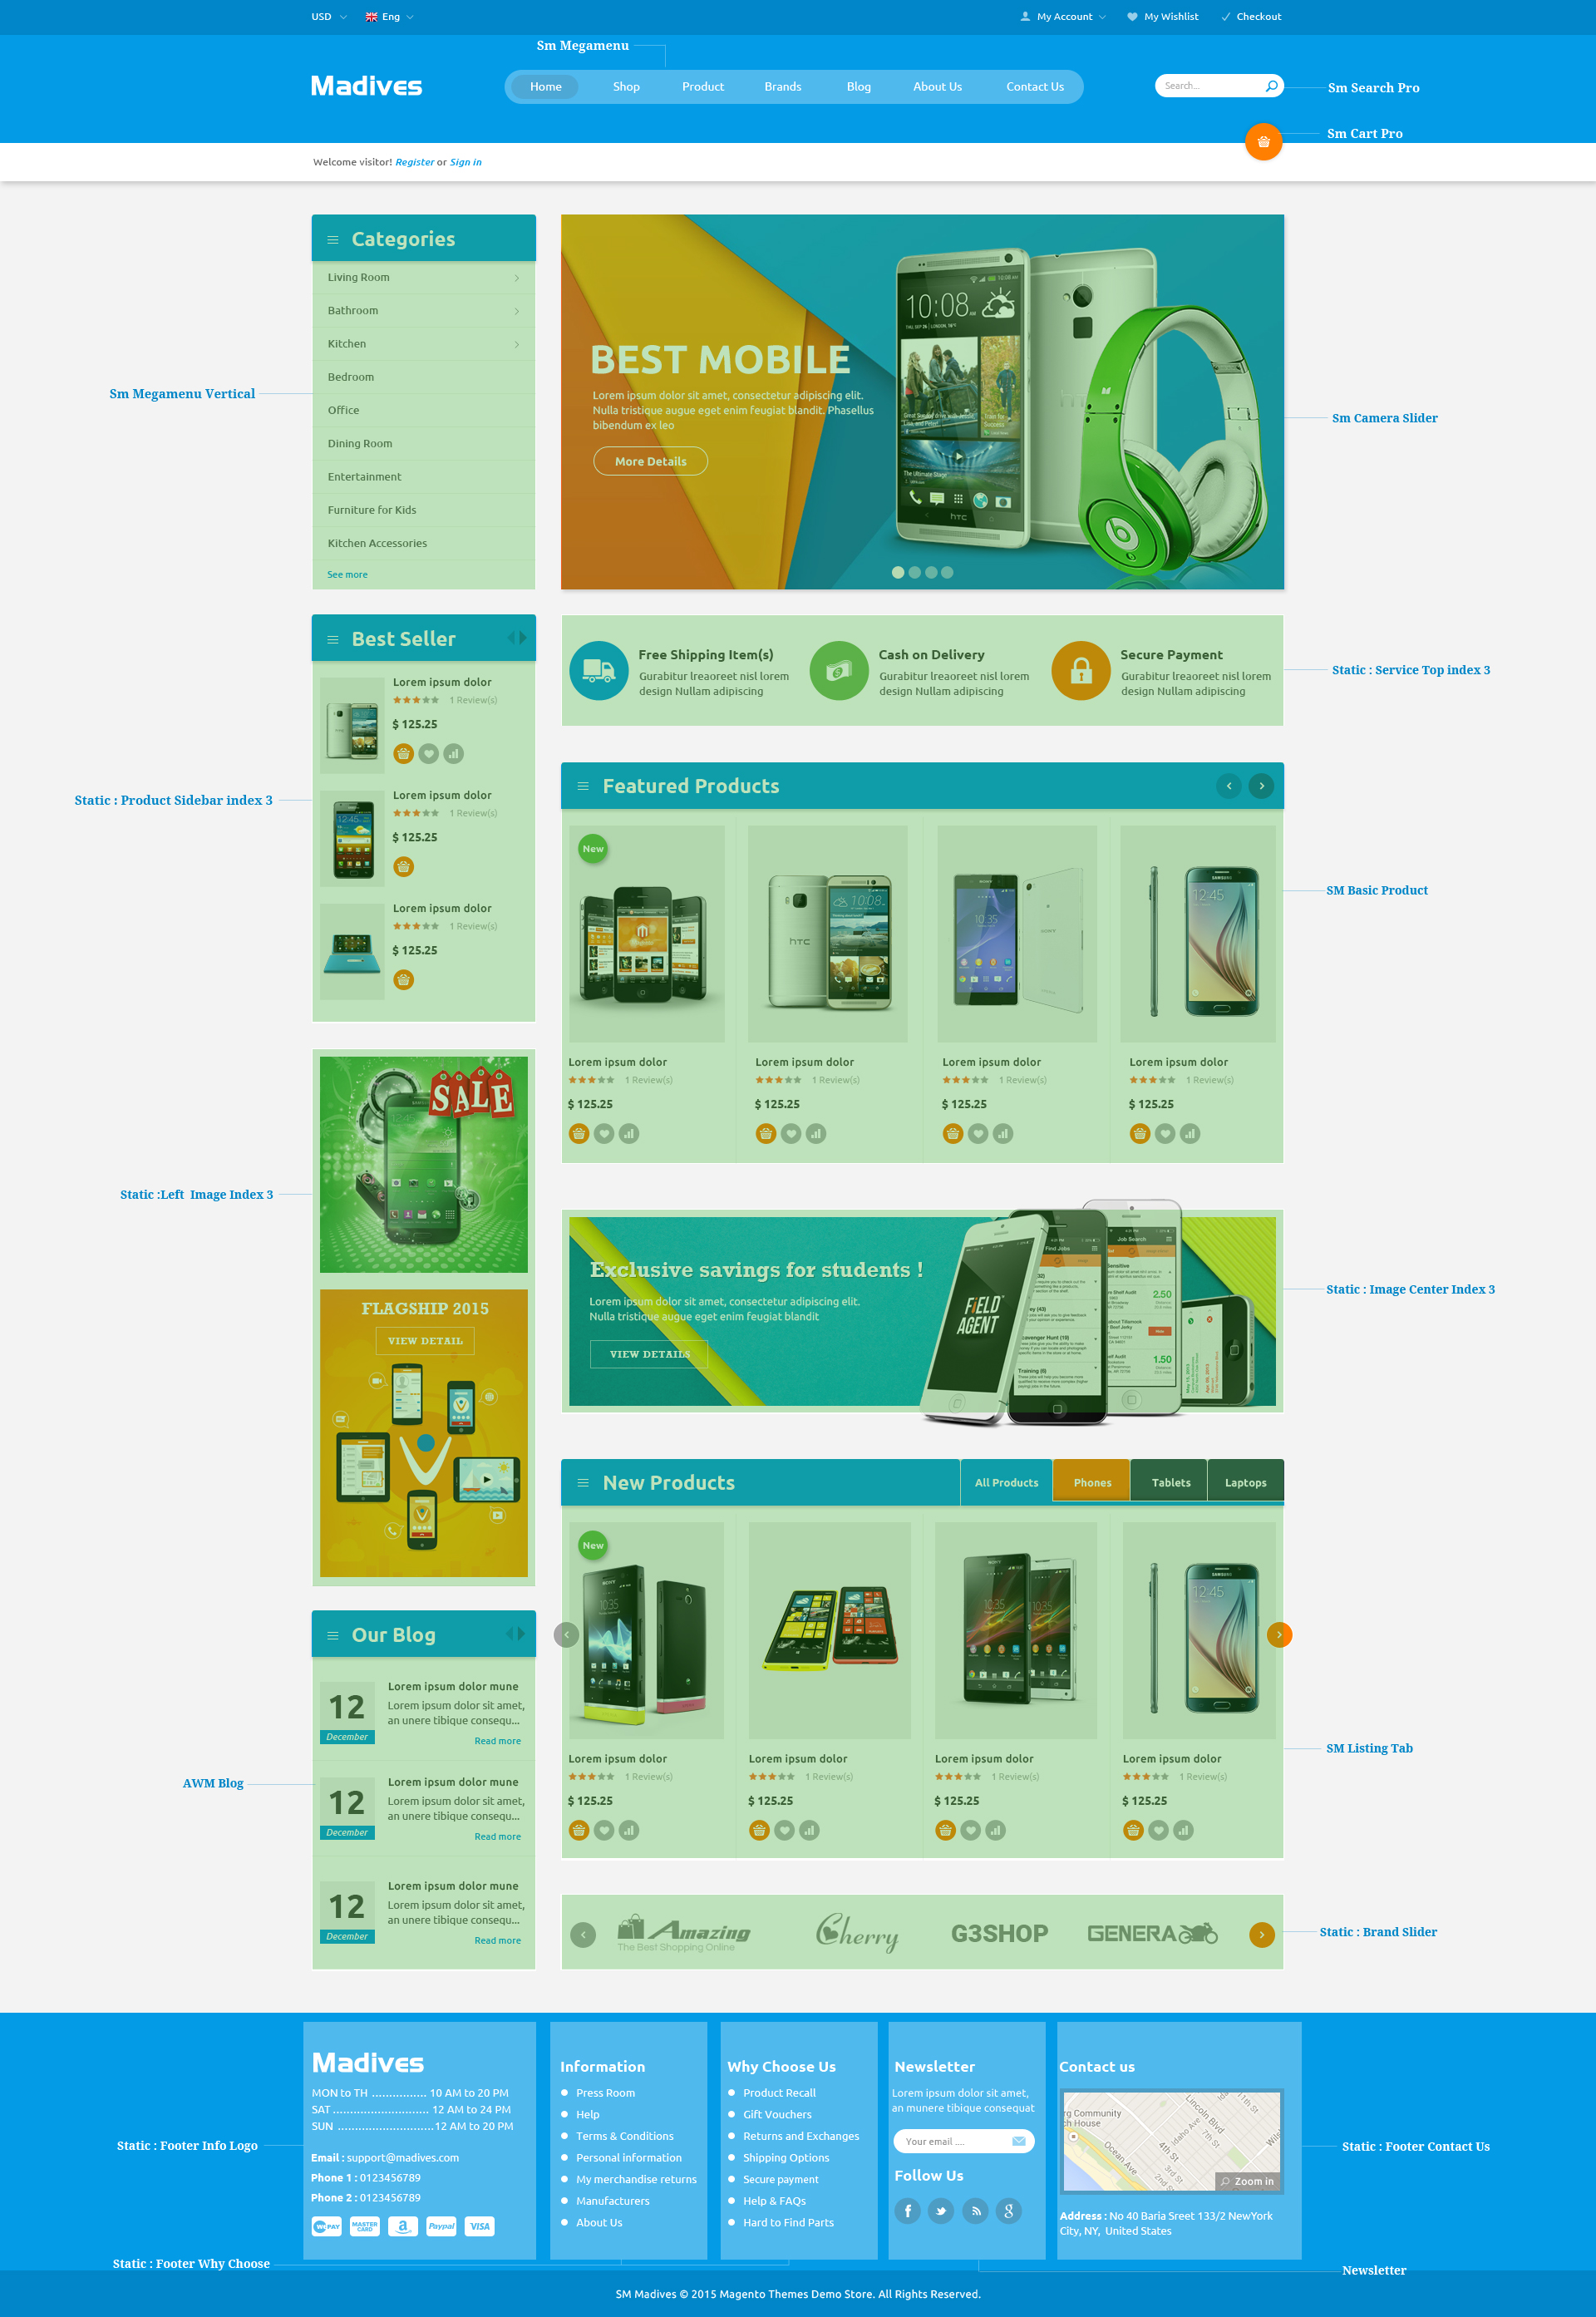
3.3 Configure Extensions
The SM Atom front-page has been integrated with extensions in the Theme as following list:
- Position: SM Search Box Pro
- Frontend Appearance

- Backend of SM Search Box Pro: Click Here
- Go Here to readmore about the SM Search Box Pro module.
- Position: SM Cart Pro
- Frontend Appearance
- Backend of SM Cart Pro: Click Here
- Go Here to readmore about the SM CartPro module.
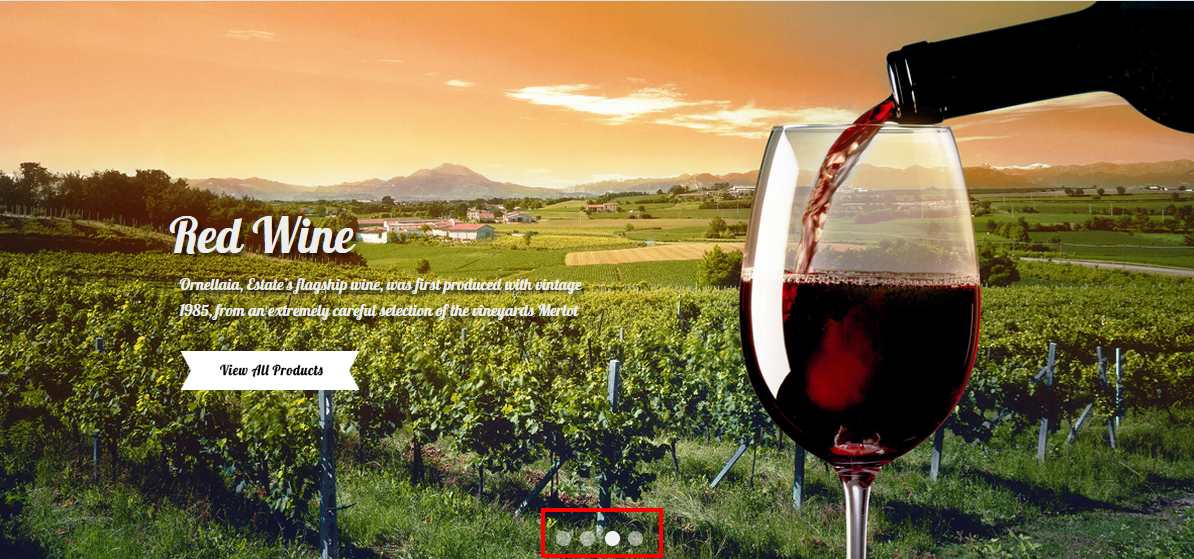
- Position: SM Camera Slide
- Frontend Appearance
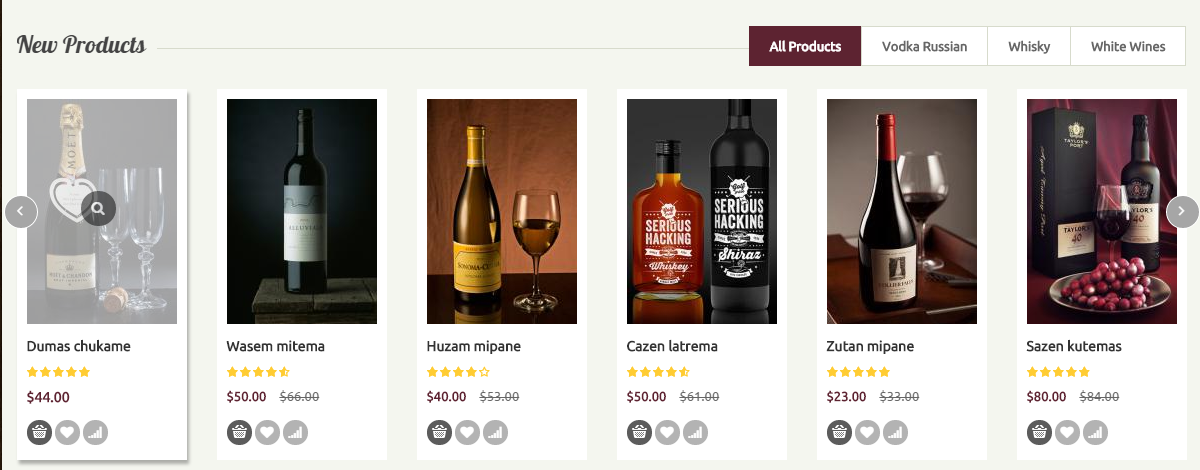
- Position: SM Basic Product
- Frontend Appearance

- Position: SM Listing Tab
- Frontend Appearance
- Position: SM Shopby
- Frontend Appearance
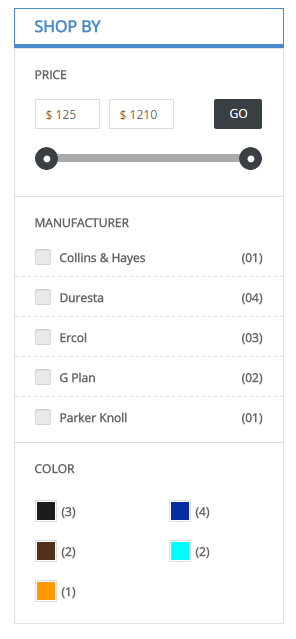
- Backend of SM Shopby : Click Here
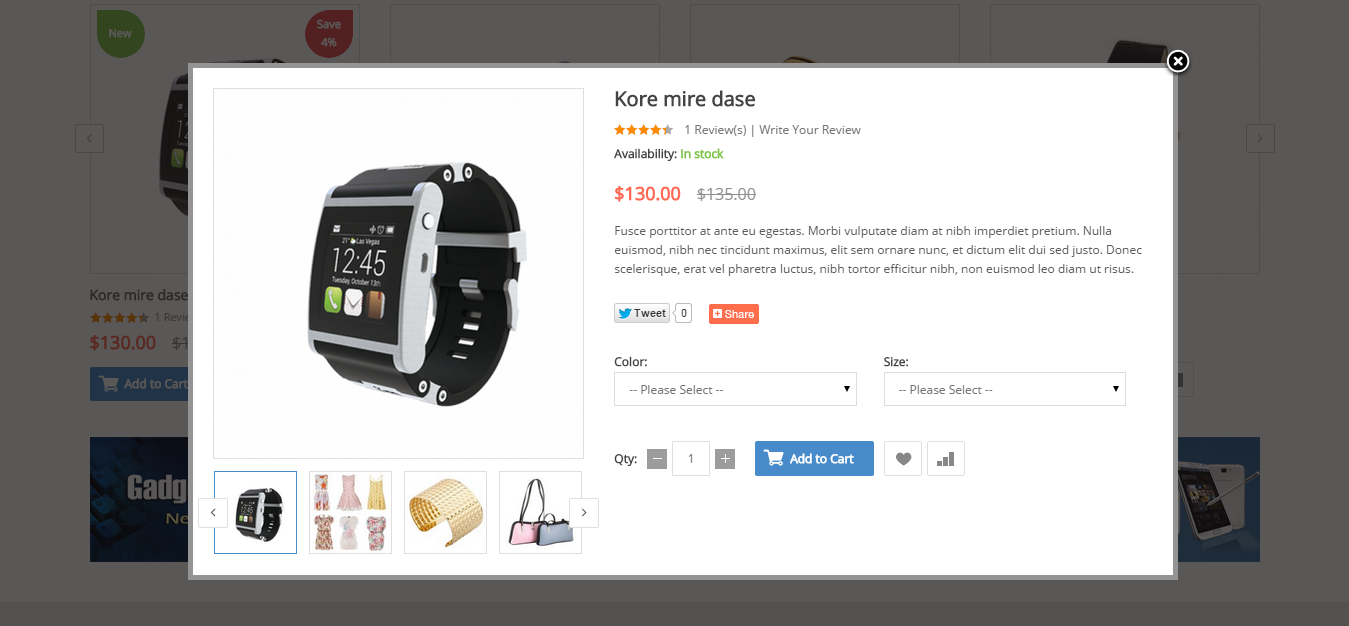
- Position: SM QuickView
- Frontend Appearance
3.4 Configure Static Blocks
The SM Madives front-page has static blocks in the Theme:
- Static: Theme-service-homepage1
- Static: Content-home-static-image-Index1
- Static: Content-home-static-image-V1
- Static: service-bottom-index1
- Static: Footer: Info-logo + Information + Why Choose Us + Contact Us
To create a new static block, go to CMS >> Static Blocks >> Add new block
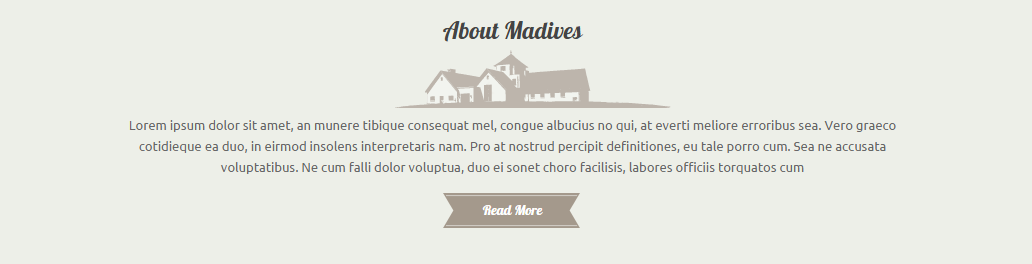
1. Static: Theme-service-homepage1
To create static blocks, go to CMS >> Static Blocks with Identifier * : “service-home”
Frontend
Backend Setting
Coppy & paste the code chain for Content of Theme Service homepage 1:
|
1
2
3
4
5
6
7
8
9
10
11
12
13
|
<div class="service-block">
<div class="block-title">
<strong><span>About Madives</span></strong>
</div>
<div class="img-title"></div>
<div class="block-content">
<ul class="list-service">
<li><span class="text-about">Lorem ipsum dolor sit amet, an munere tibique consequat mel, congue albucius no qui, at everti meliore erroribus sea. Vero graeco cotidieque ea duo, in eirmod insolens interpretaris nam. Pro at nostrud percipit definitiones, eu tale porro cum. Sea ne accusata voluptatibus. Ne cum falli dolor voluptua, duo ei sonet choro facilisis, labores officiis torquatos cum</span></li>
<li class="icon-more"><a href="#" title="read more">Read More</a></li>
</ul>
</div>
</div>
|
2. Content-home-static-image-Index1
To add this static block, first go to CMS then click Static Blocks and create a new one with Identifier * : “content-static-image”
Frontend
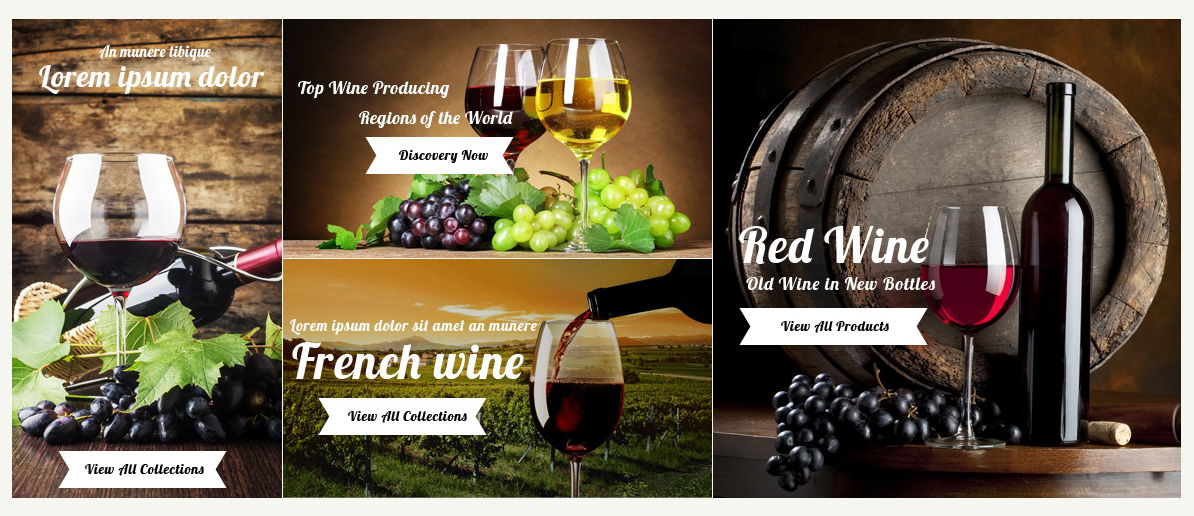
Coppy & paste the code chain for Content of Static-Theme Home Centre 1:
|
1
2
3
4
5
6
7
8
9
10
11
12
13
14
15
16
17
18
|
<div class="static-image-content">
<div class="static-image two-image one-img hidden-xs hidden-sm hidden-md">
<ul class="list-image">
<li><a href="#" title="Static Image"><img src="{{media url="wysiwyg/home-page-image/img-1.jpg"}}" alt="Static Image" /></a></li>
</ul>
</div>
<div class="static-image two-image two-img">
<ul class="list-image">
<li><a href="#" title="Static Image"><img src="{{media url="wysiwyg/home-page-image/img-2.jpg"}}" alt="Static Image" /></a></li>
<li><a href="#" title="Static Image"><img src="{{media url="wysiwyg/home-page-image/img-3.jpg"}}" alt="Static Image" /></a></li>
</ul>
</div>
<div class="static-image two-image three-img hidden-xs hidden-sm hidden-md">
<ul class="list-image">
<li><a href="#" title="Static Image"><img src="{{media url="wysiwyg/home-page-image/img-4.jpg"}}" alt="Static Image" /></a></li>
</ul>
</div>
</div>
|
3. Static: Content-home-static-image-V1
To add this static block, first go to CMS then click Static Blocks and create a new one with Identifier * : “content-static-image1″
Frontend

Coppy & paste the code chain for Content-home-static-image-V1:
|
1
2
3
4
5
|
<div class="static-image one-image">
<ul class="list-image">
<li><a href="#" title="Static Image"><img src="{{media url="wysiwyg/home-page-image/img-1.jpg"}}" alt="Static Image" /></a></li>
</ul>
</div>
|
4.Static: service-bottom-index1
To add this static block, first go to CMS then click Static Blocks and create a new one with Identifier * : “servicer-bottom”
Frontend

Coppy & paste the code chain for Content of Static-Service-bottom-index1:
|
1
2
3
4
5
6
7
8
9
10
11
12
13
14
15
16
17
18
19
20
21
22
23
24
25
26
27
28
29
30
31
32
33
34
35
36
37
38
39
40
41
42
43
44
45
46
47
48
49
50
51
52
53
54
55
56
57
58
59
60
61
62
63
|
<div class="why-choose">
<div class="rows">
<div class="col-lg-3 col-md-3 col-sm-6">
<div class="block-whychoose">
<div class="why-choose-content">
<div class="image-why-choose">
<img src="{{media url="wysiwyg/why-choose-us/choose-1.png"}}" alt="Choose" />
</div>
<div class="info-why-choose">
<h2><a href="#" title="free">Free Shipping Item</a></h2>
<div class="des-why-choose">Gurabitur lreaoreet nisl lorem design Nullam adipiscing sapien ut mi elemen</div>
</div>
</div>
</div>
</div>
<div class="col-lg-3 col-md-3 col-sm-6 whychoose2 ">
<div class="block-whychoose">
<div class="why-choose-content">
<div class="image-why-choose">
<img src="{{media url="wysiwyg/why-choose-us/choose-2.png"}}" alt="Choose" />
</div>
<div class="info-why-choose">
<h2><a href="#" title="free">Cash on Delivery</a></h2>
<div class="des-why-choose">Gurabitur lreaoreet nisl lorem design Nullam adipiscing sapien ut mi elemen</div>
</div>
</div>
</div>
</div>
<div class="col-lg-3 col-md-3 col-sm-6 whychoose3">
<div class="block-whychoose">
<div class="why-choose-content">
<div class="image-why-choose">
<img src="{{media url="wysiwyg/why-choose-us/choose-3.png"}}" alt="Choose" />
</div>
<div class="info-why-choose">
<h2><a href="#" title="free">Secure payment</a></h2>
<div class="des-why-choose">Gurabitur lreaoreet nisl lorem design Nullam adipiscing sapien ut mi elemen</div>
</div>
</div>
</div>
</div>
<div class="col-lg-3 col-md-3 col-sm-6">
<div class="block-whychoose">
<div class="why-choose-content">
<div class="image-why-choose">
<img src="{{media url="wysiwyg/why-choose-us/choose-4.png"}}" alt="Choose" />
</div>
<div class="info-why-choose">
<h2><a href="#" title="free">Accepting orders 24/7</a></h2>
<div class="des-why-choose">Gurabitur lreaoreet nisl lorem design Nullam adipiscing sapien ut mi elemen</div>
</div>
</div>
</div>
</div>
</div>
</div>
|
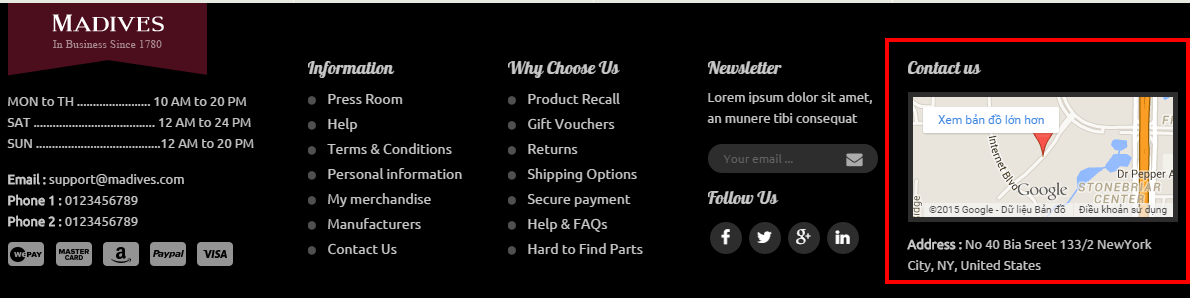
5. Static: Footer: Info-logo + Information + Why Choose Us + Contact Us
Frontend
Info-logo
To create static blocks, go to CMS >> Static Blocks with Identifier * : “footer-info”
Frontend
![]()
Backend Setting
Coppy & paste the code chain for Content of Info-logo:
Information
To create static blocks, go to CMS >> Static Blocks with Identifier * : “footer-information”
Frontend
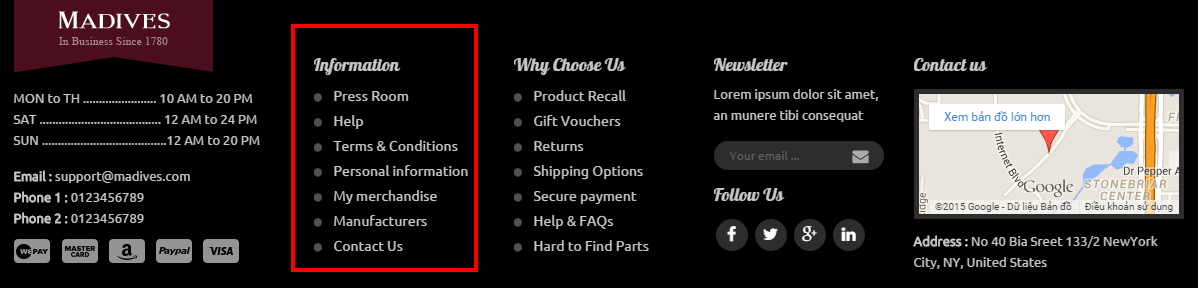
Coppy & paste the code chain for Content of Information:
Why Choose Us
To create static blocks, go to CMS >> Static Blocks with Identifier * : “footer-Choose-us”
Frontend
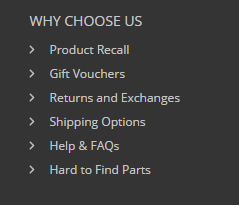
Coppy & paste the code chain for Content of Why Choose Us:
Contact Us
To create static blocks, go to CMS >> Static Blocks with Identifier * : “footer-contact-us”
Frontend
Coppy & paste the code chain for Content of Services:
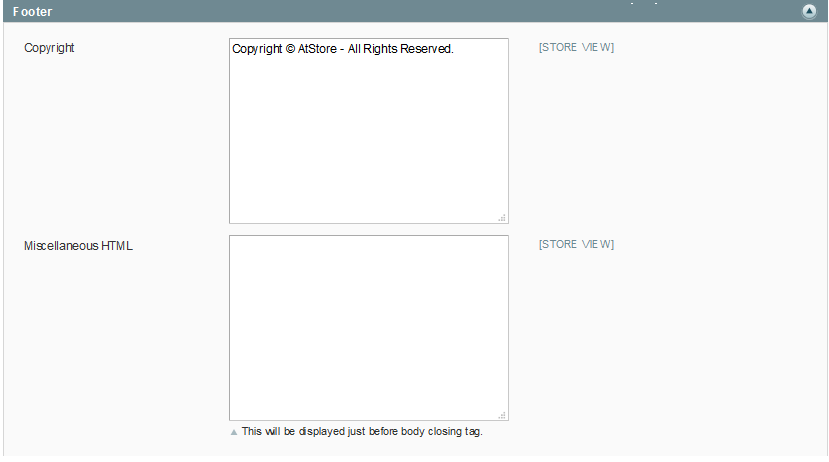
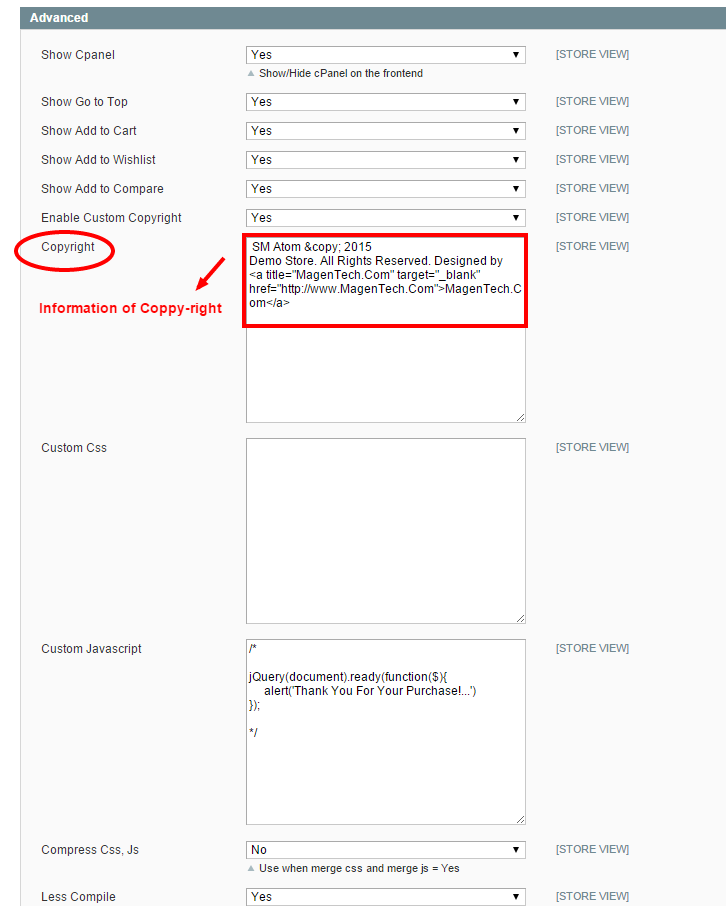
3.5 How To Edit Copyright in admin
Frontend Appearance
In the Administrator page, Please navigate to System >> Configuration >>; find SM Madives Setting Module to configure the “Custom Copyright” parameter as image below:
Advanced Style
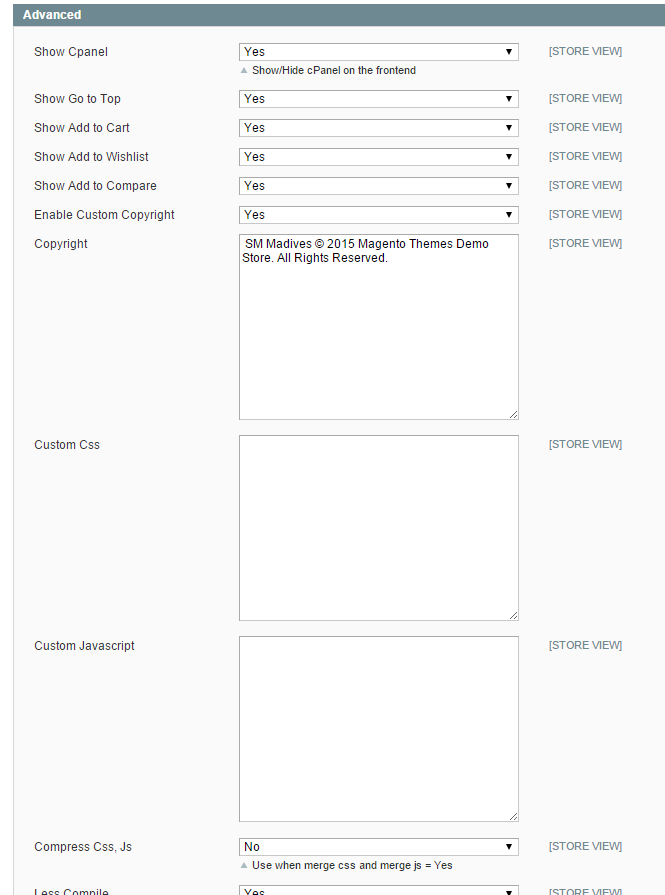
- Show Cpanel - Allow to Enable/Disable Cpanel
- Show Go to Top - Allow to Enable/Disable Go to Top
- Use Add to Cart - Allow to Enable/Disable Cart
- Use Add to Wishlist - Allow to Enable/Disable Wishlist
- Use Add to Compare - Allow to Enable/Disable Compare
- Enable Custom Copyright - Allow to Enable/Disable Custom Copyright
- Copyright - If you select “Yes”, please custom copyright here, or else “No” will display the default copyright of Magento.
- Custom Css - Allow to custom css
- Custom Javascript - Allow to custom Javascript

4SUPPORT - Back to top
Thank you so much for purchasing this theme. If you have any questions that are beyond the scope of this help file, please send us via: Support Tickets System
Thanks a bunch!