1 SYSTEM REQUIREMENT - Back to top
At the basic level, this theme will require the following conditions:
- Compatible with Magento Community Edition 1.7.x; 1.8.x and 1.9.x (the latest version : 1.9.2.2 , require: php 5.4 and Memory_limit no less than 256Mb)
Note:This package is upgraded to Magento Version 1.9.2.2
2LAYOUT POSITION - Back to top
3INSTALLATION - Back to top
There are two ways to install a Magento Theme:
- Quickstart Installation: By using this package, you will set the theme exactly as our Demo with sample data.
- Manual Installation (include of Theme Installation Package): You will need only be using the zipped files “sm_g2shop_theme_m1.7.x-1.9.x_v1.0.3.zip”.
3.1 Quickstart Installation :
Magentech provides SM Quickstart package for each theme which aims to ease the installation for users. It will help you save much time of installing and configuring if you plan to start your site from the beginning. Please following steps below:
- Step 1: Download the quickstart package
- Step 2: Extract and Upload the whole Quickstart package to your server. In Quickstart folder you will see the extracted folder that include all sample data
- Step 3: Create a Database for your Magento

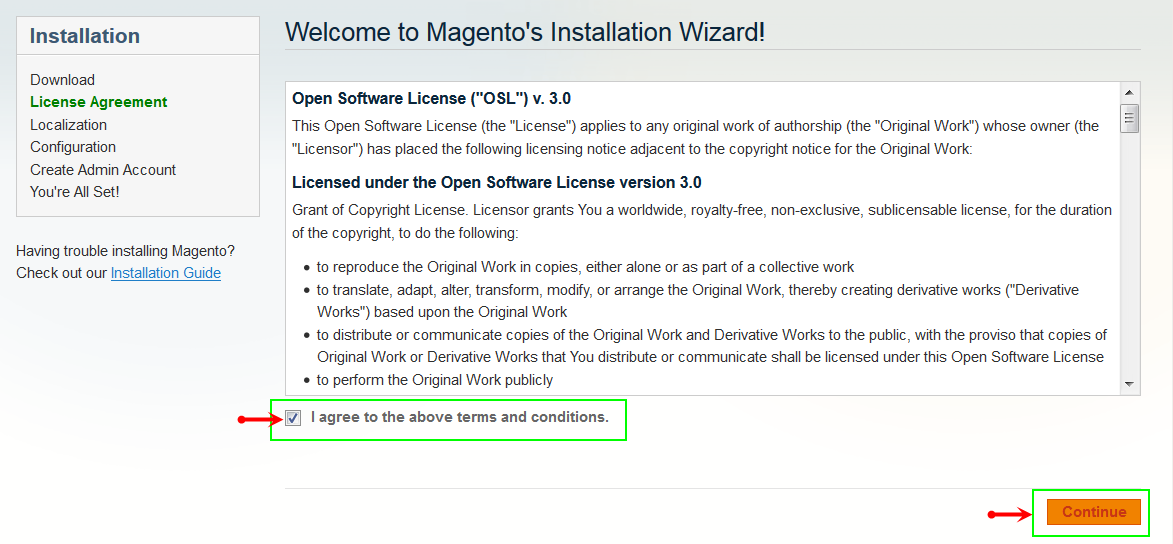
- Step 4: Start installation by opening browser and navigate to your URL (where the Quickstart uploaded) to load default Magento installer. Please follow each step of the Installer so that the installation process can be set.
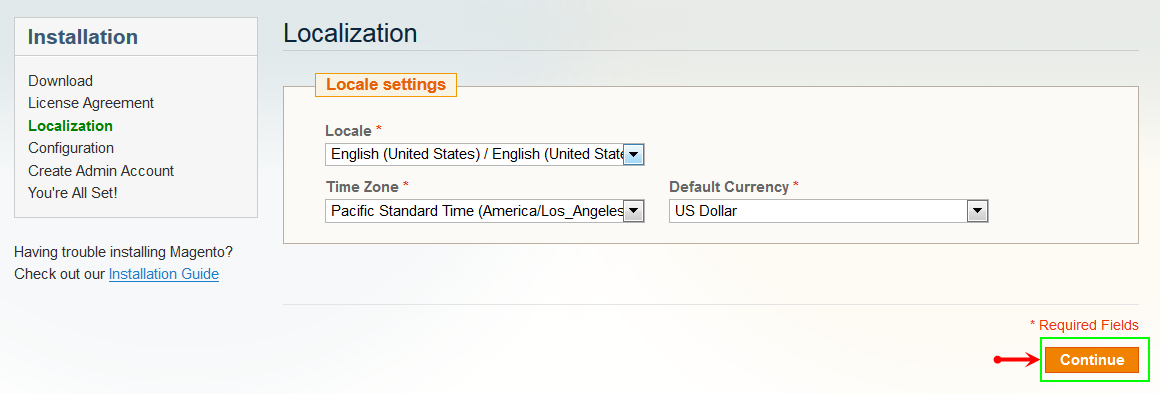
- Step 5: Locale Settings. Please fill fully into Required Fields (“Locale; Time Zone and Default Currency”.)
-
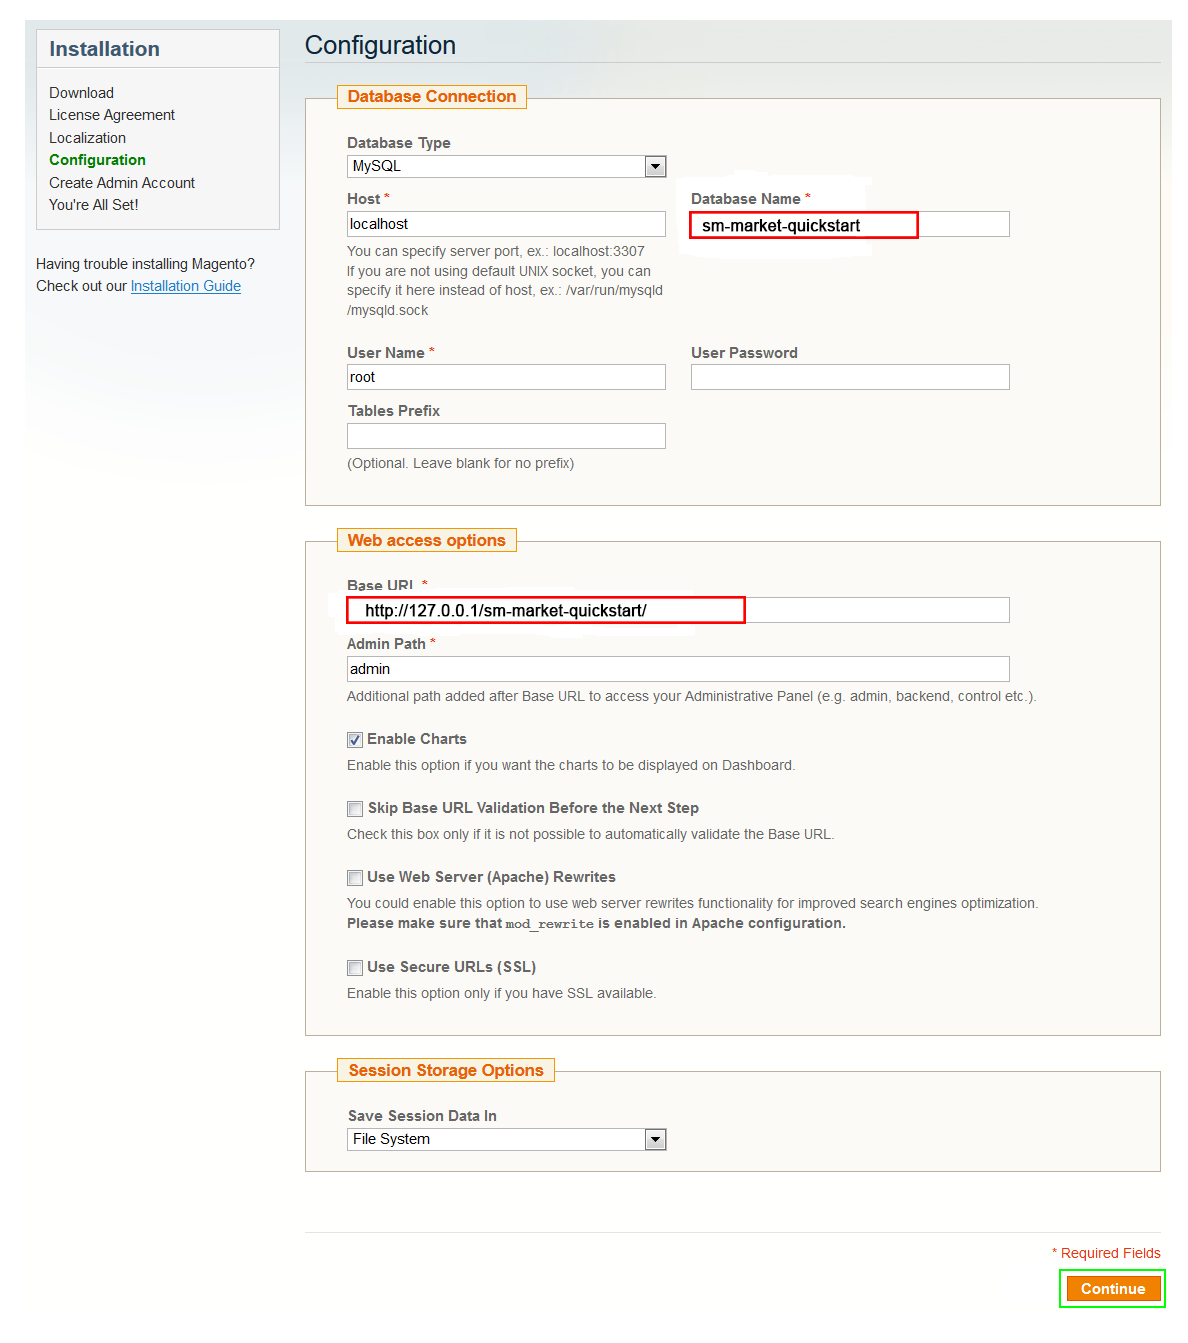
Step 6: In the Configuration step, input the required fields as below.
- Do not use “localhost” in URL, otherwise you could not log in to your Admin area (you should use your local IP in case of installing on your computer).
- Leave Tables prefix field blank.
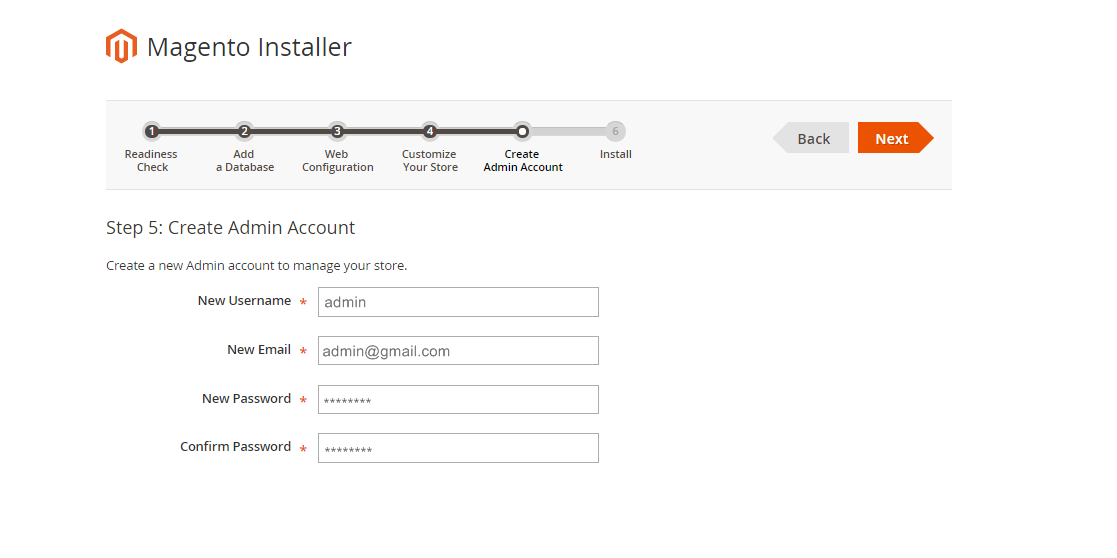
- Step 7: Create Admin Account. Please fill fully into Required Fields (“First Name; Last Name; Email; Username; password and confirm password”.)
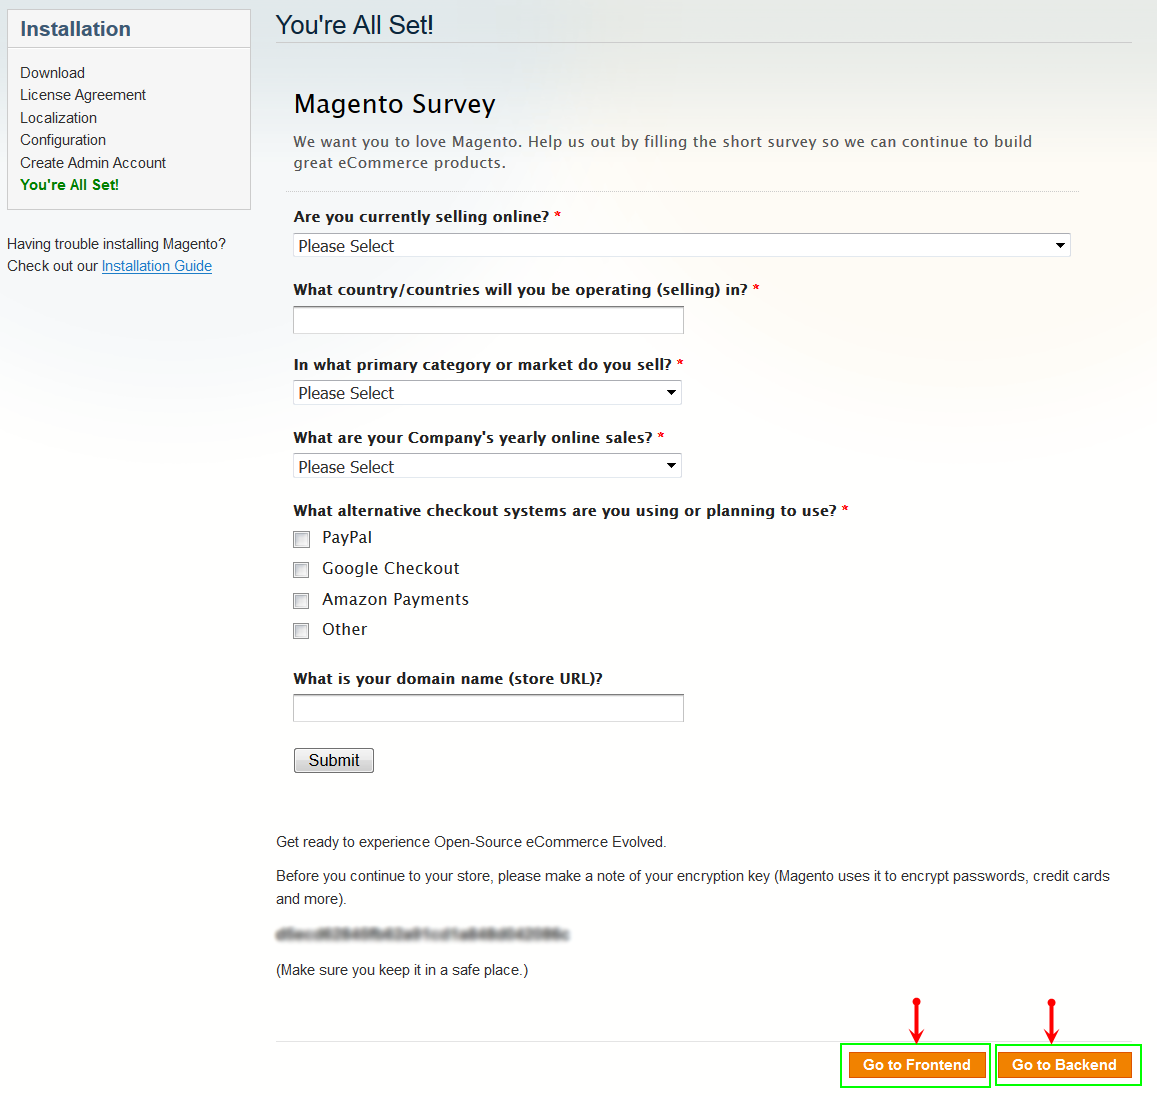
- Step 8: Finish Installation and now you can Go to Frontend or Go to Backend.
3.2 Manual Installation
Theme Installation
-
Step 1: Copy the folders skin and app to the root of your Magento site on the server. The overwritten folders should have a directory layout like this:
{docroot} /magento/
app/
index.php
js/
lib/
LICENSE.txt
media/
pear/
skin/
var/ - Step 2: Log in to your Admin Panel on the stage localhost (e.g. Access Magento Admin area: https://localhost/index.php/admin/). Log out and log in back.
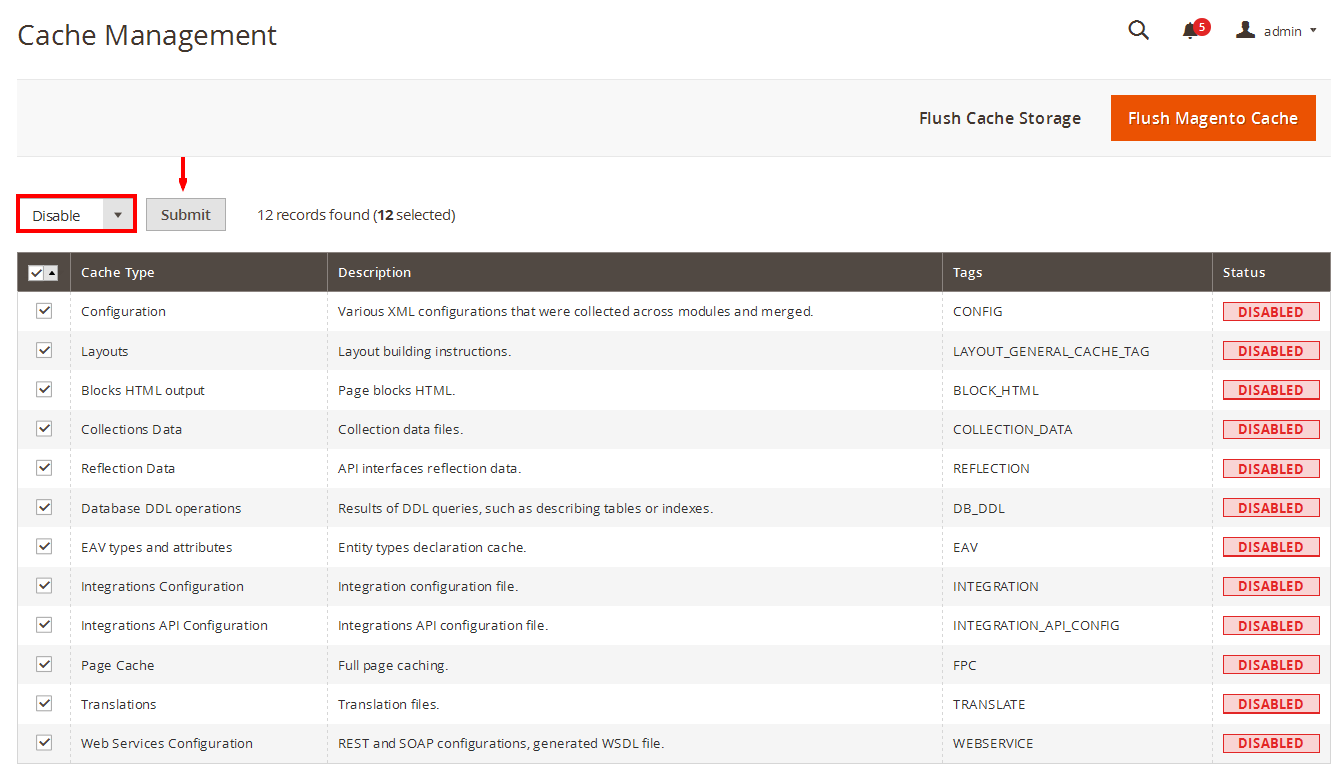
- Step 3: Navigate to System >> Cache Management, Sellect All the cache types, take Action as Refresh and Submit.
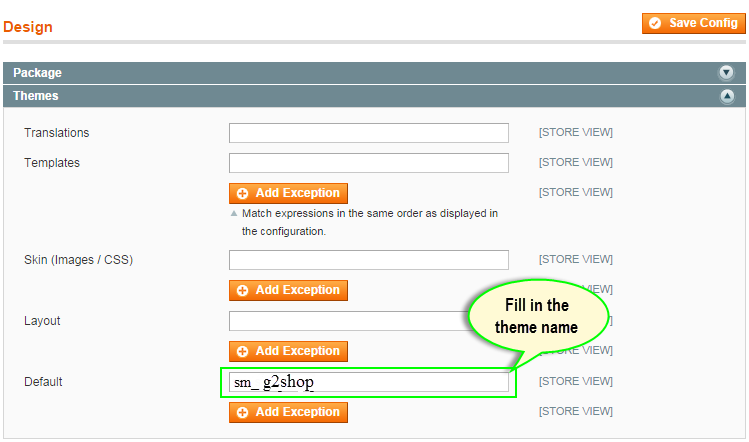
- Step 4: Navigate to System >> Configuration >> Design.
- Step 5: In Themes tab, input Default field with the actual theme name.
- Step 6: You can also change the settings for Header .
- Step 7: Click Save Config button to finish.
4CONFIGURATION - Back to top
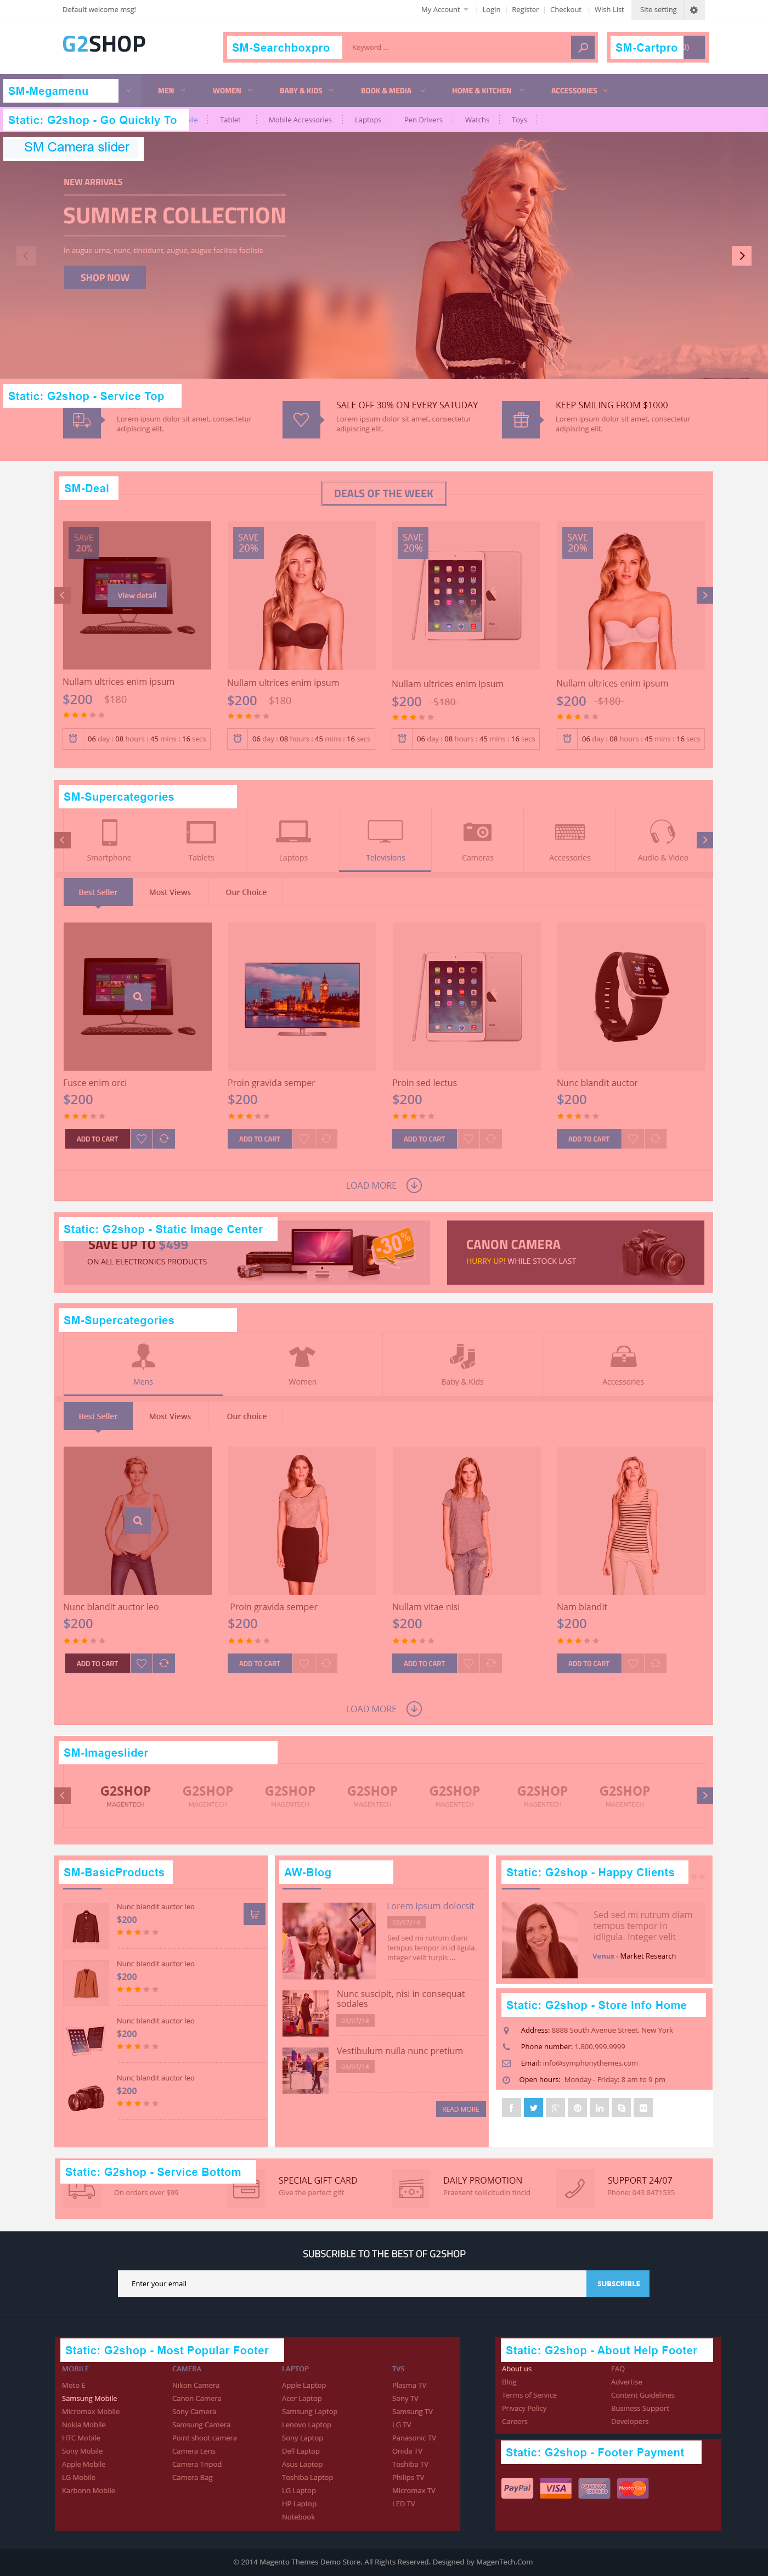
4.1 Configure pages
Home Page with 1 column
To config this page, please navigate to CMS >> Pages, create Home page, navigate to Design tab and update with the following settings:
- Layout: 1 column
- Link show home page’s backend. Please click Here to view.
-
Layout update XML: paste the code below:
123456789101112131415161718192021222324252627282930313233343536373839404142434445464748495051525354555657585960616263646566676869707172737475767778798081828384858687888990919293<reference name="slideshow"><block type="sm_cameraslide/slide_preview" name="sm_cameraslide" as="cameraslide" ></block></reference><reference name="servicetop"><block type="cms/block" name="block-top"><action method="setBlockId"><block_id>service-top</block_id></action></block></reference><reference name="servicebottom"><block type="cms/block" name="block-bottom"><action method="setBlockId"><block_id>service-bottom</block_id></action></block></reference><reference name="happyclients"><block type="cms/block" name="happy-clients"><action method="setBlockId"><block_id>happy-clients</block_id></action></block></reference><reference name="social"><block type="page/html" name="social_info" as="social_info" template="page/html/social.phtml"/></reference><reference name="dealblock"><block type="deal/List" name="deal" as="deal" template="sm/deal/default.phtml"></block></reference><reference name="supercat1"><block type="supercategories/list" name="supercategories.list.default" template="sm/supercategories/default.phtml"></block></reference><reference name="supercat2"><block type="supercategories/list" name="supercategories.list.default.2" template="sm/supercategories/default_2.phtml"><action method="_setConfig"><values><product_category>320</product_category><nb_column1>4</nb_column1><nb_column2>4</nb_column2><nb_column3>3</nb_column3><nb_column4>2</nb_column4><next_prev_display>0</next_prev_display></values></action></block></reference><reference name="recomendproducts"><block type="basicproducts/list" name="basicproducts.list.default" template="sm/basicproducts/recomend-home.phtml"><action method="_setConfig"><values><basicproducts_title_text>RECOMMENDED</basicproducts_title_text><nb_column1>1</nb_column1><nb_column2>1</nb_column2><nb_column3>1</nb_column3><nb_column4>1</nb_column4><product_source>catalog</product_source><product_category>3</product_category><product_order_by>best_sales</product_order_by><product_limitation>4</product_limitation><cat_title_display>0</cat_title_display><product_description_display>0</product_description_display><product_addcart_display>1</product_addcart_display><product_addwishlist_display>0</product_addwishlist_display><product_addcompare_display>0</product_addcompare_display><imgcfg_width>84</imgcfg_width><imgcfg_height>84</imgcfg_height></values></action></block></reference><reference name="staticcenter"><block type="cms/block" name="block-image-static"><action method="setBlockId"><block_id>image-static-center</block_id></action></block></reference><reference name="home_info_store"><block type="cms/block" name="h-info"><action method="setBlockId"><block_id>store-info-home</block_id></action></block></reference><reference name="featurebrand"><block type="imageslider/list" name="imageslider.list.default" template="sm/imageslider/feature-brand.phtml"></block></reference><reference name="latestblog"><block type="blog/blog" name="latest-blog" template="aw_blog/latest-blog.phtml"></block></reference>
Home Page with 2 columns with left bar
To config this page, please navigate to CMS >> Pages, create Home page, navigate to Design tab and update with the following settings:
- Layout: 2 columns with left bar
- Link show home page’s backend. Please click Here to view.
-
Layout update XML: paste the code below:
123456789101112131415161718192021222324252627282930313233343536373839404142434445464748495051525354555657585960616263646566676869707172737475767778798081828384858687888990919293949596979899100101102103104105106107108109110111112113114115116117118119120121122123124125126127128129130131132133134135136137138139140141142143144145146147148149150151152153154155156157158159160161162163164<reference name="slideshow"><block type="sm_cameraslide/slide_preview" name="sm_cameraslide" as="cameraslide" ></block></reference><reference name="servicetop_homeleft"><block type="cms/block" name="block-top"><action method="setBlockId"><block_id>service-top-home-left</block_id></action></block></reference><reference name="megamenu_left"><block type="megamenu/list" name="megamenu.list.theme" as="megaMenuLeft" template="sm/megamenu/megamenu-left.phtml"><action method="setConfig"><values><group_id>2</group_id><theme>2</theme></values></action></block></reference><reference name="servicebottom"><block type="cms/block" name="block-bottom"><action method="setBlockId"><block_id>service-bottom-home-left</block_id></action></block></reference><reference name="happyclients"><block type="cms/block" name="happy-clients"><action method="setBlockId"><block_id>happy-clients</block_id></action></block></reference><reference name="social"><block type="page/html" name="social_info" as="social_info" template="page/html/social.phtml"/></reference><reference name="dealblock"><block type="deal/List" name="deal" as="deal" template="sm/deal/default_home_left.phtml"></block></reference><reference name="supercat1"><block type="supercategories/list" name="supercategories.list.default" template="sm/supercategories/default.phtml"><action method="_setConfig"><values><!-- <nb_column1>5</nb_column1> --></values></action></block></reference><reference name="supercat2"><block type="supercategories/list" name="supercategories.list.default.2" template="sm/supercategories/default_2.phtml"><action method="_setConfig"><values><product_category>320</product_category><nb_column1>4</nb_column1></values></action></block></reference><reference name="home_info_store"><block type="cms/block" name="h-info"><action method="setBlockId"><block_id>store-info-home</block_id></action></block></reference><reference name="recomendproducts"><block type="basicproducts/list" name="basicproducts.list.default" template="sm/basicproducts/recomend-home.phtml"><action method="_setConfig"><values><basicproducts_title_text>Recomended</basicproducts_title_text><nb_column1>1</nb_column1><nb_column2>1</nb_column2><nb_column3>1</nb_column3><nb_column4>1</nb_column4><product_source>catalog</product_source><product_category>3</product_category><product_order_by>best_sales</product_order_by><product_limitation>4</product_limitation><cat_title_display>0</cat_title_display><product_description_display>0</product_description_display><product_addcart_display>1</product_addcart_display><product_addwishlist_display>0</product_addwishlist_display><product_addcompare_display>0</product_addcompare_display><imgcfg_width>84</imgcfg_width><imgcfg_height>84</imgcfg_height></values></action></block></reference><reference name="saveup"><block type="cms/block" name="block-saveup-static"><action method="setBlockId"><block_id>save-up</block_id></action></block></reference><reference name="saveup2"><block type="cms/block" name="block-saveup-static-2"><action method="setBlockId"><block_id>save-up-2</block_id></action></block></reference><reference name="featurebrand"><block type="imageslider/list" name="imageslider.list.default" template="sm/imageslider/feature-brand.phtml"></block></reference><reference name="latestblog"><block type="blog/blog" name="latest-blog" template="aw_blog/latest-blog.phtml"></block></reference><reference name="left"><block type="cms/block" name="block-image-static"><action method="setBlockId"><block_id>image-static-left</block_id></action></block><block type="basicproducts/list" name="basicproducts.list.default.left" template="sm/basicproducts/product-left-home.phtml"><action method="_setConfig"><values><basicproducts_title_text>Latest Products</basicproducts_title_text><nb_column1>1</nb_column1><nb_column2>1</nb_column2><nb_column3>1</nb_column3><nb_column4>1</nb_column4><product_source>catalog</product_source><product_category>3</product_category><product_order_by>lastest_product</product_order_by><product_limitation>4</product_limitation><cat_title_display>0</cat_title_display><product_description_display>0</product_description_display><product_addcart_display>0</product_addcart_display><product_addwishlist_display>0</product_addwishlist_display><product_addcompare_display>0</product_addcompare_display><imgcfg_width>84</imgcfg_width><imgcfg_height>84</imgcfg_height></values></action></block><block type="cms/block" name="block-image-static-2"><action method="setBlockId"><block_id>image-static-left-2</block_id></action></block><block type="basicproducts/list" name="basicproducts.list.default.left.second" template="sm/basicproducts/product-left-home.phtml"><action method="_setConfig"><values><basicproducts_title_text>Random Products</basicproducts_title_text><nb_column1>1</nb_column1><nb_column2>1</nb_column2><nb_column3>1</nb_column3><nb_column4>1</nb_column4><product_source>catalog</product_source><product_category>3</product_category><product_order_by>random</product_order_by><product_limitation>4</product_limitation><cat_title_display>0</cat_title_display><product_description_display>0</product_description_display><product_addcart_display>0</product_addcart_display><product_addwishlist_display>0</product_addwishlist_display><product_addcompare_display>0</product_addcompare_display><imgcfg_width>84</imgcfg_width><imgcfg_height>84</imgcfg_height></values></action></block><block type="tag/popular" after="basicproducts.list.default.left.second" name="tags_popular" template="tag/popular.phtml"/></reference>
4.2 Configure Mega Menu
To configure General settings, module parameters, Advance, login your administrator, go to SM Mega Menu >> Configuration
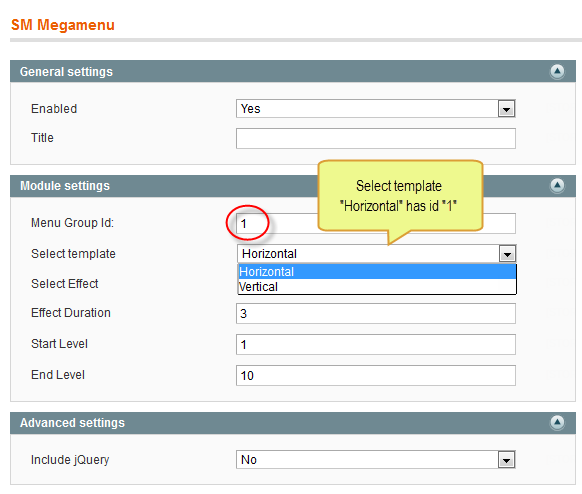
To view more guide about how to install, set up and configure SM Mega Menu as you want, please click HERE
Mega Menu Items Configuration
In order to add menu items, Go to SM Mega Menu >> Menu items Manager
HOME MENU
Frontend
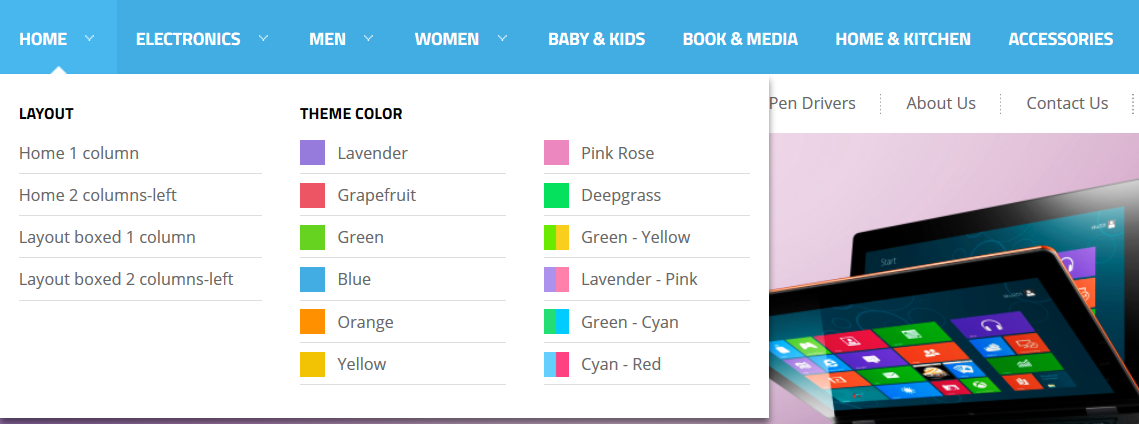
- Link show Home Menu’s backend. Please click Here to view.
Content code of Home menu:
|
1
2
3
4
5
6
7
8
9
10
11
12
13
14
15
16
17
18
19
20
21
22
23
24
25
26
27
28
29
30
|
<div class="content-home">
<div class="layout-color layout-theme">
<h2>Layout</h2>
<ul class="list-theme">
<li><a href="{{store url="?___store=english&___from_store=italia"}}" title="Home 1 column">Home 1 column</a></li>
<li><a href="{{store url="?___store=italia&___from_store=english"}}" title="Home 2 columns-left">Home 2 columns-left</a></li>
<li><a href="{{store url="?___store=bolivia&___from_store=english"}}" title="Layout boxed 1 column">Layout boxed 1 column</a></li>
<li><a href="{{store url="?___store=cambodja&___from_store=english"}}" title="Layout boxed 2 columns left">Layout boxed 2 columns-left</a></li>
</ul>
</div>
<div class="layout-color color-theme">
<h2>Theme Color</h2>
<ul class="list-theme">
<li class="lavender"><a href="{{store url="?___store=sweden&___from_store=english"}}" title="Lavender">Lavender</a></li>
<li class="grapefruit"><a href="{{store url="?___store=japan&___from_store=english"}}" title="Grapefruit">Grapefruit</a></li>
<li class="green"><a href="{{store url="?___store=argentina&___from_store=english"}}" title="Green">Green</a></li>
<li class="blue"><a href="{{store url="?___store=english&___from_store=italia"}}" title="Blue">Blue</a></li>
<li class="orange"><a href="{{store url="?___store=brazil&___from_store=english"}}" title="Orange">Orange</a></li>
<li class="yellow"><a href="{{store url="?___store=cameroon&___from_store=english"}}" title="Yellow">Yellow</a></li>
</ul>
<ul class="list-theme">
<li class="pinkrose"><a href="{{store url="?___store=hungary&___from_store=english"}}" title="Pink Rose">Pink Rose</a></li>
<li class="deepgrass"><a href="{{store url="?___store=jamaica&___from_store=english"}}" title="Deepgrass">Deepgrass</a></li>
<li class="green_yellow"><a href="{{store url="?___store=vietnam&___from_store=english"}}" title="Green - Yellow">Green - Yellow</a></li>
<li class="lavender_pink"><a href="{{store url="?___store=chile&___from_store=english"}}" title="Lavender - Pink">Lavender - Pink</a></li>
<li class="green_cyan"><a href="{{store url="?___store=spain&___from_store=english"}}" title="Green - Cyan">Green - Cyan</a></li>
<li class="cyan_red"><a href="{{store url="?___store=italia&___from_store=english"}}" title="Cyan - Red">Cyan - Red</a></li>
</ul>
</div>
</div>
|
ELECTRONICS MENU
Frontend
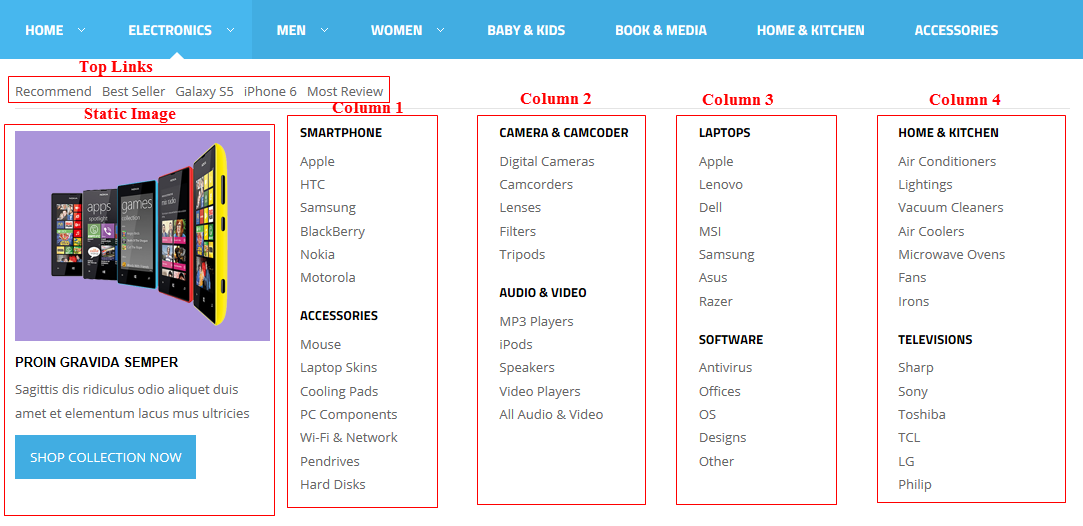
In the admin Panel page, navigate to SM MegaMenu >> Menu Items Manager to view Tree of Electronics menu:
- Top Links: backend
Content Code of “Top Links”:
|
1
2
3
4
5
6
7
8
9
|
<div class="toplink-menu">
<ul class="links-menu">
<li><a title="Recommend" href="#">Recommend</a></li>
<li><a title="Best Seller" href="#">Best Seller</a></li>
<li><a title="Galaxy S5" href="#">Galaxy S5</a></li>
<li><a title="iPhone 6" href="#">iPhone 6</a></li>
<li><a title="Most Review" href="#">Most Review</a></li>
</ul>
</div>
|
- Static Image: backend
Content Code of “Static Image”:
|
1
2
3
4
5
6
7
8
9
10
|
<div class="st-img">
<div class="img-wrapper">
<a href="#" title="Static Image"><img src="{{media url="wysiwyg/st-img1.png"}}" alt="" /></a>
</div>
<div class="detail-st-img">
<h2>Proin gravida semper</h2>
<p>Sagittis dis ridiculus odio aliquet duis amet et elementum lacus mus ultricies</p>
<a class="btn-button-st" href="#" title="Shop collection now">Shop collection now</a>
</div>
</div>
|
- Column 1: backend
Note: Column 2, 3 & 4 configure the same with Column 1
MEN MENU
Frontend
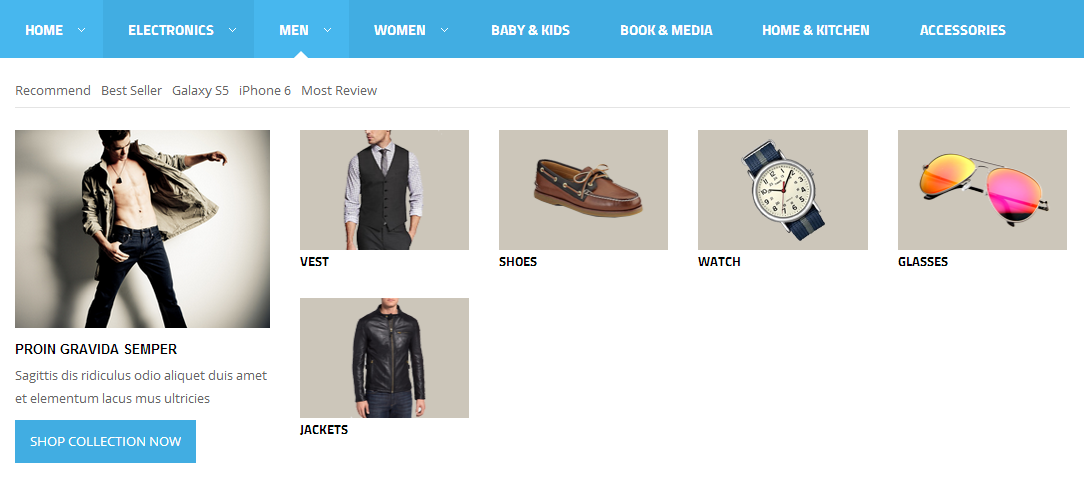
In the admin Panel page, navigate to SM MegaMenu >> Menu Items Manager to view Tree of Men menu:
- Top Links: configure the same above
Content Code of “Top Links”: configure the same above
- Column 1: configure the same above
- Vest: backend
- Image Vest: backend
Content Code of “Image Vest”:
|
1
2
3
|
<div class="img-wrapper">
<a href="{{store url="fashion/men-category/vest.html"}}" title="Vest"><img src="{{media url="wysiwyg/vest-image.png"}}" alt="Vest" /></a>
</div>
|
- Vest: backend
4.3 Configure Extensions
I. SM Search Box Pro
- Position: SM Search Box Pro
- Frontend

- Backend of SM Search Box Pro: Click Here
- To view more guide about how to install, set up and configure SM Search Box as you want, please click here
II. SM Cart Pro
- Position: SM Cart Pro
- Frontend

- Backend of SM Cart Pro: Click Here
- To view more guide about how to install, set up and configure SM Cart Pro as you want, please click here
III. SM Camera Slider
- Position: SM Camera Slider
- Frontend
/module/sm-dynamic-slideshow.png)
- Backend of SM Camera Slider: Click Here
- To view more guide about how to install, set up and configure SM Camera Slider as you want, please click here
-
To config this position, please navigate to CMS >> Pages >> Home page, navigate to Design tab and paste code as below:
123<reference name="slideshow"><block type="sm_cameraslide/slide_preview" name="sm_cameraslide" as="cameraslide" ></block></reference>
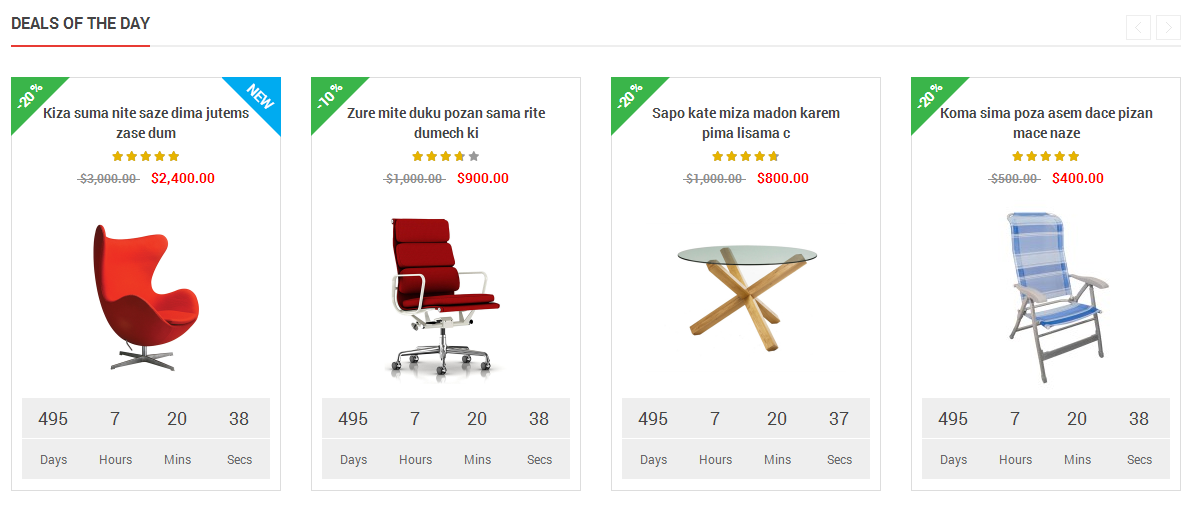
IV. SM DEAL
- Position: SM Deal
- Frontend
- Backend of SM Deal: Click Here
- To view more guide about how to configure SM Deal as you want, please click here
- To config this position, please navigate to CMS >> Pages >> Home page, navigate to Design tab and paste code as below:
|
1
2
3
|
<reference name="dealblock">
<block type="deal/List" name="deal" as="deal" template="sm/deal/default.phtml"></block>
</reference>
|
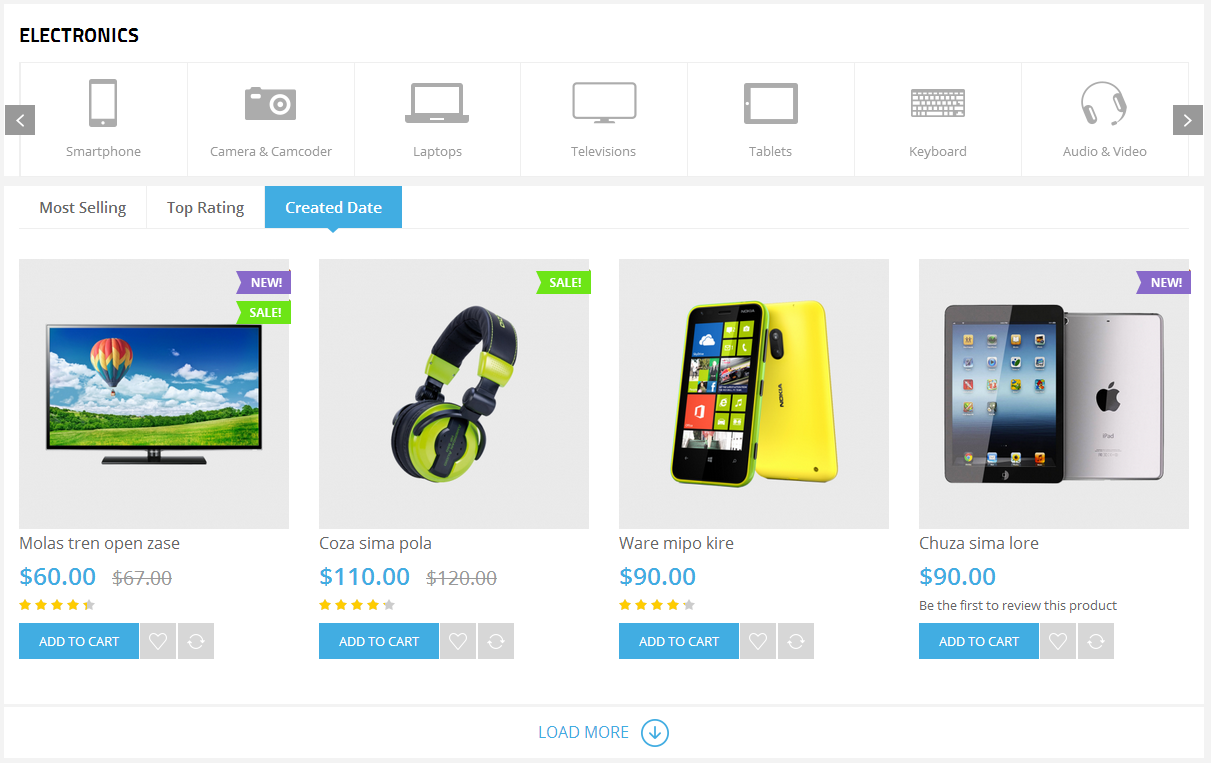
- Position: SM Supercategories
- Frontend
- Backend of SM Supercategories: Click Here
- To configure the quickview image as demo, please go to System >> Configuration >> find SM Quickview module (in the left hands) to configure. Click Here to view details.
- To config this position, please navigate to CMS >> Pages >> Home page, navigate to Design tab and paste code as below:
|
1
2
3
|
<reference name="supercat1">
<block type="supercategories/list" name="supercategories.list.default" template="sm/supercategories/default.phtml"></block>
</reference>
|
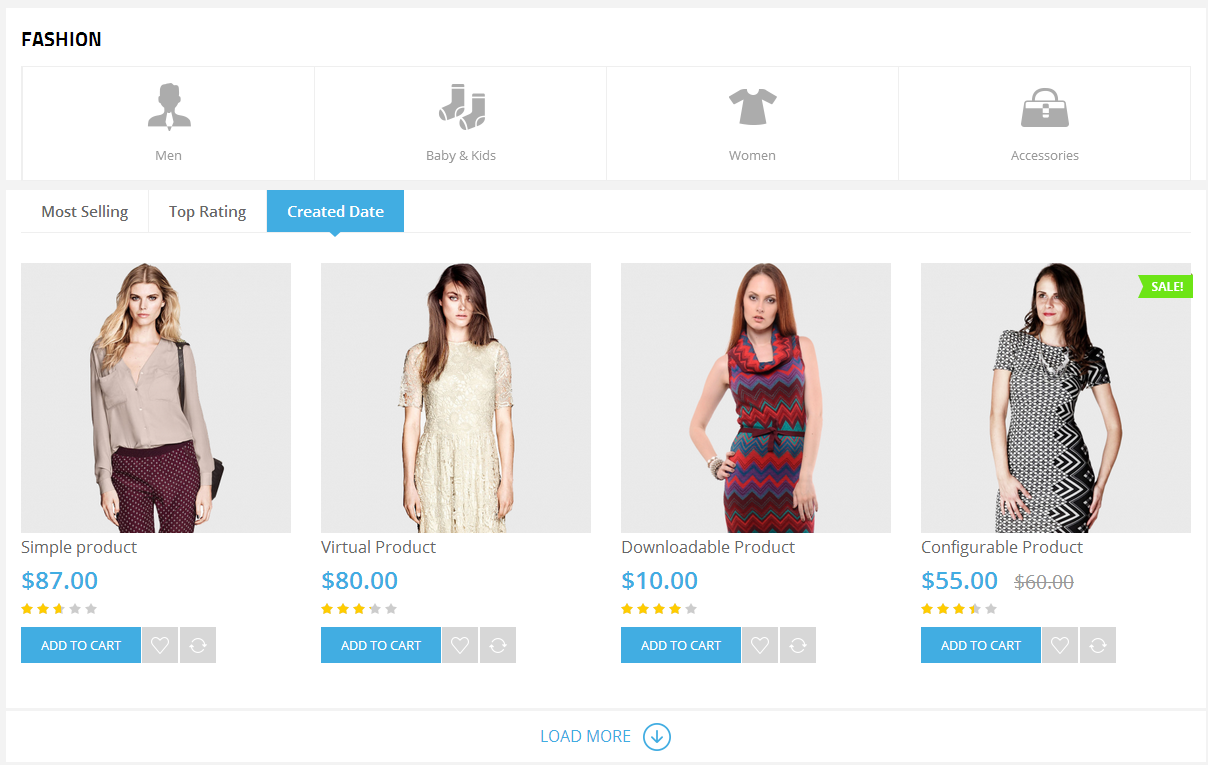
- Position: SM Supercategories
- Frontend
- To configure the quickview image as demo, please go to System >> Configuration >> find SM Quickview module (in the left hands) to configure. Click Here to view details.
- To config this position, please navigate to CMS >> Pages >> Home page, navigate to Design tab and paste code as below:
|
1
2
3
4
5
6
7
8
9
10
11
12
13
14
|
<reference name="supercat2">
<block type="supercategories/list" name="supercategories.list.default.2" template="sm/supercategories/default_2.phtml">
<action method="_setConfig">
<values>
<product_category>320</product_category>
<nb_column1>4</nb_column1>
<nb_column2>4</nb_column2>
<nb_column3>3</nb_column3>
<nb_column4>2</nb_column4>
<next_prev_display>0</next_prev_display>
</values>
</action>
</block>
</reference>
|
- Position: SM Image Slider
- Frontend

- Backend of SM Image Slider: Click Here
VIII. SM Basic Products
- Position: SM Basic Products
- Frontend
- Backend of SM Basic Products: Click Here
- To config this position, please navigate to CMS >> Pages >> Home page, navigate to Design tab and paste code as below:
|
1
2
3
4
5
6
7
8
9
10
11
12
13
14
15
16
17
18
19
20
21
22
23
24
|
<reference name="recomendproducts">
<block type="basicproducts/list" name="basicproducts.list.default" template="sm/basicproducts/recomend-home.phtml">
<action method="_setConfig">
<values>
<basicproducts_title_text>RECOMMENDED</basicproducts_title_text>
<nb_column1>1</nb_column1>
<nb_column2>1</nb_column2>
<nb_column3>1</nb_column3>
<nb_column4>1</nb_column4>
<product_source>catalog</product_source>
<product_category>3</product_category>
<product_order_by>best_sales</product_order_by>
<product_limitation>4</product_limitation>
<cat_title_display>0</cat_title_display>
<product_description_display>0</product_description_display>
<product_addcart_display>1</product_addcart_display>
<product_addwishlist_display>0</product_addwishlist_display>
<product_addcompare_display>0</product_addcompare_display>
<imgcfg_width>84</imgcfg_width>
<imgcfg_height>84</imgcfg_height>
</values>
</action>
</block>
</reference>
|
4.4 Configure blocks
How To Create Static Blocks
- Step 1: Login to your Admin Panel on the stage localhost:.
- Step 2: Navigate to CMS >> Static Blocks.
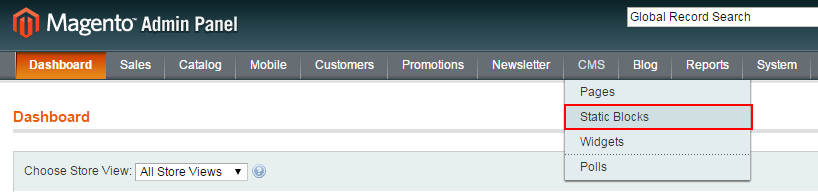
- Step 3: From the Static Blocks page, click the [+Add New Block] button to create a new Static Block. The New Block configuration page will open.
-
Step 4: From this page, define and configure the following fields::
- Block Title: Define a relevant title for this block of content.
- Identifier - Define a unique identifier. A recommended guideline is if your title is “My Special Title,” your identifier should be “my_special_title.” The identifier is used to manipulate data blocks using XML code. It is not visible on your storefront.
- Store View - Select the store view(s) this content block will be visible or All Store Views to include all.
NOTE: Store View field will be visible only if you have set multiple store views.
TIP: To select multiple store views, use Ctrl + Click when selecting from the list.
- Status - Select Enabled to make this static block visible on front-end.
- Content - Fill in with the content for this static block. You can use the WYSIWYG Editor (visible at the top of the textbox) to format text, create links and tables, or add images and media. To learn more about how to use the WYSIWYG Editor, see “Tips on using the WYSIWYG editor.”
Once you have filled in content and configured the static block, click the [Save Block] button to save your changes.
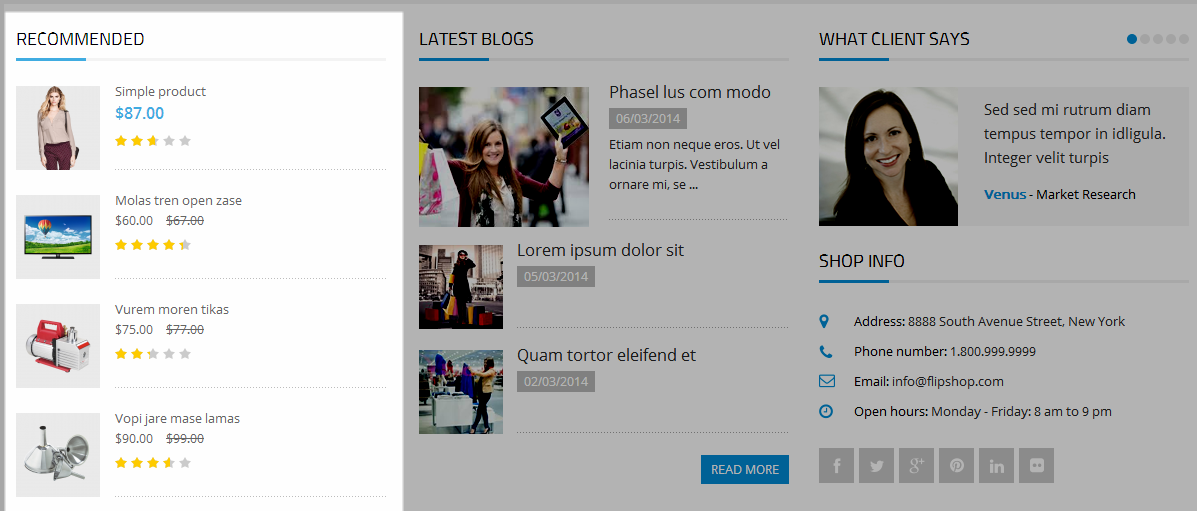
The SM G2shop front-page has static blocks in the Theme:
- G2shop - My Account Links
- G2shop - Go Quickly To
- G2shop - Service Top
- G2shop - Static Image Center
- G2shop - Happy Clients
- G2shop - Store Info Home
- G2shop - Service Bottom
- G2shop - Most Popular Footer
- G2shop - About Help Footer
- G2shop - Footer Payment
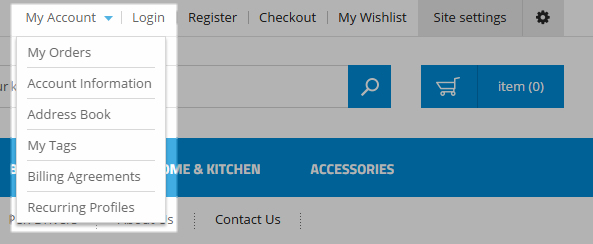
G2shop - My Account Links
Frontend
Link show Backend of G2shop - My Account Links.
- Content Code of G2shop - My Account Links:
|
1
2
3
4
5
6
7
8
|
<ul class="dropdown-link-account">
<li><a title="My Orders" href="{{store url="sales/order/history"}}">My Orders</a></li>
<li><a title="Account Information" href="{{store url="customer/account/edit"}}">Account Information</a></li>
<li><a title="Address Book" href="{{store url="customer/address"}}">Address Book</a></li>
<li><a title="My Tags" href="{{store url="tag/customer"}}">My Tags</a></li>
<li><a title="Billing Agreements" href="{{store url="sales/billing_agreement"}}">Billing Agreements</a></li>
<li><a title="Recurring Profiles" href="{{store url="sales/recurring_profile"}}">Recurring Profiles</a></li>
</ul>
|
G2shop - Go Quickly To
Frontend

Link show Backend of G2shop - Go Quickly To.
- Content Code of G2shop - Go Quickly To:
|
1
2
3
4
5
6
7
8
9
10
11
|
<ul class="list-item-quick">
<li class="ql-item"><span>Go quickly to</span></li>
<li><a title="Moto" href="#">Moto E</a></li>
<li><a title="Mobile" href="#">Mobile</a></li>
<li><a title="Tablet" href="#">Tablet</a></li>
<li><a title="Mobile Accessories" href="#">Mobile Accessories</a></li>
<li><a title="Laptops" href="#">Laptops</a></li>
<li><a title="Pen Drivers" href="#">Pen Drivers</a></li>
<li><a title="Watchs" href="{{store url='about-us'}}">About Us</a></li>
<li><a title="Toys" href="{{store url='contacts/index'}}">Contact Us</a></li>
</ul>
|
G2shop - Service Top
Frontend

Link show Backend of G2shop - Service Top.
- Content Code of G2shop - Service Top:
|
1
2
3
4
5
6
7
8
9
10
11
12
13
14
15
16
17
18
19
20
21
22
23
24
25
26
27
|
<div class="service-block service-top">
<div class="container">
<div class="row">
<div class="col-md-4">
<div class="i-con i-con-free"><a title="Free Shipping" href="#">Free Shipping</a></div>
<div class="service-info">
<h2><a title="Free Shipping" href="#">Free Shipping</a></h2>
<p>Lorem ipsum dolor sit amet, consectetur adipiscing elit.</p>
</div>
</div>
<div class="col-md-4">
<div class="i-con i-con-wishlist"><a title="Sale of 30% on Every Saturday" href="#">Sale of 30% on Every Saturday</a></div>
<div class="service-info">
<h2><a title="Sale of 30% on Every Saturday" href="#">Sale of 30% on Every Saturday</a></h2>
<p>Lorem ipsum dolor sit amet, consectetur adipiscing elit.</p>
</div>
</div>
<div class="col-md-4">
<div class="i-con i-con-box"><a title="Keep Smiling from $1000" href="#">Keep Smiling from $1000</a></div>
<div class="service-info">
<h2><a title="Keep Smiling from $1000" href="#">Keep Smiling from $1000</a></h2>
<p>Lorem ipsum dolor sit amet, consectetur adipiscing elit.</p>
</div>
</div>
</div>
</div>
</div>
|
G2shop - Static Image Center
Frontend

Link show Backend of G2shop - Static Image Center.
- Content Code of G2shop - Static Image Center:
|
1
2
3
4
5
6
7
8
9
10
11
12
|
<div class="static-image-center">
<div class="container">
<div class="row">
<div class="col-md-7">
<div class="img-block"><a title="Save Up To $499" href="#"><img src="{{media url="wysiwyg/img-center-1.png"}}" alt="Save Up To $499" /></a></div>
</div>
<div class="col-md-5">
<div class="img-block"><a title="Canon Camera" href="#"><img src="{{media url="wysiwyg/img-center-2.png"}}" alt="Canon Camera" /></a></div>
</div>
</div>
</div>
</div>
|
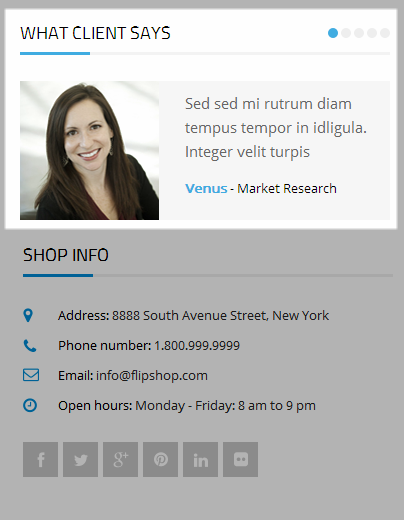
G2shop - Happy Clients
Frontend
Link show Backend of G2shop - Happy Clients
- Content Code of G2shop - Happy Clients
|
1
2
3
4
5
6
7
8
9
10
11
12
13
14
15
16
17
18
19
20
21
22
23
24
25
26
27
28
29
30
31
32
33
34
35
36
37
38
39
40
41
42
43
44
45
46
47
48
49
50
51
52
53
54
55
56
57
|
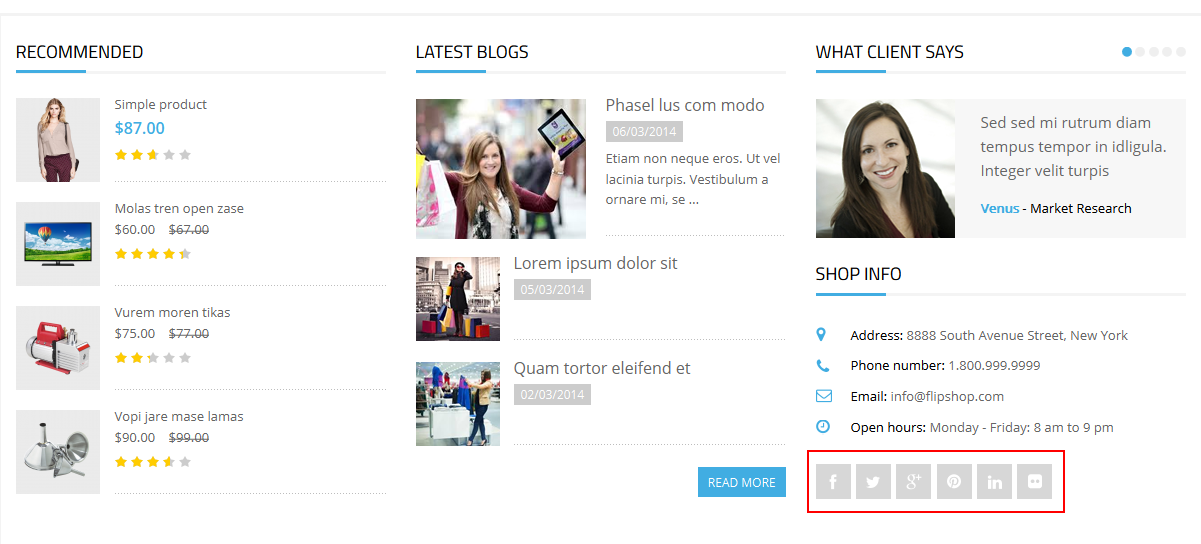
<div class="three-title-home">
<h2>What Client Says</h2>
</div>
<div id="what-client-say" class="client-say-wrapper carousel slide" data-ride="carousel"><ol class="carousel-indicators carousel-dotted">
<li class="active" data-target="#what-client-say" data-slide-to="0"></li>
<li data-target="#what-client-say" data-slide-to="1"></li>
<li data-target="#what-client-say" data-slide-to="2"></li>
<li data-target="#what-client-say" data-slide-to="3"></li>
<li data-target="#what-client-say" data-slide-to="4"></li>
</ol>
<div class="carousel-inner wrapper-client-say">
<div class="item active">
<div class="client-image"><a title="Venus - Market Research" href="#"><img src="{{media url="wysiwyg/client-1.png"}}" alt="Venus - Market Research" /></a></div>
<div class="client-info">
<div class="des-client">Sed sed mi rutrum diam tempus tempor in idligula. Integer velit turpis</div>
<div class="client-bottom"><a title="Venus - Market Research" href="#"><span class="color-client">Venus</span> - Market Research</a></div>
</div>
</div>
<div class="item">
<div class="client-image"><a title="Venus - Market Research" href="#"><img src="{{media url="wysiwyg/client-1.png"}}" alt="Venus - Market Research" /></a></div>
<div class="client-info">
<div class="des-client">Sed sed mi rutrum diam tempus tempor in idligula. Integer velit turpis</div>
<div class="client-bottom"><a title="Venus - Market Research" href="#"><span class="color-client">Venus</span> - Market Research</a></div>
</div>
</div>
</div>
</div>
<script type="text/javascript">// <![CDATA[
jQuery(document).ready(function($) {
$('.carousel').carousel({
interval: 0,
pause: '',
wrap: true
});
});
// ]]></script>
|
G2shop - Store Info Home
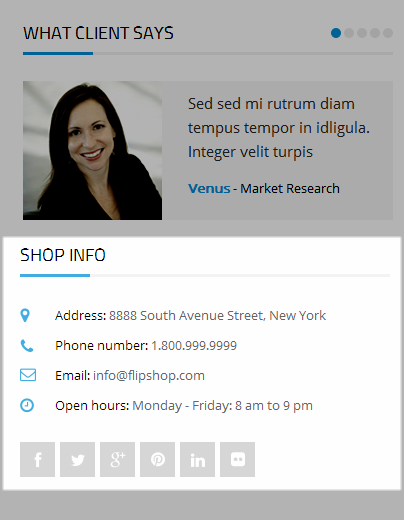
Link show Backend of G2shop - Store Info Home
- Content Code of G2shop - Store Info Home
G2shop - Service Bottom
Frontend

Link show Backend of G2shop - Service Bottom
- Content Code of G2shop - Service Bottom:
|
1
2
3
4
5
6
7
8
9
10
11
12
13
14
15
16
17
18
19
20
21
22
23
24
25
26
27
28
29
30
31
32
33
34
|
<div class="service-block service-bottom">
<div class="container">
<div class="row">
<div class="col-lg-3 col-md-6 col-sm-6 col-xs-12">
<div class="i-con i-con-free-bottom"><a title="Free Shipping" href="#">Free Shipping</a></div>
<div class="service-info">
<h2><a title="Free Shipping" href="#">Free Shipping</a></h2>
<p>On orders over $99</p>
</div>
</div>
<div class="col-lg-3 col-md-6 col-sm-6 col-xs-12">
<div class="i-con i-con-special"><a title="Special Gift Card" href="#">Special Gift Card</a></div>
<div class="service-info">
<h2><a title="Special Gift Card" href="#">Special Gift Card</a></h2>
<p>Give the perfect gift</p>
</div>
</div>
<div class="col-lg-3 col-md-6 col-sm-6 col-xs-12 bl-bottom">
<div class="i-con i-con-promotion"><a title="DAILY PROMOTION" href="#">DAILY PROMOTION</a></div>
<div class="service-info">
<h2><a title="DAILY PROMOTION" href="#">DAILY PROMOTION</a></h2>
<p>Praesent sollicitudin tincid</p>
</div>
</div>
<div class="col-lg-3 col-md-6 col-sm-6 col-xs-12 bl-bottom">
<div class="i-con i-con-support"><a title="support 24/07" href="#">support 24/07</a></div>
<div class="service-info">
<h2><a title="support 24/07" href="#">support 24/07</a></h2>
<p>Phone: 043 8471535</p>
</div>
</div>
</div>
</div>
</div>
|
G2shop - Most Popular Footer
Frontend
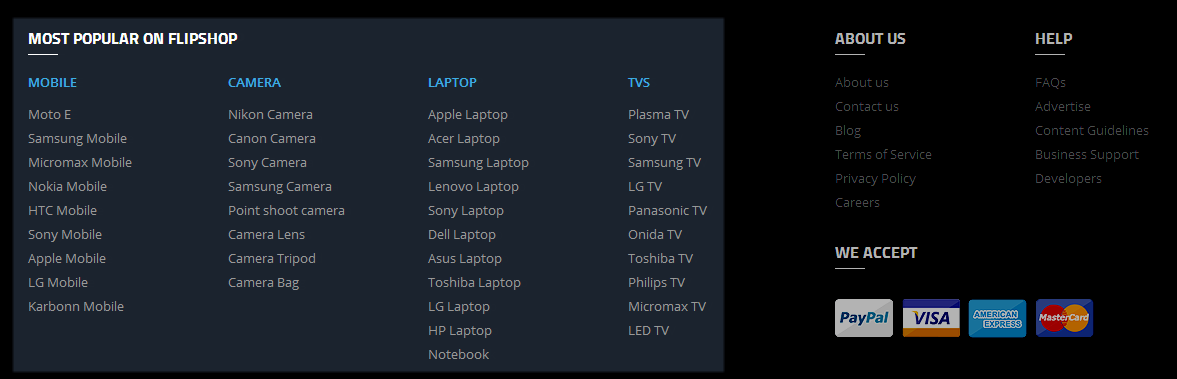
Link show Backend of G2shop - Most Popular Footer
- Content Code of G2shop - Most Popular Footer:
|
1
2
3
4
5
6
7
8
9
10
11
12
13
14
15
16
17
18
19
20
21
22
23
24
25
26
27
28
29
30
31
32
33
34
35
36
37
38
39
40
41
42
43
44
45
46
47
48
49
50
51
52
53
54
55
56
57
58
59
60
61
62
63
64
65
66
67
|
<div class="col-md-8 most-popular">
<div class="title-footer">
<h2>Most Popular on FLIPSHOP</h2>
<div class="content-footer">
<div class="row">
<div class="col-md-3 col-sm-6">
<h3>Mobile</h3>
<ul class="list-links">
<li><a title="Moto E" href="#">Moto E</a></li>
<li><a title="Samsung Mobile" href="#">Samsung Mobile</a></li>
<li><a title="Micromax Mobile" href="#">Micromax Mobile</a></li>
<li><a title="Nokia Mobile" href="#">Nokia Mobile</a></li>
<li><a title="HTC Mobile" href="#">HTC Mobile</a></li>
<li><a title="Sony Mobile" href="#">Sony Mobile</a></li>
<li><a title="Apple Mobile" href="#">Apple Mobile</a></li>
<li><a title="LG Mobile" href="#">LG Mobile</a></li>
<li><a title="Karbonn Mobile" href="#">Karbonn Mobile</a></li>
</ul>
</div>
<div class="col-md-3 col-sm-6">
<h3>Camera</h3>
<ul class="list-links">
<li><a title="Nikon Camera" href="#">Nikon Camera</a></li>
<li><a title="Canon Camera" href="#">Canon Camera</a></li>
<li><a title="Sony Camera" href="#">Sony Camera</a></li>
<li><a title="Samsung Camera" href="#">Samsung Camera</a></li>
<li><a title="Point shoot camera" href="#">Point shoot camera</a></li>
<li><a title="Camera Lens" href="#">Camera Lens</a></li>
<li><a title="Camera Tripod" href="#">Camera Tripod</a></li>
<li><a title="Camera Bag" href="#">Camera Bag</a></li>
</ul>
</div>
<div class="col-md-3 col-sm-6 clear-left">
<h3>Laptop</h3>
<ul class="list-links">
<li><a title="Apple Laptop" href="#">Apple Laptop</a></li>
<li><a title="Acer Laptop" href="#">Acer Laptop</a></li>
<li><a title="Samsung Laptop" href="#">Samsung Laptop</a></li>
<li><a title="Lenovo Laptop" href="#">Lenovo Laptop</a></li>
<li><a title="Sony Laptop" href="#">Sony Laptop</a></li>
<li><a title="Dell Laptop" href="#">Dell Laptop</a></li>
<li><a title="Asus Laptop" href="#">Asus Laptop</a></li>
<li><a title="Toshiba Laptop" href="#">Toshiba Laptop</a></li>
<li><a title="LG Laptop" href="#">LG Laptop</a></li>
<li><a title="HP Laptop" href="#">HP Laptop</a></li>
<li><a title="Notebook" href="#">Notebook</a></li>
</ul>
</div>
<div class="col-md-3 col-sm-6">
<h3>TVS</h3>
<ul class="list-links">
<li><a title="Plasma TV" href="#">Plasma TV</a></li>
<li><a title="Sony TV" href="#">Sony TV</a></li>
<li><a title="Samsung TV" href="#">Samsung TV</a></li>
<li><a title="LG TV" href="#">LG TV</a></li>
<li><a title="Panasonic TV" href="#">Panasonic TV</a></li>
<li><a title="Onida TV" href="#">Onida TV</a></li>
<li><a title="Toshiba TV" href="#">Toshiba TV</a></li>
<li><a title="Philips TV" href="#">Philips TV</a></li>
<li><a title="Micromax TV" href="#">Micromax TV</a></li>
<li><a title="LED TV" href="#">LED TV</a></li>
</ul>
</div>
</div>
</div>
</div>
</div>
|
G2shop - About Help Footer
Frontend
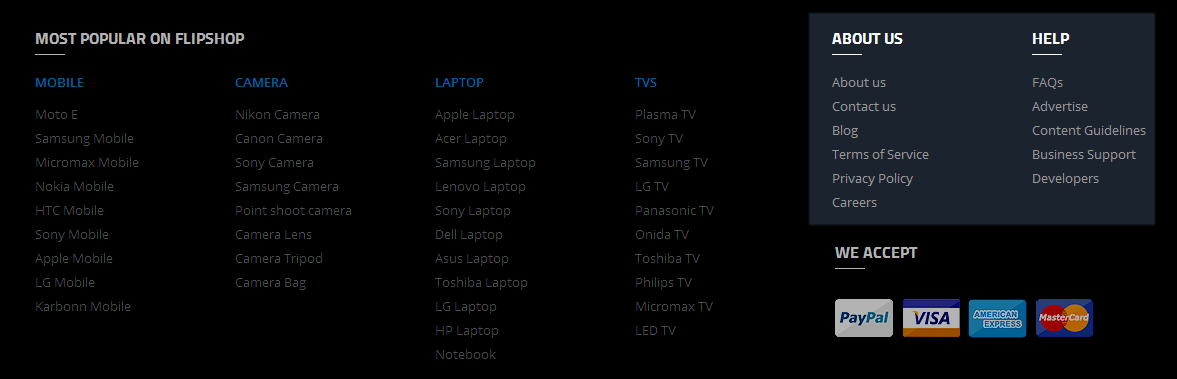
Link show Backend of G2shop - About Help Footer.
- Content Code of G2shop - About Help Footer :
|
1
2
3
4
5
6
7
8
9
10
11
12
13
14
15
16
17
18
19
20
21
22
23
24
25
26
27
28
29
|
<div class="col-md-6 col-sm-6">
<div class="title-footer">
<h2>About us</h2>
</div>
<div class="content-footer">
<ul class="list-links">
<li><a title="About us" href="{{store url='about-us'}}">About us</a></li>
<li><a title="Contact us" href="{{store url='contacts/index'}}">Contact us</a></li>
<li><a title="Blog" href="{{store url='blog'}}">Blog</a></li>
<li><a title="Terms of Service" href="#">Terms of Service</a></li>
<li><a title="Privacy Policy" href="#">Privacy Policy</a></li>
<li><a title="Careers" href="#">Careers</a></li>
</ul>
</div>
</div>
<div class="col-md-6 col-sm-6">
<div class="title-footer">
<h2>Help</h2>
</div>
<div class="content-footer">
<ul class="list-links">
<li><a title="FAQ" href="#">FAQs</a></li>
<li><a title="Advertise" href="#">Advertise</a></li>
<li><a title="Content Guidelines" href="#">Content Guidelines</a></li>
<li><a title="Business Support" href="#">Business Support</a></li>
<li><a title="Developers" href="#">Developers</a></li>
</ul>
</div>
</div>
|
G2shop - Footer Payment
Frontend

Link show Backend of G2shop - Footer Payment.
- Content Code of G2shop - Footer Payment :
|
1
2
3
4
5
6
7
8
9
10
11
12
13
|
<div class="col-md-12 payment-wrap">
<div class="title-footer">
<h2>We Accept</h2>
</div>
<div class="content-footer">
<ul class="list-payment">
<li title="Payment 1"><img src="{{media url="wysiwyg/payment-1.png"}}" alt="Payment 1" /></li>
<li title="Payment 2"><img src="{{media url="wysiwyg/payment-2.png"}}" alt="Payment 2" /></li>
<li title="Payment 3"><img src="{{media url="wysiwyg/payment-3.png"}}" alt="Payment 3" /></li>
<li title="Payment 4"><img src="{{media url="wysiwyg/payment-4.png"}}" alt="Payment 4" /></li>
</ul>
</div>
</div>
|
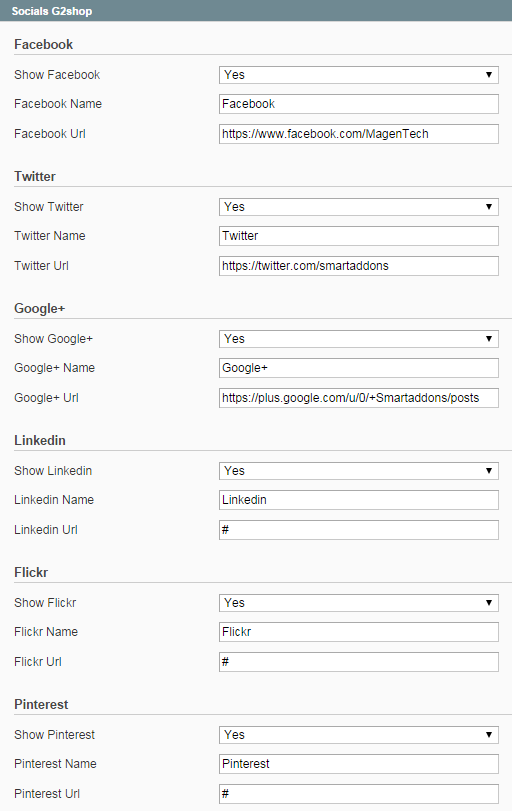
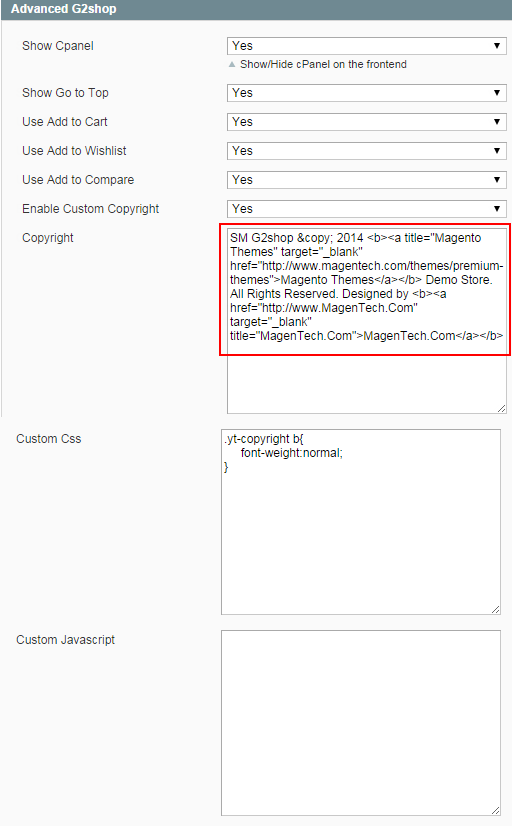
4.5 How To Enable/Disable Social setting & Custom Copyright in admin
Frontend: Socials
Frontend: Copyright

Backend
In the Administrator page, Please navigate to System >> Configuration >> find SM G2shop to configure the “Social setting” & “Custom Copyright” parameter as image below:
4.6 How To Edit Content of Subscription
Frontend
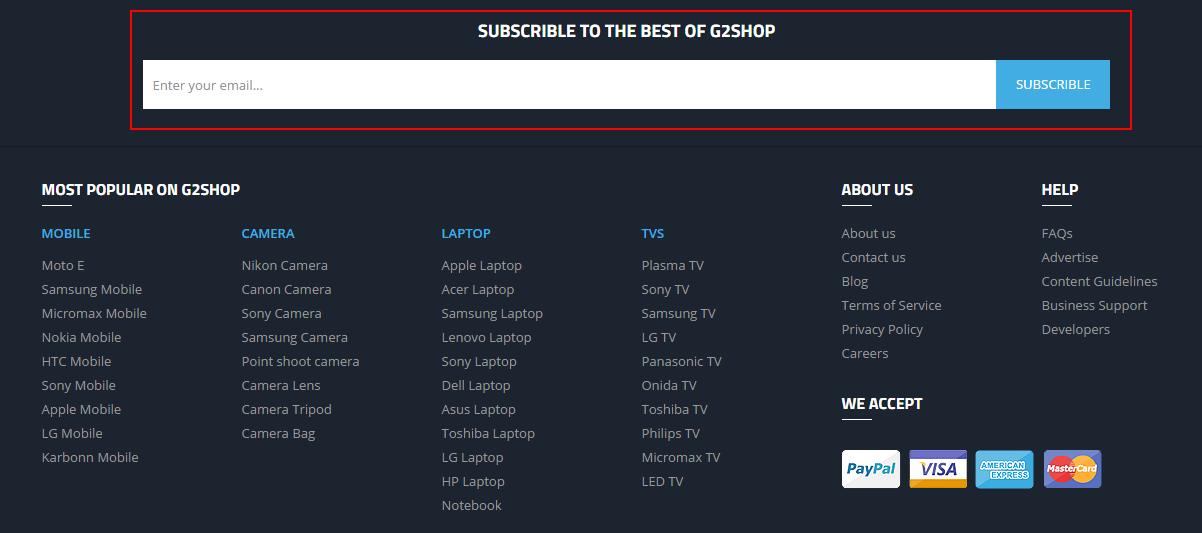
Note: To edit content of “Subscribe“, please go to your installation directory url : app\design\frontend\default\sm_G2shop\template\newsletter and edit footer-subscribe.phtml file.
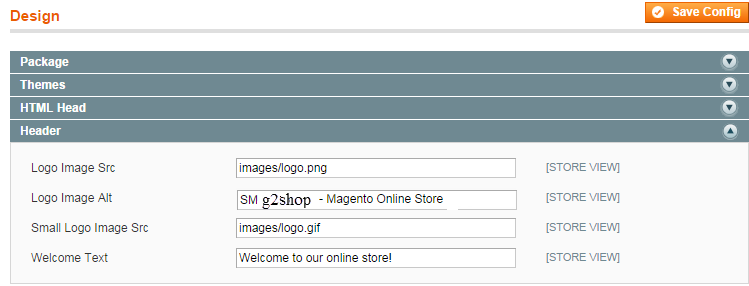
4.7 How To Edit Logo & Welcome Text
Frontend Appearance:
![]()
Backend Settings:
In your Administrator Panel, please go to System >> Configuration >> Click “Design” (in the left hands column) >> find Header tab >> edit “Logo Image Src” field and “Welcome Text” fields as you want.
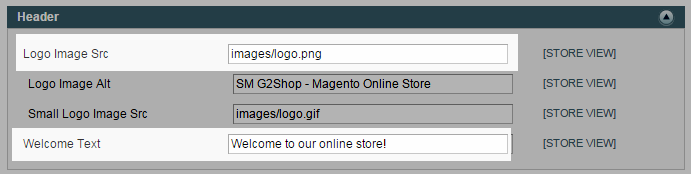
Note 1: To edit Logo image of “G2SHOP“, please go to your installation directory: \skin\frontend\default\sm_g2shop\images to edit logo image as you want.
Note 2: Please edit Text in “Welcome Text” field as you want.
4.8 How To Edit Login, Register, Checkout, MyWishlist
Frontend Appearance:

Note: Please go to your installation directory url : “\app\design\frontend\default\sm_g2shop\template\page\html” and click ”header.phtml” file to edit.
4.9 How To Set Default Language and Currency in Magento
Please go Here to readmore How To Set Default Language and Currency in Magento.
5SUPPORT - Back to top
Thank you so much for purchasing this theme. If you have any questions that are beyond the scope of this help file, please send us via: Support Tickets System
Thanks so much!