This document is for SM Market Magento Version 2.0.x
Firstly, a huge thanks for purchasing this theme, your support is truly appreciated!
This document covers the installation and use of this theme, reveals some answers to common problems and issues. We encourage you to read throughout this document if you are experiencing any difficulties. If you have any questions that are beyond the scope of document, please feel free to contact us via our Support Tickets System.
Note: This theme has versions for Magento 1.9.x, Magento 2.0.x, and Magento 2.1.1.
| Version | Userguide |
|---|---|
| SM Market Magento Version 1.9.x | Please click Here to view |
| SM Market Magento Version 2.0.x | Please click Here to view |
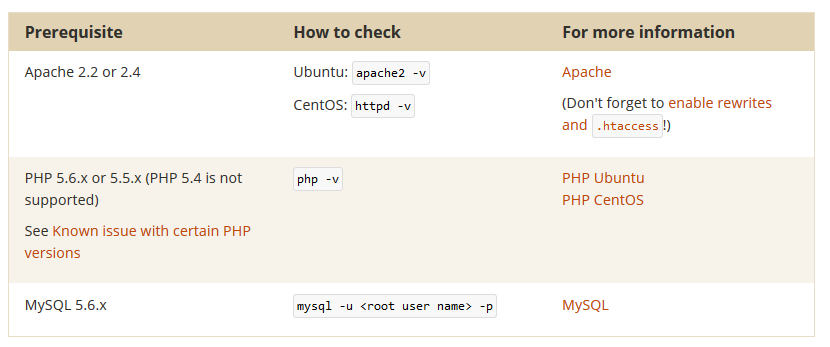
1 SYSTEM REQUIREMENT
At the basic level, this theme will require the following conditions:
- Compatible with Magento Community Edition 2.0.4
- Composer (latest stable version)
- Apache 2.2 or late
- PHP: 5.5.x,5.6.x and Memory_limit no less than 256Mb)
- In the future if the conditions change, please check the Magento 2 documentation
2INSTALLATION
There are two ways to install a Magento Theme:
- Quickstart Installation: Suitable if you have your first installation and want to get a whole new fresh site as our Demo.
- Manual Installation (including Theme Installation): Suitable if your store is full with content that you don’t want to overwrite.
2.1 Quickstart Installation:
Magentech provides SM Quickstart package for each theme which aims to ease the installation for users. Please note that with Quickstart, all your existing data will be overwritten. Thus, if you plan to start your site from the beginning, it will help you save much time of installing and configuring.
Note: Follow Magento 2.0 Installation Guide to install the Composer before doing this Quickstart installation.
Please follow steps below:
- Step 1: Download the quickstart package named as sm_market_quickstart_pl_m2.0.7_v2.1.0.zip
- Step 2: Extract and Upload the whole Quickstart package to your server. In Quickstart folder you will see the extracted folder that include all sample data
- Step 3: Create a Database for your Magento site
- Step 4:Import database sample_data.sql under the folder sm_market_quickstart_pl_m2.0.7_v2.1.0\data_quickstart
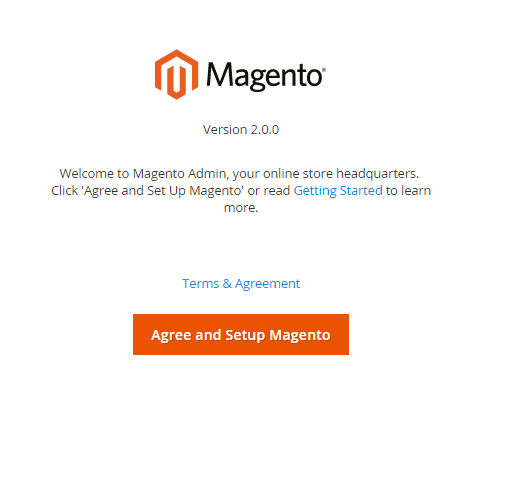
- Step 5: Run installation process by opening browser and navigate to your URL (where the Quickstart uploaded) to load default Magento installer and follow each step of the Installer so that the installation process can be set.
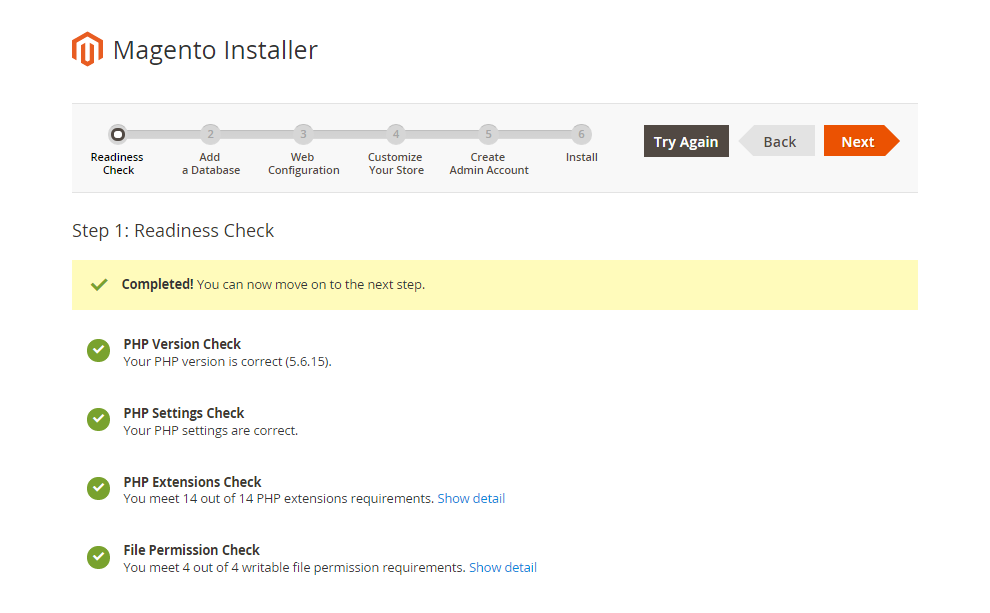
- Step 6: Choose Start Readiness Check. After Start Readiness Check is completed, select Next .
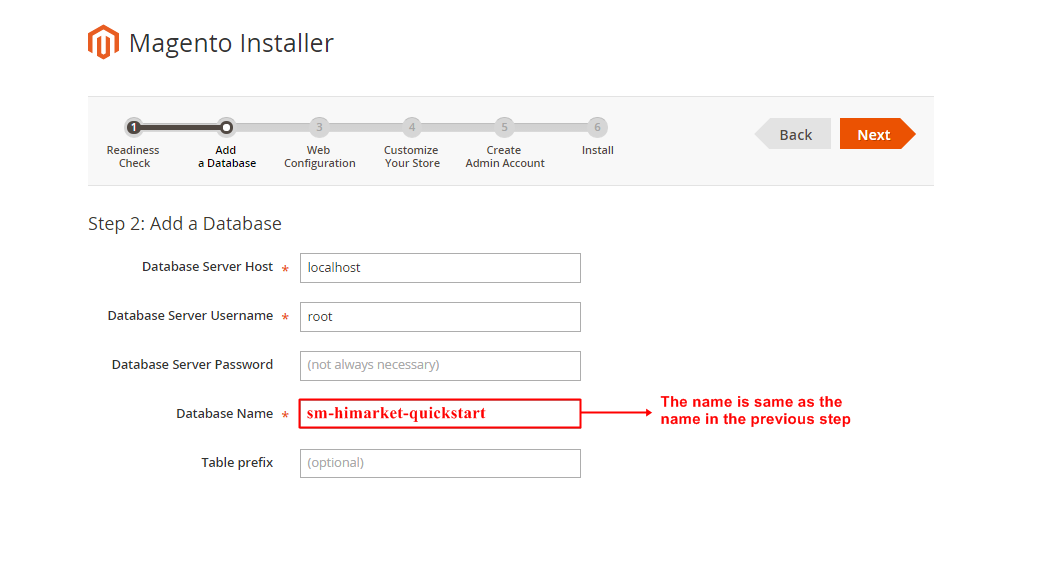
- Step 7: Enter server and database in step 2 and then click on Next.
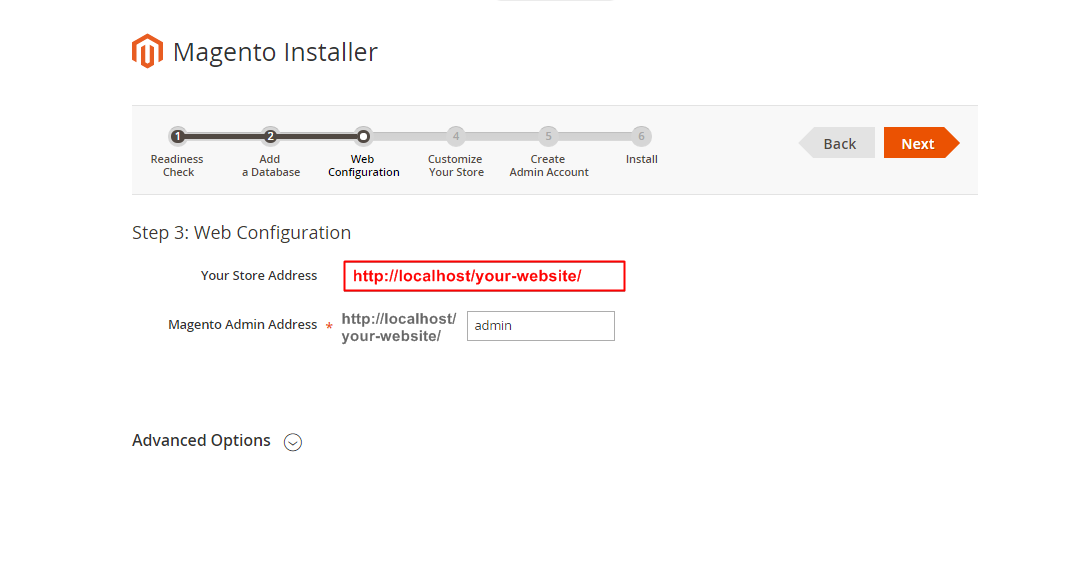
- Step 8: Put your website link and continue to click on Next.
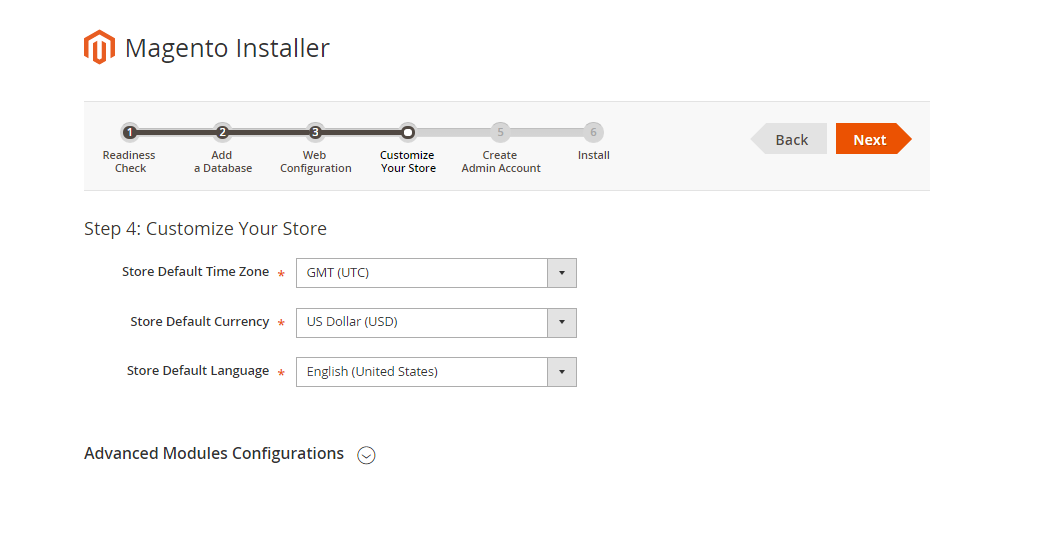
- Step 9: Customize your store: you can choose Time Zone, Currency and Languages.
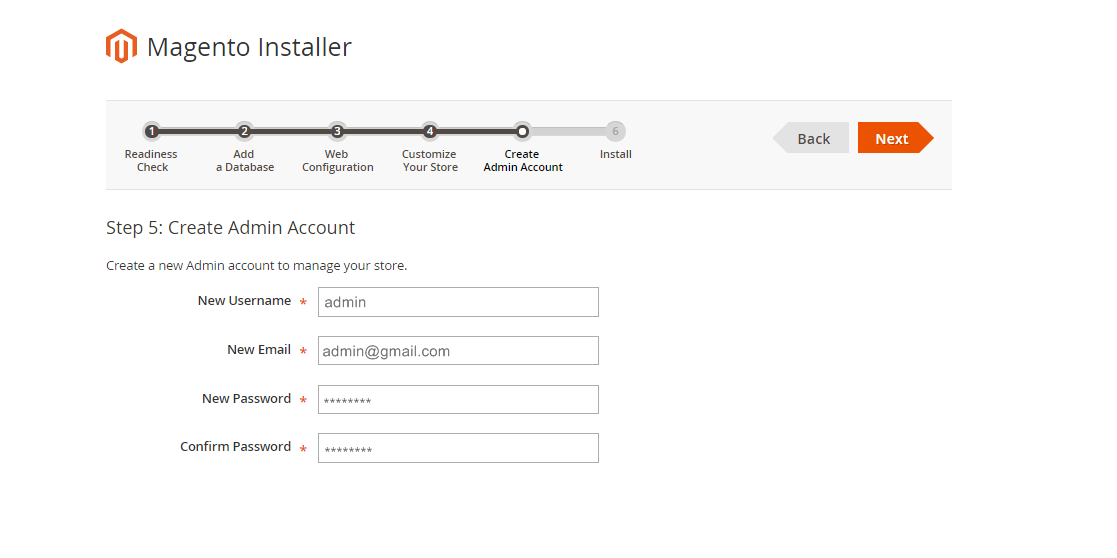
- Step 10: You need to Create Admin Account. Enter your information and move to the next step.
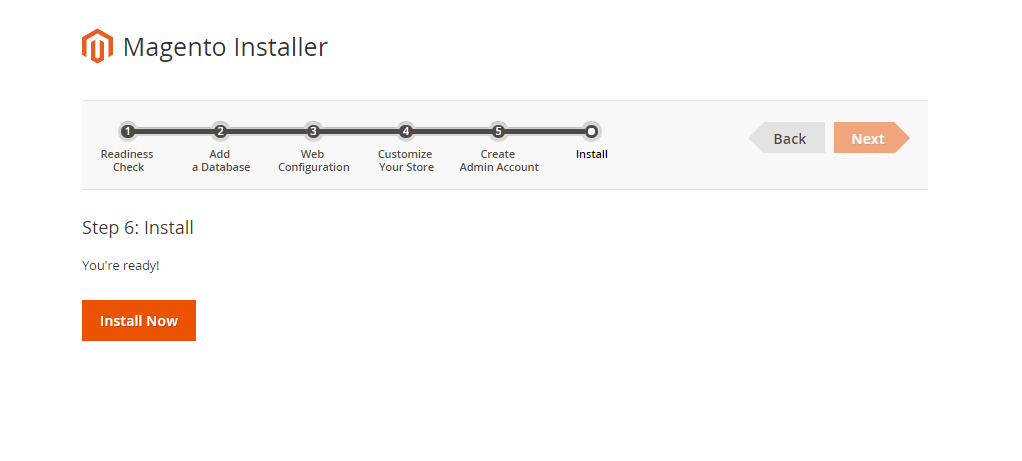
- Step 11: In this step, you should click on the button: Install Now.
- Step 12:
- 1. Now to verify Composer installation in above directory, type composer install.
- 2. In this step, we are setting up static content to deploy on our Magento store. To perform this, type php bin/magento setup:static-content:deploy.
-
3. Clear compiled code and the cache by typing php bin/magento setup:upgrade in CMD. Typically, you use magento this command line to update components and each component can require different compiled classes.
-
4. And finally, to Reindex Magento Static Blocks type php bin/magento indexer:reindex.
-
Step 1: Please unzip ‘sm_market_theme_m2.0.x_v2.1.0′ file and upload folders app; pub from the theme package to the root of your Magento site folder on your server.
Note: You could change the name of this folder. However, if you want your website run correctly, it need to have the same name as the database.
To verify Composer installation, Deploy static content, Clear compiled code and the cache, Reindex the Magento 2 blocks before configuring your site, please go Here to follow
-
Step 2: Log in to your Admin Panel (e.g. https://yourdomain.com/admin/)
Note: If you are using the Admin Panel when copying folders in step 1, you need to log out and log in back.
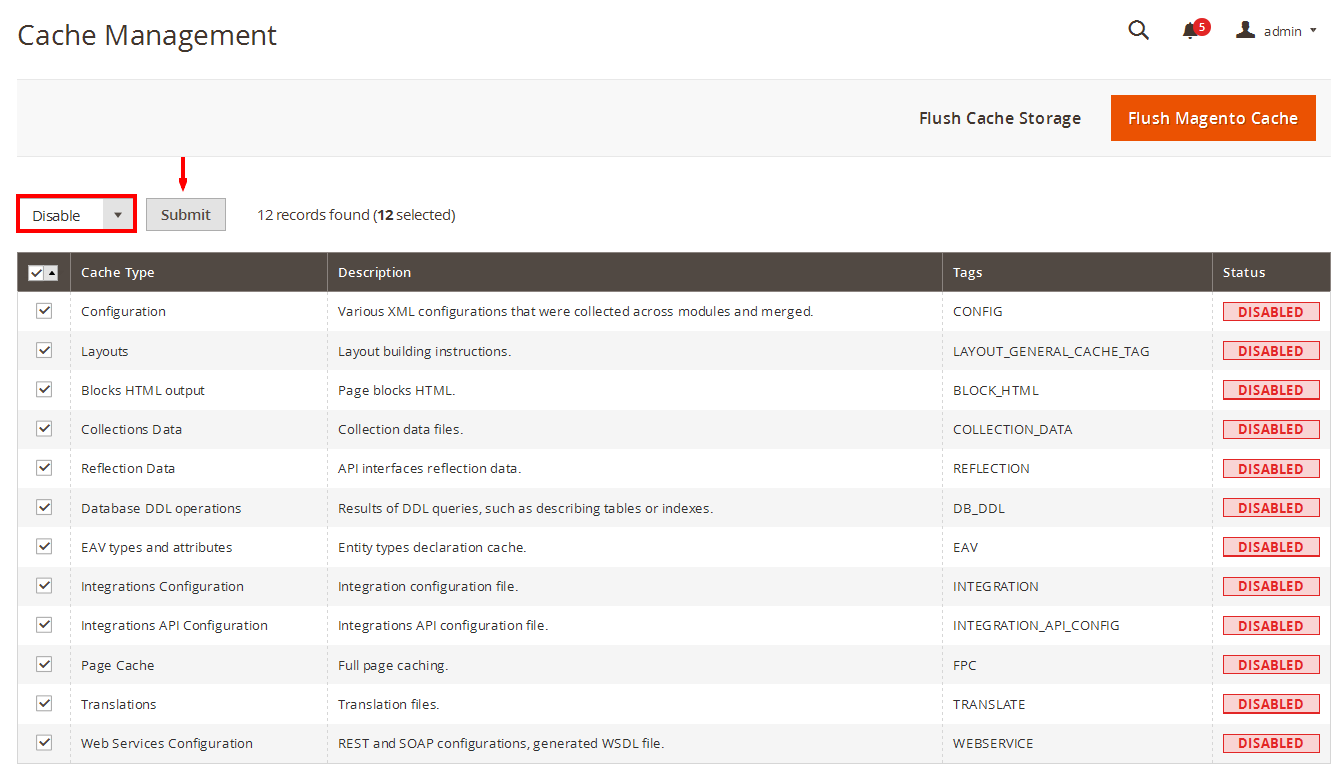
- Step 3: Disable Cache: Go to >> Tools >> Cache Management, click ‘Sellect All’ button, then choose ‘Disable’ and click ‘Submit’ button to complete the action.
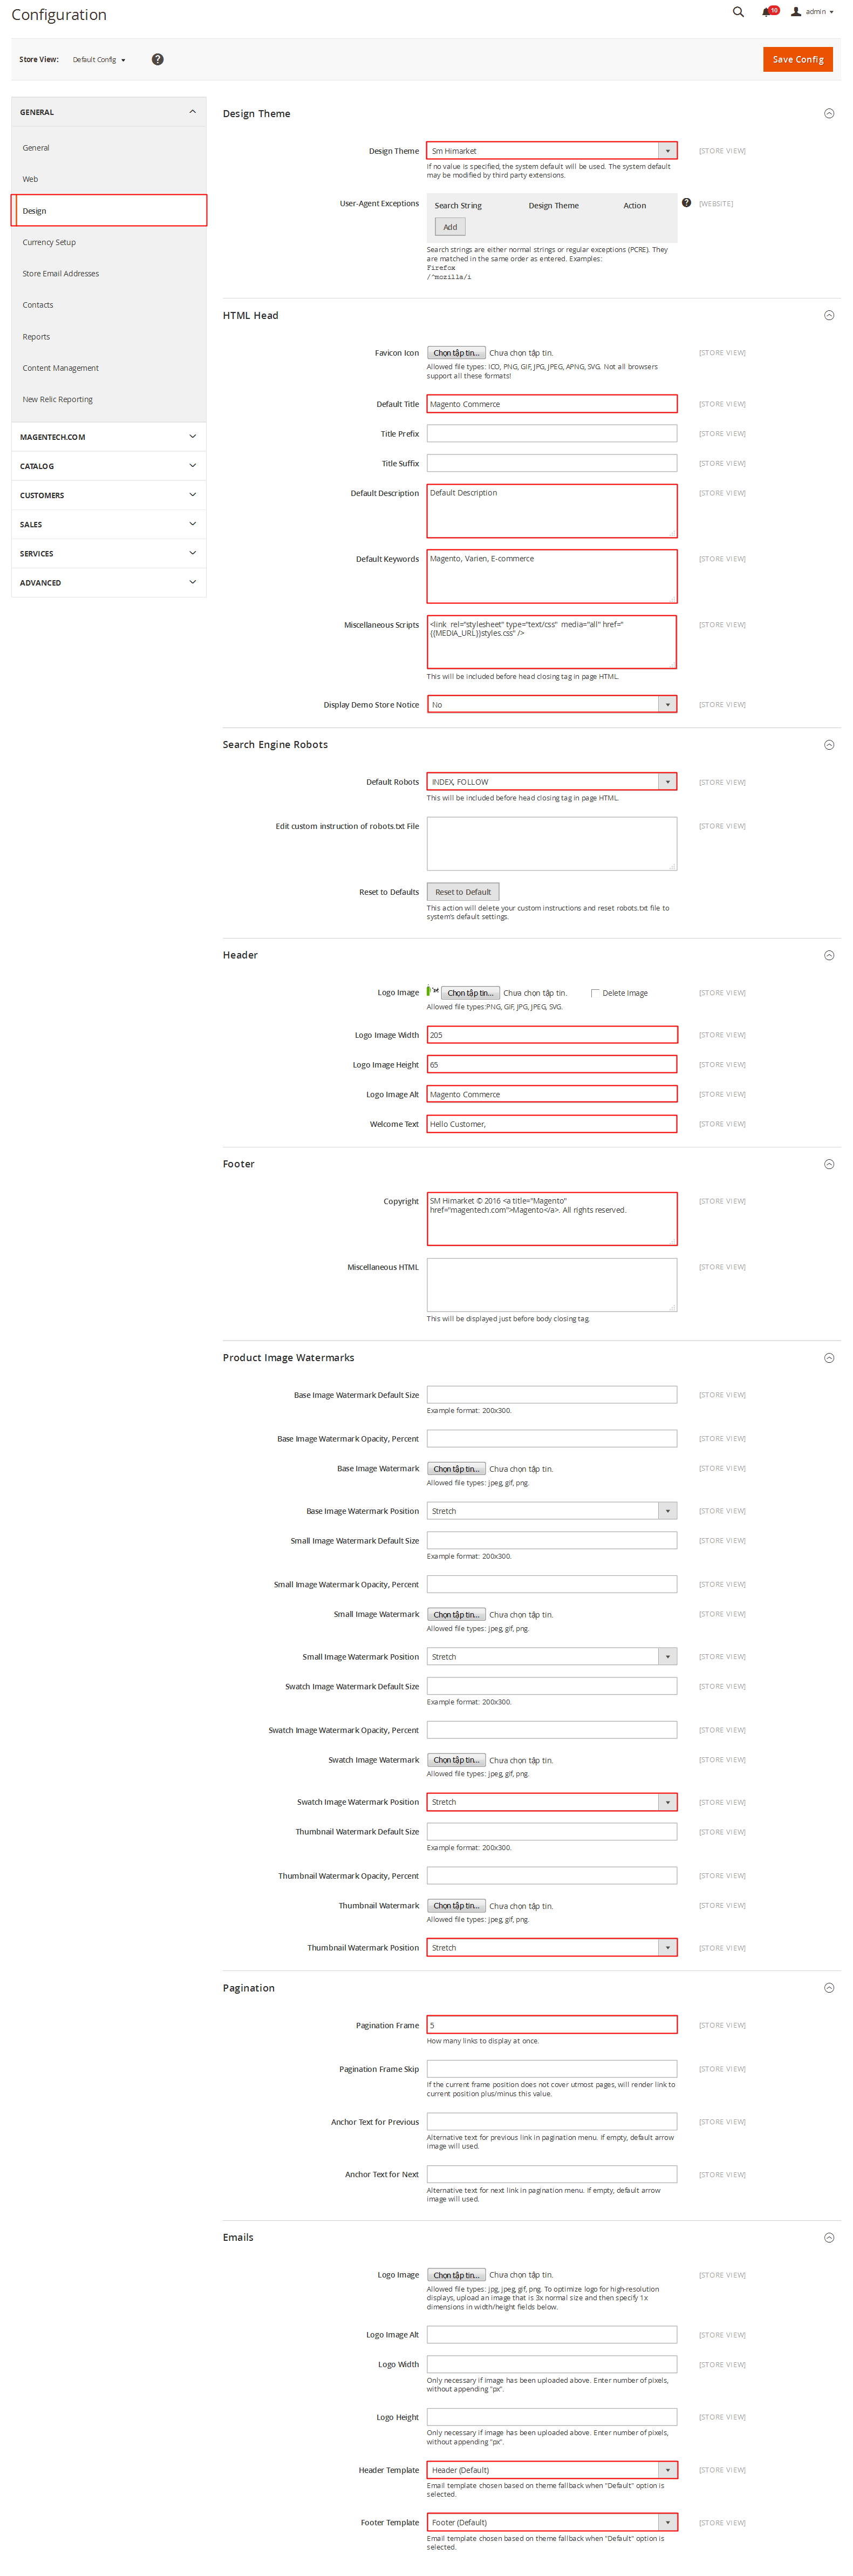
- Step 4: Navigate to Stores>> Settings>> Configuration >> Design. In Design tab, select Design Theme field with the Sm Market.
- Step 5: Click “Save Config” button to save your changes.
- Configure General Options with Color (of theme), Body Font, Elements Google Font, Menu for any store.
- Configure Theme Layout with Layout style
- Configure the Product Listing with Layout 1 Column, Layout 2 Columns, Layout 3 Columns
- Configure the Product Detail To zoom image of product, adjust Zoom Mode, Custom tab, and content, etc.
- Configure Socials : To connect with social networks such as Facebook, Twitter, Google Plus, Linkedin, Pinterest
- Configure Advanced : To Show Go to Top, Add to Cart, Add to Wishlist, Add to Compare,
-
Configure Developer: To Custom Css or Javascript
Note: You need to remember the database name to use in the next steps

Note:
After successful installation DO NOT run magento.
Now we are going to Set file system ownership and permissions. To perform all actions, you should use PuTTY - a free SSH and telnet client for Windows on your computer. When you have the command-line access, enter the following commands in the order shown:
Go Here to readmore about the action.
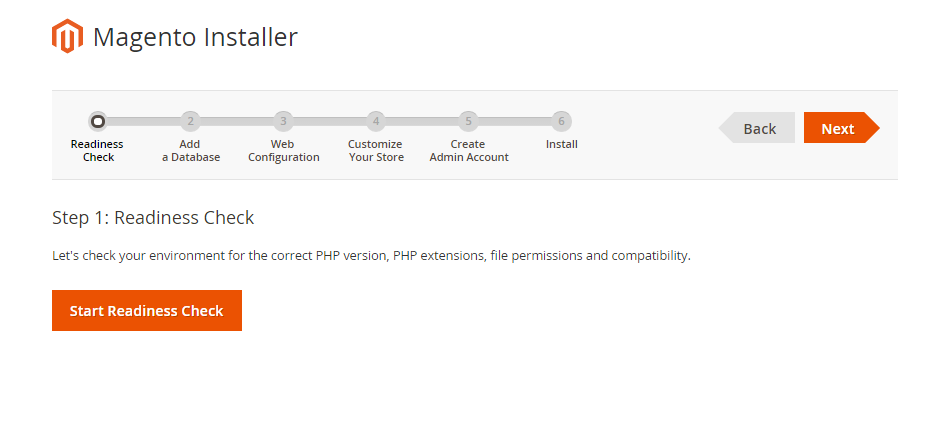
When you click on “Start Readiness Check”,the error could occur like the below image

You need to open your php.ini file and set always_populate_raw_post_data to -1.
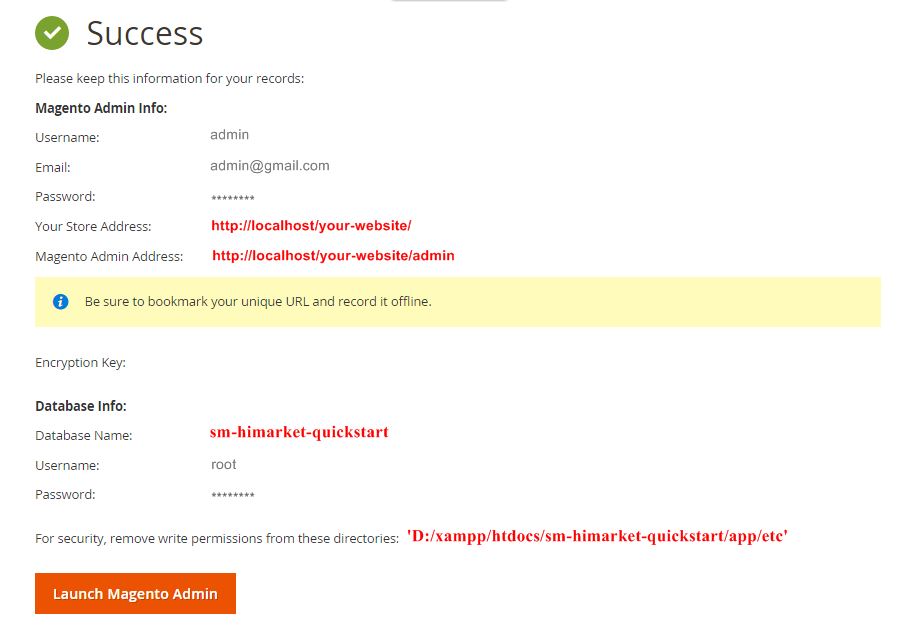
It will take some minutes to complete this installation process. If your window is the same as below, CONGRAT! You install this quickstart package successfully
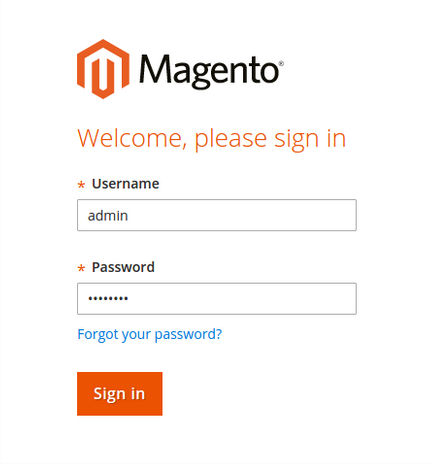
After clicking on the button, the Admin Login screen will be opened and you can use admin credentials to login on this screen. It will open Admin panel after successful authentication.
Now we are going to verify Composer installation, Deploy static content, Clear compiled code and the cache, Reindex the Magento 2 blocks. On Windows server environment, to perform all above actions, press WINDOWS KEY + R to open RUN dialog and type cmd to open Command Prompt.
Type cd PATH_TO_YOUR_MAGENTO2_FILES to enter in Magento 2 ROOT directory.
If you get any error in this step, please check your Composer installation.
If you get any error, check your PHP.EXE and PHP.INI Environment Variable
Note:
At this moment we should Set file system ownership and permissions again. To perform all actions, you should use PuTTY - a free SSH and telnet client for Windows on your computer. When you have the command-line access, enter the following commands in the order shown:
Go Here to readmore about the action.
2.2 Manual Installation
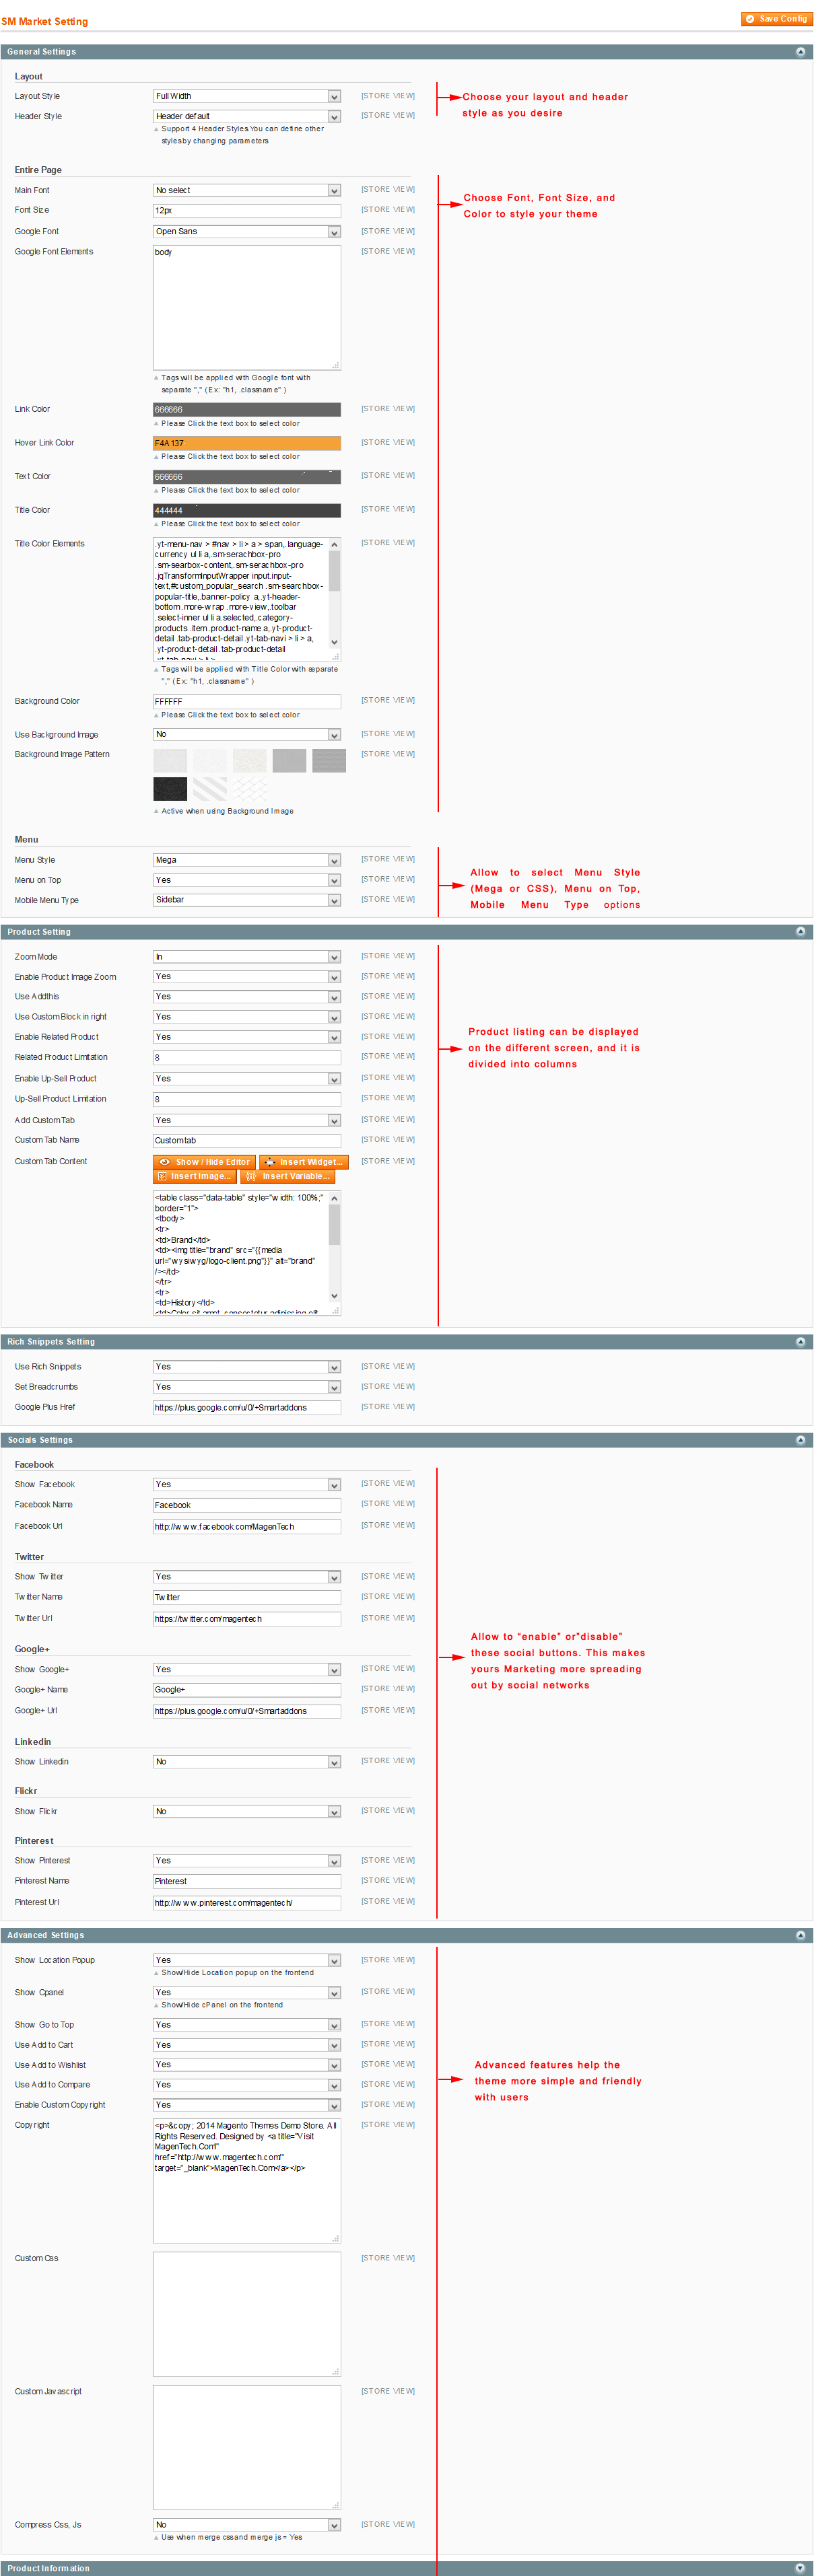
2.3 Theme Setting
In Magento admin panel, navigate to Stores>> Settings>> Configuration >> MAGENTECH >> SM Market and configure its settings as you want.

3.1 Page Configuration
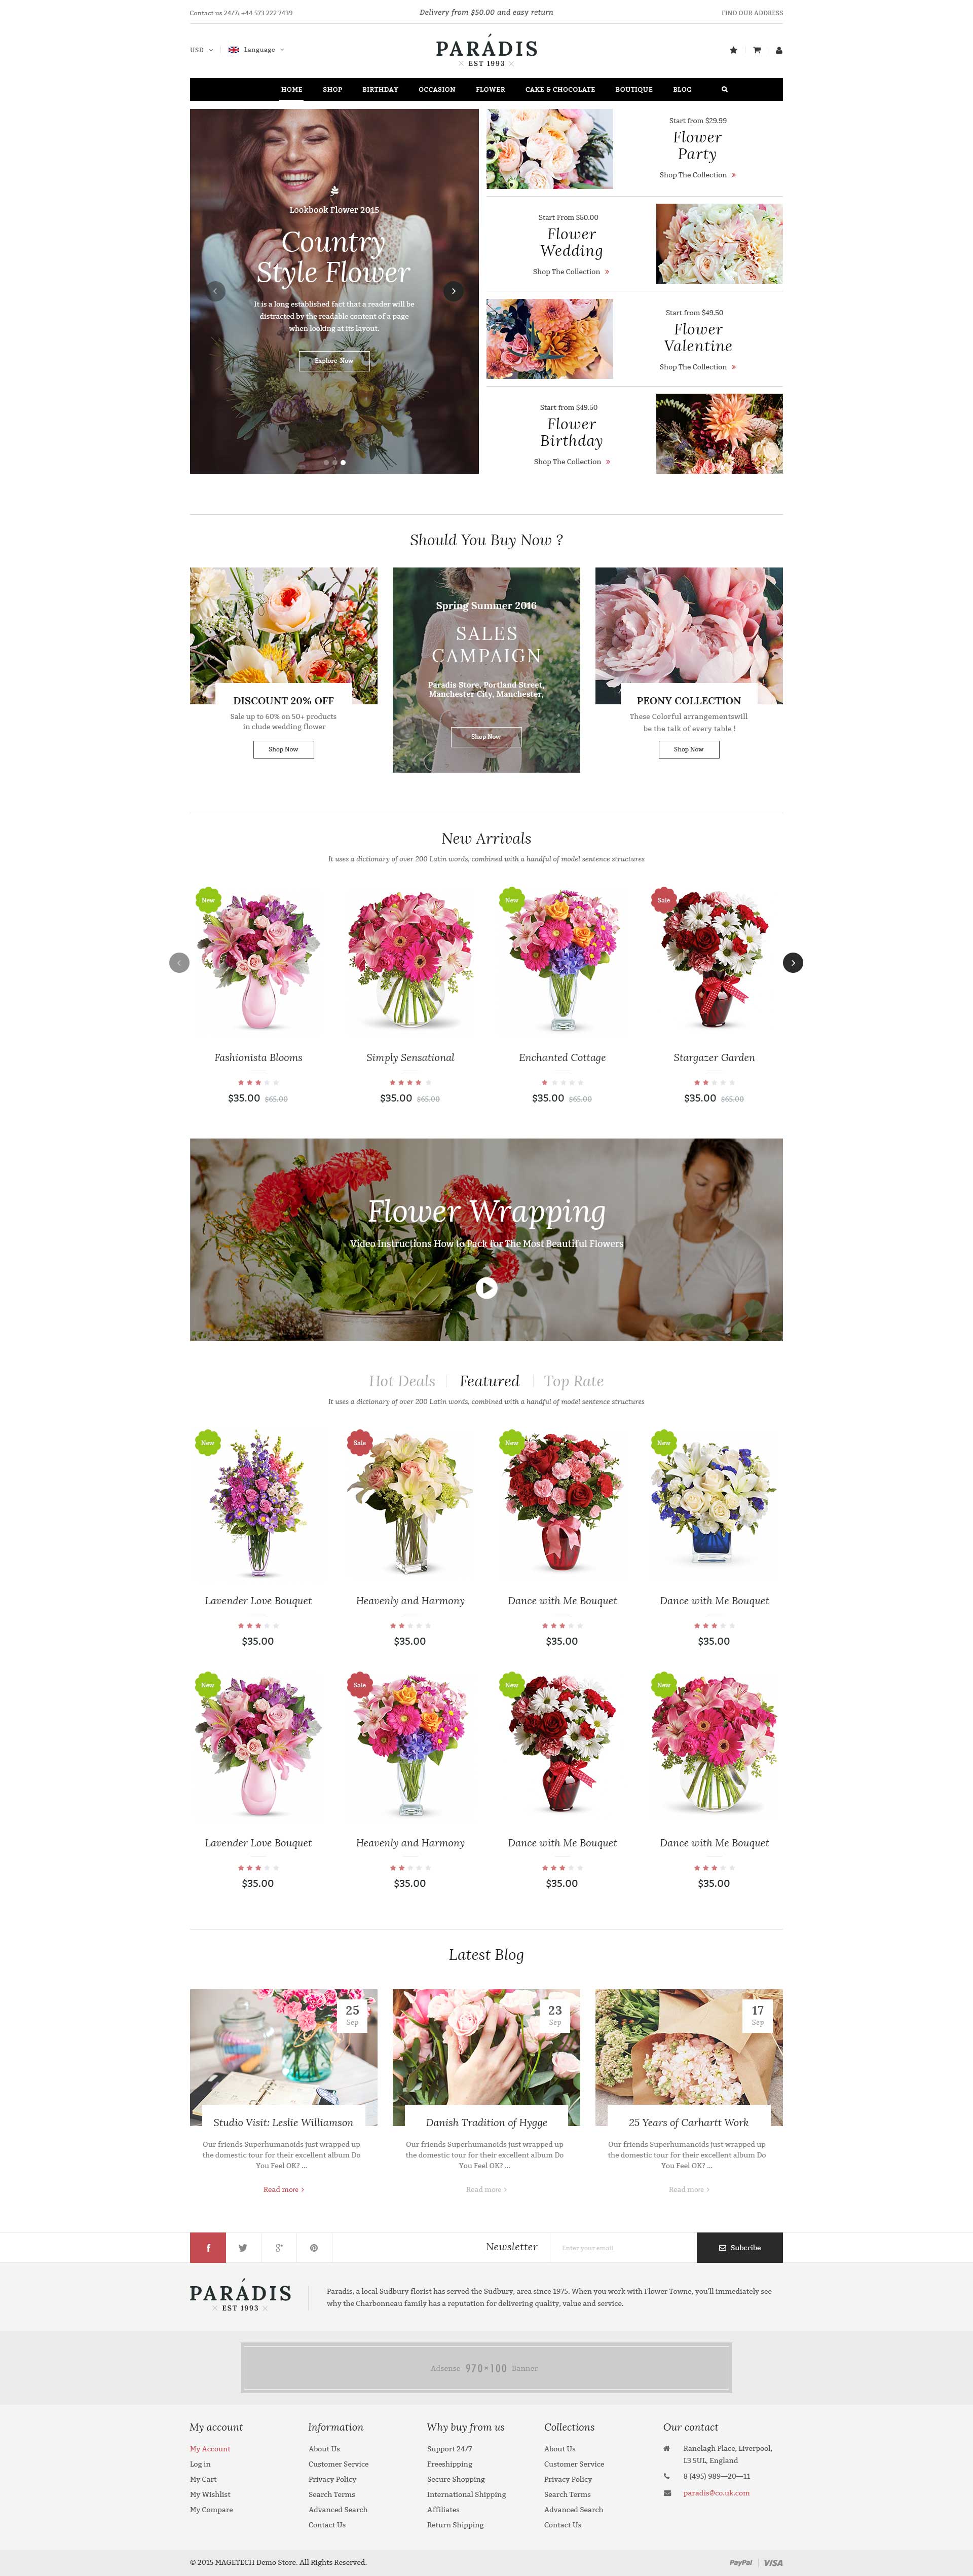
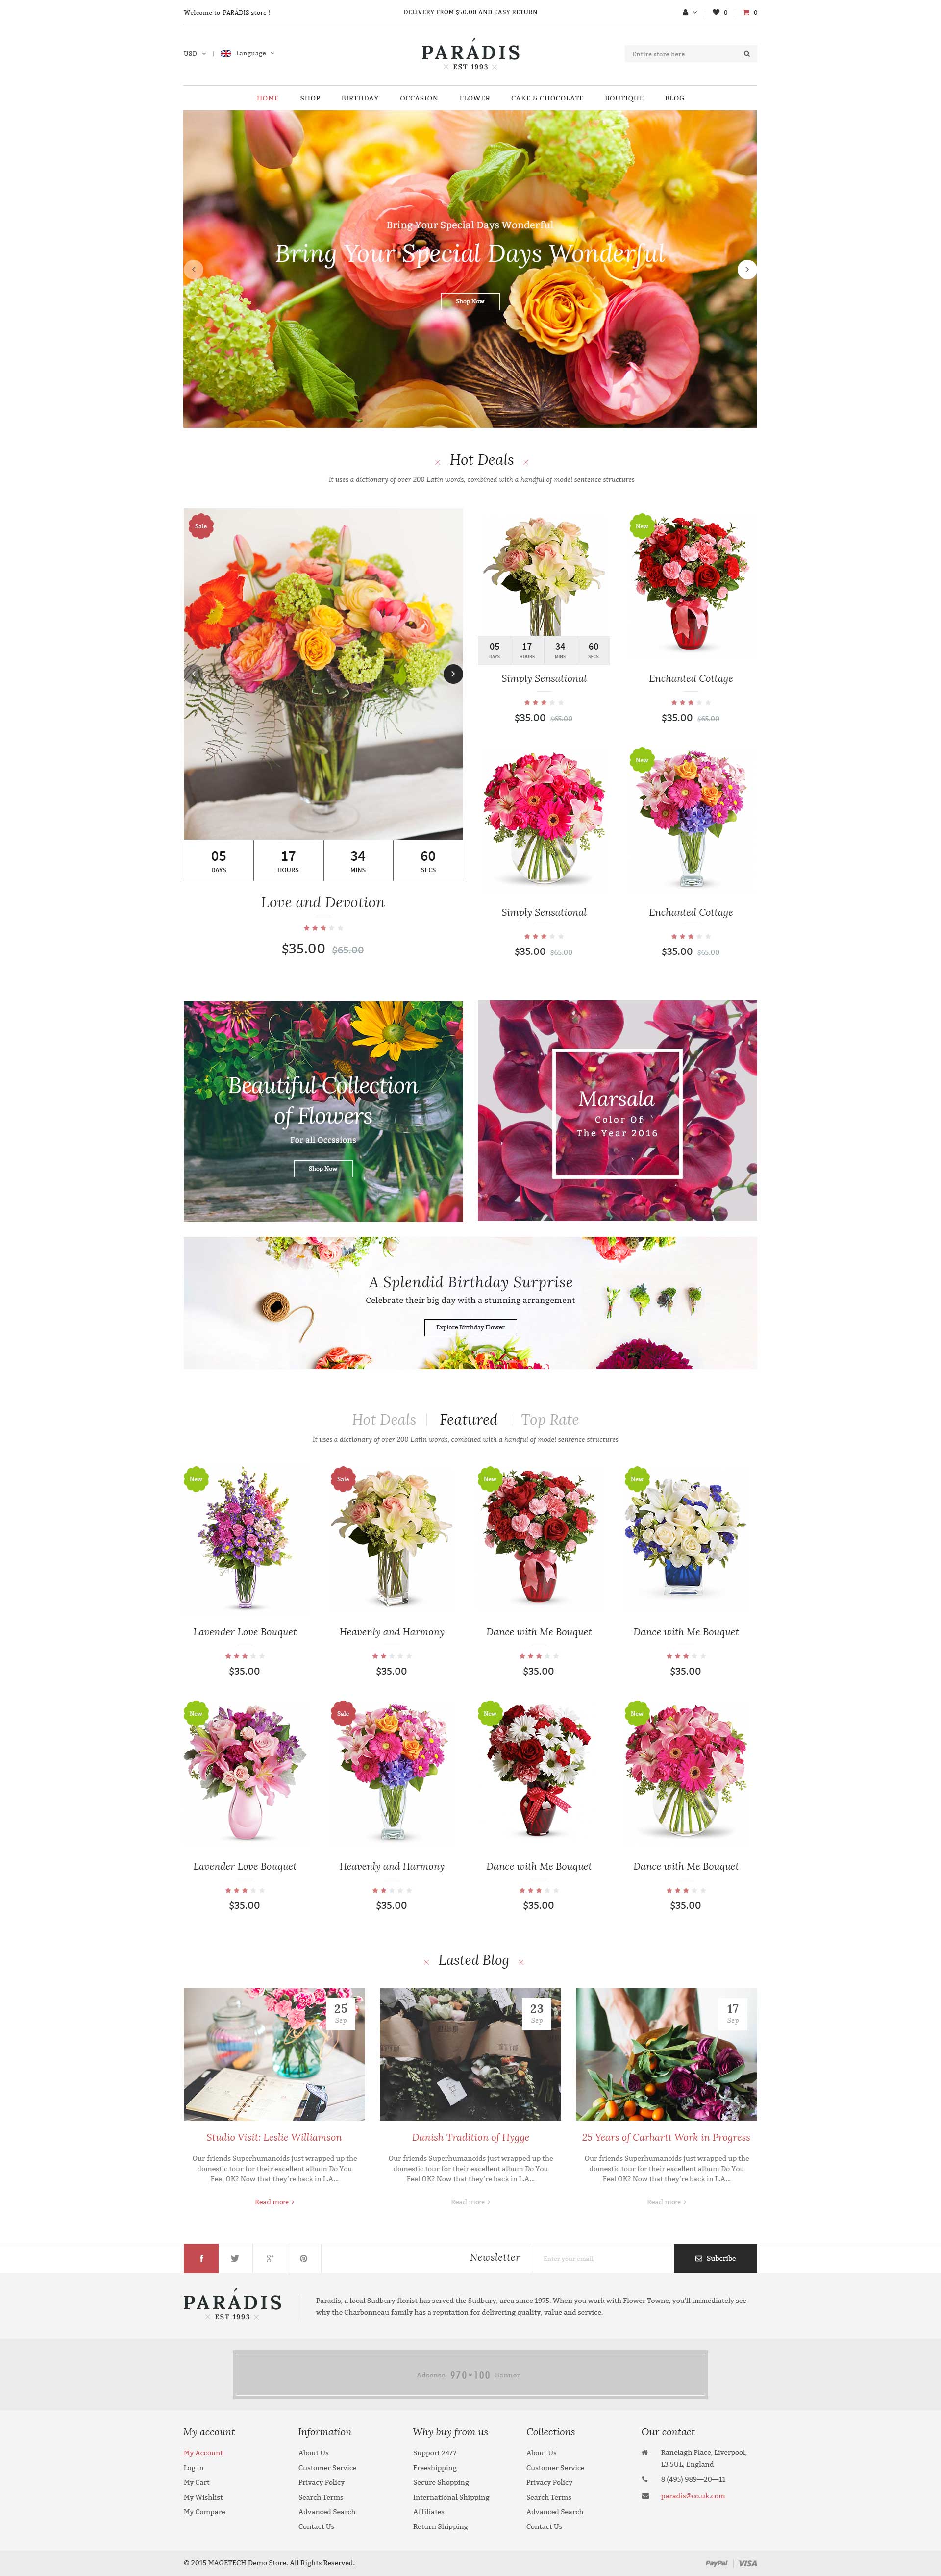
3.1.1 Home Style 1
Frontend of Home Style 1 - Layout Position
In the Admin Panel, please navigate to Content >> Elements >> Pages to create a new page in Pages section. Here is the list of steps in this style’s configuration process:
- Page Information Tab: Please click to see the Backend Settings.
- Content Tab: Please click to see the Backend Settings.
- Design Tab: Please click to see the Backend Settings.
Copy and paste the following code into the Content field::
|
1
2
3
4
5
6
7
8
9
10
11
12
13
14
15
16
17
18
19
20
|
<div class="home-style home-page-1">
<div class="row">
<div class="col-lg-9 col-lg-offset-3">{{block class="Magento\\Cms\\Block\\Block" block_id="top-search"}}
<div class="image-slider-home">{{block class="Sm\ImageSlider\Block\ImageSlider" template="Sm_ImageSlider::default.phtml"}}</div>
<div class="static-image-1">{{block class="Magento\\Cms\\Block\\Block" block_id="static-image-1"}}</div>
<div class="services-home">{{block class="Magento\\Cms\\Block\\Block" block_id="services-store"}}</div>
</div>
</div>
<div class="list-product-home">{{block class="Sm\ListingTabs\Block\ListingTabs" template="Sm_ListingTabs::sm/listingtabs/default.phtml"}}</div>
<div class="row">
<div class="static-image-2">{{block class="Magento\\Cms\\Block\\Block" block_id="static-image-2"}}</div>
</div>
<div class="list-product-home list-product-home-custom">{{block class="Magento\\Cms\\Block\\Block" block_id="listing-tab-2"}}</div>
<div class="home-collection">{{block class="Magento\\Cms\\Block\\Block" block_id="block-collection"}}</div>
<div class="full-wrapper full-categories">
<div class="container">
<div class="hot-categories-home">{{block class="Sm\Categories\Block\Categories" template="Sm_Categories::default.phtml"}}</div>
</div>
</div>
</div>
|
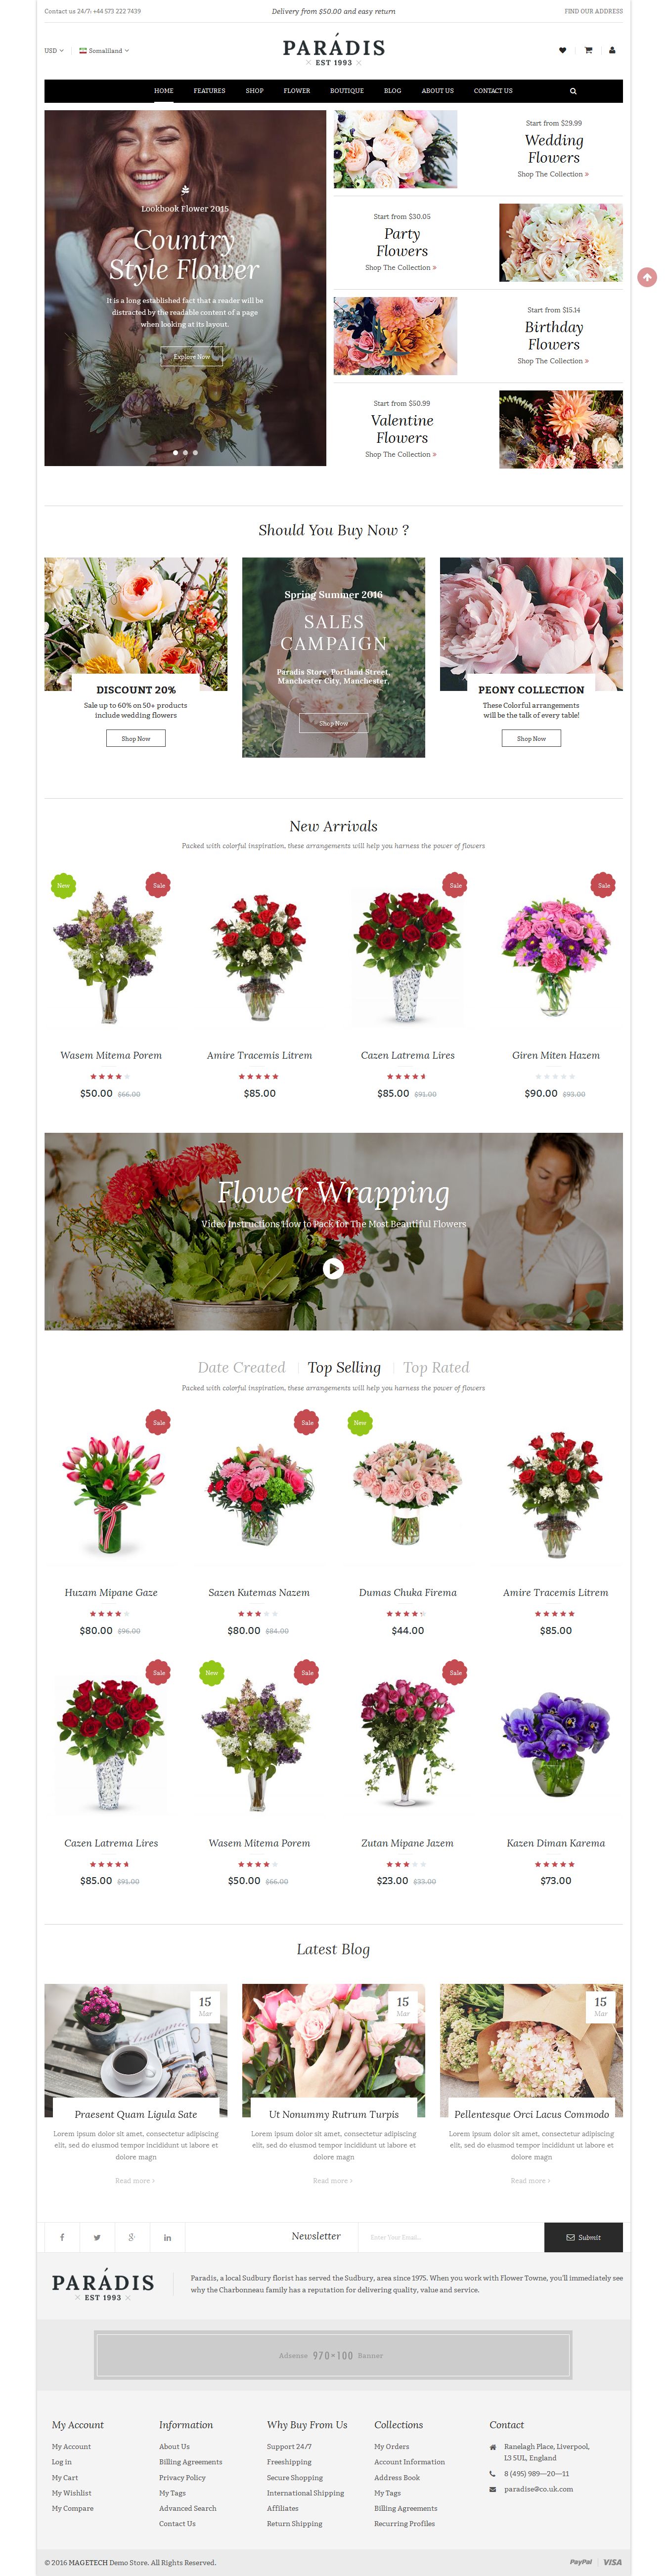
3.1.2 Home Style 2
Frontend of Home Style 2 - Layout Position

In the Admin Panel, please navigate to Content >> Elements >> Pages to create a new page in Pages section. Here is the list of steps in this style’s configuration process:
- Page Information Tab: Please click to see the Backend Settings.
- Content Tab: Please click to see the Backend Settings.
- Design Tab: Please click to see the Backend Settings.
Copy and paste the following code into the Content field::
|
1
2
3
4
5
6
7
8
9
10
11
12
13
14
15
16
17
18
19
20
21
22
23
24
25
|
<div class="home-style home-page-2">
<div class="row">
<div class="col-lg-9 col-lg-offset-3">
<div class="image-slider-home">{{block class="Sm\ImageSlider\Block\ImageSlider" template="Sm_ImageSlider::default.phtml"}}</div>
</div>
</div>
<div class="row">
<div class="col-lg-3 col-md-3 newsletter-home">{{block class="Magento\Newsletter\Block\Subscribe" template="subscribe-home.phtml"}}</div>
<div class="col-lg-9 col-md-9 static-image-block-1">{{block class="Magento\\Cms\\Block\\Block" block_id="static-image-3"}}</div>
</div>
<div class="row">
<div class="col-lg-9 col-md-9 left-main">
<div class="list-product-home">{{block class="Sm\ListingTabs\Block\ListingTabs" template="Sm_ListingTabs::sm/listingtabs/default.phtml"}}</div>
<div class="static-image-block-2">{{block class="Magento\\Cms\\Block\\Block" block_id="static-image-4"}}</div>
<div class="list-product-home list-product-home-custom">{{block class="Magento\\Cms\\Block\\Block" block_id="listing-tab-2"}}</div>
<div class="home-collection">{{block class="Magento\\Cms\\Block\\Block" block_id="block-collection"}}</div>
</div>
<div class="col-lg-3 col-md-3 right-main">{{block class="Magento\\Cms\\Block\\Block" block_id="product-sidebar-home"}} {{block class="Magento\\Cms\\Block\\Block" block_id="clients-say-slider"}} {{block class="Magento\\Cms\\Block\\Block" block_id="static-image-sidebar"}}</div>
</div>
<div class="full-wrapper full-categories">
<div class="container">
<div class="hot-categories-home">{{block class="Sm\Categories\Block\Categories" template="Sm_Categories::default.phtml"}}</div>
</div>
</div>
</div>
|
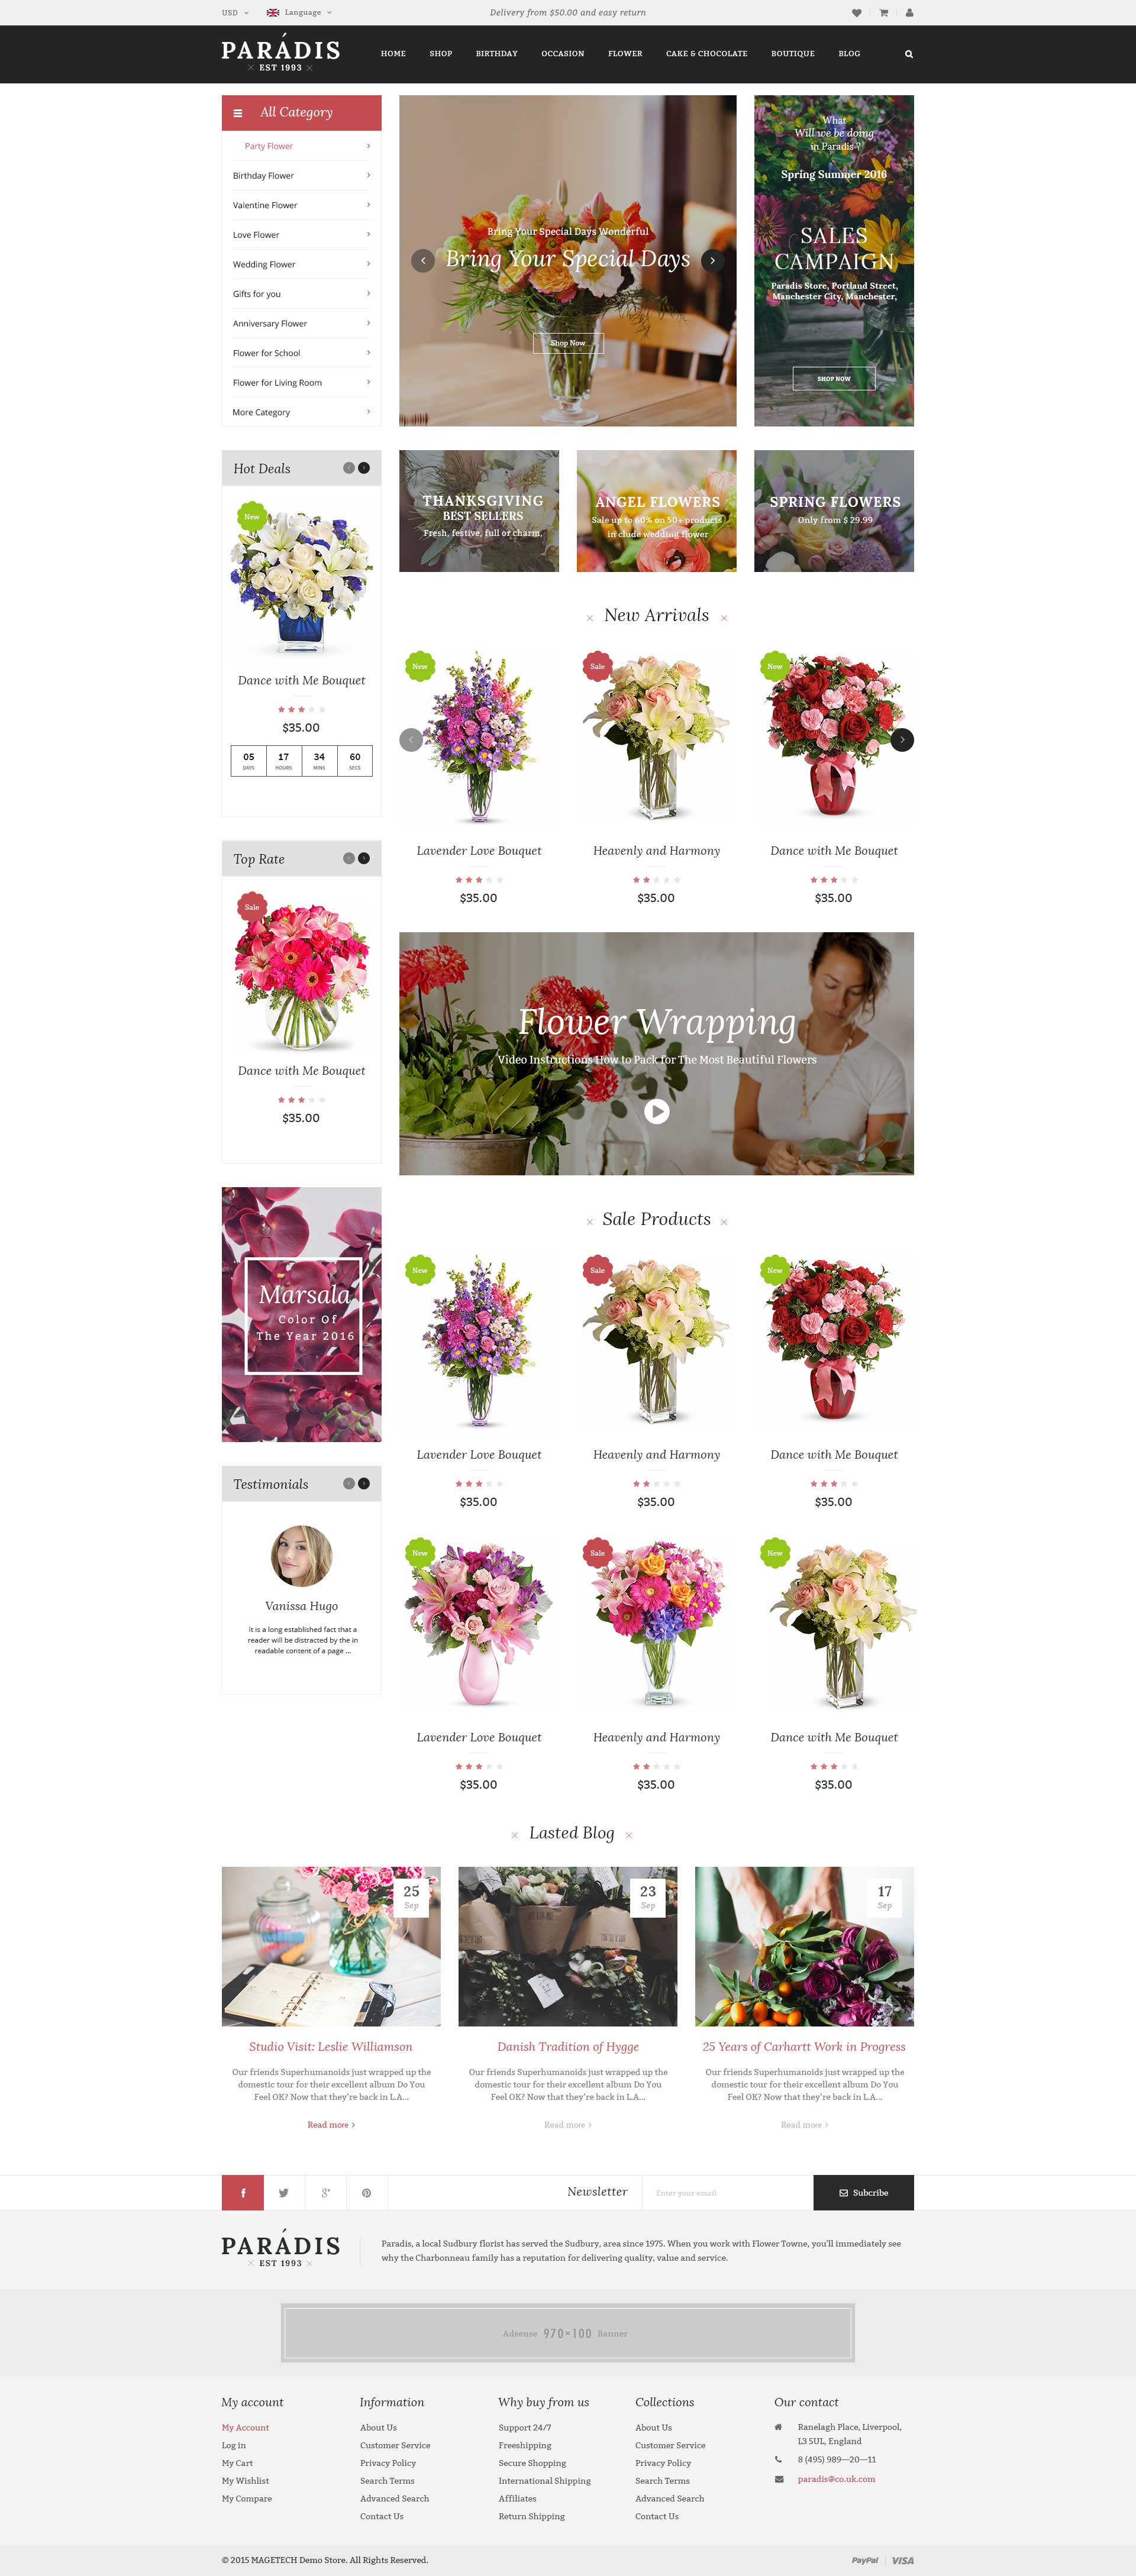
3.1.3 Home Style 3
Frontend of Home Style 3 - Layout Position
In the Admin Panel, please navigate to Content >> Elements >> Pages to create a new page in Pages section. Here is the list of steps in this style’s configuration process:
- Page Information Tab: Please click to see the Backend Settings.
- Content Tab: Please click to see the Backend Settings.
- Design Tab: Please click to see the Backend Settings.
Copy and paste the following code into the Content field::
|
1
2
3
4
5
6
7
8
9
10
11
12
13
14
15
16
17
18
19
20
21
22
23
|
<div class="home-style home-page-3">
<div class="row">
<div class="col-lg-9 col-md-9 image-slideshow">
<div class="image-slider-home">{{block class="Sm\ImageSlider\Block\ImageSlider" template="Sm_ImageSlider::default.phtml"}}</div>
</div>
<div class="col-lg-3 col-md-3 static-image-5">{{block class="Magento\\Cms\\Block\\Block" block_id="static-image-5"}}</div>
</div>
<div class="services-home">{{block class="Magento\\Cms\\Block\\Block" block_id="services-store-3"}}</div>
<div class="row">
<div class="col-lg-3 col-md-3 sidebar-home">{{block class="Magento\Framework\View\Element\Template" template="Magento_Theme::html/custom-nav.phtml"}} {{block class="Magento\\Cms\\Block\\Block" block_id="product-sidebar-home3"}} {{block class="Magento\\Cms\\Block\\Block" block_id="clients-say-slider"}} {{block class="Magento\\Cms\\Block\\Block" block_id="static-image-7"}}</div>
<div class="col-lg-9 col-md-9 main-home">
<div class="list-product-home">{{block class="Sm\ListingTabs\Block\ListingTabs" template="Sm_ListingTabs::sm/listingtabs/default.phtml"}}</div>
<div class="static-image-6">{{block class="Magento\\Cms\\Block\\Block" block_id="static-image-6"}}</div>
<div class="list-product-home list-product-home-custom">{{block class="Magento\\Cms\\Block\\Block" block_id="listing-tab-2"}}</div>
<div class="home-collection">{{block class="Magento\\Cms\\Block\\Block" block_id="block-collection"}}</div>
</div>
</div>
<div class="full-wrapper full-categories">
<div class="container">
<div class="hot-categories-home">{{block class="Sm\Categories\Block\Categories" template="Sm_Categories::default.phtml"}}</div>
</div>
</div>
</div>
|
3.1.4 Home Style 4
Frontend of Home Style 4 - Layout Position
In the Admin Panel, please navigate to Content >> Elements >> Pages to create a new page in Pages section. Here is the list of steps in this style’s configuration process:
- Page Information Tab: Please click to see the Backend Settings.
- Content Tab: Please click to see the Backend Settings.
- Design Tab: Please click to see the Backend Settings.
Copy and paste the following code into the Content field::
|
1
2
3
4
5
6
7
8
9
10
11
12
13
14
15
16
17
18
19
20
|
<div class="home-style home-page-4">
<div class="row">
<div class="col-lg-9 image-slideshow">
<div class="image-slider-home">{{block class="Sm\ImageSlider\Block\ImageSlider" template="Sm_ImageSlider::default.phtml"}}</div>
</div>
<div class="col-lg-3 slider-deal">{{block class="Sm\Deals\Block\Deals" template="Sm_Deals::default.phtml"}}</div>
</div>
<div class="services-home">{{block class="Magento\\Cms\\Block\\Block" block_id="services-store-3"}}</div>
<div class="list-product-home">{{block class="Sm\ListingTabs\Block\ListingTabs" template="Sm_ListingTabs::sm/listingtabs/default.phtml"}}</div>
<div class="row">
<div class="static-image-2">{{block class="Magento\\Cms\\Block\\Block" block_id="static-image-2"}}</div>
</div>
<div class="list-product-home list-product-home-custom">{{block class="Magento\\Cms\\Block\\Block" block_id="listing-tab-2"}}</div>
<div class="home-collection">{{block class="Magento\\Cms\\Block\\Block" block_id="block-collection"}}</div>
<div class="full-wrapper full-categories">
<div class="container">
<div class="hot-categories-home">{{block class="Sm\Categories\Block\Categories" template="Sm_Categories::default.phtml"}}</div>
</div>
</div>
</div>
|
Note: Set Default Page
- To set a default page for your Magento Site, in the Admin Panel you go to Stores>> Settings >>Configuration>>Web>>Default Pages. Please click to see the Backend Settings.
- You need to change to the website / store view that you want to change (the dropdown menu in the upper left corner). You will probably have to create a new CMS page if you want to have something different from your default home page.
3.1.5 Home Style 5
Frontend of Home Style 5 - Layout Position

In the Admin Panel, please navigate to Content >> Elements >> Pages to create a new page in Pages section. Here is the list of steps in this style’s configuration process:
- Page Information Tab: Please click to see the Backend Settings.
- Content Tab: Please click to see the Backend Settings.
- Design Tab: Please click to see the Backend Settings.
Copy and paste the following code into the Content field::
|
1
2
3
4
5
6
7
8
9
10
11
12
13
14
15
16
17
18
19
20
21
22
23
|
<div class="home-page-5">
<div class="row">
<div class="col-lg-3 col-md-3 sidebar-home">{{block class="Magento\Framework\View\Element\Template" template="Magento_Theme::html/custom-nav-v5.phtml"}} {{block class="Magento\\Cms\\Block\\Block" block_id="clients-say-v5"}} {{block class="Magento\\Cms\\Block\\Block" block_id="collection-v5"}}
<div class="fb-fanbox">{{block class="Magento\\Cms\\Block\\Block" block_id="facebook-fanbox"}}</div>
{{block class="Magento\Newsletter\Block\Subscribe" template="subscribe-home.phtml"}}</div>
<div class="col-lg-9 col-md-9 content-home">
<div class="slider-deal-type2">{{block class="Sm\Deals\Block\Deals" template="Sm_Deals::default-v2.phtml"}}</div>
{{block class="Magento\\Cms\\Block\\Block" block_id="banner-v51"}}
<div class="listing-tab-wrapper">{{block class="Sm\ListingTabs\Block\ListingTabs" template="Sm_ListingTabs::default-id5.phtml"}}</div>
{{block class="Magento\\Cms\\Block\\Block" block_id="banner-v52"}}
<div class="row product-brand">
<div class="col-lg-6 col-md-6 product-featured">{{block class="Sm\BasicProducts\Block\BasicProducts" template="Sm_BasicProducts::sidebar-product-v5.phtml" title="Featured Product" product_limitation="3" img_width="100" img_height="100" product_addcart_display="0" product_addwishlist_display="0" product_addcompare_display="0"}}</div>
<div class="col-lg-6 col-md-6 brand-wrapper">{{block class="Magento\\Cms\\Block\\Block" block_id="brand-v5"}}</div>
</div>
{{block class="Magento\\Cms\\Block\\Block" block_id="banner-v53"}} {{block class="Magento\\Cms\\Block\\Block" block_id="latest-blog-v5"}}</div>
</div>
{{block class="Magento\\Cms\\Block\\Block" block_id="services-v5"}}
<div class="full-wrapper hot-cat-full">
<div class="container">
<div class="hot-categories-home">{{block class="Sm\Categories\Block\Categories" template="Sm_Categories::default-v5.phtml"}}</div>
</div>
</div>
</div&g
|
Copy and paste the following code into the Content field:
|
1
2
3
|
<referenceContainer name="slideshow-header">
<block class="Sm\ImageSlider\Block\ImageSlider" name="slideshow.hd5" as="slideshow.hd5" template="Sm_ImageSlider::default.phtml" />
</referenceContainer>
|
3.1.6 Home Style 6
Frontend of Home Style 6 - Layout Position
In the Admin Panel, please navigate to Content >> Elements >> Pages to create a new page in Pages section. Here is the list of steps in this style’s configuration process:
- Page Information Tab: Please click to see the Backend Settings.
- Content Tab: Please click to see the Backend Settings.
- Design Tab: Please click to see the Backend Settings.
Copy and paste the following code into the Content field:
|
1
2
3
4
5
6
7
8
9
10
11
12
13
14
15
16
17
18
19
20
21
22
23
24
25
26
27
28
|
<div class="home-page-6">
<div class="slideshow-index">{{block class="Sm\ImageSlider\Block\ImageSlider" template="Sm_ImageSlider::default.phtml"}}</div>
<div class="row">
<div class="col-lg-3 col-md-3 collection-index">{{block class="Magento\\Cms\\Block\\Block" block_id="collection-v5"}}</div>
<div class="col-lg-9 col-md-9 slider-deal-index">
<div class="slider-deal-type2">{{block class="Sm\Deals\Block\Deals" template="Sm_Deals::default-v2.phtml"}}</div>
</div>
</div>
{{block class="Magento\\Cms\\Block\\Block" block_id="banner-v61"}}
<div class="listingtab-custom tab-custom-1">{{block class="Sm\ListingTabs\Block\ListingTabs" template="Sm_ListingTabs::default.phtml"}}
<div class="custom-image static-image">{{block class="Magento\\Cms\\Block\\Block" block_id="customtab-1-v6"}}</div>
</div>
<div class="listingtab-custom tab-custom-2">{{block class="Sm\ListingTabs\Block\ListingTabs" template="Sm_ListingTabs::default.phtml" filter_type="fieldproducts" title="Furniture" product_category="99,189,190,191,192" filter_order_by="created_at,most_viewed,best_sales"}}
<div class="custom-image static-image">{{block class="Magento\\Cms\\Block\\Block" block_id="customtab-2-v6"}}</div>
</div>
<div class="full-wrapper full-wrapper-sv">
<div class="container">{{block class="Magento\\Cms\\Block\\Block" block_id="services-v6"}}</div>
</div>
<div class="tab-custom-3">{{block class="Sm\ListingTabs\Block\ListingTabs" template="Sm_ListingTabs::default.phtml" title="Most Viewed" margin="30" nb_column1="4" nb_column2="3" nb_column3="3" nb_column4="2" nb_column5="1" filter_type="categories" product_category="97,98,103" category_preload="97" product_order_by="most_viewed"}}</div>
<div class="product-featured">{{block class="Sm\BasicProducts\Block\BasicProducts" template="Sm_BasicProducts::default-v6.phtml" title="Featured Product" nb_column1="3" nb_column2="2" nb_column3="2" nb_column4="1" product_limitation="6" img_width="140" img_height="140" product_addcart_display="1" product_addwishlist_display="1" product_addcompare_display="1"}}</div>
<div class="latest-post-wrapper">{{block class="Magento\\Cms\\Block\\Block" block_id="latest-blog-v6"}}</div>
<div class="brand-wrapper">{{block class="Magento\\Cms\\Block\\Block" block_id="brand-v6"}}</div>
<div class="full-wrapper full-categories">
<div class="container">
<div class="hot-categories-home">{{block class="Sm\Categories\Block\Categories" template="Sm_Categories::default.phtml"}}</div>
</div>
</div>
</div>
|
3.1.7 Home Style 7
Frontend of Home Style 7 - Layout Position
In the Admin Panel, please navigate to Content >> Elements >> Pages to create a new page in Pages section. Here is the list of steps in this style’s configuration process:
- Page Information Tab: Please click to see the Backend Settings.
- Content Tab: Please click to see the Backend Settings.
- Design Tab: Please click to see the Backend Settings.
Copy and paste the following code into the Content field:
|
1
2
3
4
5
6
7
8
9
10
11
12
13
14
15
16
17
18
19
20
21
22
23
24
25
26
27
28
29
30
31
32
|
<div class="home-page-7">
<div class="full-wrapper full-slidershow-container">
<div class="full-content">
<div class="container">{{block class="Sm\ImageSlider\Block\ImageSlider" template="Sm_ImageSlider::default.phtml"}}</div>
</div>
</div>
{{block class="Magento\\Cms\\Block\\Block" block_id="services-v7"}}
<div class="listingtab-custom tab-custom-1">{{block class="Sm\ListingTabs\Block\ListingTabs" template="Sm_ListingTabs::default.phtml"}}
<div class="custom-image">{{block class="Magento\\Cms\\Block\\Block" block_id="customtab-1-v7"}}</div>
</div>
<div class="row">
<div class="col-lg-3 col-md-3 left-banner-wrapper">{{block class="Magento\\Cms\\Block\\Block" block_id="banner-71"}}</div>
<div class="col-lg-9 col-md-9 deal-content-wrapper">
<div class="slider-deal-type2">{{block class="Sm\Deals\Block\Deals" template="Sm_Deals::default-v2.phtml"}}</div>
</div>
</div>
<div class="listingtab-custom tab-custom-1">{{block class="Sm\ListingTabs\Block\ListingTabs" template="Sm_ListingTabs::default.phtml" title="Furniture" product_category="100"}}
<div class="custom-image">{{block class="Magento\\Cms\\Block\\Block" block_id="customtab-2-v7"}}</div>
</div>
<div class="row">
<div class="col-lg-4 col-md-4 banner-left">{{block class="Magento\\Cms\\Block\\Block" block_id="banner-left-v7"}}</div>
<div class="col-lg-4 col-md-4 newsletter-index">{{block class="Magento\Newsletter\Block\Subscribe" template="subscribe-home-v7.phtml"}}</div>
<div class="col-lg-4 col-md-4 banner-right">{{block class="Magento\\Cms\\Block\\Block" block_id="banner-right-v7"}}</div>
</div>
<div class="latest-post-wrapper">{{block class="Magento\\Cms\\Block\\Block" block_id="latest-blog-v6"}}</div>
<div class="collection-wrapper">{{block class="Magento\\Cms\\Block\\Block" block_id="collection-slider"}}</div>
<div class="full-wrapper full-categories">
<div class="container">
<div class="hot-categories-home">{{block class="Sm\Categories\Block\Categories" template="Sm_Categories::default.phtml"}}</div>
</div>
</div>
</div>
|
3.1.8 Home Style 8
Frontend of Home Style 8 - Layout Position
In the Admin Panel, please navigate to Content >> Elements >> Pages to create a new page in Pages section. Here is the list of steps in this style’s configuration process:
- Page Information Tab: Please click to see the Backend Settings.
- Content Tab: Please click to see the Backend Settings.
- Design Tab: Please click to see the Backend Settings.
Copy and paste the following code into the Content field:
|
1
2
3
4
5
6
7
8
9
10
11
12
13
14
15
16
17
18
19
20
21
22
23
24
25
26
27
28
29
30
31
|
<div class="home-page-8">
<div class="row">
<div class="col-lg-offset-3 col-lg-9 right-content-index">
<div class="slideshow-banner">
<div class="slidershow-content">{{block class="Sm\ImageSlider\Block\ImageSlider" template="Sm_ImageSlider::default.phtml"}}</div>
<div class="banner-right-index">{{block class="Magento\\Cms\\Block\\Block" block_id="banner-v81"}}
<div class="newsletter-right">{{block class="Magento\Newsletter\Block\Subscribe" template="subscribe-home-v8.phtml"}}</div>
</div>
<div class="product-featured">{{block class="Sm\BasicProducts\Block\BasicProducts" template="Sm_BasicProducts::default-slider.phtml" nb_column1="3" nb_column3="2" product_limitation="6" img_width="140" img_height="140" product_addcart_display="0" product_addwishlist_display="0" product_addcompare_display="0"}}</div>
</div>
</div>
</div>
{{block class="Magento\\Cms\\Block\\Block" block_id="services-v7"}}
<div class="listingtab-custom">{{block class="Sm\ListingTabs\Block\ListingTabs" template="Sm_ListingTabs::default.phtml"}}</div>
<div class="full-wrapper full-categories">
<div class="container">
<div class="hot-categories-home">{{block class="Sm\Categories\Block\Categories" template="Sm_Categories::default.phtml"}}</div>
</div>
</div>
<div class="collection-wrapper">{{block class="Magento\\Cms\\Block\\Block" block_id="collection-slider"}}</div>
<div class="listingtab-default">{{block class="Sm\ListingTabs\Block\ListingTabs" template="Sm_ListingTabs::default.phtml" nb_rows="1" display_title="1" title="New Arrivals" filter_type="categories" product_category="97,99,100" category_preload="97" product_order_by="created_at" product_limitation="8"}}</div>
{{block class="Magento\\Cms\\Block\\Block" block_id="banner-v82"}}
<div class="row">
<div class="col-lg-9 col-md-12 deal-container">
<div class="slider-deal-type2">{{block class="Sm\Deals\Block\Deals" template="Sm_Deals::default-v2.phtml"}}</div>
</div>
<div class="col-lg-3 col-md-12 collection-container">{{block class="Magento\\Cms\\Block\\Block" block_id="clients-say-v5"}}</div>
</div>
<div class="latest-post-wrapper">{{block class="Magento\\Cms\\Block\\Block" block_id="latest-blog-v6"}}</div>
<div class="brand-wrapper">{{block class="Magento\\Cms\\Block\\Block" block_id="brand-v6"}}</div>
</div>
|
3.2 Configure Megamenu
- Step 1: Create a New Menu In Admin Panel, navigate to SM Megamenu >> Add New Menu (add group: “Mega Menu Horizontal“, “Mega Menu Vertical“.
- Step 2: Navigate to SM Megamenu >> Configuration & fill the ID number for the created menu in step 1
- Step 3: In order to add menu items, go to SM Megamenu >> Menu Manager >> click on ‘Edit’to open Menu Items to add items as you want
3.2.1 Horizontal Megamenu:

- Sortable Categories Items Please click Here to view.
Home
Frontend Appearance 
- Backend Settings: Please click Here to view.
New Arrivals
Frontend Appearance 
- Backend Settings: Please click Here to view.
Note: Do the same with the others.
3.2.2 Vertical Megamenu:
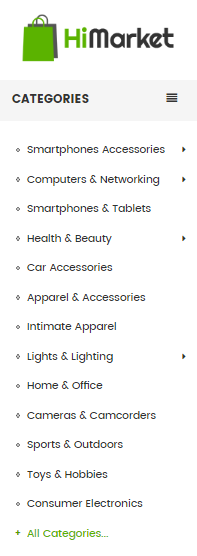
- Sortable Categories Items Please click Here to view.
Electronics
Frontend Appearance 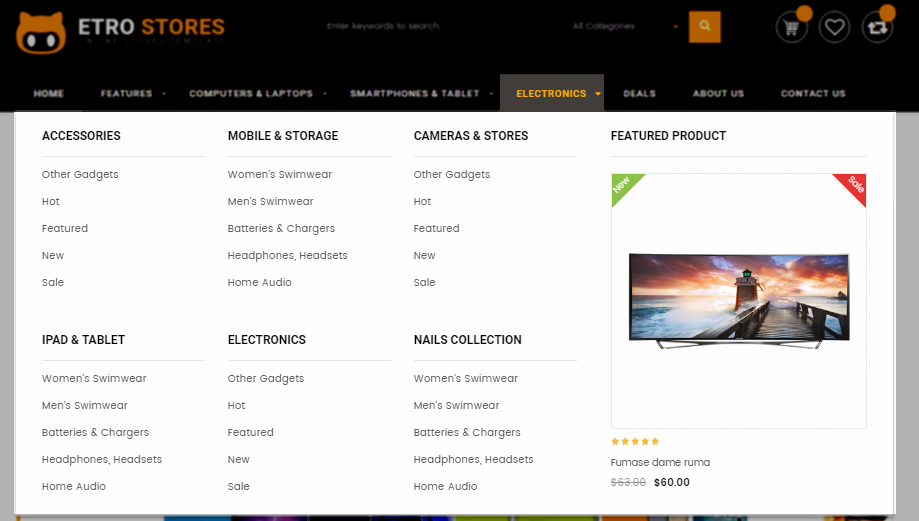
- Backend Settings: Please click Here to view.
Smartphones & Tablets
Frontend Appearance 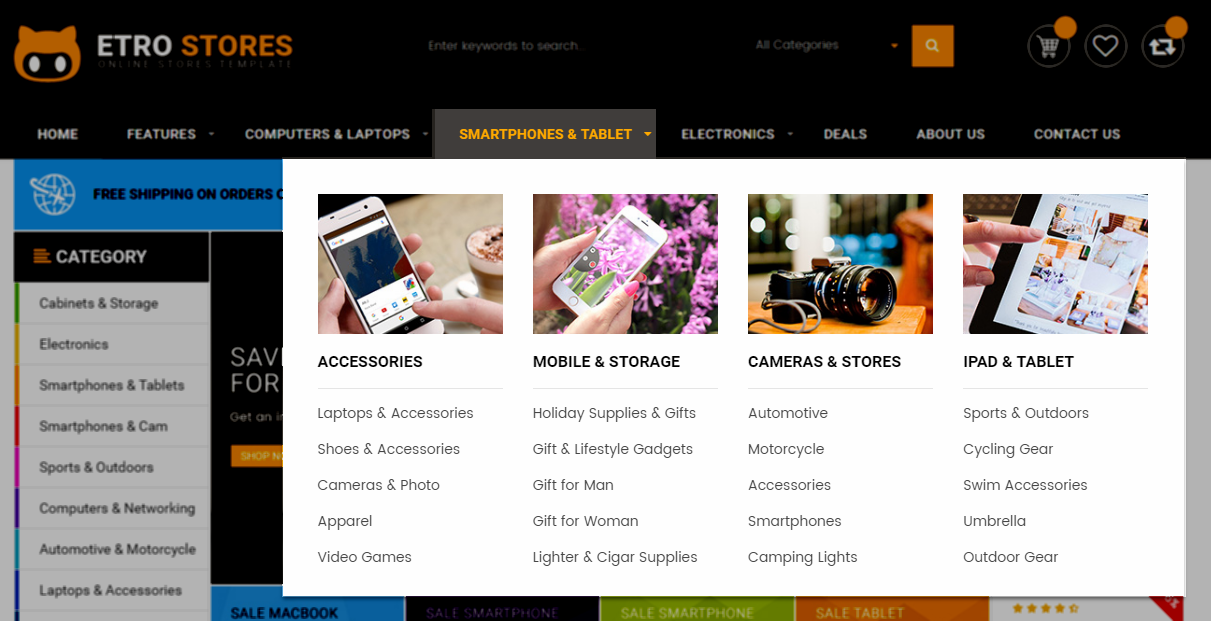
- Backend Settings: Please click Here to view.
- Backend of ‘Group Categories Smartphone’: Please click Here to view.
- Backend of ‘Col-1′ in ‘Group Categories Smartphone’: Please click Here to view.
Note: Item Col-2 having same level would have same configuration as Col-1.
- Backend of ‘Camping & Hiking Gear’ in ‘Col-1′: Please click Here to view.
Note: Item Swim Gear, Cycling Gear having same level would have same configuration as Camping & Hiking Gear.
- Backend of ‘Poduct Megamenu’: Please click Here to view.
Health & Beauty
Frontend Appearance 
- Backend Settings: Please click Here to view.
Note: The following items, having same level, would have same configuration as Health & Beauty: Toys & Hobbies, Computers & Networking, Laptops & Accessories, Jewelry & Watches, Bags, Shoes & Accessories, Cameras & Photo, Holiday Supplies & Gifts, Apparel, Video Games. .
Sports & Outdoors
Frontend Appearance 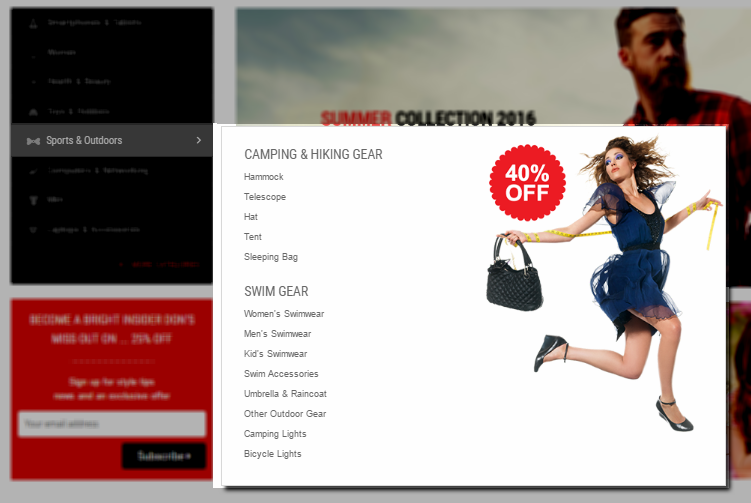
- Backend Settings: Please click Here to view.
- Backend of ‘Categories Sports & Outdoors’: Please click Here to view.
- Backend of ‘Cycling Gear’ in ‘Categories Sports & Outdoors’: Please click Here to view.
Note: The following items, having same level, would have same configuration as Cycling Gear: . Camping & Hiking Gear, Swim Gear.
- Backend of ‘Right Static Image’: Please click Here to view.
Copy and paste the following code into the Content field::
|
1
2
3
4
5
|
<div class="right-image-menu">
<a title="Static Image" href="#">
<img src="{{media url="wysiwyg/mega-menu/mega-banner.png"}}" alt="Static Image" />
</a>
</div>
|
Automotive & Motorcycle
Frontend Appearance 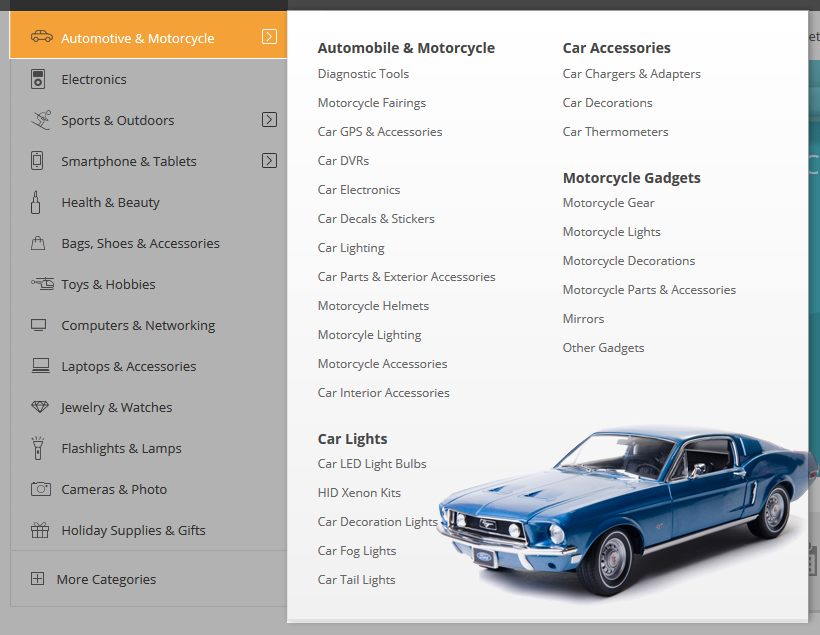
- Backend Settings: Please click Here to view.
- Backend of ‘Motorcycle’: Please click Here to view.
Note: The following items, having same level, would have same configuration as Motorcycle: . Car Accessories, Motorcycle Gadgets, Car Lights.
3.3 Configure Extensions
The SM Market front-page has been integrated with the extensions in the following list:
- SM Listing Deals
- SM Megamenu
- SM Listing Tabs
- SM Listing Extend
- SM Image Slider
- SM Basic Products
- SM Search Box
- SM Deals
- SM Quickview
- SM Categories
In SM Market Administration Page, please navigate to Stores>> Settings>> Configuration >> MAGENTECH to configure extensions as you want.
- Backend of SM Listing Deals: Click Here
- Position: SM Megamenu
- Frontend Appearance
Horizontal Megamenu: 
Vertical Megamenu: 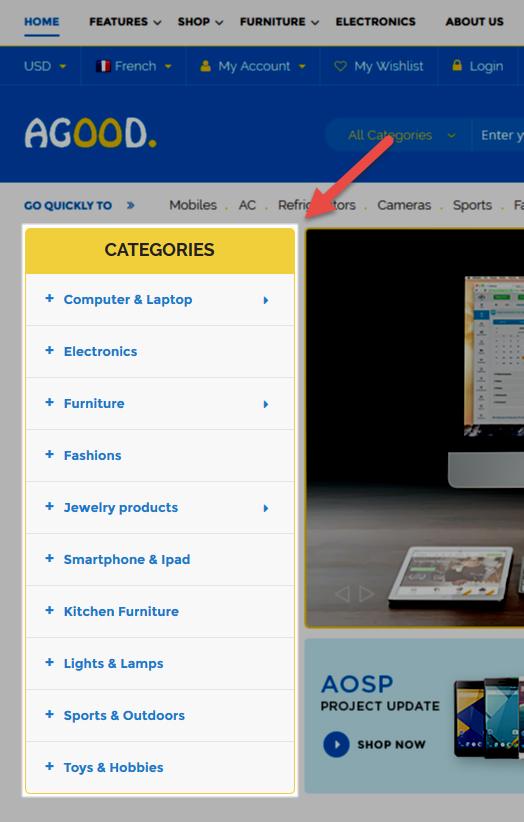
- Backend of SM Megamenu: Click Here
- Position: SM Listing Tabs
- Frontend Appearance
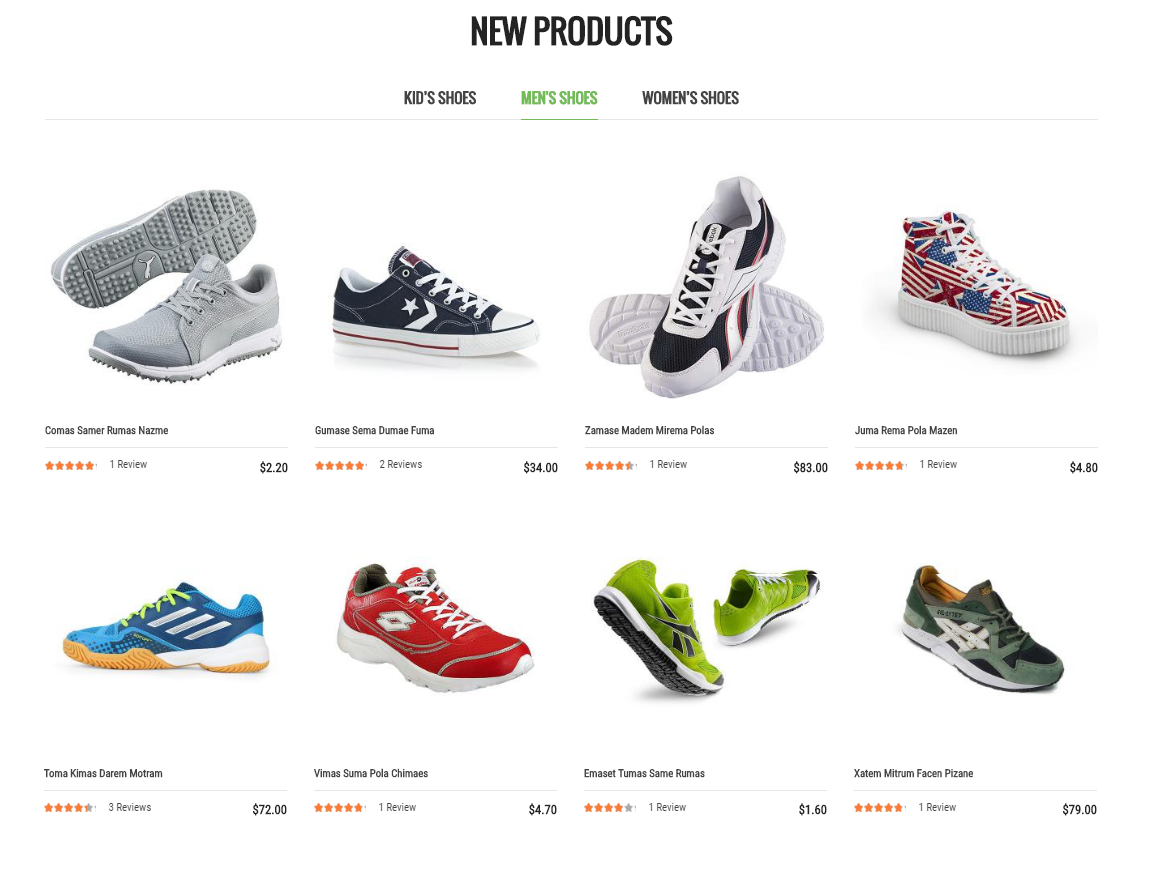
- Backend of SM Listing Tabs: Click Here
- Backend of SM Listing Extend: Click Here
- Position: SM Image Slider
- Frontend Appearance
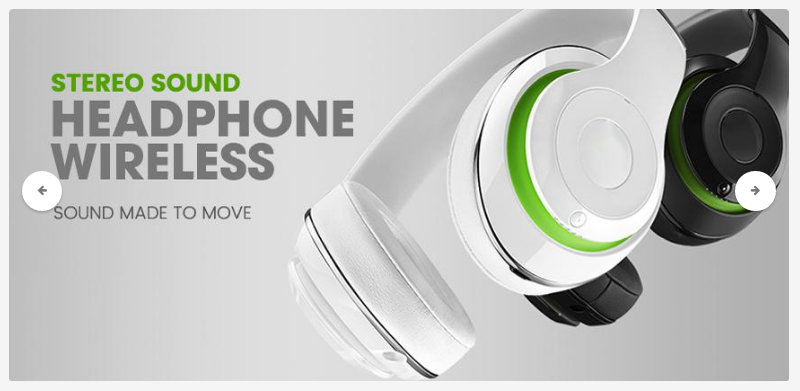
- Backend of SM Image Slider: Click Here
- Position: SM Basic Products
- Frontend Appearance
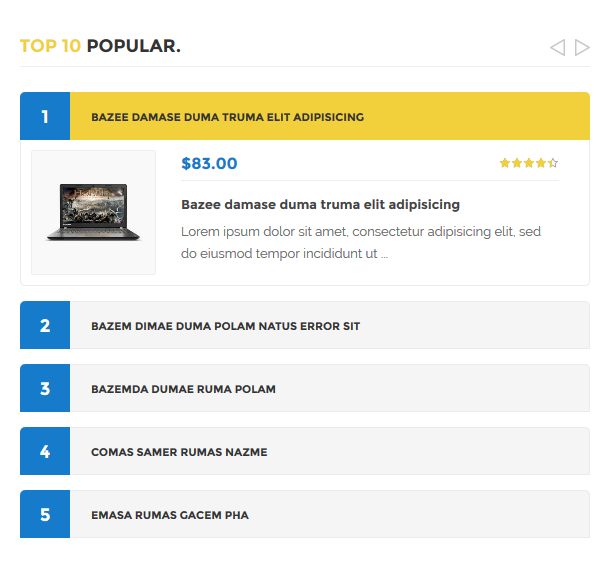
- Backend of SM Basic Products: Click Here
- Position: SM Search Box
- Frontend Appearance

- Backend of SM Search Box: Click Here
- Position: SM Deals
- Frontend Appearance
- Backend of SM Deals: Click Here
- Position: SM Quick View
- Frontend Appearance
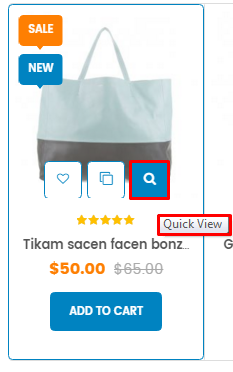
- Backend of SM Quick View: Click Here
- Position: SM Categories
- Frontend Appearance

- Backend of SM Categories: Click Here
3.4 Configure Static Blocks
The SM Market front-page has the following static blocks in the theme:
- Static Block:top-search
- Static Block:static-image-1
- Static Block:services-store
- Static Block:static-image-2
- Static Block:block-collection
- Static Block:about-footer
- Static Block:customer-services-footer
- Static Block:payment-shipping-footer
- Static Block:contact-footer
- Static Block:footer-links
- Static Block:payment-footer
- Static Block:static-image-3
- Static Block:static-image-4
- Static Block:clients-say-slider
- Static Block:static-image-sidebar
- Static Block:static-image-5
- Static Block:services-store-3
- Static Block:static-image-6
- Static Block:static-image-7
- Static Block:banner-v51
- Static Block:clientsay-v5
- Static Block:collection-v5
- Static Block:banner-v52
- Static Block:brand-v5
- Static Block:facebook-fanbox
- Static Block:banner-v53
- Static Block:lastest-blog-v5
- Static Block:services-v5
- Static Block:banner-v61
- Static Block:services-v6
- Static Block:lastest-blog-v6
- Static Block:banner-slider-v6
- Static Block:services-v7
- Static Block:banner-71
- Static Block:banner-left-v7
- Static Block:banner-right-v7
- Static Block:collection-slider
- Static Block:banner-v81
- Static Block:banner-v82
To create a new static block, go to Content>> Elements>> Blocks >> Add new block.
Static Block: top-search
To create the static block, go to Content>> Elements>> Blocks with Identifier * : “top-search”
Frontend Appearance 
- Backend Setting: Please click Here to view.
Copy and paste the following code into the content tab of this static block:
|
1
2
3
4
5
6
7
8
9
10
11
12
13
|
<div class="top-search">
<ul>
<li class="search-label">Top Search:</li>
<li><a title="Tattoo Kits" href="#">Tattoo Kits</a></li>
<li><a title="Electronic Cigarettes" href="#">Electronic Cigarettes</a></li>
<li><a title="Sexy Lingerie" href="#">Sexy Lingerie</a></li>
<li><a title="Eye Makeup" href="#">Eye Makeup</a></li>
<li><a title="iPad Mini Cases" href="#">iPad Mini Cases</a></li>
<li><a title="iPhone 5 Cases" href="#">iPhone 5 Cases</a></li>
<li><a title="Tattoo Supplies" href="#">Tattoo Supplies</a></li>
<li><a title="RC Helicopters" href="#">RC Helicopters</a></li>
</ul>
</div>
|
Static Block: static-image-1
To create the static block, go to Content>> Elements>> Blocks with Identifier * : “static-image-1″
Frontend Appearance 
- Backend Setting: Please click Here to view.
Copy and paste the following code into the content tab of this static block:
|
1
2
3
4
5
|
<ul class="static-image">
<li><a title="Static Image" href="#"> <img src="{{media url="wysiwyg/banner/banner1-1.jpg"}}" alt="Static Image" /> </a></li>
<li><a title="Static Image" href="#"> <img src="{{media url="wysiwyg/banner/banner1-2.jpg"}}" alt="Static Image" /> </a></li>
<li><a title="Static Image" href="#"> <img src="{{media url="wysiwyg/banner/banner1-3.jpg"}}" alt="Static Image" /> </a></li>
</ul>
|
Static Block: services-store
To create the static block, go to Content>> Elements>> Blocks with Identifier * : “services-store”
Frontend Appearance 
- Backend Setting: Please click Here to view.
Copy and paste the following code into the content tab of this static block:
|
1
2
3
4
5
6
7
8
|
<div class="banner-policy">
<div class="inner">
<div class="policy policy1"><a title="90 days money back" href="#"><span class="ico-policy">ico policy</span>90 days<br />money back</a></div>
<div class="policy policy2"><a title="free shipping on all orders" href="#"><span class="ico-policy">ico policy</span>free shipping<br />on all orders</a></div>
<div class="policy policy3"><a title="lowest price guarantee" href="#"><span class="ico-policy">ico policy</span>lowest price guarantee</a></div>
<div class="policy policy4"><a title="safe shopping guarantee" href="#"><span class="ico-policy">ico policy</span>safe shopping guarantee</a></div>
</div>
</div>
|
Static Block: static-image-2
To create the static block, go to Content>> Elements>> Blocks with Identifier * : “static-image-2″
Frontend Appearance 
- Backend Setting: Please click Here to view.
Copy and paste the following code into the content tab of this static block:
|
1
2
3
|
<div class="col-lg-4 col-md-4 col-sm-4 static-image"><a title="Static Image" href="#"><img src="{{media url="wysiwyg/banner/banner-4.jpg"}}" alt="Static Image" /></a></div>
<div class="col-lg-4 col-md-4 col-sm-4 static-image"><a class="image-top" title="Static Image" href="#"><img src="{{media url="wysiwyg/banner/banner-5.jpg"}}" alt="Static Image" /></a> <a title="Static Image" href="#"><img src="{{media url="wysiwyg/banner/banner-6.jpg"}}" alt="Static Image" /></a></div>
<div class="col-lg-4 col-md-4 col-sm-4 static-image"><a title="Static Image" href="#"><img src="{{media url="wysiwyg/banner/banner-7.jpg"}}" alt="Static Image" /></a></div>
|
Static Block: block-collection
To create the static block, go to Content>> Elements>> Blocks with Identifier * : “block-collection”
Frontend Appearance 
- Backend Setting: Please click Here to view.
Copy and paste the following code into the content tab of this static block:
|
1
2
3
4
5
6
7
8
9
10
11
|
<div class="collections-wrap">
<div class="title-home-page"><span>Collections</span></div>
<ul class="collections">
<li class="collect collect1"><a href="#">Furniture</a></li>
<li class="collect collect2"><a href="#">Gift idea</a></li>
<li class="collect collect3"><a href="#">Cool gadgets</a></li>
<li class="collect collect4"><a href="#">Ourdoor<br /><span>activities</span></a></li>
<li class="collect collect5"><a href="#">Accessories for<br /><span>smartphone</span></a></li>
<li class="collect collect6"><a href="#">Women world</a></li>
</ul>
</div>
|
To create the static block, go to Content>> Elements>> Blocks with Identifier * : “about-footer”
Frontend Appearance 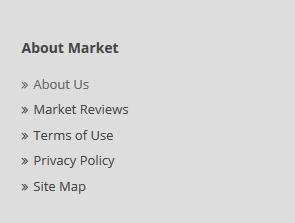
- Backend Setting: Please click Here to view.
Copy and paste the following code into the content tab of this static block:
|
1
2
3
4
5
6
7
8
9
10
11
12
13
14
|
<div class="footer-block">
<div class="footer-block-title">
<h3>About Market</h3>
</div>
<div class="footer-block-content">
<ul class="links-footer">
<li><a title="About Us" href="{{store url=""}}about-us.html">About Us</a></li>
<li><a title="Market Reviews" href="#">Market Reviews</a></li>
<li><a title="Terms of Use" href="#">Terms of Use</a></li>
<li><a title="Privacy Policy" href="#">Privacy Policy</a></li>
<li><a title="Site Map" href="#">Site Map</a></li>
</ul>
</div>
</div>
|
To create the static block, go to Content>> Elements>> Blocks with Identifier * : “customer-services-footer”
Frontend Appearance 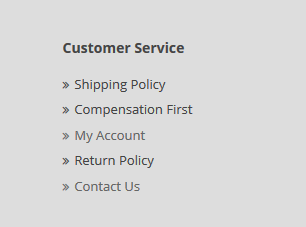
- Backend Setting: Please click Here to view.
Copy and paste the following code into the content tab of this static block:
|
1
2
3
4
5
6
7
8
9
10
11
12
13
14
|
<div class="footer-block">
<div class="footer-block-title">
<h3>Customer Service</h3>
</div>
<div class="footer-block-content">
<ul class="links-footer">
<li><a title="Shipping Policy" href="#">Shipping Policy</a></li>
<li><a title="Compensation First" href="#">Compensation First</a></li>
<li><a title="My Account" href="{{store url=""}}customer/account">My Account</a></li>
<li><a title="Return Policy" href="#">Return Policy</a></li>
<li><a title="Contact Us" href="{{store url=""}}contact-us.html">Contact Us</a></li>
</ul>
</div>
</div>
|
To create the static block, go to Content>> Elements>> Blocks with Identifier * : “payment-shipping-footer”
Frontend Appearance 
- Backend Setting: Please click Here to view.
Copy and paste the following code into the content tab of this static block:
|
1
2
3
4
5
6
7
8
9
10
11
12
13
14
|
<div class="footer-block">
<div class="footer-block-title">
<h3>Payment & Shipping</h3>
</div>
<div class="footer-block-content">
<ul class="links-footer">
<li><a title="Terms of Use" href="#">Terms of Use</a></li>
<li><a title="Payment Methods" href="#">Payment Methods</a></li>
<li><a title="Shipping Guide" href="#">Shipping Guide</a></li>
<li><a title="Locations We Ship To" href="#">Locations We Ship To</a></li>
<li><a title="Estimated Delivery Time" href="#">Estimated Delivery Time</a></li>
</ul>
</div>
</div>
|
To create the static block, go to Content>> Elements>> Blocks with Identifier * : “contact-footer”
Frontend Appearance 
- Backend Setting: Please click Here to view.
Copy and paste the following code into the content tab of this static block:
To create the static block, go to Content>> Elements>> Blocks with Identifier * : “footer-links”
Frontend Appearance 
- Backend Setting: Please click Here to view.
Copy and paste the following code into the content tab of this static block:
|
1
2
3
4
5
6
7
8
9
10
11
12
13
14
15
16
17
18
19
20
21
22
23
24
25
26
27
28
29
30
31
32
|
<div class="footer-links-w">
<div class="label-link">Top Stores : Brand Directory | Store Directory</div>
<ul>
<li>
<h2>MOST SEARCHED KEYWORDS MARKET:</h2>
<a href="#">Xiaomi Mi3</a> | <a href="#">Digiflip Pro XT 712 Tablet</a> | <a href="#">Mi 3 Phones</a> | <a href="#">View all</a></li>
<li>
<h2>MOBILES:</h2>
<a href="#">Moto E</a> | <a href="#">Samsung Mobile</a> | <a href="#">Micromax Mobile</a> | <a href="#">Nokia Mobile</a> | <a href="#">HTC Mobile</a> | <a href="#">Sony Mobile</a> | <a href="#">Apple Mobile</a> | <a href="#">LG Mobile</a> | <a href="#">Karbonn Mobile</a> | <a href="#">View all</a></li>
<li>
<h2>CAMERA:</h2>
<a href="#">Nikon Camera</a> | <a href="#">Canon Camera</a> | <a href="#">Sony Camera</a> | <a href="#">Samsung Camera</a> | <a href="#">Point shoot camera</a> | <a href="#">Camera Lens</a> | <a href="#">Camera Tripod</a> | <a href="#">Camera Bag</a> | <a href="#">View all</a></li>
<li>
<h2>LAPTOPS:</h2>
<a href="#">Apple Laptop</a> | <a href="#">Acer Laptop</a> | <a href="#">Samsung Laptop</a> | <a href="#">Lenovo Laptop</a> | <a href="#">Sony Laptop</a> | <a href="#">Dell Laptop</a> | <a href="#">Asus Laptop</a> | <a href="#">Toshiba Laptop</a> | <a href="#">LG Laptop</a> | <a href="#">HP Laptop</a> | <a href="#">Notebook</a> | <a href="#">View all</a></li>
<li>
<h2>TVS:</h2>
<a href="#">Sony TV</a> | <a href="#">Samsung TV</a> | <a href="#">LG TV</a> | <a href="#">Panasonic TV</a> | <a href="#">Onida TV</a> | <a href="#">Toshiba TV</a> | <a href="#">Philips TV</a> | <a href="#">Micromax TV</a> | <a href="#">LED TV</a> | <a href="#">LCD TV</a> | <a href="#">Plasma TV</a> | <a href="#">3D TV</a> | <a href="#">Smart TV</a> | <a href="#">View all</a></li>
<li>
<h2>TABLETS:</h2>
<a href="#">Micromax Tablets</a> | <a href="#">HCL Tablets</a> | <a href="#">Samsung Tablets</a> | <a href="#">Lenovo Tablets</a> | <a href="#">Karbonn Tablets</a> | <a href="#">Asus Tablets</a> | <a href="#">Apple Tablets</a> | <a href="#">View all</a></li>
<li>
<h2>WATCHES:</h2>
<a href="#">FCUK Watches</a> | <a href="#">Titan Watches</a> | <a href="#">Casio Watches</a> | <a href="#">Fastrack Watches</a> | <a href="#">Timex Watches</a> | <a href="#">Fossil Watches</a> | <a href="#">Diesel Watches</a> | <a href="#">Luxury Watches</a> | <a href="#">View all</a></li>
<li>
<h2>CLOTHING:</h2>
<a href="#">Shirts</a> | <a href="#">Jeans</a> | <a href="#">T shirts</a> | <a href="#">Kurtis</a> | <a href="#">Sarees</a> | <a href="#">Levis Jeans</a> | <a href="#">Killer Jeans</a> | <a href="#">Pepe Jeans</a> | <a href="#">Arrow Shirts</a> | <a href="#">Ethnic Wear</a> | <a href="#">Formal Shirts</a> | <a href="#">Peter England Shirts</a> | <a href="#">View all</a></li>
<li>
<h2>FOOTWEAR:</h2>
<a href="#">Shoes</a> | <a href="#">Casual Shoes</a> | <a href="#">Sports Shoes</a> | <a href="#">Formal Shoes</a> | <a href="#">Adidas Shoes</a> | <a href="#">Gas Shoes</a> | <a href="#">Puma Shoes</a> | <a href="#">Reebok Shoes</a> | <a href="#">Woodland Shoes</a> | <a href="#">Red tape Shoes</a> | <a href="#">Nike Shoes</a> | <a href="#">View all</a></li>
</ul>
</div>
|
To create the static block, go to Content>> Elements>> Blocks with Identifier * : “payment-footer”
Frontend Appearance 
- Backend Setting: Please click Here to view.
Copy and paste the following code into the content tab of this static block:
|
1
|
<p><img src="{{media url="wysiwyg/payment/payment.png"}}" alt="Payment" /></p>
|
Static Block: static-image-3
To create the static block, go to Content>> Elements>> Blocks with Identifier * : “static-image-3″
Frontend Appearance 
- Backend Setting: Please click Here to view.
Copy and paste the following code into the content tab of this static block:
|
1
2
3
4
|
<div class="static-image">
<div class="col-1-image"><a class="image-1" title="Static Image" href="#"> <img src="{{media url="wysiwyg/banner/banner2-1.jpg"}}" alt="Static Image" /> </a> <a class="image-2" title="Static Image" href="#"> <img src="{{media url="wysiwyg/banner/banner2-2.jpg"}}" alt="Static Image" /> </a> <a class="image-3" title="Static Image" href="#"> <img src="{{media url="wysiwyg/banner/banner2-3.jpg"}}" alt="Static Image" /> </a></div>
<div class="col-2-image"><a title="Static Image" href="#"> <img src="{{media url="wysiwyg/banner/banner2-4.jpg"}}" alt="Static Image" /> </a></div>
</div>
|
Static Block: static-image-4
To create the static block, go to Content>> Elements>> Blocks with Identifier * : “static-image-4″
Frontend Appearance 
- Backend Setting: Please click Here to view.
Copy and paste the following code into the content tab of this static block:
|
1
|
<div class="static-image"><a title="Static Image" href="#"> <img src="{{media url="wysiwyg/banner/banner2-5.jpg"}}" alt="Static Image" /> </a></div>
|
Static Block: clients-say-slider
To create the static block, go to Content>> Elements>> Blocks with Identifier * : “clients-say-slider”
Frontend Appearance 
- Backend Setting: Please click Here to view.
Copy and paste the following code into the content tab of this static block:
|
1
2
3
4
5
6
7
8
9
10
11
12
13
14
15
16
17
18
19
20
21
22
23
24
25
26
27
28
29
30
31
32
33
34
35
36
37
38
39
40
41
42
43
44
45
46
47
48
49
50
51
52
53
54
55
56
57
58
59
60
61
62
63
64
65
66
67
68
69
70
|
<div class="block clients-say">
<div class="block-title filter-title"><strong>Clients say</strong></div>
<div class="block-content block-content-clients-say">
<div class="clients-say-slider">
<div class="item">
<div class="client-description">Aliquam ut tellus dignissim, cursus erat ultricies tellus. Nulla tempus sollicitudin mauris cursus dictum. Etiam id diam diam.</div>
<div class="client-info"><img src="{{media url="wysiwyg/clientsay/client-img1.jpg"}}" alt="Static Image" />
<div class="info-detail">
<h3>Aliquam Tellus</h3>
<p>Vitae Ornare Mauris</p>
</div>
</div>
</div>
<div class="item">
<div class="client-description">Aliquam ut tellus dignissim, cursus erat ultricies tellus. Nulla tempus sollicitudin mauris cursus dictum. Etiam id diam diam.</div>
<div class="client-info"><img src="{{media url="wysiwyg/clientsay/client-img2.jpg"}}" alt="Static Image" />
<div class="info-detail">
<h3>Aliquam Tellus</h3>
<p>Vitae Ornare Mauris</p>
</div>
</div>
</div>
<div class="item">
<div class="client-description">Aliquam ut tellus dignissim, cursus erat ultricies tellus. Nulla tempus sollicitudin mauris cursus dictum. Etiam id diam diam.</div>
<div class="client-info"><img src="{{media url="wysiwyg/clientsay/client-img1.jpg"}}" alt="Static Image" />
<div class="info-detail">
<h3>Aliquam Tellus</h3>
<p>Vitae Ornare Mauris</p>
</div>
</div>
</div>
</div>
<script type="text/javascript">// <![CDATA[
jQuery(document).ready(function($) {
var owl_clientsay = $(".clients-say-slider");
owl_clientsay.owlCarousel({
responsive:{
0:{
items:1
},
480:{
items:1
},
768:{
items:1
},
992:{
items:1
},
1200:{
items:1
}
},
autoplay:false,
loop:true,
nav : true,
dots: false,
autoplaySpeed : 500,
navSpeed : 500,
dotsSpeed : 500,
autoplayHoverPause: true,
margin:20,
});
});
// ]]></script>
</div>
</div>
|
To create the static block, go to Content>> Elements>> Blocks with Identifier * : “static-image-sidebar”
Frontend Appearance 
- Backend Setting: Please click Here to view.
Copy and paste the following code into the content tab of this static block:
|
1
|
<div class="static-image-sidebar static-image"><a title="Static Image" href="#"> <img src="{{media url="wysiwyg/banner/banner2-6.jpg"}}" alt="Static Image" /> </a></div>
|
Static Block: static-image-5
To create the static block, go to Content>> Elements>> Blocks with Identifier * : “static-image-5″
Frontend Appearance 
- Backend Setting: Please click Here to view.
Copy and paste the following code into the content tab of this static block:
|
1
|
<div class="static-image"><a title="Static Image" href="#"><img src="{{media url="wysiwyg/banner/banner3-1.jpg"}}" alt="Static Image" /></a></div>
|
Static Block: services-store-3
To create the static block, go to Content>> Elements>> Blocks with Identifier * : “services-store-3″
Frontend Appearance 
- Backend Setting: Please click Here to view.
Copy and paste the following code into the content tab of this static block:
|
1
2
3
4
5
6
7
8
|
<div class="banner-policy">
<div class="inner">
<div class="policy policy1"><a title="90 days money back" href="#"> <span class="ico-policy">ico policy</span> <span class="info-service"> <span class="title-sv">30 DAY RETURN</span> <span>moneyback guarantee</span> </span> </a></div>
<div class="policy policy2"><a title="free shipping on all orders" href="#"> <span class="ico-policy">ico policy</span> <span class="info-service"> <span class="title-sv">FREE SHIPPING</span> <span>on all order over $99</span> </span> </a></div>
<div class="policy policy3"><a title="lowest price guarantee" href="#"> <span class="ico-policy">ico policy</span> <span class="info-service"> <span class="title-sv">LOWEST PRICE</span> <span>guarantee</span> </span> </a></div>
<div class="policy policy4"><a title="safe shopping guarantee" href="#"> <span class="ico-policy">ico policy</span> <span class="info-service"> <span class="title-sv">SAFE SHOPPING</span> <span>guarantee</span> </span> </a></div>
</div>
</div>
|
Static Block: static-image-6
To create the static block, go to Content>> Elements>> Blocks with Identifier * : “static-image-6″
Frontend Appearance 
- Backend Setting: Please click Here to view.
Copy and paste the following code into the content tab of this static block:
|
1
2
3
4
5
|
<div class="static-image-content">
<div class="static-image"><a title="Static Image" href="#"><img src="{{media url="wysiwyg/banner/banner3-2.jpg"}}" alt="Static Image" /></a></div>
<div class="static-image"><a class="first-image" title="Static Image" href="#"><img src="{{media url="wysiwyg/banner/banner3-3.jpg"}}" alt="Static Image" /></a> <a title="Static Image" href="#"><img src="{{media url="wysiwyg/banner/banner3-4.jpg"}}" alt="Static Image" /></a></div>
<div class="static-image"><a title="Static Image" href="#"><img src="{{media url="wysiwyg/banner/banner3-5.jpg"}}" alt="Static Image" /></a></div>
</div>
|
Static Block: static-image-7
To create the static block, go to Content>> Elements>> Blocks with Identifier * : “static-image-7″
Frontend Appearance 
- Backend Setting: Please click Here to view.
Copy and paste the following code into the content tab of this static block:
|
1
2
3
|
<div class="static-image-7">
<div class="static-image"><a title="Static Image" href="#"><img src="{{media url="wysiwyg/banner/banner3-6.jpg"}}" alt="Static Image" /></a></div>
</div>
|
To create the static block, go to Content>> Elements>> Blocks with Identifier * : “banner-v51″
Frontend Appearance 
- Backend Setting: Please click Here to view.
Copy and paste the following code into the content tab of this static block:
|
1
2
3
4
|
<div class="banner-v51">
<div class="left-banner static-image"><a title="Static Image" href="#"> <img src="{{media url="wysiwyg/banner/banner-v51.jpg"}}" alt="Banner" /> </a></div>
<div class="right-banner static-image"><a title="Static Image" href="#"> <img src="{{media url="wysiwyg/banner/banner-v52.jpg"}}" alt="Banner" /> </a> <a title="Static Image" href="#"> <img src="{{media url="wysiwyg/banner/banner-v53.jpg"}}" alt="Banner" /> </a></div>
</div>
|
Static Block: clientsay-v5
To create the static block, go to Content>> Elements>> Blocks with Identifier * : “clientsay-v5″
Frontend Appearance 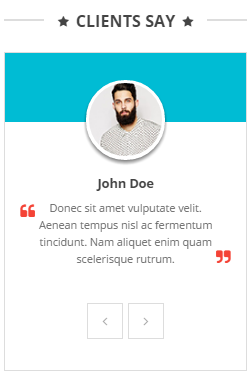
- Backend Setting: Please click Here to view.
Copy and paste the following code into the content tab of this static block:
|
1
2
3
4
5
6
7
8
9
10
11
12
13
14
15
16
17
18
19
20
21
22
23
24
25
26
27
28
29
30
31
32
33
34
35
36
37
38
39
40
41
42
43
44
45
46
47
48
49
50
51
52
53
54
55
56
57
58
59
60
61
62
63
64
65
66
67
68
69
70
71
72
|
<div class="clients-say-container">
<div class="title-home">
<h2><span>Clients Say</span></h2>
</div>
<div class="clientsay-wrap">
<div class="clients-say-content">
<div class="clients-say-slider">
<div class="item">
<div class="item-inner">
<div class="image-box-client">
<div class="image"><img src="{{media url="wysiwyg/clients/client-1-v5.jpg"}}" alt="Client" /></div>
</div>
<div class="info-client">
<h3>John Doe</h3>
<div class="description">Donec sit amet vulputate velit. Aenean tempus nisl ac fermentum tincidunt. Nam aliquet enim quam scelerisque rutrum.</div>
</div>
</div>
</div>
</div>
<script type="text/javascript">// <![CDATA[
jQuery(document).ready(function($) {
var clients_slider = $(".clients-say-slider");
clients_slider.owlCarousel({
nav: true,
dots:false,
responsive: {
0: {
items:1
},
480: {
items:1
},
768: {
items:1
},
991: {
items:1
},
1200: {
items:1
}
}
});
});
// ]]></script>
</div>
</div>
</div>
|
Static Block: collection-v5
To create the static block, go to Content>> Elements>> Blocks with Identifier * : “collection-v5″
Frontend Appearance 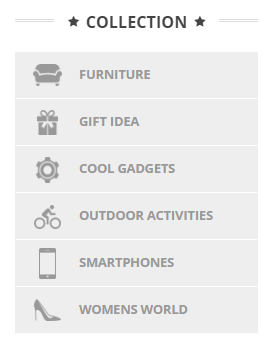
- Backend Setting: Please click Here to view.
Copy and paste the following code into the content tab of this static block:
|
1
2
3
4
5
6
7
8
9
10
11
12
13
14
15
|
<div class="collection-sidebar">
<div class="title-home">
<h2><span>Collection</span></h2>
</div>
<div class="collection-content">
<ul class="collection-list">
<li><a title="Furniture" href="#"> <span class="icon-collection"> <img src="{{media url="wysiwyg/collection/icon-1.png"}}" alt="Collection" /> </span> <span class="name-collection">Furniture</span> </a></li>
<li><a title="Gift Idea" href="#"> <span class="icon-collection"> <img src="{{media url="wysiwyg/collection/icon-2.png"}}" alt="Gift Idea" /> </span> <span class="name-collection">Gift Idea</span> </a></li>
<li><a title="Cool Gadgets" href="#"> <span class="icon-collection"> <img src="{{media url="wysiwyg/collection/icon-3.png"}}" alt="Cool Gadgets" /> </span> <span class="name-collection">Cool Gadgets</span> </a></li>
<li><a title="Outdoor Activities" href="#"> <span class="icon-collection"> <img src="{{media url="wysiwyg/collection/icon-4.png"}}" alt="Outdoor Activities" /> </span> <span class="name-collection">Outdoor Activities</span> </a></li>
<li><a title="Smartphones" href="#"> <span class="icon-collection"> <img src="{{media url="wysiwyg/collection/icon-5.png"}}" alt="Smartphones" /> </span> <span class="name-collection">Smartphones</span> </a></li>
<li><a title="Womens World" href="#"> <span class="icon-collection"> <img src="{{media url="wysiwyg/collection/icon-6.png"}}" alt="Womens World" /> </span> <span class="name-collection">Womens World</span> </a></li>
</ul>
</div>
</div>
|
To create the static block, go to Content>> Elements>> Blocks with Identifier * : “banner-v52″
Frontend Appearance 
- Backend Setting: Please click Here to view.
Copy and paste the following code into the content tab of this static block:
|
1
|
<div class="banner-v52 static-image"><a title="Static Image" href="#"> <img src="{{media url="wysiwyg/banner/banner-v54.jpg"}}" alt="Banner" /> </a> <a title="Static Image" href="#"> <img src="{{media url="wysiwyg/banner/banner-v55.jpg"}}" alt="Banner" /> </a> <a title="Static Image" href="#"> <img src="{{media url="wysiwyg/banner/banner-v56.jpg"}}" alt="Banner" /> </a></div>
|
Static Block: brand-v5
To create the static block, go to Content>> Elements>> Blocks with Identifier * : “brand-v5″
Frontend Appearance 
- Backend Setting: Please click Here to view.
Copy and paste the following code into the content tab of this static block:
|
1
2
3
4
5
6
7
8
9
10
11
12
13
14
15
16
17
18
|
<div class="brand-container">
<div class="title-home">
<h2><span>Our Brands</span></h2>
</div>
<div class="brands-content">
<ul class="brand-list">
<li><a title="Brand" href="#"> <img src="{{media url="wysiwyg/brand/brand-1.jpg"}}" alt="Brand" /> </a></li>
<li><a title="Brand" href="#"> <img src="{{media url="wysiwyg/brand/brand-2.jpg"}}" alt="Brand" /> </a></li>
<li><a title="Brand" href="#"> <img src="{{media url="wysiwyg/brand/brand-3.jpg"}}" alt="Brand" /> </a></li>
<li><a title="Brand" href="#"> <img src="{{media url="wysiwyg/brand/brand-4.jpg"}}" alt="Brand" /> </a></li>
<li><a title="Brand" href="#"> <img src="{{media url="wysiwyg/brand/brand-5.jpg"}}" alt="Brand" /> </a></li>
<li><a title="Brand" href="#"> <img src="{{media url="wysiwyg/brand/brand-6.jpg"}}" alt="Brand" /> </a></li>
<li><a title="Brand" href="#"> <img src="{{media url="wysiwyg/brand/brand-7.jpg"}}" alt="Brand" /> </a></li>
<li><a title="Brand" href="#"> <img src="{{media url="wysiwyg/brand/brand-8.jpg"}}" alt="Brand" /> </a></li>
<li><a title="Brand" href="#"> <img src="{{media url="wysiwyg/brand/brand-9.jpg"}}" alt="Brand" /> </a></li>
</ul>
</div>
</div>
|
Static Block: facebook-fanbox
To create the static block, go to Content>> Elements>> Blocks with Identifier * : “facebook-fanbox”
Frontend Appearance 
- Backend Setting: Please click Here to view.
Copy and paste the following code into the content tab of this static block:
To create the static block, go to Content>> Elements>> Blocks with Identifier * : “banner-v53″
Frontend Appearance 
- Backend Setting: Please click Here to view.
Copy and paste the following code into the content tab of this static block:
|
1
|
<div class="banner-v53 static-image"><a title="Static Image" href="#"> <img src="{{media url="wysiwyg/banner/banner-v57.jpg"}}" alt="Banner" /> </a></div>
|
Static Block: lastest-blog-v5
To create the static block, go to Content>> Elements>> Blocks with Identifier * : “lastest-blog-v5″
Frontend Appearance 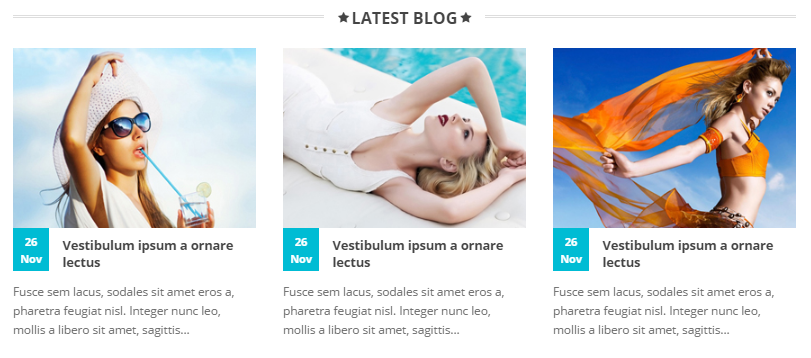
- Backend Setting: Please click Here to view.
Copy and paste the following code into the content tab of this static block:
|
1
2
3
4
5
6
7
8
9
10
11
12
13
14
15
16
17
18
19
20
21
22
23
24
25
26
27
28
29
30
31
32
33
34
35
36
37
38
39
40
41
42
43
44
45
46
47
48
49
50
51
52
53
54
55
56
57
58
59
60
61
62
63
64
65
66
67
68
69
70
71
72
73
74
75
76
77
78
79
80
81
82
83
84
85
86
87
88
89
90
91
92
93
94
95
96
97
98
99
100
101
102
|
<div class="latest-post-container">
<div class="title-home">
<h2><span>Latest Blog</span></h2>
</div>
<div class="slider-post-container">
<div class="slider-post">
<div class="item item-post">
<div class="image-blog static-image"><a class="img-link" title="Vestibulum ipsum a ornare lectus" href="#"><img src="{{media url="wysiwyg/blog/blo1.jpg"}}" alt="Blog Image" /></a></div>
<div class="info-blog">
<div class="date-post-title">
<div class="date-post">
<div class="day">26</div>
<div class="month">Nov</div>
</div>
<h2 class="postTitle"><a href="#">Vestibulum ipsum a ornare lectus</a></h2>
</div>
<div class="postContent">Fusce sem lacus, sodales sit amet eros a, pharetra feugiat nisl. Integer nunc leo, mollis a libero sit amet, sagittis...</div>
</div>
</div>
<div class="item item-post">
<div class="image-blog static-image"><a class="img-link" title="Vestibulum ipsum a ornare lectus" href="#"><img src="{{media url="wysiwyg/blog/blo2.jpg"}}" alt="Blog Image" /></a></div>
<div class="info-blog">
<div class="date-post-title">
<div class="date-post">
<div class="day">26</div>
<div class="month">Nov</div>
</div>
<h2 class="postTitle"><a href="#">Vestibulum ipsum a ornare lectus</a></h2>
</div>
<div class="postContent">Fusce sem lacus, sodales sit amet eros a, pharetra feugiat nisl. Integer nunc leo, mollis a libero sit amet, sagittis...</div>
</div>
</div>
<div class="item item-post">
<div class="image-blog static-image"><a class="img-link" title="Vestibulum ipsum a ornare lectus" href="#"><img src="{{media url="wysiwyg/blog/blo3.jpg"}}" alt="Blog Image" /></a></div>
<div class="info-blog">
<div class="date-post-title">
<div class="date-post">
<div class="day">26</div>
<div class="month">Nov</div>
</div>
<h2 class="postTitle"><a href="#">Vestibulum ipsum a ornare lectus</a></h2>
</div>
<div class="postContent">Fusce sem lacus, sodales sit amet eros a, pharetra feugiat nisl. Integer nunc leo, mollis a libero sit amet, sagittis...</div>
</div>
</div>
<div class="item item-post">
<div class="image-blog static-image"><a class="img-link" title="Vestibulum ipsum a ornare lectus" href="#"><img src="{{media url="wysiwyg/blog/blo4.jpg"}}" alt="Blog Image" /></a></div>
<div class="info-blog">
<div class="date-post-title">
<div class="date-post">
<div class="day">26</div>
<div class="month">Nov</div>
</div>
<h2 class="postTitle"><a href="#">Vestibulum ipsum a ornare lectus</a></h2>
</div>
<div class="postContent">Fusce sem lacus, sodales sit amet eros a, pharetra feugiat nisl. Integer nunc leo, mollis a libero sit amet, sagittis...</div>
</div>
</div>
<div class="item item-post">
<div class="image-blog static-image"><a class="img-link" title="Vestibulum ipsum a ornare lectus" href="#"><img src="{{media url="wysiwyg/blog/blo5.jpg"}}" alt="Blog Image" /></a></div>
<div class="info-blog">
<div class="date-post-title">
<div class="date-post">
<div class="day">26</div>
<div class="month">Nov</div>
</div>
<h2 class="postTitle"><a href="#">Vestibulum ipsum a ornare lectus</a></h2>
</div>
<div class="postContent">Fusce sem lacus, sodales sit amet eros a, pharetra feugiat nisl. Integer nunc leo, mollis a libero sit amet, sagittis...</div>
</div>
</div>
</div>
</div>
<script type="text/javascript">// <![CDATA[
jQuery(document).ready(function($) {
var post_slider = $(".slider-post");
post_slider.owlCarousel({
nav: true,
dots:false,
margin: 30,
responsive: {
0: {
items:1
},
480: {
items:2
},
768: {
items:3
},
991: {
items:2
},
1200: {
items:3
}
}
});
});
// ]]></script>
</div>
|
Static Block: services-v5
To create the static block, go to Content>> Elements>> Blocks with Identifier * : “services-v5″
Frontend Appearance 
- Backend Setting: Please click Here to view.
Copy and paste the following code into the content tab of this static block:
|
1
2
3
4
5
6
7
|
<div class="services">
<div class="row">
<div class="col-lg-4 col-md-4 col-sm-4 service-item"><a title="Services" href="#"> <img src="{{media url="wysiwyg/banner/banner-v58.png"}}" alt="Service" /> </a></div>
<div class="col-lg-4 col-md-4 col-sm-4 service-item"><a title="Services" href="#"> <img src="{{media url="wysiwyg/banner/banner-v59.png"}}" alt="Service" /> </a></div>
<div class="col-lg-4 col-md-4 col-sm-4 service-item"><a title="Services" href="#"> <img src="{{media url="wysiwyg/banner/banner-v551.png"}}" alt="Service" /> </a></div>
</div>
</div>
|
To create the static block, go to Content>> Elements>> Blocks with Identifier * : “banner-v61″
Frontend Appearance 
- Backend Setting: Please click Here to view.
Copy and paste the following code into the content tab of this static block:
|
1
2
3
4
|
<div class="banner-v61">
<div class="left-banner static-image"><a title="Banner" href="#"> <img src="{{media url="wysiwyg/banner/banner61.jpg"}}" alt="Banner" /> </a></div>
<div class="right-banner static-image"><a title="Banner" href="#"> <img src="{{media url="wysiwyg/banner/banner62.jpg"}}" alt="Banner" /> </a> <a title="Banner" href="#"> <img src="{{media url="wysiwyg/banner/banner63.jpg"}}" alt="Banner" /> </a></div>
</div>
|
Static Block: services-v6
To create the static block, go to Content>> Elements>> Blocks with Identifier * : “services-v6″
Frontend Appearance 
- Backend Setting: Please click Here to view.
Copy and paste the following code into the content tab of this static block:
|
1
2
3
4
5
6
7
8
9
10
11
12
13
14
15
16
|
<div class="services-v6">
<div class="row">
<div class="col-lg-3 col-md-3 col-sm-6 item item-1">
<div class="item-inner"><a class="item-inline" title="30 DAY RETURN" href="#"> <span class="title-sv">30 DAY RETURN</span> <span>moneyback guarantee</span> </a></div>
</div>
<div class="col-lg-3 col-md-3 col-sm-6 item item-2">
<div class="item-inner"><a class="item-inline" title="FREE SHIPPING" href="#"> <span class="title-sv">FREE SHIPPING</span> <span>on all order over $99</span> </a></div>
</div>
<div class="col-lg-3 col-md-3 col-sm-6 item item-3">
<div class="item-inner"><a class="item-inline" title="LOWEST PRICE" href="#"> <span class="title-sv">LOWEST PRICE</span> <span>guarantee</span> </a></div>
</div>
<div class="col-lg-3 col-md-3 col-sm-6 item item-4">
<div class="item-inner"><a class="item-inline" title="SAFE SHOPPING" href="#"> <span class="title-sv">SAFE SHOPPING</span> <span>guarantee</span> </a></div>
</div>
</div>
</div>
|
Static Block: lastest-blog-v6
To create the static block, go to Content>> Elements>> Blocks with Identifier * : “lastest-blog-v6″
Frontend Appearance 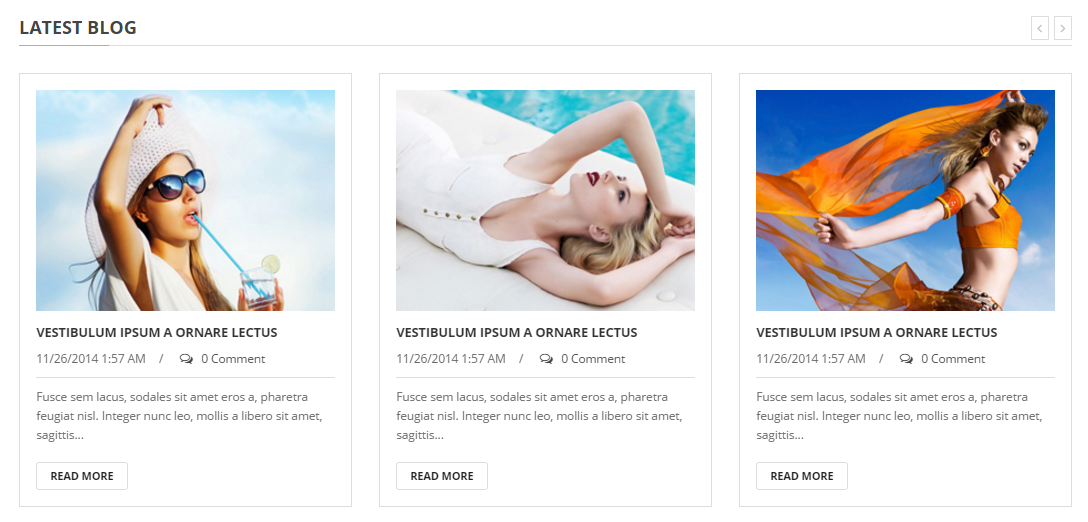
- Backend Setting: Please click Here to view.
Copy and paste the following code into the content tab of this static block:
|
1
2
3
4
5
6
7
8
9
10
11
12
13
14
15
16
17
18
19
20
21
22
23
24
25
26
27
28
29
30
31
32
33
34
35
36
37
38
39
40
41
42
43
44
45
46
47
48
49
50
51
52
53
54
55
56
57
58
59
60
61
62
63
64
65
66
67
68
69
70
71
72
73
74
75
76
77
78
79
80
81
82
83
84
85
|
<div class="latest-post-type2">
<div class="title-home-page">Latest Blog</div>
<div class="slider-post-container">
<div class="slider-post">
<div class="item item-post">
<div class="post-content">
<div class="image-blog static-image"><a class="img-link" title="Vestibulum ipsum a ornare lectus" href="#"> <img src="{{media url="wysiwyg/blog/blo1.jpg"}}" alt="Blog" /> </a></div>
<div class="info-blog">
<h2 class="postTitle"><a href="#">Vestibulum ipsum a ornare lectus</a></h2>
<div class="date-comment"><span class="date">11/26/2014 1:57 AM</span> <a class="comment" href="#"><span>0</span> <span>Comment </span></a></div>
<div class="postContent">Fusce sem lacus, sodales sit amet eros a, pharetra feugiat nisl. Integer nunc leo, mollis a libero sit amet, sagittis...</div>
<a class="readmore" title="Read more" href="#">Read more</a></div>
</div>
</div>
<div class="item item-post">
<div class="post-content">
<div class="image-blog static-image"><a class="img-link" title="Vestibulum ipsum a ornare lectus" href="#"> <img src="{{media url="wysiwyg/blog/blo2.jpg"}}" alt="Blog" /> </a></div>
<div class="info-blog">
<h2 class="postTitle"><a href="#">Vestibulum ipsum a ornare lectus</a></h2>
<div class="date-comment"><span class="date">11/26/2014 1:57 AM</span> <a class="comment" href="#"><span>0</span> <span>Comment </span></a></div>
<div class="postContent">Fusce sem lacus, sodales sit amet eros a, pharetra feugiat nisl. Integer nunc leo, mollis a libero sit amet, sagittis...</div>
<a class="readmore" title="Read more" href="#">Read more</a></div>
</div>
</div>
<div class="item item-post">
<div class="post-content">
<div class="image-blog static-image"><a class="img-link" title="Vestibulum ipsum a ornare lectus" href="#"> <img src="{{media url="wysiwyg/blog/blo3.jpg"}}" alt="Blog" /> </a></div>
<div class="info-blog">
<h2 class="postTitle"><a href="#">Vestibulum ipsum a ornare lectus</a></h2>
<div class="date-comment"><span class="date">11/26/2014 1:57 AM</span> <a class="comment" href="#"><span>0</span> <span>Comment </span></a></div>
<div class="postContent">Fusce sem lacus, sodales sit amet eros a, pharetra feugiat nisl. Integer nunc leo, mollis a libero sit amet, sagittis...</div>
<a class="readmore" title="Read more" href="#">Read more</a></div>
</div>
</div>
<div class="item item-post">
<div class="post-content">
<div class="image-blog static-image"><a class="img-link" title="Vestibulum ipsum a ornare lectus" href="#"> <img src="{{media url="wysiwyg/blog/blo4.jpg"}}" alt="Blog" /> </a></div>
<div class="info-blog">
<h2 class="postTitle"><a href="#">Vestibulum ipsum a ornare lectus</a></h2>
<div class="date-comment"><span class="date">11/26/2014 1:57 AM</span> <a class="comment" href="#"><span>0</span> <span>Comment </span></a></div>
<div class="postContent">Fusce sem lacus, sodales sit amet eros a, pharetra feugiat nisl. Integer nunc leo, mollis a libero sit amet, sagittis...</div>
<a class="readmore" title="Read more" href="#">Read more</a></div>
</div>
</div>
<div class="item item-post">
<div class="post-content">
<div class="image-blog static-image"><a class="img-link" title="Vestibulum ipsum a ornare lectus" href="#"> <img src="{{media url="wysiwyg/blog/blo5.jpg"}}" alt="Blog" /> </a></div>
<div class="info-blog">
<h2 class="postTitle"><a href="#">Vestibulum ipsum a ornare lectus</a></h2>
<div class="date-comment"><span class="date">11/26/2014 1:57 AM</span> <a class="comment" href="#"><span>0</span> <span>Comment </span></a></div>
<div class="postContent">Fusce sem lacus, sodales sit amet eros a, pharetra feugiat nisl. Integer nunc leo, mollis a libero sit amet, sagittis...</div>
<a class="readmore" title="Read more" href="#">Read more</a></div>
</div>
</div>
</div>
<script type="text/javascript">// <![CDATA[
jQuery(document).ready(function($) {
var post_slider = $(".slider-post");
post_slider.owlCarousel({
nav: true,
dots:false,
margin: 30,
responsive: {
0: {
items:1
},
480: {
items:2
},
768: {
items:2
},
991: {
items:2
},
1200: {
items:3
}
}
});
});
// ]]></script>
</div>
</div>
|
Static Block: services-v7
To create the static block, go to Content>> Elements>> Blocks with Identifier * : “services-v7″
Frontend Appearance 
- Backend Setting: Please click Here to view.
Copy and paste the following code into the content tab of this static block:
|
1
2
3
4
5
6
7
|
<div class="services-v7">
<div class="row">
<div class="item-sv col-lg-4 col-md-4 col-sm-4"><a title="Service" href="#"> <img src="{{media url="wysiwyg/banner/sv-71.jpg"}}" alt="Service" /> </a></div>
<div class="item-sv col-lg-4 col-md-4 col-sm-4"><a title="Service" href="#"> <img src="{{media url="wysiwyg/banner/sv-72.jpg"}}" alt="Service" /> </a></div>
<div class="item-sv col-lg-4 col-md-4 col-sm-4"><a title="Service" href="#"> <img src="{{media url="wysiwyg/banner/sv-73.jpg"}}" alt="Service" /> </a></div>
</div>
</div>
|
To create the static block, go to Content>> Elements>> Blocks with Identifier * : “banner-71″
Frontend Appearance 
- Backend Setting: Please click Here to view.
Copy and paste the following code into the content tab of this static block:
|
1
|
<div class="banner-v71 static-image"><a title="Banner" href="#"> <img src="{{media url="wysiwyg/banner/banner71.jpg"}}" alt="Banner" /> </a> <a title="Banner" href="#"> <img src="{{media url="wysiwyg/banner/banner72.jpg"}}" alt="Banner" /> </a></div>
|
To create the static block, go to Content>> Elements>> Blocks with Identifier * : “banner-left-v7″
Frontend Appearance 
- Backend Setting: Please click Here to view.
Copy and paste the following code into the content tab of this static block:
|
1
|
<div class="banner-content static-image"><a title="Banner" href="#"> <img src="{{media url="wysiwyg/banner/banner73.jpg"}}" alt="Banner" /> </a> <a title="Banner" href="#"> <img src="{{media url="wysiwyg/banner/banner74.jpg"}}" alt="Banner" /> </a></div>
|
To create the static block, go to Content>> Elements>> Blocks with Identifier * : “banner-right-v7″
Frontend Appearance 
- Backend Setting: Please click Here to view.
Copy and paste the following code into the content tab of this static block:
|
1
|
<div class="banner-content static-image"><a title="Banner" href="#"> <img src="{{media url="wysiwyg/banner/banner75.jpg"}}" alt="Banner" /> </a></div>
|
Static Block: collection-slider
To create the static block, go to Content>> Elements>> Blocks with Identifier * : “collection-slider”
Frontend Appearance 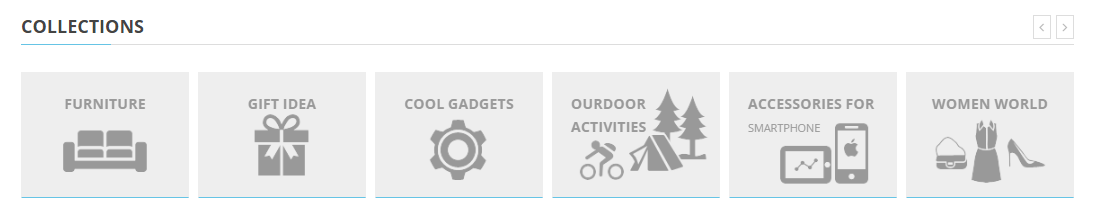
- Backend Setting: Please click Here to view.
Copy and paste the following code into the content tab of this static block:
|
1
2
3
4
5
6
7
8
9
10
11
12
13
14
15
16
17
18
19
20
21
22
23
24
25
26
27
28
29
30
31
32
33
34
35
36
37
38
39
40
41
42
43
44
45
|
<div class="collections-wrap-container">
<div class="title-home-page">Collections</div>
<div class="collections">
<div class="item collect collect1"><a href="#">Furniture</a></div>
<div class="item collect collect2"><a href="#">Gift idea</a></div>
<div class="item collect collect3"><a href="#">Cool gadgets</a></div>
<div class="item collect collect4"><a href="#">Ourdoor<br /><span>activities</span></a></div>
<div class="item collect collect5"><a href="#">Accessories for<br /><span>smartphone</span></a></div>
<div class="item collect collect6"><a href="#">Women world</a></div>
</div>
<script type="text/javascript">// <![CDATA[
jQuery(document).ready(function($) {
var collections_slider = $(".collections");
collections_slider.owlCarousel({
nav: true,
dots:false,
margin: 10,
responsive: {
0: {
items:1
},
480: {
items:3
},
768: {
items:4
},
991: {
items:4
},
1200: {
items:6
}
}
});
});
// ]]></script>
</div>
|
To create the static block, go to Content>> Elements>> Blocks with Identifier * : “banner-v81″
Frontend Appearance 
- Backend Setting: Please click Here to view.
Copy and paste the following code into the content tab of this static block:
|
1
|
<div class="banner-v81 static-image"><a title="Banner" href="#"> <img src="{{media url="wysiwyg/banner/banner86.jpg"}}" alt="Banner" /></a></div>
|
To create the static block, go to Content>> Elements>> Blocks with Identifier * : “banner-v82″
Frontend Appearance 
- Backend Setting: Please click Here to view.
Copy and paste the following code into the content tab of this static block:
|
1
2
3
4
5
|
<div class="banner82 static-image">
<div class="banner banner-left"><a title="Banner" href="#"> <img src="{{media url="wysiwyg/banner/banner81.jpg"}}" alt="Banner" /> </a></div>
<div class="banner banner-center"><a title="Banner" href="#"> <img src="{{media url="wysiwyg/banner/banner82.jpg"}}" alt="Banner" /> </a></div>
<div class="banner banner-right"><a title="Banner" href="#"> <img src="{{media url="wysiwyg/banner/banner83.jpg"}}" alt="Banner" /> </a> <a title="Banner" href="#"> <img src="{{media url="wysiwyg/banner/banner84.jpg"}}" alt="Banner" /> </a></div>
</div>
|
3.5 How To Edit Copyright in Admin Panel
Frontend Appearance

In SM Market Administration Page, please navigate to Stores>> Settings>> Configuration >> MAGENTECH >> SM Market >> Advanced to configure this theme’s copyright.
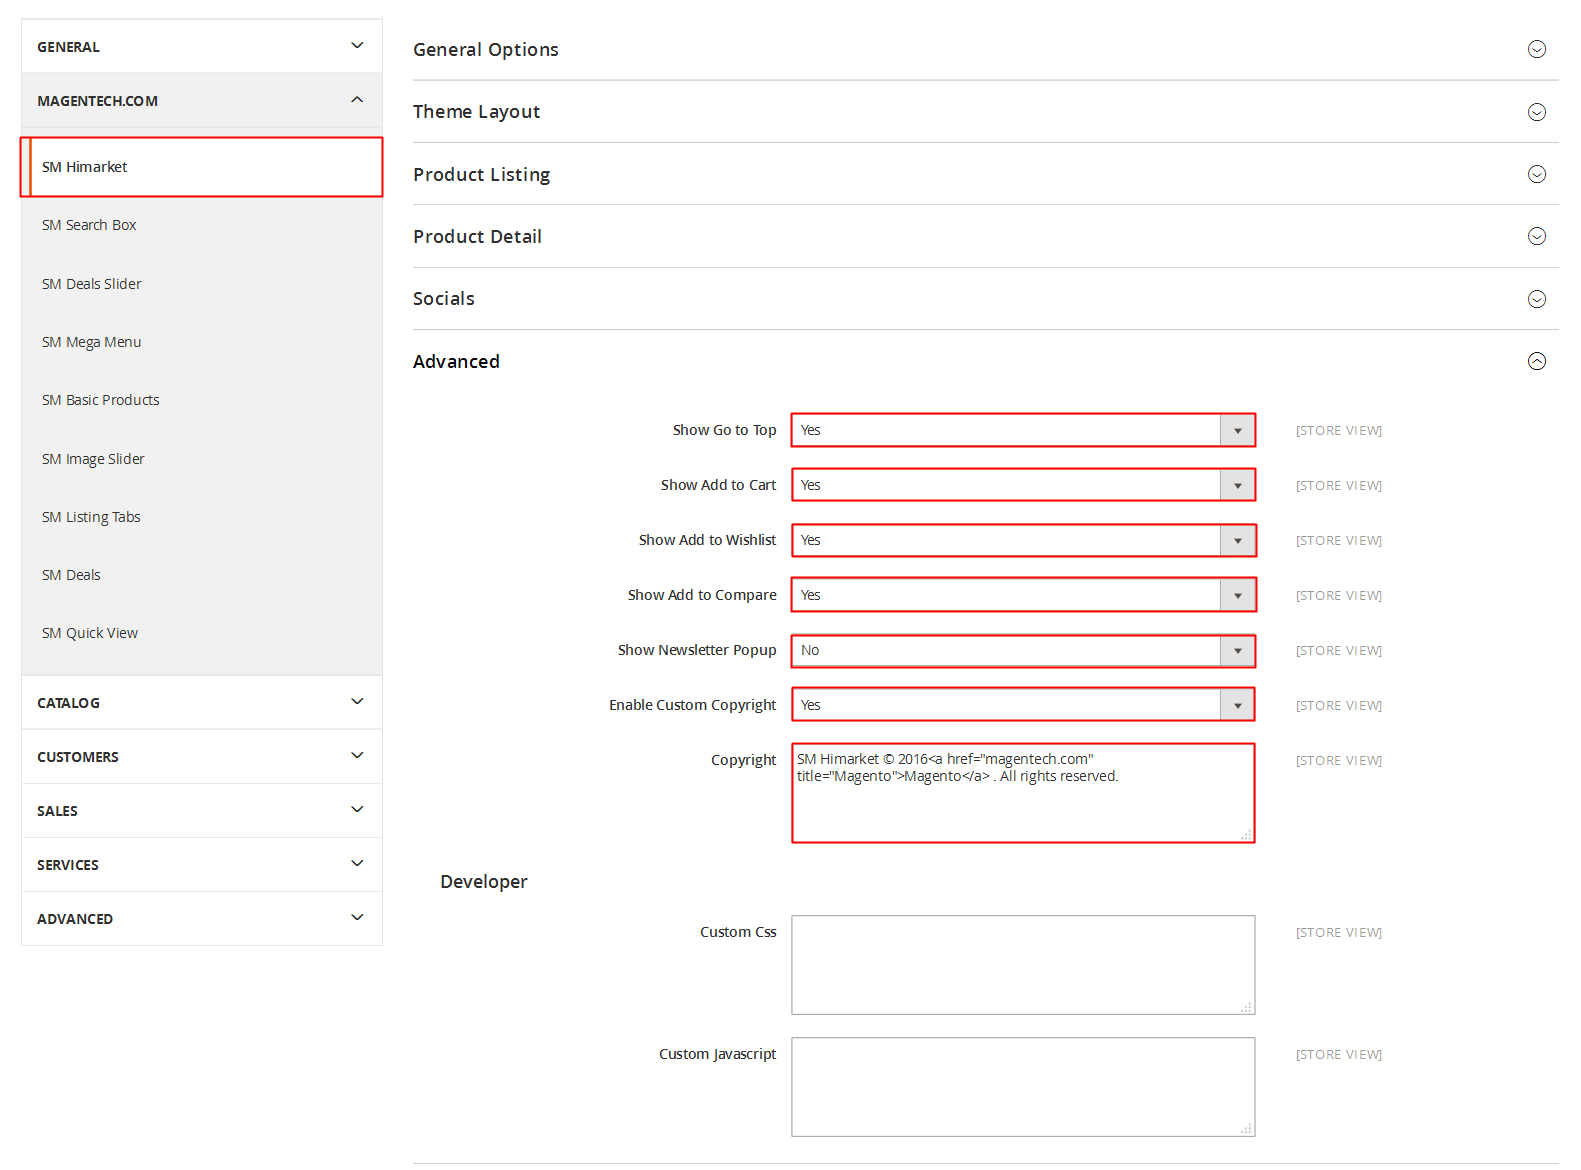
Edit the code here:
3.6 How To Customize the Social symbols in admin panel
Frontend Appearance
In SM Market Administration Page, please navigate to Stores>> Settings >> Configuration >> MAGENTECH >> SM Market >> Socials.
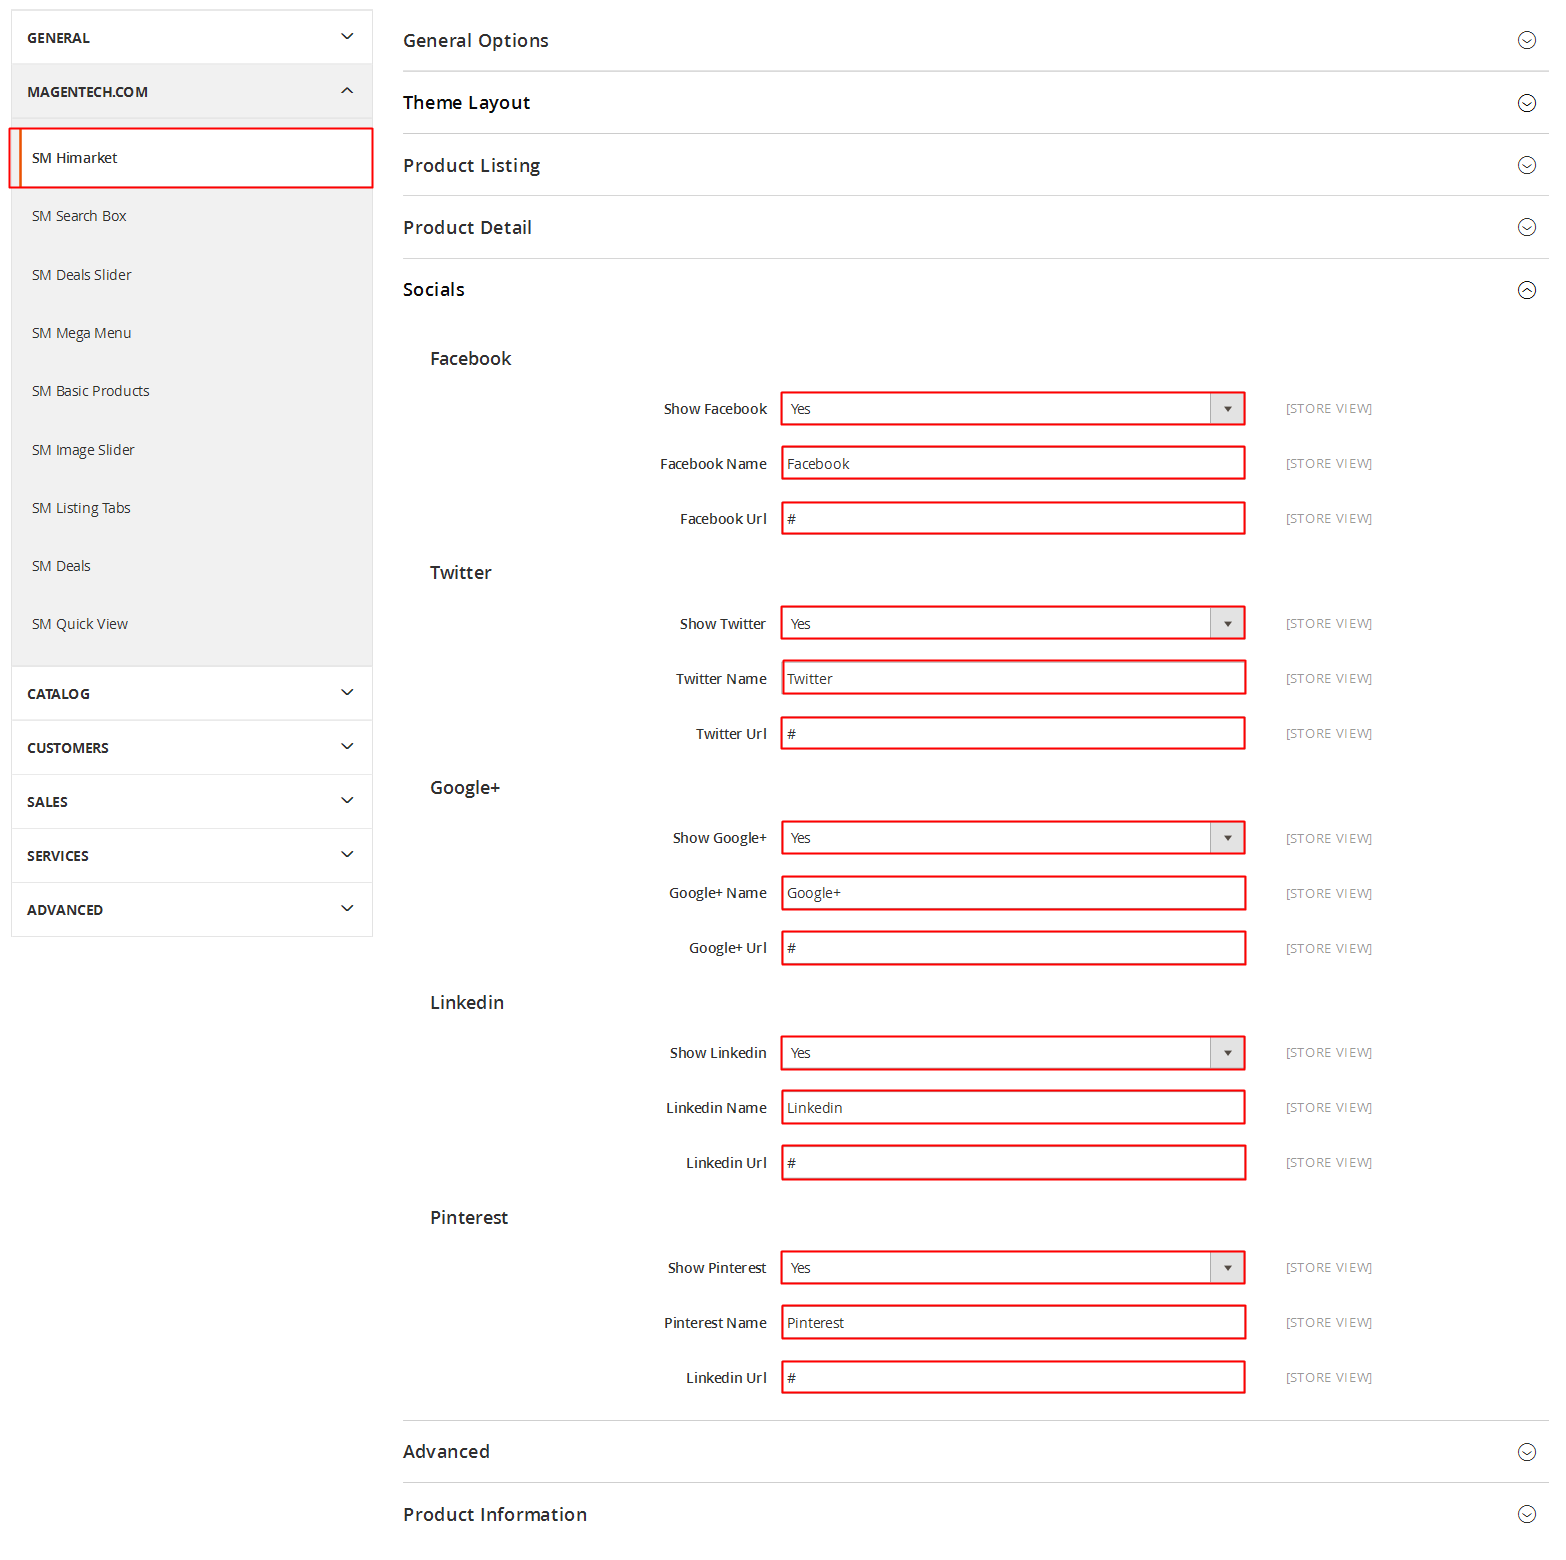
4SUPPORT
- SUPPORT - If you have any questions that are beyond the scope of this help file, please feel free to send us via: Support Tickets System
- FAQs - Go to Here to view more the Frequently Asked Questions.