Table of content as following:
1 SYSTEM REQUIREMENT – Back to top
At the basic level, this theme will require the following conditions:
- Compatible with Magento Community Edition 1.7.x; 1.8.x and 1.9.x
2LAYOUT POSITION – Back to top
3INSTALLATION – Back to top
There are two ways to install a Magento Theme:
- Install quickstart: By using this package, you will set the theme exactly as our Demo with sample data.
- Install Theme and Extensions: You will need only be using the zipped files in “Extensions” and “Theme” folders.
3.1 Install with Quickstart Package:
Magentech provides SM Quickstart package for each theme which aims to ease the installation for users. It will help you save much time of installing and configuring if you plan to start your site from the beginning.
Please following steps below:
- Step 1: Download the quickstart package
- Step 2: Extract and Upload the whole Quickstart package to your server. In Quickstart folder you will see the extracted folder that include all sample data
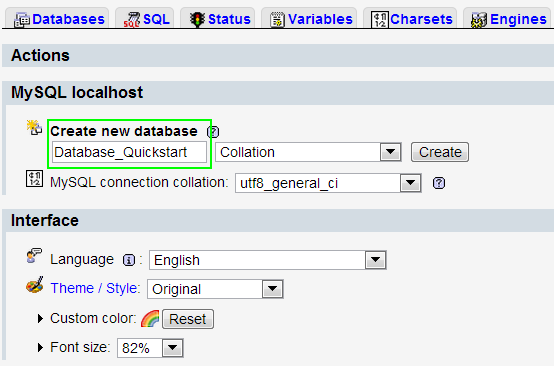
- Step 3: Create a database for your Magento
- Step 4: Start installation by opening browser and navigate to your url (where the quickstart uploaded) to load default Magento installer.
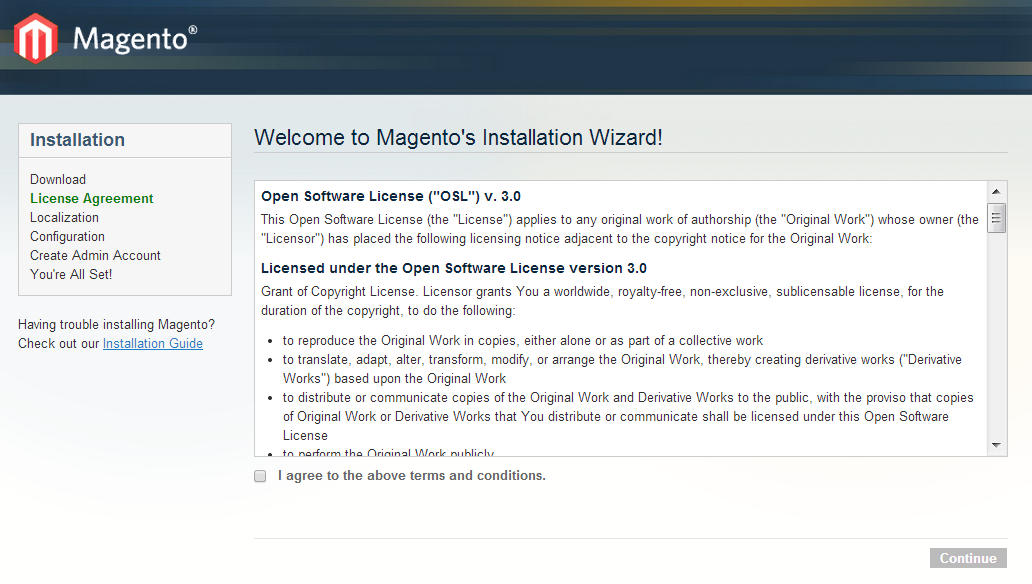
- Step 5: Finish installation
3.2 Install Magento Theme
The installation of our theme is quite simple. You just need follow steps below to get our theme ready for your Magento store:
-
Step 1: Upload folders skin and app from our download package to your Web server’s document root (from here on, referenced as {docroot}). You should see a directory layout like this:
{docroot} /magento/
app/
index.php js/
lib/
LICENSE.txt media/
pear/
skin/
var/
- Step 2: Login your Magento Admin area (ex: Access Magento Admin area: https://yourdomain/index.php/admin/)
- Step 3: Navigate to System => Configuration => Design as screen shot below.
- Step 4: Finally, Click button “Save Config” to save your configuration
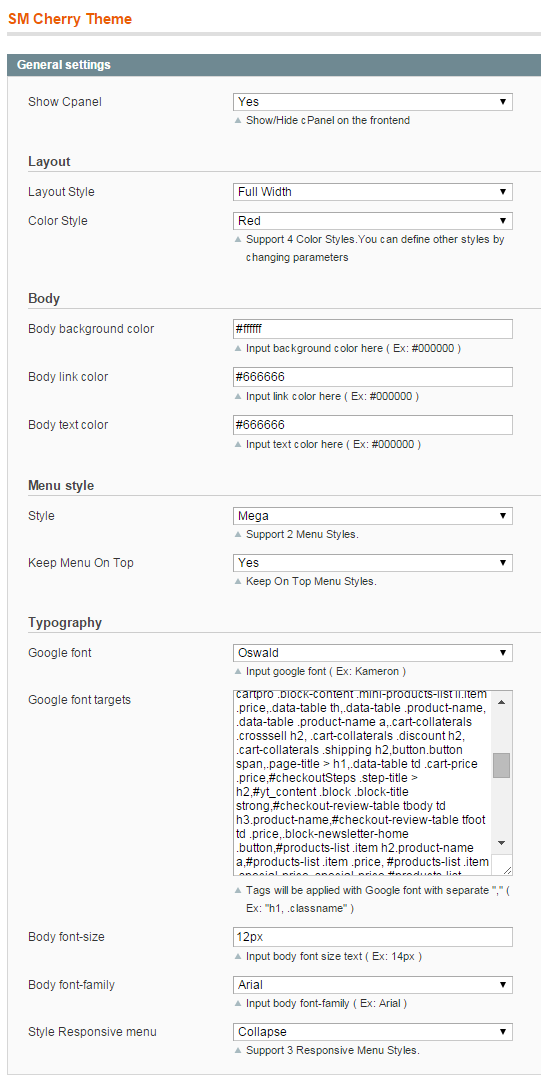
Configure theme using admin backend
For easing the theme configuration, we has been created Cpanel in both backend and frontend, this is SM Style configuration in backend:
1. Under Magento admin panel, go to System >> Configuration
2. Select SM Style Setting theme on the left-hand menu
3. Tweak the theme as you want
3.3 Install Magento Extension
You just need following steps below to get our extensions ready for your Magento store:
-
Step 1: Upload folders skin and app from our download package to your Web server’s document root (from here on, referenced as {docroot}). These files will overwrite default folders skin and app in your Magento folder, you should see a directory layout like this:
{docroot} /magento/
app/
index.php
js/
lib/
LICENSE.txt
media/
pear/
skin/
var/
- Step 2: Login your Magento Admin area (ex: access Magento Admin area: https://yourdomain/magento/index.php/admin/)
- Step 3: Navigate to System => Configuration => Extensions Configuration (on the left-hand menu)
- Step 4: You will see installed extension, click extension’s name tab to go to extension configuration page.
4CONFIGURATION – Back to top
4.1 Configure pages
Home Page with default style
To config this page, please navigate to CMS >> Pages
Create a new page named {home} in Page Management section.
- Layout: 1 column
- Page information Tab: Please click Here to view Backend Settings.
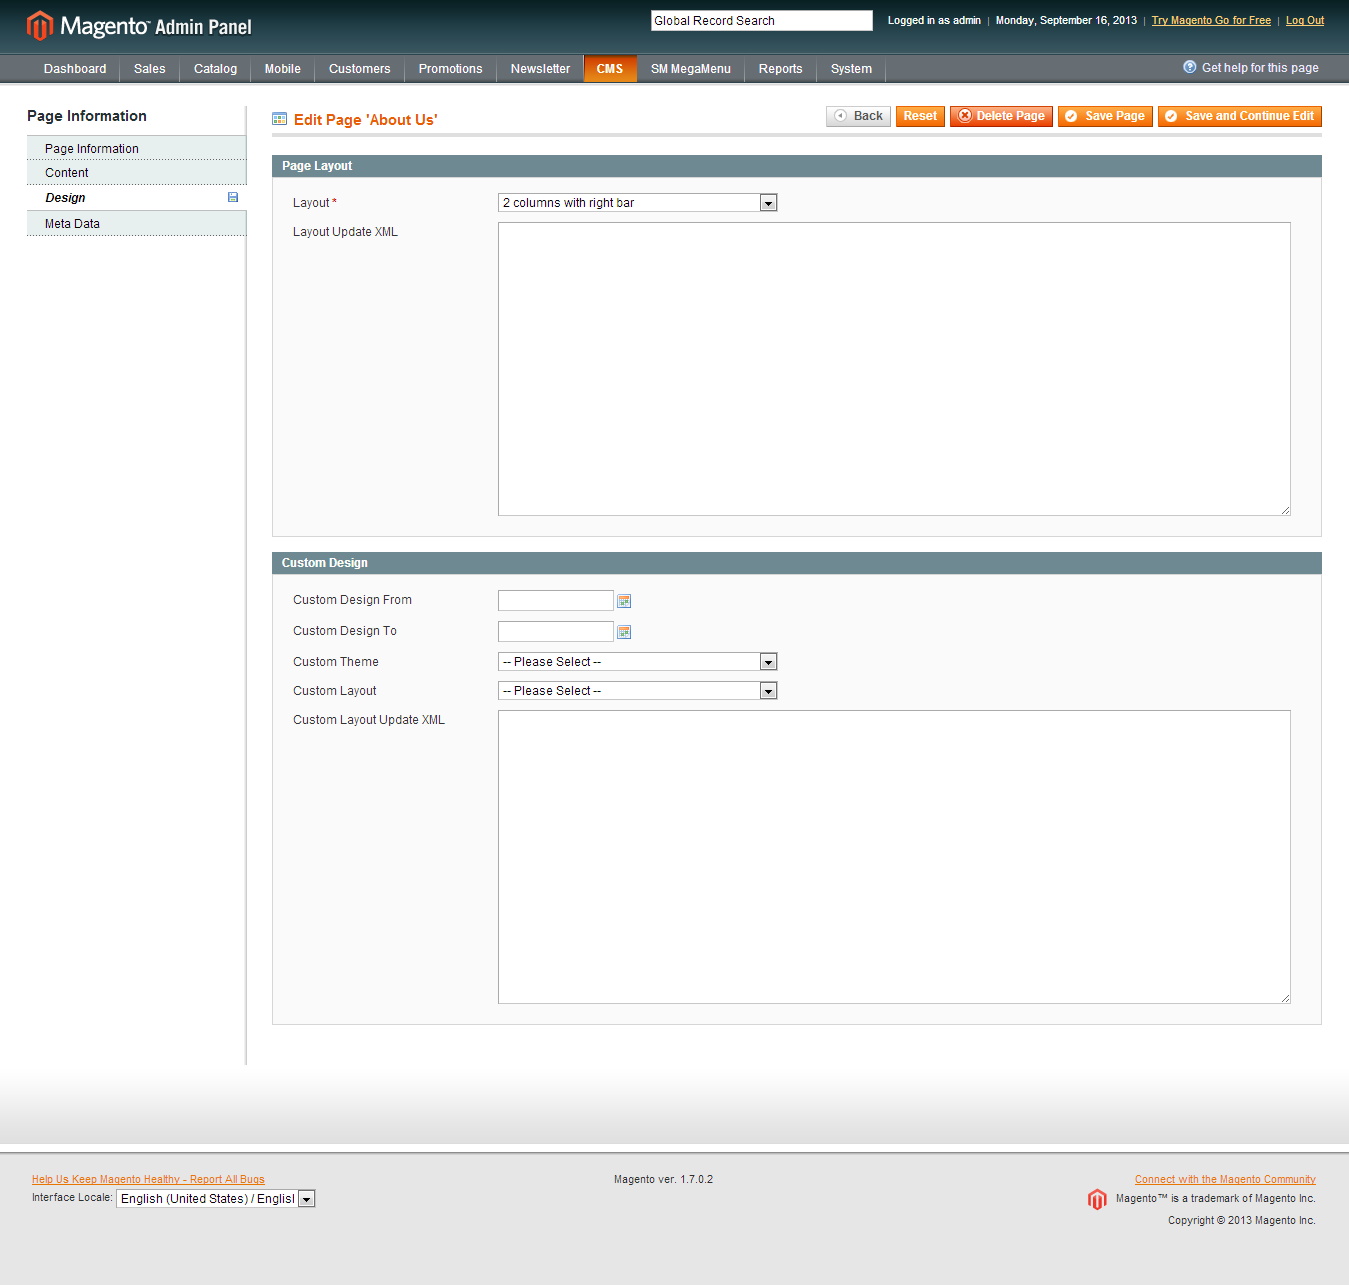
- Design Tab: Please click Here to view Backend Settings.
- Layout update XML: paste the code below to the Design field.
|
1
2
3
4
5
6
7
8
9
10
11
12
13
14
15
16
17
18
19
20
21
22
23
24
25
26
27
28
29
30
31
32
33
34
35
36
37
38
39
40
41
42
43
44
45
46
47
48
49
50
51
52
53
54
55
56
57
58
59
60
61
62
63
64
65
66
67
68
|
<reference name="servicetop">
<block type="cms/block" name="block-top">
<action method="setBlockId"><block_id>service-top</block_id></action>
</block>
</reference>
<reference name="static_image_2">
<block type="cms/block" name="static-image-2">
<action method="setBlockId"><block_id>static-image-2</block_id></action>
</block>
</reference>
<reference name="tababoutus">
<block type="cms/block" name="block-tababoutus">
<action method="setBlockId"><block_id>about-shop-home</block_id></action>
</block>
</reference>
<reference name="testimonials">
<block type="cms/block" name="block-testimonials">
<action method="setBlockId"><block_id>slider-testimonials</block_id></action>
</block>
</reference>
<reference name="staticcenter">
<block type="cms/block" name="block-image-static">
<action method="setBlockId"><block_id>static-center-image</block_id></action>
</block>
</reference>
<reference name="slider_video">
<block type="cms/block" name="block-slider">
<action method="setBlockId"><block_id>video-slider</block_id></action>
</block>
</reference>
<reference name="content_tab">
<block type="tablisting/list" name="tablisting">
<action method="setConfig"></action>
</block>
</reference>
<reference name="left_static_nav">
<block type="cms/block" name="left-static-nav">
<action method="setBlockId"><block_id>left-static-navigation</block_id></action>
</block>
</reference>
<reference name="tw_slider">
<block type="twitterslider/list" name="twitterslider.list.theme1">
<action method="setConfig">
</action>
</block>
</reference>
<reference name="left_static_image">
<block type="cms/block" name="left-static-image">
<action method="setBlockId"><block_id>img-static-left</block_id></action>
</block>
</reference>
<reference name="dealblock">
<block type="deal/List" name="deal" as="deal" template="sm/deal/default.phtml"></block>
</reference>
<reference name="latestblog">
<block type="blog/blog" name="latest-blog" template="aw_blog/latest-blog.phtml"></block>
</reference>
|
To config this page, please navigate to CMS >> Pages
Create a new page named {home-v2} in Page Management section.
- Layout: 1 column
- Page information Tab: Please click Here to view Backend Settings.
- Design Tab: Please click Here to view Backend Settings.
- Layout update XML: paste the code below to the Design field.
|
1
2
3
4
5
6
7
8
9
10
11
12
13
14
15
16
17
18
19
20
21
22
23
24
25
26
27
28
29
30
31
32
33
34
35
36
37
38
39
40
41
42
43
44
45
46
47
48
49
50
51
52
53
54
55
56
57
58
59
60
61
62
63
64
65
66
67
68
|
<reference name="servicetop">
<block type="cms/block" name="block-top">
<action method="setBlockId"><block_id>service-top</block_id></action>
</block>
</reference>
<reference name="static_image_2">
<block type="cms/block" name="static-image-2">
<action method="setBlockId"><block_id>static-image-2</block_id></action>
</block>
</reference>
<reference name="tababoutus">
<block type="cms/block" name="block-tababoutus">
<action method="setBlockId"><block_id>about-shop-home</block_id></action>
</block>
</reference>
<reference name="testimonials">
<block type="cms/block" name="block-testimonials">
<action method="setBlockId"><block_id>slider-testimonials</block_id></action>
</block>
</reference>
<reference name="staticcenter">
<block type="cms/block" name="block-image-static">
<action method="setBlockId"><block_id>static-center-image</block_id></action>
</block>
</reference>
<reference name="slider_video">
<block type="cms/block" name="block-slider">
<action method="setBlockId"><block_id>video-slider</block_id></action>
</block>
</reference>
<reference name="content_tab">
<block type="tablisting/list" name="tablisting">
<action method="setConfig"></action>
</block>
</reference>
<reference name="left_static_nav">
<block type="cms/block" name="left-static-nav">
<action method="setBlockId"><block_id>left-static-navigation</block_id></action>
</block>
</reference>
<reference name="tw_slider">
<block type="twitterslider/list" name="twitterslider.list.theme1">
<action method="setConfig">
</action>
</block>
</reference>
<reference name="left_static_image">
<block type="cms/block" name="left-static-image">
<action method="setBlockId"><block_id>img-static-left</block_id></action>
</block>
</reference>
<reference name="dealblock">
<block type="deal/List" name="deal" as="deal" template="sm/deal/default-home-v2.phtml"></block>
</reference>
<reference name="latestblog">
<block type="blog/blog" name="latest-blog" template="aw_blog/latest-blog.phtml"></block>
</reference>
|
To config this page, please navigate to CMS >> Pages
Create a new page named {home-v3} in Page Management section.
|
1
2
3
4
5
6
7
8
9
10
11
12
13
14
15
16
17
18
19
20
21
22
23
24
25
26
27
28
29
30
31
32
33
34
35
36
37
38
39
40
41
42
43
44
45
46
47
48
49
50
51
52
53
54
55
56
57
58
59
60
61
62
63
64
65
66
67
68
|
<reference name="servicetop">
<block type="cms/block" name="block-top">
<action method="setBlockId"><block_id>service-top</block_id></action>
</block>
</reference>
<reference name="static_image_2">
<block type="cms/block" name="static-image-2">
<action method="setBlockId"><block_id>static-image-2</block_id></action>
</block>
</reference>
<reference name="tababoutus">
<block type="cms/block" name="block-tababoutus">
<action method="setBlockId"><block_id>about-shop-home</block_id></action>
</block>
</reference>
<reference name="testimonials">
<block type="cms/block" name="block-testimonials">
<action method="setBlockId"><block_id>slider-testimonials</block_id></action>
</block>
</reference>
<reference name="staticcenter">
<block type="cms/block" name="block-image-static">
<action method="setBlockId"><block_id>static-center-image</block_id></action>
</block>
</reference>
<reference name="slider_video">
<block type="cms/block" name="block-slider">
<action method="setBlockId"><block_id>video-slider</block_id></action>
</block>
</reference>
<reference name="content_tab">
<block type="tablisting/list" name="tablisting">
<action method="setConfig"></action>
</block>
</reference>
<reference name="left_static_nav">
<block type="cms/block" name="left-static-nav">
<action method="setBlockId"><block_id>left-static-navigation</block_id></action>
</block>
</reference>
<reference name="tw_slider">
<block type="twitterslider/list" name="twitterslider.list.theme1">
<action method="setConfig">
</action>
</block>
</reference>
<reference name="left_static_image">
<block type="cms/block" name="left-static-image">
<action method="setBlockId"><block_id>img-static-left</block_id></action>
</block>
</reference>
<reference name="dealblock">
<block type="deal/List" name="deal" as="deal" template="sm/deal/default-home-v2.phtml"></block>
</reference>
<reference name="latestblog">
<block type="blog/blog" name="latest-blog" template="aw_blog/latest-blog.phtml"></block>
</reference>
|
Home Page with style 4
To config this page, please navigate to CMS >> Pages
Create a new page named {home-v4} in Page Management section.
- Layout: 1 column
- Page information Tab: Please click Here to view Backend Settings. Paste “URL Key” is home-v4
- Design Tab: Please click Here to view Backend Settings.
- Layout update XML: paste the code below to the Design field.
|
1
2
3
4
5
6
7
8
9
10
11
12
13
14
15
16
17
18
19
20
21
22
23
24
25
26
27
28
29
30
31
32
33
34
35
36
37
38
39
40
41
42
43
44
45
46
47
48
49
50
51
52
53
54
55
56
57
58
59
60
61
62
63
64
65
66
67
68
69
70
71
72
73
74
75
76
77
78
79
80
|
<reference name="servicetop">
<block type="cms/block" name="block-top">
<action method="setBlockId"><block_id>service-top</block_id></action>
</block>
</reference>
<reference name="static_image_3">
<block type="cms/block" name="static_image_3_home">
<action method="setBlockId"><block_id>static-image-3</block_id></action>
</block>
</reference>
<reference name="static_image_center_homve_v4">
<block type="cms/block" name="block-img-center-home-v4">
<action method="setBlockId"><block_id>static-img-center-home-v4</block_id></action>
</block>
</reference>
<reference name="recomended_home_v4">
<block type="cms/block" name="recomend_home_v4">
<action method="setBlockId"><block_id>left-column-products-home-v4</block_id></action>
</block>
</reference>
<reference name="tababoutus">
<block type="cms/block" name="block-tababoutus">
<action method="setBlockId"><block_id>about-shop-home</block_id></action>
</block>
</reference>
<reference name="testimonials">
<block type="cms/block" name="block-testimonials">
<action method="setBlockId"><block_id>slider-testimonials</block_id></action>
</block>
</reference>
<reference name="staticcenter">
<block type="cms/block" name="block-image-static">
<action method="setBlockId"><block_id>static-center-image</block_id></action>
</block>
</reference>
<reference name="slider_video_home_v4">
<block type="cms/block" name="block-slider">
<action method="setBlockId"><block_id>video-slider-home-v4</block_id></action>
</block>
</reference>
<reference name="content_tab">
<block type="tablisting/list" name="tablisting">
<action method="setConfig"></action>
</block>
</reference>
<reference name="navigation_home_v4">
<block type="cms/block" name="left-static-nav">
<action method="setBlockId"><block_id>navigation-home-v4</block_id></action>
</block>
</reference>
<reference name="tw_slider">
<block type="twitterslider/list" name="twitterslider.list.theme1">
<action method="setConfig">
</action>
</block>
</reference>
<reference name="left_static_image">
<block type="cms/block" name="left-static-image">
<action method="setBlockId"><block_id>img-static-left</block_id></action>
</block>
</reference>
<reference name="dealblock">
<block type="deal/List" name="deal" as="deal" template="sm/deal/default-home-v4.phtml"></block>
</reference>
<reference name="latestblog">
<block type="blog/blog" name="latest-blog" template="aw_blog/latest-blog.phtml"></block>
</reference>
|
4.2 Configure Mega Menu
To configure General settings, module parameters, Advance, login your administrator, go to SM Mega Menu >> Configuration
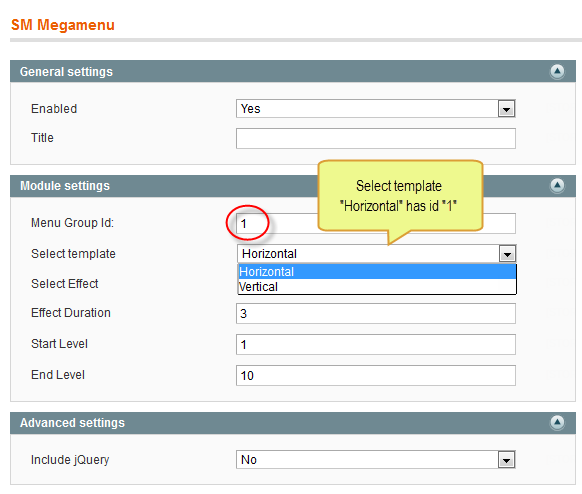
To view more guide about how to install, set up and configure SM Mega Menu as you want, please click HERE
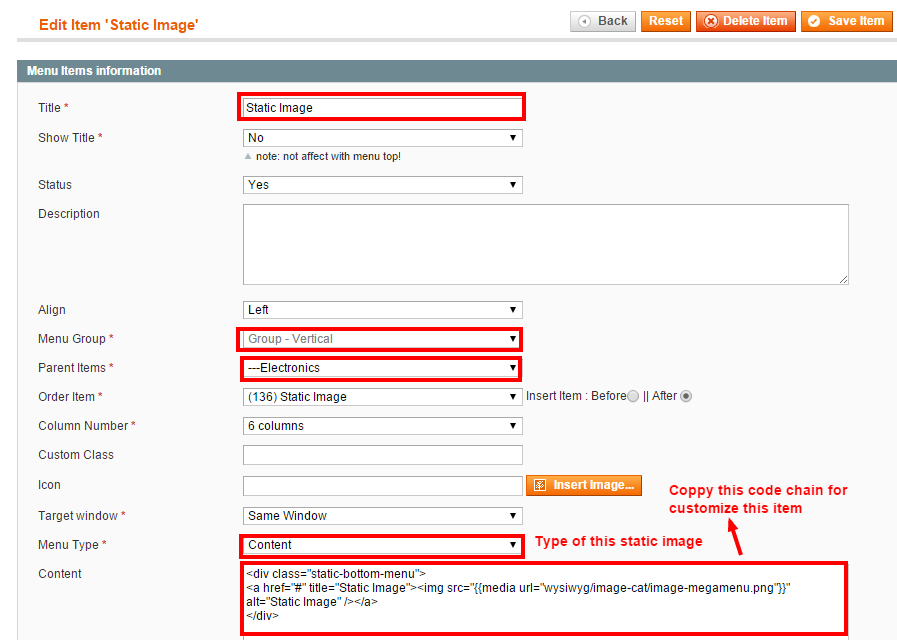
Mega Menu Items Configuration
In order to add menu items, Go to SM Mega Menu >> Menu items Manager
HOME MENU
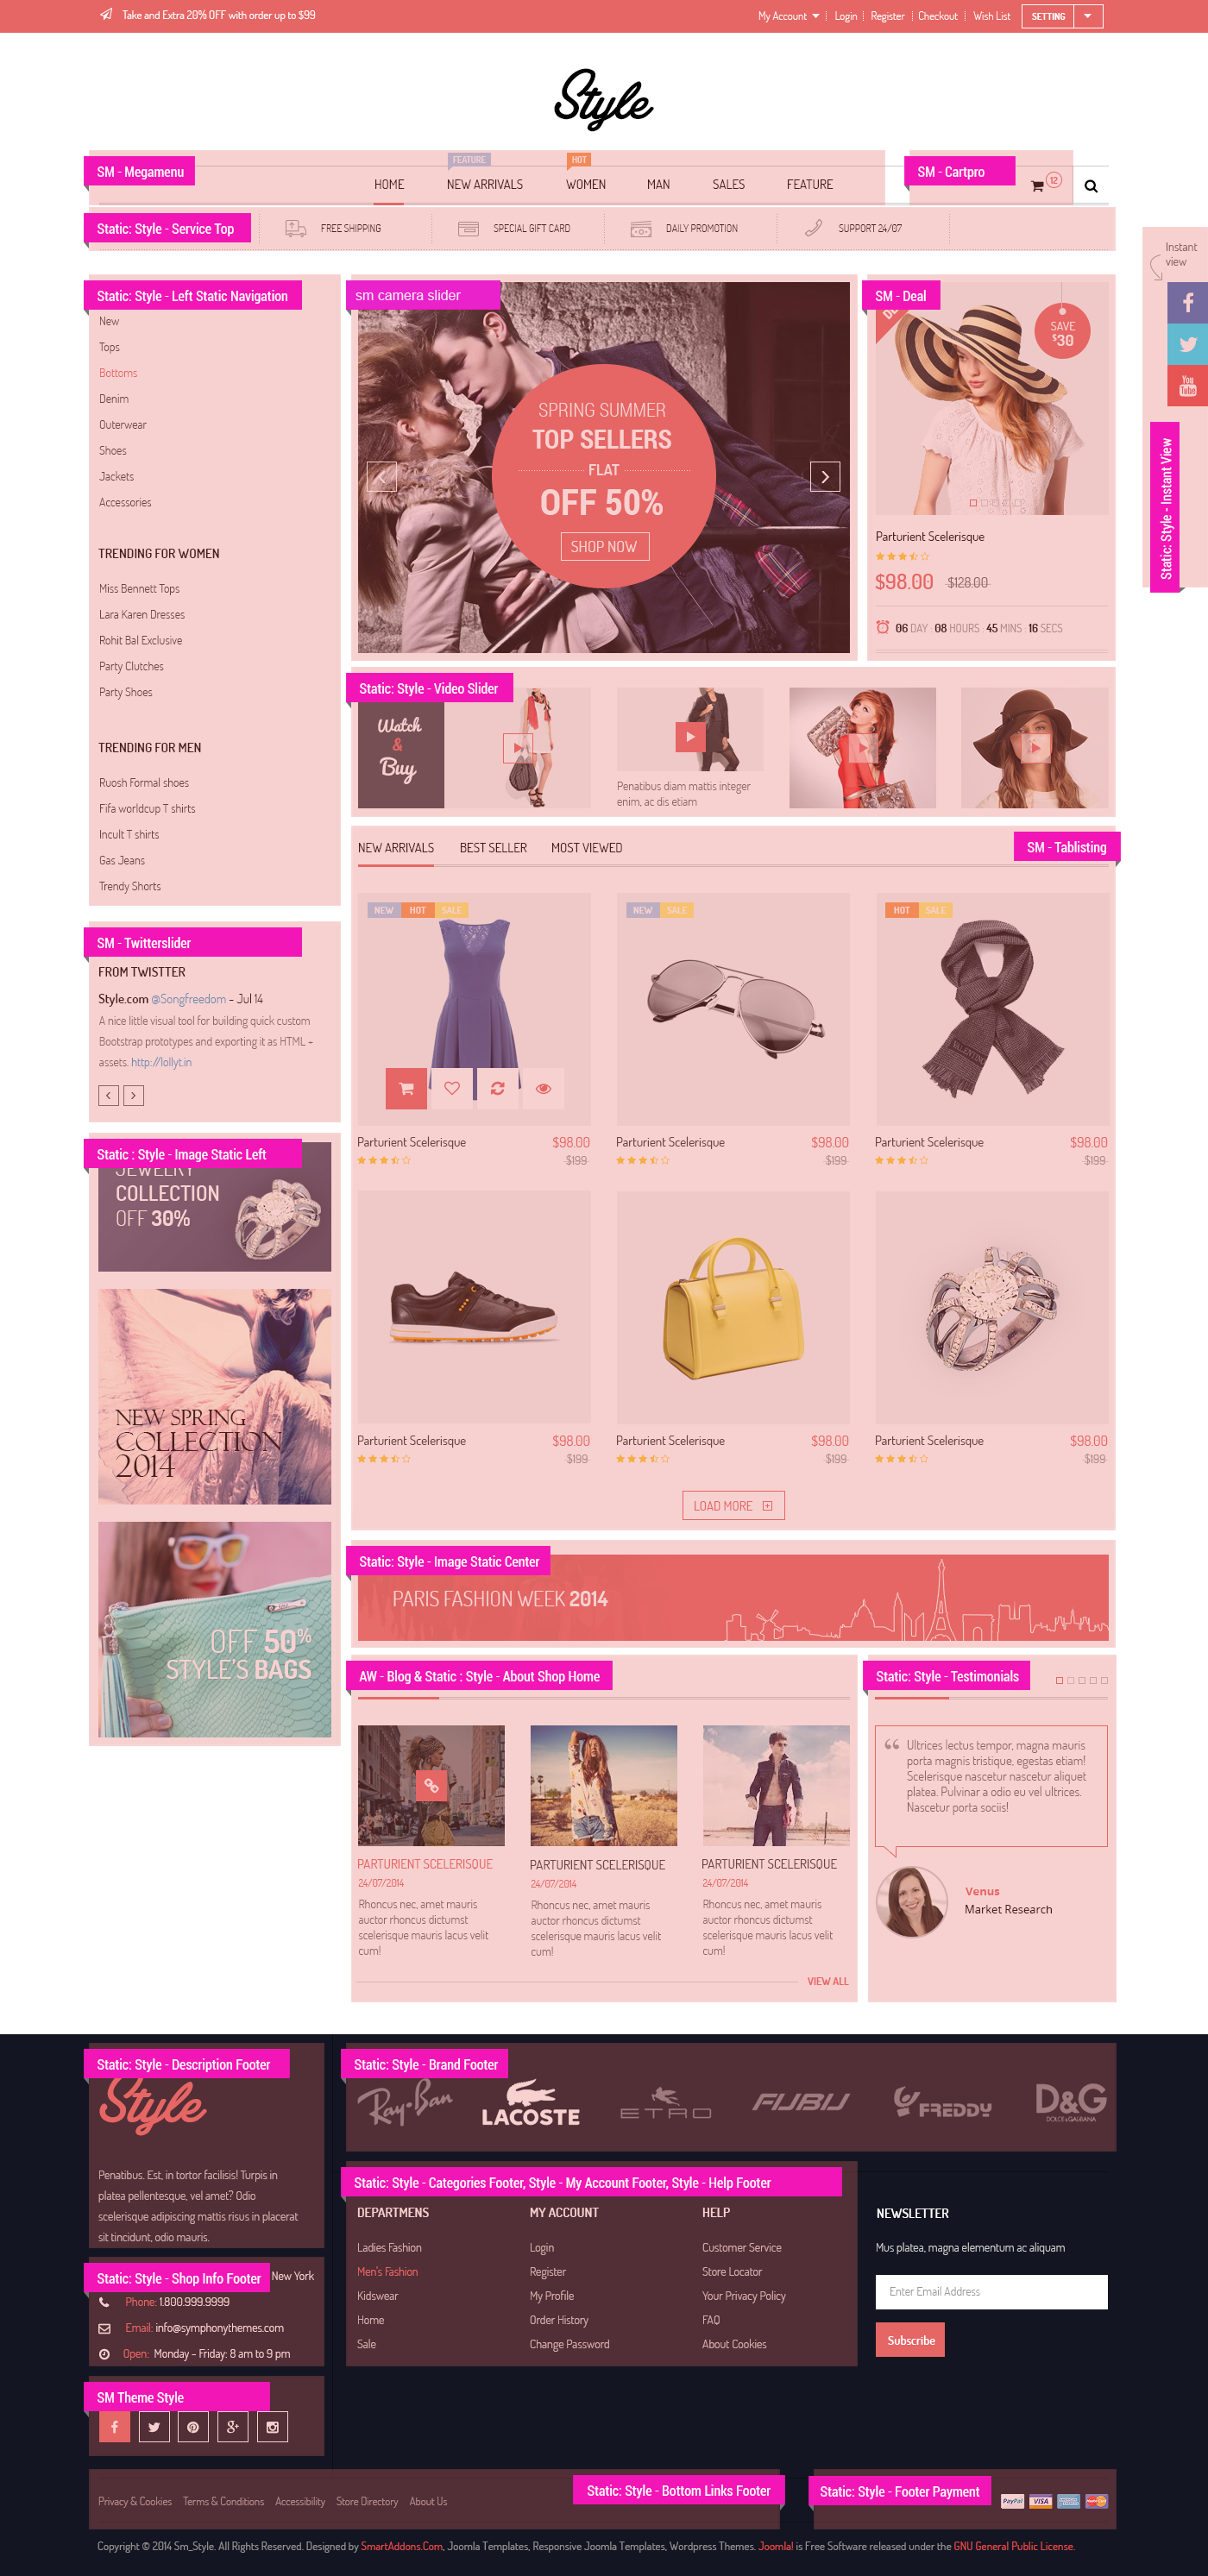
Frontend
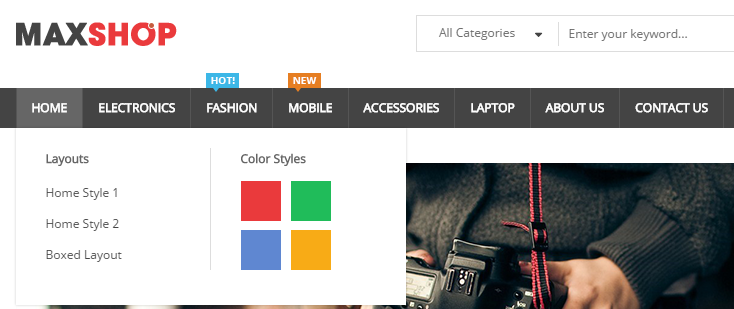
In the admin Panel page, navigate to SM MegaMenu >> Menu Items Manager to view Tree of Home menu:
- Link show Home Menu’s backend. Please click Here to view.
Content code of Home Menu:
|
1
2
3
4
5
6
7
8
9
10
11
12
13
14
15
16
17
18
19
20
21
22
23
24
25
26
27
28
29
30
31
32
33
34
35
36
37
38
|
<div class="home-item-wrapper">
<div class="colum-home home-layout">
<h2>Layout Styles</h2>
<ul class="list-item-home">
<li><a title="Home Default" href="{{store url="?___store=english&___from_store=italia"}}">Home Default</a></li>
<li><a title="Home Style 2" href="{{store url="?___store=italia&___from_store=english"}}">Home Style 2</a></li>
<li><a title="Home Style 3" href="{{store url="?___store=bolivia&___from_store=english"}}">Home Style 3</a></li>
<li><a title="Home Style 4" href="{{store url="?___store=cambodja&___from_store=english"}}">Home Style 4</a></li>
</ul>
</div>
<div class="colum-home header-style">
<h2>Header Styles</h2>
<ul class="list-item-home">
<li><a title="Header Style 1" href="{{store url="?___store=english&___from_store=italia"}}">Header Style 1</a></li>
<li><a title="Header Style 2" href="{{store url="?___store=bolivia&___from_store=english"}}">Header Style 2</a></li>
<li><a title="Header Style 3" href="{{store url="?___store=cambodja&___from_store=italia"}}">Header Style 3</a></li>
</ul>
</div>
<div class="colum-home color-style">
<h2>Color Styles</h2>
<div class="content-color-style">
<ul class="list-item-home">
<li class="sand"><a title="Sand" href="{{store url="?___store=french&___from_store=english"}}">Sand</a></li>
<li class="green"><a title="Green" href="{{store url="?___store=japan&___from_store=english"}}">Green</a></li>
<li class="cayenne"><a title="Cayenne" href="{{store url="?___store=english&___from_store=italia"}}">Cayenne</a></li>
<li class="hemlock"><a title="Hemlock" href="{{store url="?___store=hungary&___from_store=english"}}">Hemlock</a></li>
</ul>
<ul class="list-item-home">
<li class="pink"><a title="Pink" href="{{store url="?___store=jamaica&___from_store=english"}}">Pink</a></li>
<li class="placid_blue"><a title="Placid - Blue" href="{{store url="?___store=argentina&___from_store=english"}}">Placid - Blue</a></li>
<li class="violet_tulip"><a title="Violet - Tulip" href="{{store url="?___store=brazil&___from_store=english"}}">Violet - Tulip</a></li>
<li class="deep_grey"><a title="Deep - Grey" href="{{store url="?___store=cameroon&___from_store=english"}}">Deep - Grey</a></li>
</ul>
</div>
</div>
</div>
|
WOMEN MENU
Frontend

In the admin Panel page, navigate to SM MegaMenu >> Menu Items Manager to view Tree of Women menu:
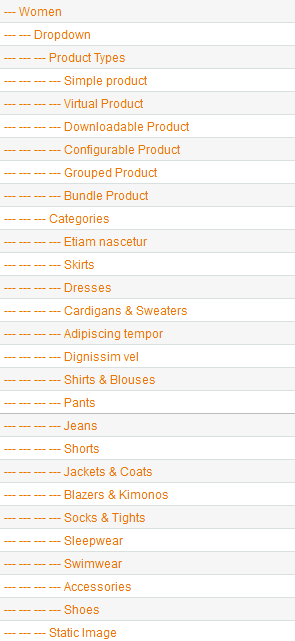
Backend
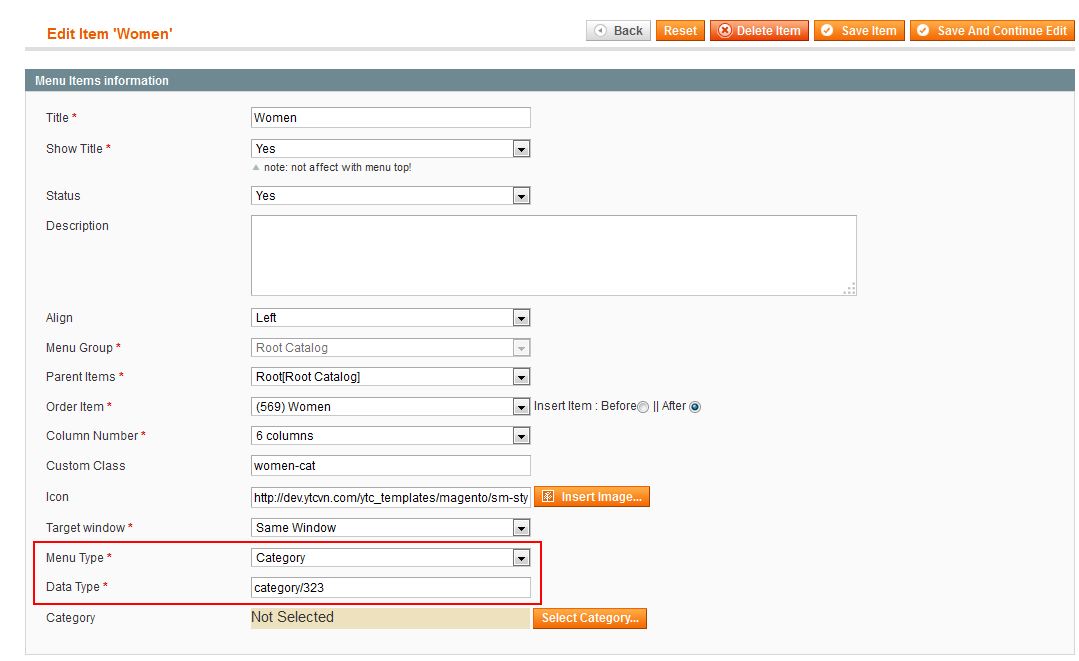
Data Type: “category/323″. To config, please go to Catalog >> Manage Categories >> Women Category
Dropdown: backend
Categories: backend
Static Image: backend
Content code of Satic Image:
|
1
|
<div class="static-img-block"><a title="Static Image" href="#"><img alt="Static Image" src="{{media url="wysiwyg/wm-static-image.png"}}" /></a></div>
|
4.4 Configure Extensions
I. SM Cart Pro
- Position: SM Cart Pro
- Frontend
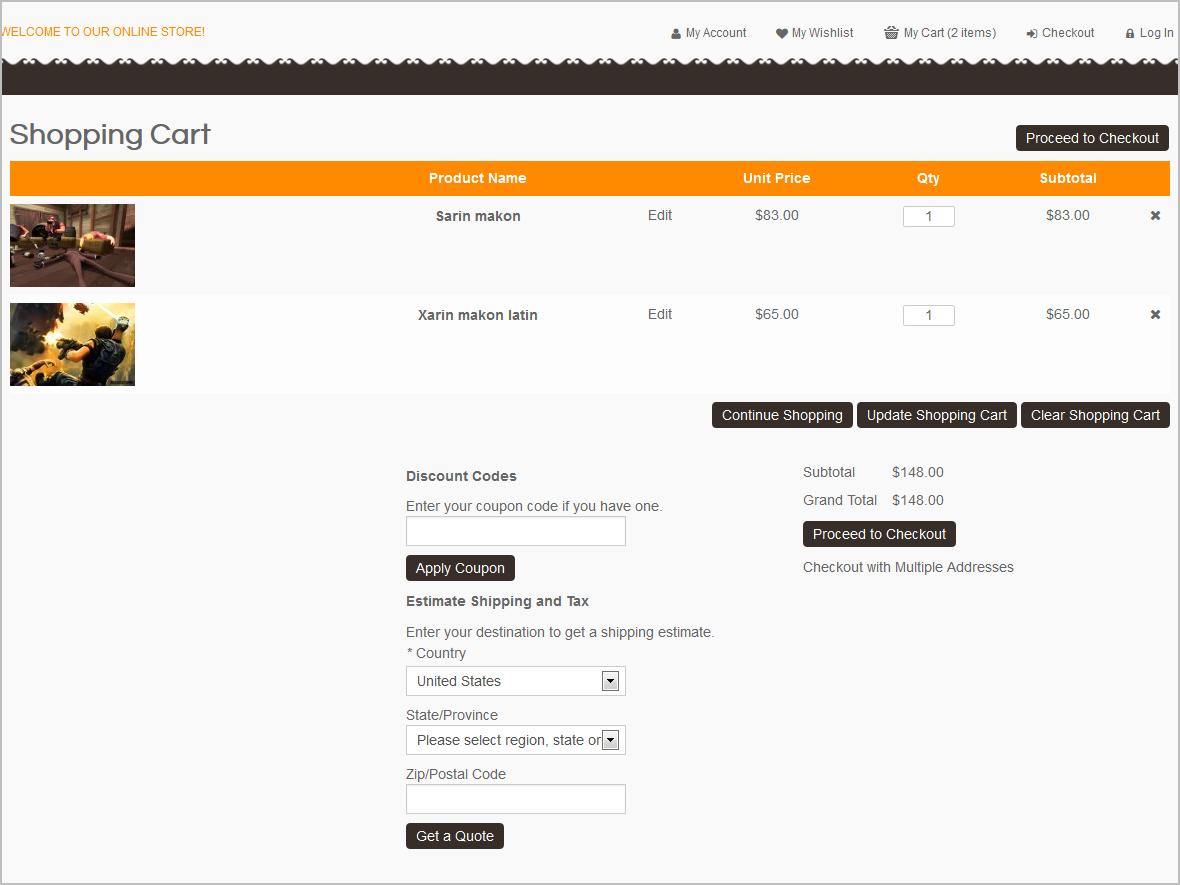
- Backend of SM Cart Pro: Click Here
- To view more guide about how to install, set up and configure SM Cart Pro as you want, please click here
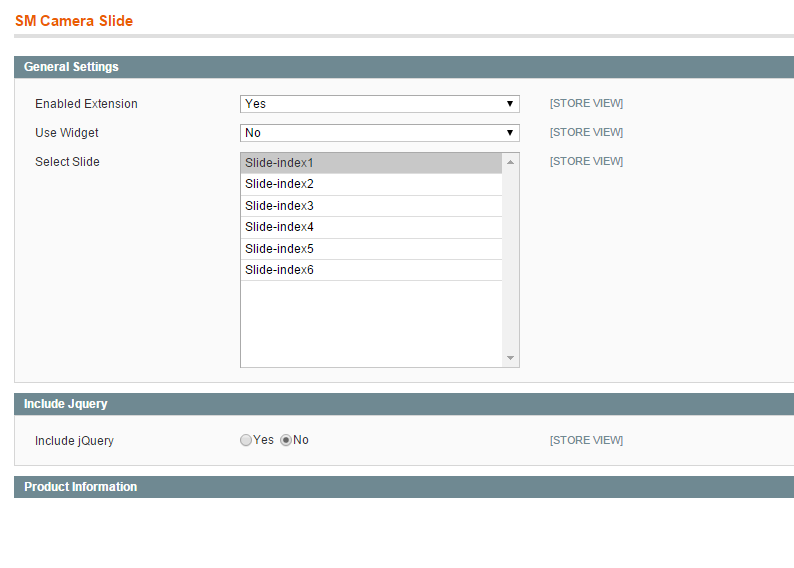
II. SM Camera Slide
- Position: SM Camera Slide
- Frontend
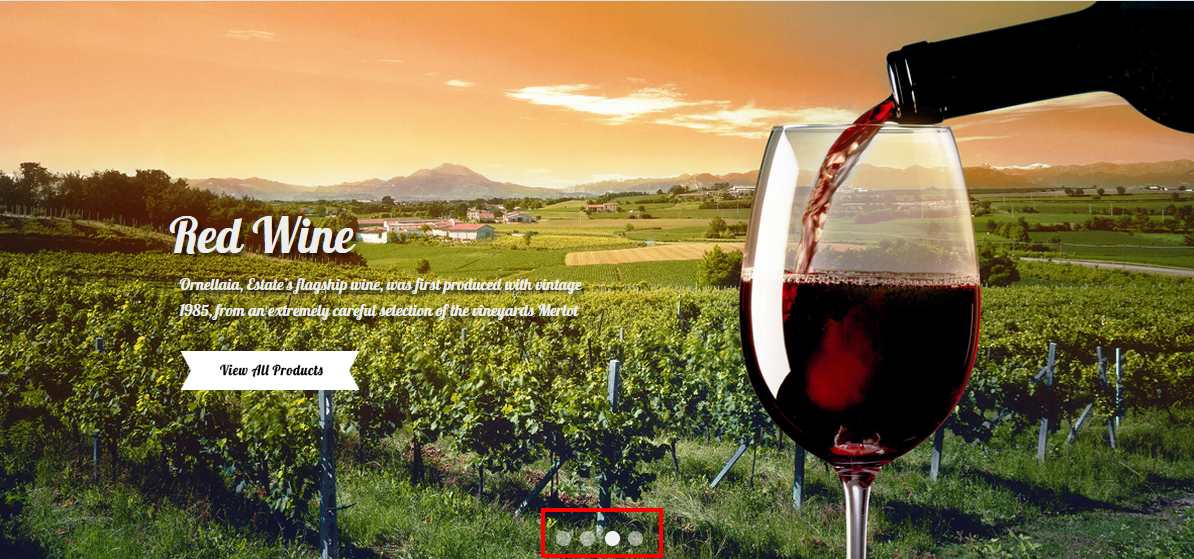
- Backend
III. SM Deal
- Position: SM Deal
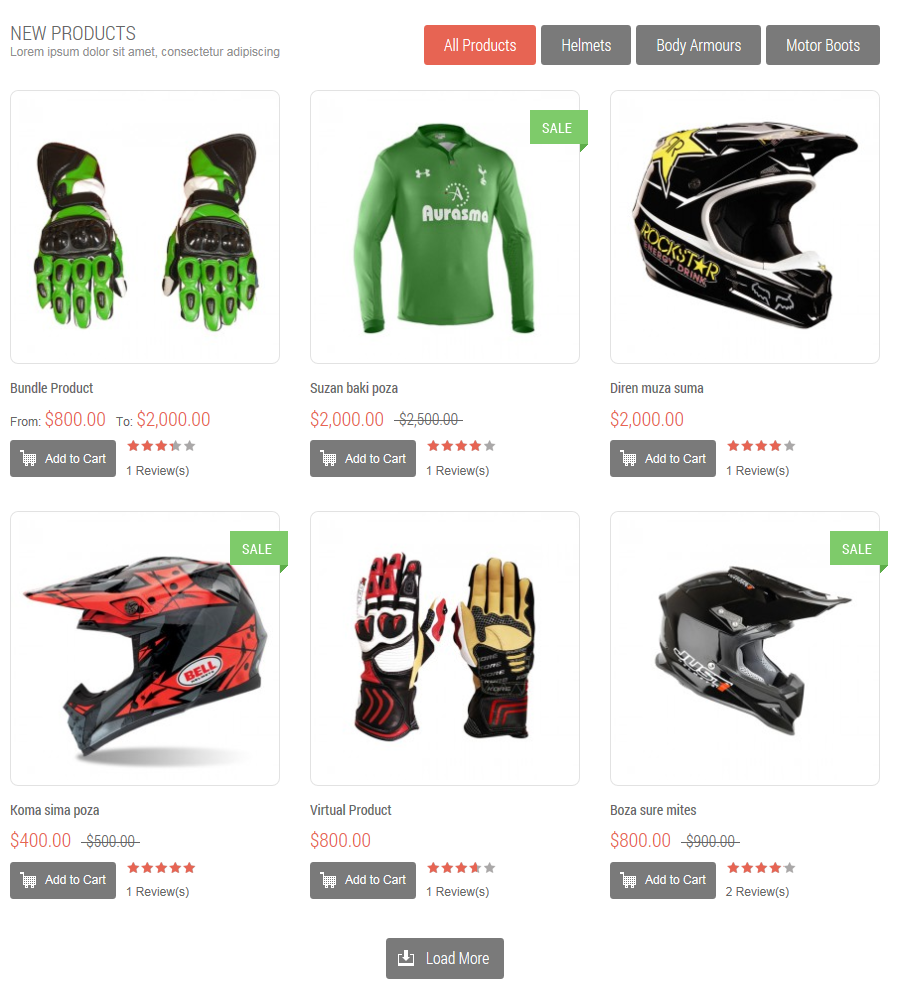
- Frontend
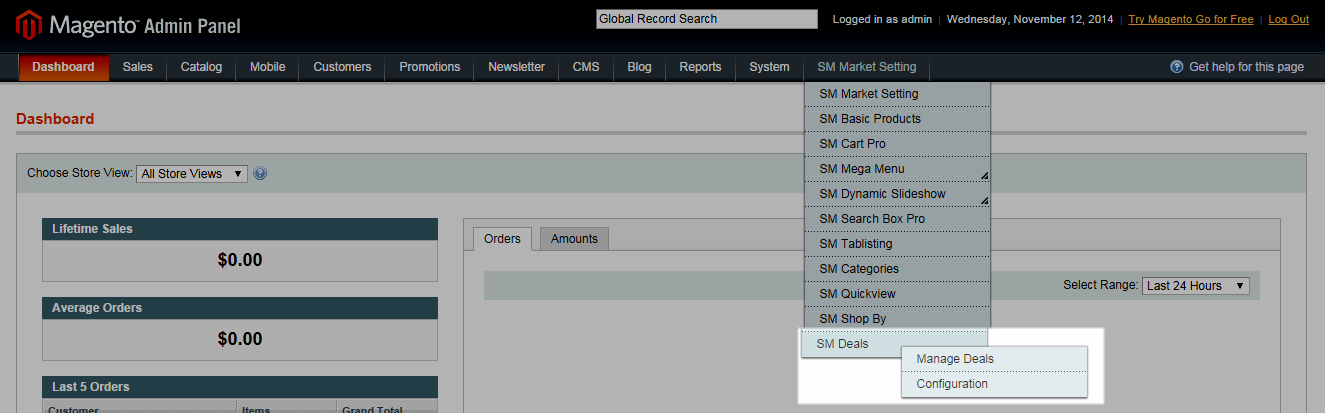
- Backend of SM Deal: Click Here
- To view more guide about how to install and configure SM Deal as you want, please click here
- To config this position, please navigate to CMS >> Pages >> SM Style - Responsive Magento Fashion Theme, navigate to Design tab and paste code as below:
|
1
2
3
|
<reference name="dealblock">
<block type="deal/List" name="deal" as="deal" template="sm/deal/default.phtml"></block>
</reference>
|
- Position: SM Tab Listing
- Frontend
- Backend of SM Tab Listing: Click Here
- To view more guide about how to install and configure SM Tab Listing as you want, please click here
- To config this position, please navigate to CMS >> Pages >> SM Style - Responsive Magento Fashion Theme, navigate to Design tab and paste code as below:
|
1
2
3
4
5
|
<reference name="content_tab">
<block type="tablisting/list" name="tablisting">
<action method="setConfig"></action>
</block>
</reference>
|
- Position: SM Twitter Slider
- Frontend
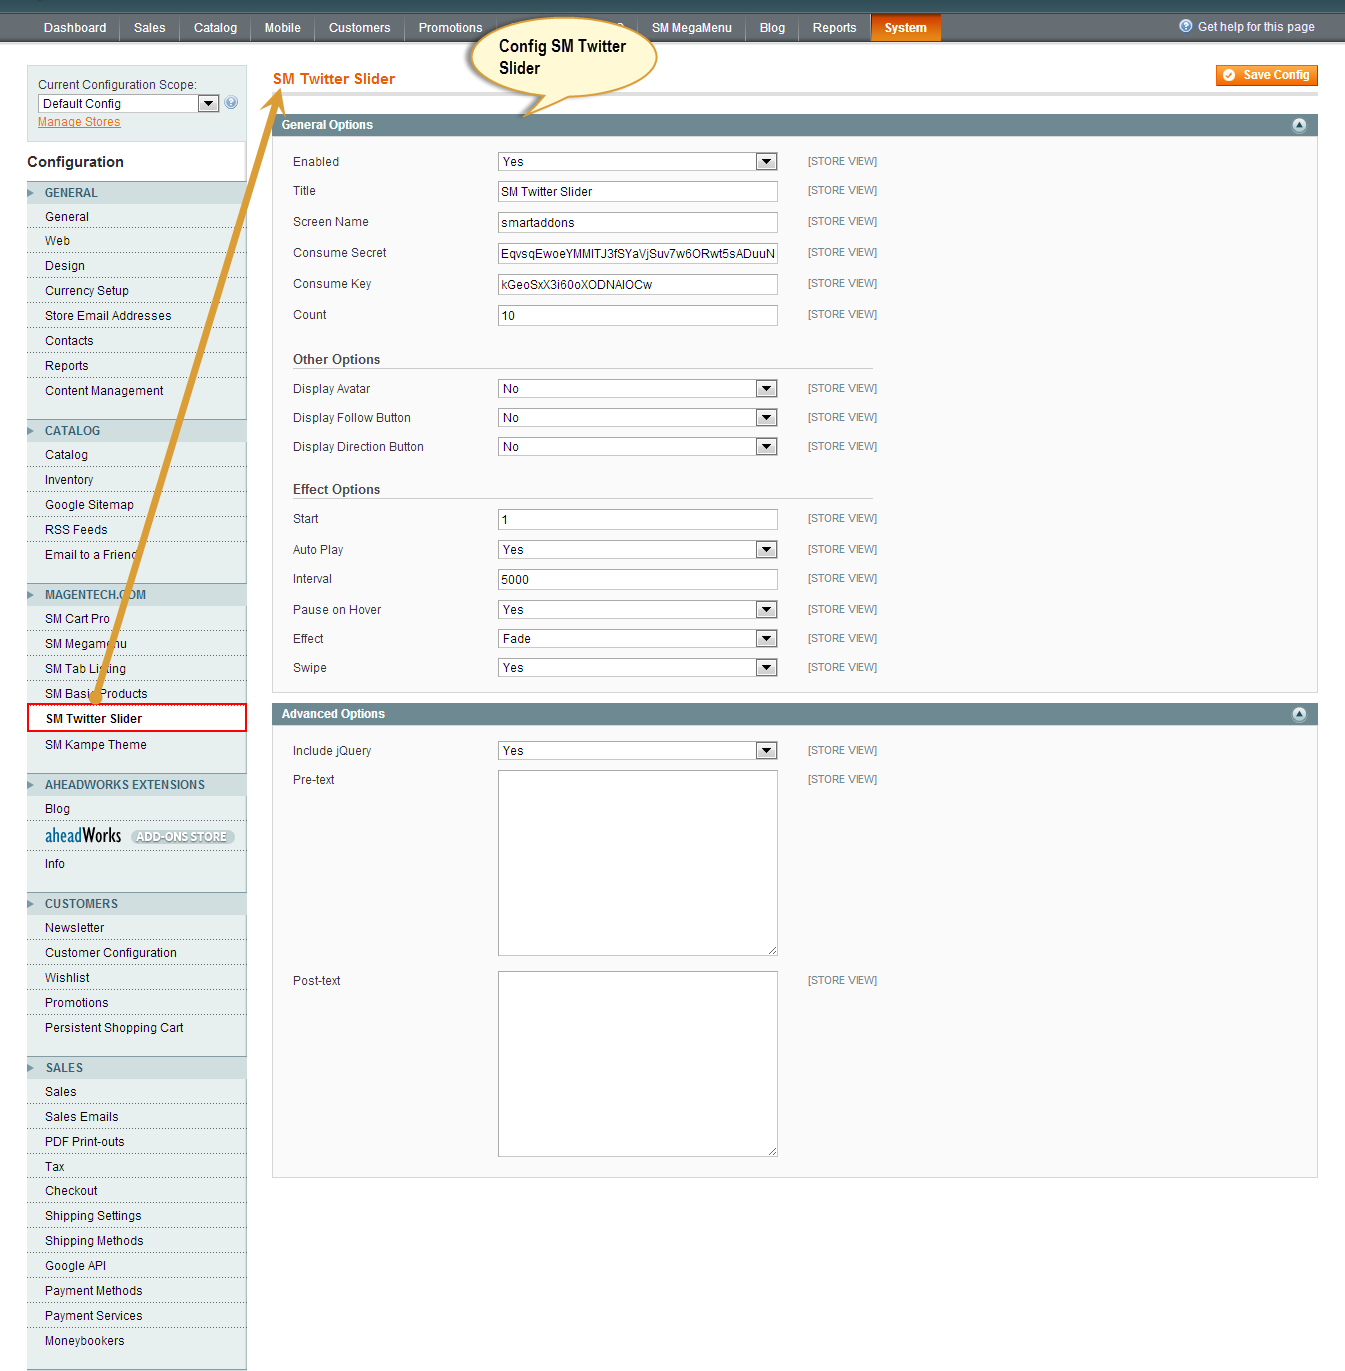
- Backend of SM Twitter Slider: Click Here
- To config this position, please navigate to CMS >> Pages >> SM Style - Responsive Magento Fashion Theme, navigate to Design tab and paste code as below:
|
1
2
3
4
5
6
|
<reference name="tw_slider">
<block type="twitterslider/list" name="twitterslider.list.theme1">
<action method="setConfig">
</action>
</block>
</reference>
|
- To view more guide about how to install and configure SM Twitter Slider as you want, please click here
4.5 Configure blocks
The SM Style has static blocks in the Theme:
- Style - Service Top
- Style - Left Static Navigation
- Style - 2 Static Image
- Style - Video Slider
- Style - Image Static Left
- Style - Image Static Center
- Style - About Shop Home
- Style - Testimonials
- Style - Description Footer
- Style - Brand Footer
- Style - Shop Info Footer
- Style – Categories Footer
- Style – My Account Footer
- Style – Help Footer
- Style – Bottom Links Footer
- Style – Footer Payment
- Style – Instant View
To create static blocks, go to CMS >> Static Blocks >> Add new block
Style - Service Top
Identifier: service-top
Frontend

Link show Backend of Style - Service Top.
Content Code of Style - Service Top:
|
1
2
3
4
5
6
7
8
9
10
11
12
13
14
15
16
17
18
19
20
21
22
|
<ul class="list-service">
<li class="sv-item free-shipping">
<div class="sv-content"><a title="FREE SHIPPING" href="#">FREE SHIPPING</a>
<p class="tooltip-sv">Lorem ipsum dolor sit amet, consectetur adipiscing elit donec vestibulum dolor mauris.</p>
</div>
</li>
<li class="sv-item special-gift">
<div class="sv-content"><a title="Special Gift Card" href="#">Special Gift Card</a>
<p class="tooltip-sv">Lorem ipsum dolor sit amet, consectetur adipiscing elit donec vestibulum dolor mauris.</p>
</div>
</li>
<li class="sv-item promotion">
<div class="sv-content"><a title="Daily promotion" href="#">Daily promotion</a>
<p class="tooltip-sv">Lorem ipsum dolor sit amet, consectetur adipiscing elit donec vestibulum dolor mauris.</p>
</div>
</li>
<li class="sv-item support">
<div class="sv-content"><a title="support 24/07" href="#">support 24/07</a>
<p class="tooltip-sv">Lorem ipsum dolor sit amet, consectetur adipiscing elit donec vestibulum dolor mauris.</p>
</div>
</li>
</ul>
|
Style - Left Static Navigation
Identifier: left-static-navigation
Frontend
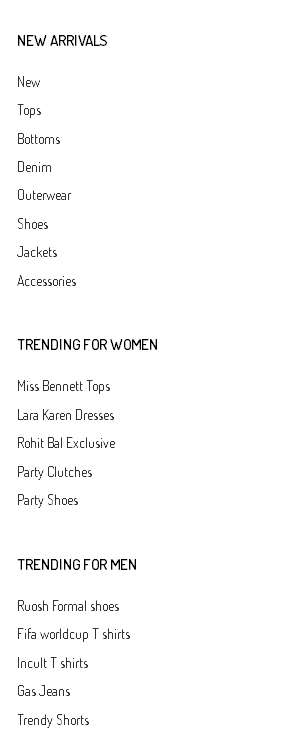
Link show Backend of Style - Left Static Navigation.
Content Code of Style - Left Static Navigation:
|
1
2
3
4
5
6
7
8
9
10
11
12
13
14
15
16
17
18
19
20
21
22
23
24
25
26
27
28
29
30
31
32
33
34
35
36
37
38
39
40
41
42
43
44
45
46
|
<div class="banner-policy">
<div class="cat-wrapper">
<div class="title-cat-left">
<h2>NEW ARRIVALS</h2>
</div>
<div class="content-l">
<ul class="item-list-cat">
<li><a title="New" href="#">New</a></li>
<li><a title="Tops" href="#">Tops</a></li>
<li><a title="Bottoms" href="#">Bottoms</a></li>
<li><a title="Denim" href="#">Denim</a></li>
<li><a title="Outerwear" href="#">Outerwear</a></li>
<li><a title="Shoes" href="#">Shoes</a></li>
<li><a title="Jackets" href="#">Jackets</a></li>
<li><a title="Accessories" href="#">Accessories</a></li>
</ul>
</div>
</div>
<div class="cat-wrapper">
<div class="title-cat-left">
<h2>Trending for women</h2>
</div>
<div class="content-l">
<ul class="item-list-cat">
<li><a title="Miss Bennett Tops" href="#">Miss Bennett Tops</a></li>
<li><a title="Lara Karen Dresses" href="#">Lara Karen Dresses</a></li>
<li><a title="Rohit Bal Exclusive" href="#">Rohit Bal Exclusive</a></li>
<li><a title="Party Clutches" href="#">Party Clutches</a></li>
<li><a title="Party Shoes" href="#">Party Shoes</a></li>
</ul>
</div>
</div>
<div class="cat-wrapper">
<div class="title-cat-left">
<h2>Trending for Men</h2>
</div>
<div class="content-l">
<ul class="item-list-cat">
<li><a title="Ruosh Formal shoes" href="#">Ruosh Formal shoes</a></li>
<li><a title="Fifa worldcup T shirts" href="#">Fifa worldcup T shirts</a></li>
<li><a title="Incult T shirts" href="#">Incult T shirts</a></li>
<li><a title="Gas Jeans" href="#">Gas Jeans</a></li>
<li><a title="Trendy Shorts" href="#">Trendy Shorts</a></li>
</ul>
</div>
</div>
|
Style - 2 Static Image
Identifier: static-image-2
Frontend
Link show Backend of Style - 2 Static Image.
Content Code of Style - 2 Static Image:
|
1
2
3
4
5
6
|
<div class="static-image-2">
<ul>
<li><a title="Static Image" href="#"><img src="{{media url="wysiwyg/img-st-1.png"}}" alt="Static Image" /></a></li>
<li><a title="Static Image" href="#"><img src="{{media url="wysiwyg/img-st-2.png"}}" alt="Static Image" /></a></li>
</ul>
</div>
|
Style - Video Slider
Identifier: video-slider Frontend  Link show Backend of Style - Video Slider. Content Code of Style - Video Slider:
Style - Image Static Left
Identifier: img-static-left
Frontend

Link show Backend of Style - Image Static Left.
Content Code of Style - Image Static Left:
|
1
2
3
4
5
|
<ul class="img-static-l">
<li><a title="Jewelry collection off 30%" href="#"><img src="/cms_wysiwyg/directive/___directive/e3ttZWRpYSB1cmw9Ind5c2l3eWcvbGVmdC1pbWFnZS0xLnBuZyJ9fQ,,/key/ed014158b090cd71916d29313bdf59c1/" alt="Jewelry collection off 30%" /> </a></li>
<li><a title="New spring collection" href="#"><img src="/cms_wysiwyg/directive/___directive/e3ttZWRpYSB1cmw9Ind5c2l3eWcvbGVmdC1pbWFnZS0yLnBuZyJ9fQ,,/key/ed014158b090cd71916d29313bdf59c1/" alt="New spring collection" /></a></li>
<li><a title="off 50% Style's bags" href="#"><img src="/cms_wysiwyg/directive/___directive/e3ttZWRpYSB1cmw9Ind5c2l3eWcvbGVmdC1pbWFnZS0zLnBuZyJ9fQ,,/key/ed014158b090cd71916d29313bdf59c1/" alt="off 50% Style's bags" /> </a></li>
</ul>
|
Style - Image Static Center
Identifier: static-center-image
Frontend

Link show Backend of Style - Image Static Center.
Content Code of Style - Image Static Center:
|
1
|
<div class="img-center-static"><a title="Paris Fashion Week" href="#"><img src="/cms_wysiwyg/directive/___directive/e3ttZWRpYSB1cmw9Ind5c2l3eWcvaW1nLXN0YXRpYy1jZW50ZXIucG5nIn19/key/ed014158b090cd71916d29313bdf59c1/" alt="Paris Fashion Week" /></a></div>
|
Style - About Shop Home
Identifier: about-shop-home
Frontend
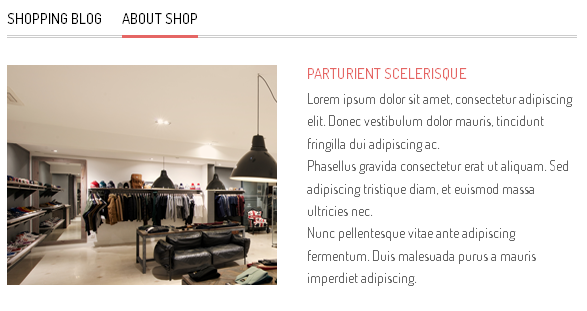
Link show Backend of Style - About Shop Home.
Content Code of Style - About Shop Home:
|
1
2
3
4
5
6
7
8
9
|
<div class="about-us-home">
<div class="image-shop"><a title="Shop Image" href="#"><img src="/cms_wysiwyg/directive/___directive/e3ttZWRpYSB1cmw9Ind5c2l3eWcvaW1hZ2Utc2hvcC1ob21lLnBuZyJ9fQ,,/key/ed014158b090cd71916d29313bdf59c1/" alt="Shop Image" /></a></div>
<div class="info-shop-home">
<h2 class="shop-name"><a title="Parturient Scelerisque" href="#">Parturient Scelerisque</a></h2>
<p>Lorem ipsum dolor sit amet, consectetur adipiscing elit. Donec vestibulum dolor mauris, tincidunt fringilla dui adipiscing ac.</p>
<p>Phasellus gravida consectetur erat ut aliquam. Sed adipiscing tristique diam, et euismod massa ultricies nec.</p>
<p>Nunc pellentesque vitae ante adipiscing fermentum. Duis malesuada purus a mauris imperdiet adipiscing.</p>
</div>
</div>
|
Style - Testimonials
Identifier: slider-testimonials
Frontend
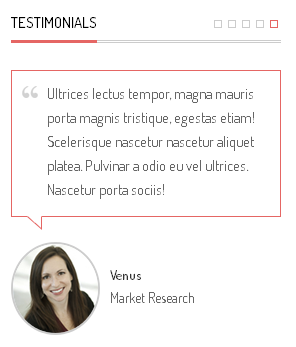
Link show Backend of Style - Testimonials.
Content Code of Style - Testimonials:
|
1
2
3
4
5
6
7
8
9
10
11
12
13
14
15
16
17
18
19
20
21
22
23
24
25
26
27
28
29
30
31
32
33
34
35
36
37
38
39
40
41
42
43
44
45
46
47
48
49
50
51
52
53
54
55
56
57
58
59
60
|
<div class="testimonials">
<div class="title-home">
<h2><span>Testimonials</span></h2>
</div>
<div class="slider-testimonials">
<div class="item">
<div class="description">Ultrices lectus tempor, magna mauris porta magnis tristique, egestas etiam! Scelerisque nascetur nascetur aliquet platea. Pulvinar a odio eu vel ultrices. Nascetur porta sociis!</div>
<div class="image-client"><a class="image-p" title="Venus - Market Research" href="#"><img src="/cms_wysiwyg/directive/___directive/e3ttZWRpYSB1cmw9Ind5c2l3eWcvaW1nLWNsaWVudC0xLnBuZyJ9fQ,,/key/ed014158b090cd71916d29313bdf59c1/" alt="Venus - Market Research" /></a>
<div class="info-client"><a class="name-client" title="Venus" href="#">Venus</a>
<p class="job-client">Market Research</p>
</div>
</div>
</div>
</div>
<script type="text/javascript">// <![CDATA[
jQuery(document).ready(function($) {
$('.slider-testimonials').owlCarousel({
navigation : false, // Show next and prev buttons
slideSpeed : 300,
stopOnHover: true,
paginationSpeed : 400,
autoPlay:true,
pagination: true,
singleItem:true
});
});
// ]]></script>
</div>
|
Style - Description Footer
Identifier: description-footer
Frontend
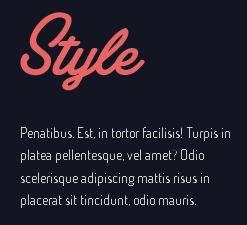
Link show Backend of Style - Description Footer.
Content Code of Style - Description Footer:
|
1
|
<div class="description-footer">Penatibus. Est, in tortor facilisis! Turpis in platea pellentesque, vel amet? Odio scelerisque adipiscing mattis risus in placerat sit tincidunt, odio mauris.</div>
|
Style - Brand Footer
Identifier: band-footer
Frontend

Link show Backend of Style - Brand Footer.
Content Code of Style - Brand Footer:
|
1
2
3
4
5
6
7
8
|
<ul class="list-brand row">
<li class="col-lg-2 col-md-4"><a title="Brand Image" href="#"><img src="/cms_wysiwyg/directive/___directive/e3ttZWRpYSB1cmw9Ind5c2l3eWcvYnJhbmQtMS5wbmcifX0,/key/ed014158b090cd71916d29313bdf59c1/" alt="Brand Image" /></a></li>
<li class="col-lg-2 col-md-4"><a title="Brand Image" href="#"><img src="/cms_wysiwyg/directive/___directive/e3ttZWRpYSB1cmw9Ind5c2l3eWcvYnJhbmQtMi5wbmcifX0,/key/ed014158b090cd71916d29313bdf59c1/" alt="Brand Image" /></a></li>
<li class="col-lg-2 col-md-4"><a title="Brand Image" href="#"><img src="/cms_wysiwyg/directive/___directive/e3ttZWRpYSB1cmw9Ind5c2l3eWcvYnJhbmQtMy5wbmcifX0,/key/ed014158b090cd71916d29313bdf59c1/" alt="Brand Image" /></a></li>
<li class="col-lg-2 col-md-4"><a title="Brand Image" href="#"><img src="/cms_wysiwyg/directive/___directive/e3ttZWRpYSB1cmw9Ind5c2l3eWcvYnJhbmQtNC5wbmcifX0,/key/ed014158b090cd71916d29313bdf59c1/" alt="Brand Image" /></a></li>
<li class="col-lg-2 col-md-4"><a title="Brand Image" href="#"><img src="/cms_wysiwyg/directive/___directive/e3ttZWRpYSB1cmw9Ind5c2l3eWcvYnJhbmQtNS5wbmcifX0,/key/ed014158b090cd71916d29313bdf59c1/" alt="Brand Image" /></a></li>
<li class="col-lg-2 col-md-4"><a title="Brand Image" href="#"><img src="/cms_wysiwyg/directive/___directive/e3ttZWRpYSB1cmw9Ind5c2l3eWcvYnJhbmQtNi5wbmcifX0,/key/ed014158b090cd71916d29313bdf59c1/" alt="Brand Image" /></a></li>
</ul>
|
Style - Shop Info Footer
Identifier: shop-info-footer
Frontend

Link show Backend of Style - Shop Info Footer.
Content Code of Style - Shop Info Footer:
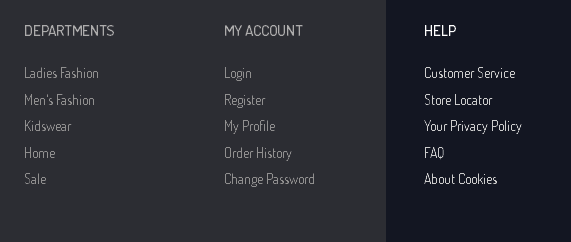
Style - Categories Footer
Identifier: categories-footer
Frontend
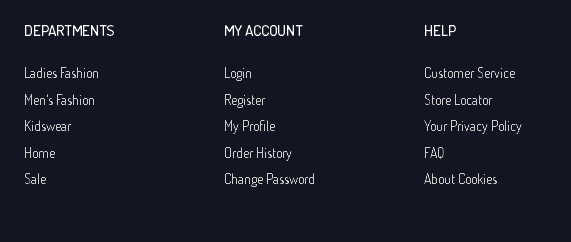
Link show Backend of Style - Categories Footer.
Content Code of Style - Categories Footer:
|
1
2
3
4
5
6
7
8
9
10
|
<div class="list-category">
<h2 class="title-footer">Departments</h2>
<ul class="list-c">
<li><a title="Ladies Fashion" href="#">Ladies Fashion</a></li>
<li><a title="Men's Fashion" href="#">Men's Fashion</a></li>
<li><a title="Kidswear" href="#">Kidswear</a></li>
<li><a title="Home" href="#">Home</a></li>
<li><a title="Sale" href="#">Sale</a></li>
</ul>
</div>
|
Style - My Account Footer
Identifier: account-footer
Frontend
Link show Backend of Style - My Account Footer.
Content Code of Style - My Account Footer:
|
1
2
3
4
5
6
7
8
9
10
|
<div class="list-category">
<h2 class="title-footer">my account</h2>
<ul class="list-c">
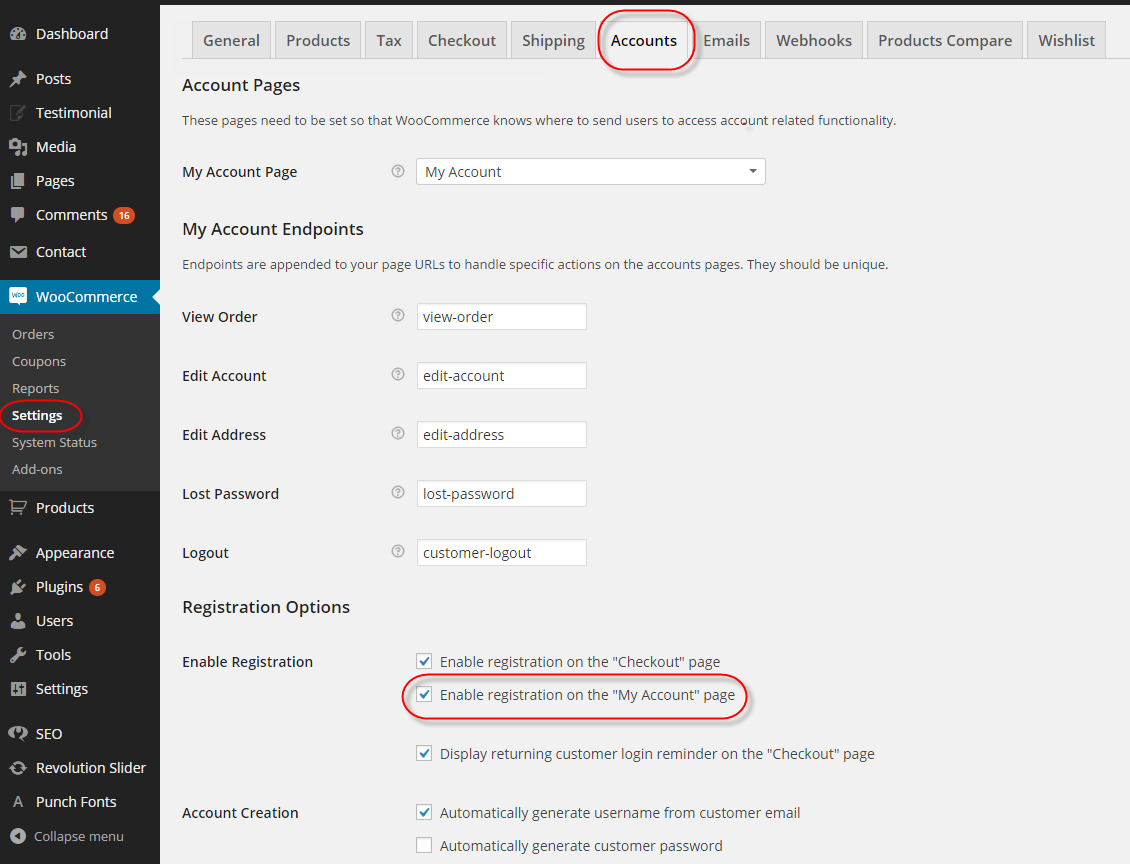
<li><a title="Login" href="#">Login</a></li>
<li><a title="Register" href="#">Register</a></li>
<li><a title="My Profile" href="#">My Profile</a></li>
<li><a title="Order History" href="#">Order History</a></li>
<li><a title="Change Password" href="#">Change Password</a></li>
</ul>
</div>
|
Style - Help Footer
Identifier: help-footer
Frontend
Link show Backend of Style - Help Footer.
Content Code of Style - Help Footer:
|
1
2
3
4
5
6
7
8
9
10
|
<div class="list-category">
<h2 class="title-footer">HELP</h2>
<ul class="list-c">
<li><a title="Customer Service" href="#">Customer Service</a></li>
<li><a title="Store Locator" href="#">Store Locator</a></li>
<li><a title="Your Privacy Policy" href="#">Your Privacy Policy</a></li>
<li><a title="FAQ" href="#">FAQ</a></li>
<li><a title="About Cookies" href="#">About Cookies</a></li>
</ul>
</div>
|
Style - Bottom Links Footer
Identifier: bottom-links-footer
Frontend

Link show Backend of Style - Bottom Links Footer.
Content Code of Style - Bottom Links Footer:
|
1
2
3
4
5
6
7
8
9
|
<ul class="mid-links">
<li><a title="Privacy & Cookies" href="#">Privacy & Cookies</a></li>
<li><a title="Terms & Conditions" href="#">Terms & Conditions</a></li>
<li><a title="Accessibility" href="#">Accessibility</a></li>
<li><a title="Store Directory" href="#">Store Directory</a></li>
<li><a title="Blog" href="{{store url='blog'}}">Blog</a></li>
<li><a title="About Us" href="{{store url='about-us'}}">About Us</a></li>
<li><a title="Contact Us" href="{{store url='contacts/index'}}">Contact Us</a></li>
</ul>
|
Style - Footer Payment
Identifier: payment-footer
Frontend
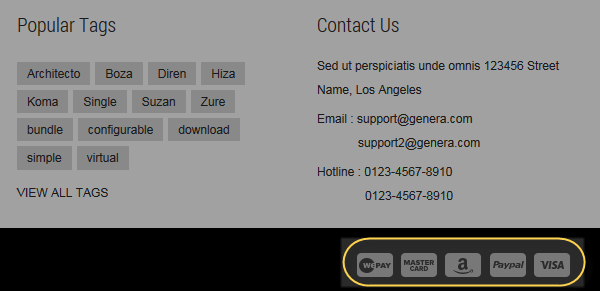
Link show Backend of Style - Footer Payment.
Content Code of Style - Instant View:
|
1
2
3
4
5
6
|
<ul class="footer-payment">
<li><img src="{{media url="wysiwyg/icon-payment-1.png"}}" alt="Payment" /></li>
<li><img src="{{media url="wysiwyg/icon-payment-2.png"}}" alt="Payment" /></li>
<li><img src="{{media url="wysiwyg/icon-payment-3.png"}}" alt="Payment" /></li>
<li><img src="{{media url="wysiwyg/icon-payment-4.png"}}" alt="Payment" /></li>
</ul>
|
Style - Instant View
Identifier: instant-view
Frontend
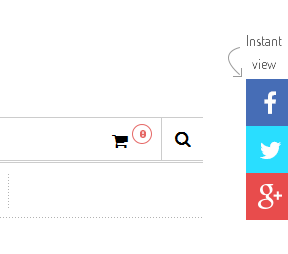
Link show Backend of Style - Instant View.
Content Code of Style - Instant View:
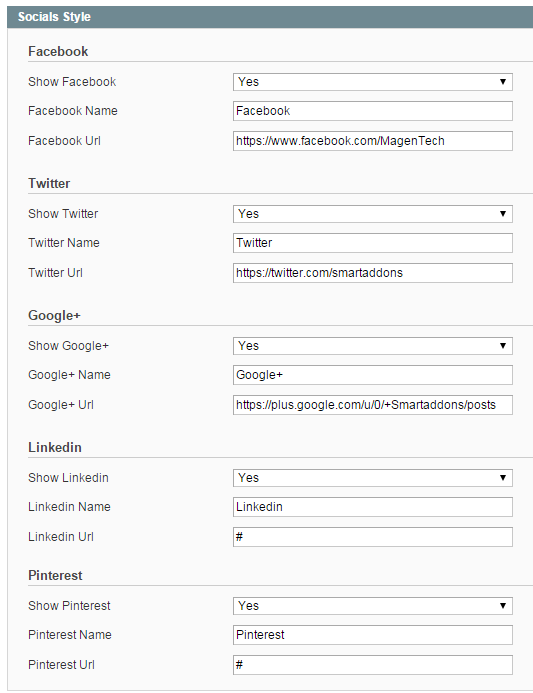
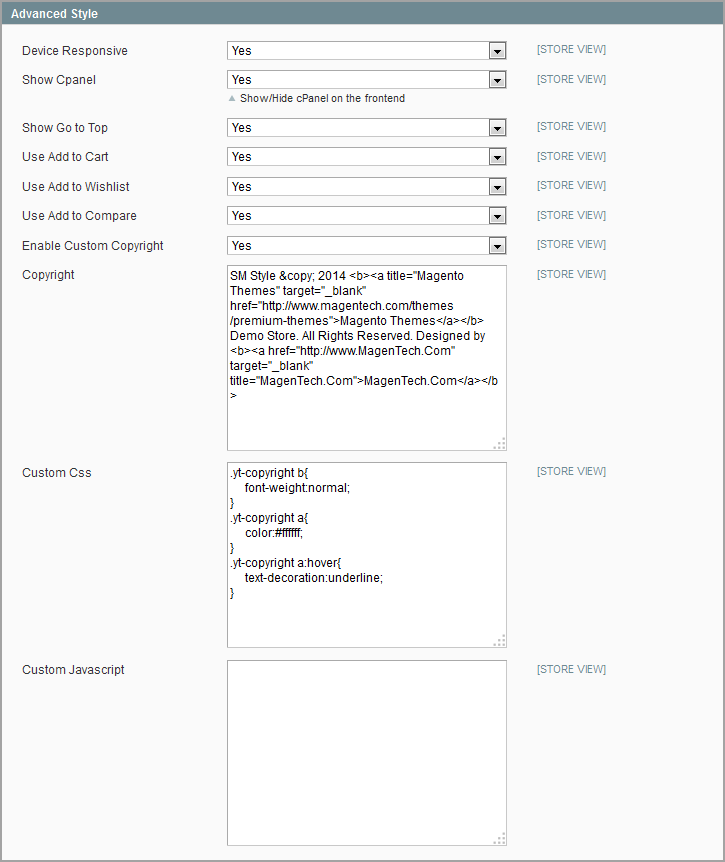
4.6 How To Enable/Disable Social setting & Custom Copyright in admin
In the Administrator page, Please navigate to System >> Configuration >> find SM Theme Style to configure the “Social Styles” & “Custom Copyright” parameter as image below:
5SUPPORT – Back to top
Thank you so much for purchasing this theme. If you have any questions that are beyond the scope of this help file, please send us via: Support Tickets System
Thanks so much!