1GETTING STARTED
1.1 Introduction
Firstly, a huge thanks for purchasing this theme, your support is truly appreciated!
This document covers the installation and use of this theme, reveals some answers to common problems and issues. We encourage you to read this document throughtly if you are experiencing any difficulties. If you have any questions that are beyond the scope of document, please feel free to contact us via our Support Tickets System.
1.2 System Requirements
Please make sure your hosting server meets the PrestaShop requirements:
- Supported operating system: Windows, Mac and Linux.
- Wamp (for Windows) or Xampp (for Windows and Mac)
- Web server: Apache Web server 1.3 or later, Microsoft’s IIS Web server 6.0 or later.
- PHP 5.2* or later.
- MySQL 5.0 or later.
- At least 32 Mb of RAM on your server (64 Mb is comfortable, the more the better).
Note: If you can not import the theme/module file to your server due to the maximum upload and PHP memory limit, you need to increase the parameter “memory_limit=200M”; “max_execution_time=300″; “max_execution_time=1000″ & “upload_max_filesize=20M” in the file php.ini.
1.3 PrestaShop Guide
If you are not familiar with Prestashop, please read its guide first
2INSTALLATION
There are two ways to install SP Hurama Theme
- Quickstart Installation: By using this package, you will set the theme exactly like our Demo with sample data.
-
Manual Installation : Include of Theme layout Installation Packages. Please unzip the package and you would see the following folders:
- module folder
- override folder
-
sp_hurama_template_p16_v1.0.0.zipfile
2.1 Quickstart Installation
We provide Quickstart package for each theme which aims to ease the installation for users. It will help you save much time of installing and configuring if you plan to start your site from the beginning. Please following steps below:
- Step 1: Download the quickstart package of SP Hurama theme
- Step 2: Extract the downloaded package named “sp_hurama_quickstart_p16_v1.0.0.zip” in your localhost (or your hosting) folder. In Quickstart folder you will see the extracted folder that include all sample data
- Step 3: Start installation by opening browser and navigate to your URL (where the Quickstart uploaded) to load default Prestashop installer. Please follow these steps of the Installer so that the installation process can be set.
- Installation Assistant (Choose your language)
Please select the installation language
Please note: The installation language option will not affect your store language. By default PrestaShop is offered in English. You can install additional localization packages to change the store language.
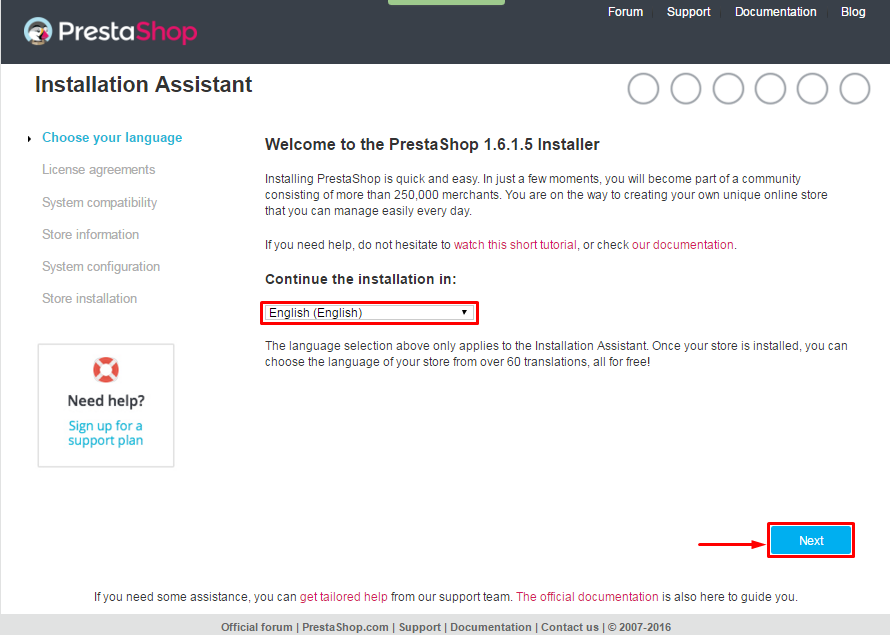 When you are done, click the ‘Next’ button.
- Installation Assistant (License agreements)
Please check the license agreement.
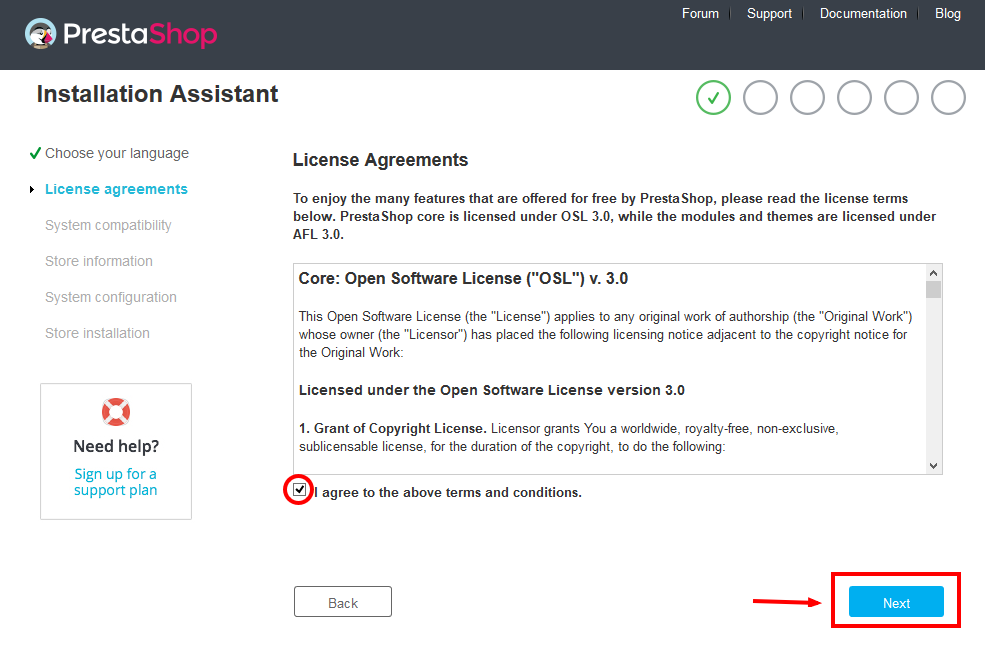
When you are done, click the ‘Next’ button.
- System Compatibility
Check the PHP settings and directory permissions. In case of any errors, please contact your hosting provider for further assistance.
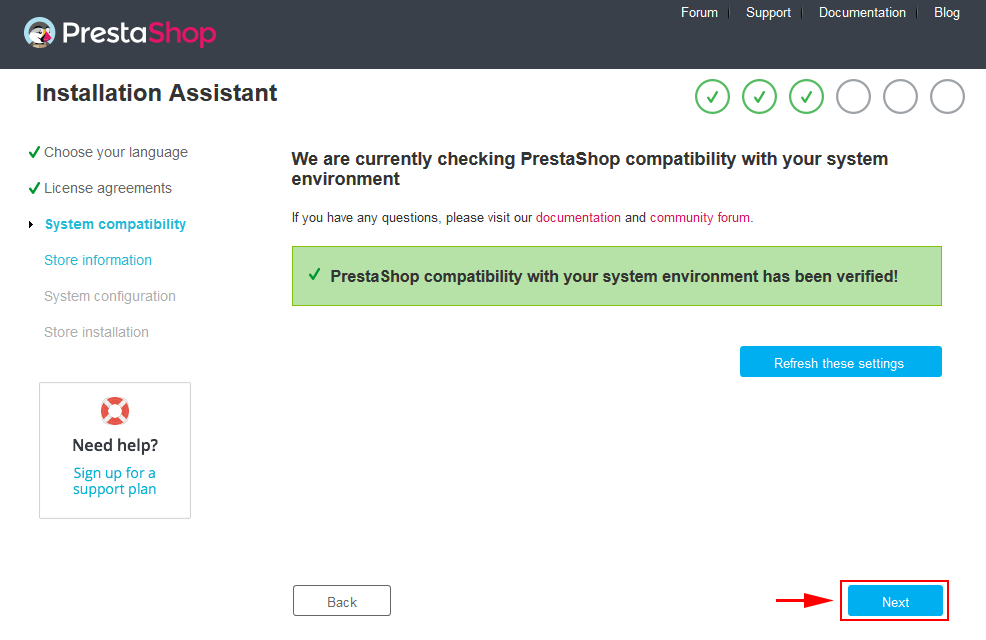
If everything is correct, click the ‘Next’ button.
- Store Information
Now add required information for your store: Shop name, Main activity, Country, Shop timezone and add the account info: first name, last name, email and password. Click “Next” to next step.
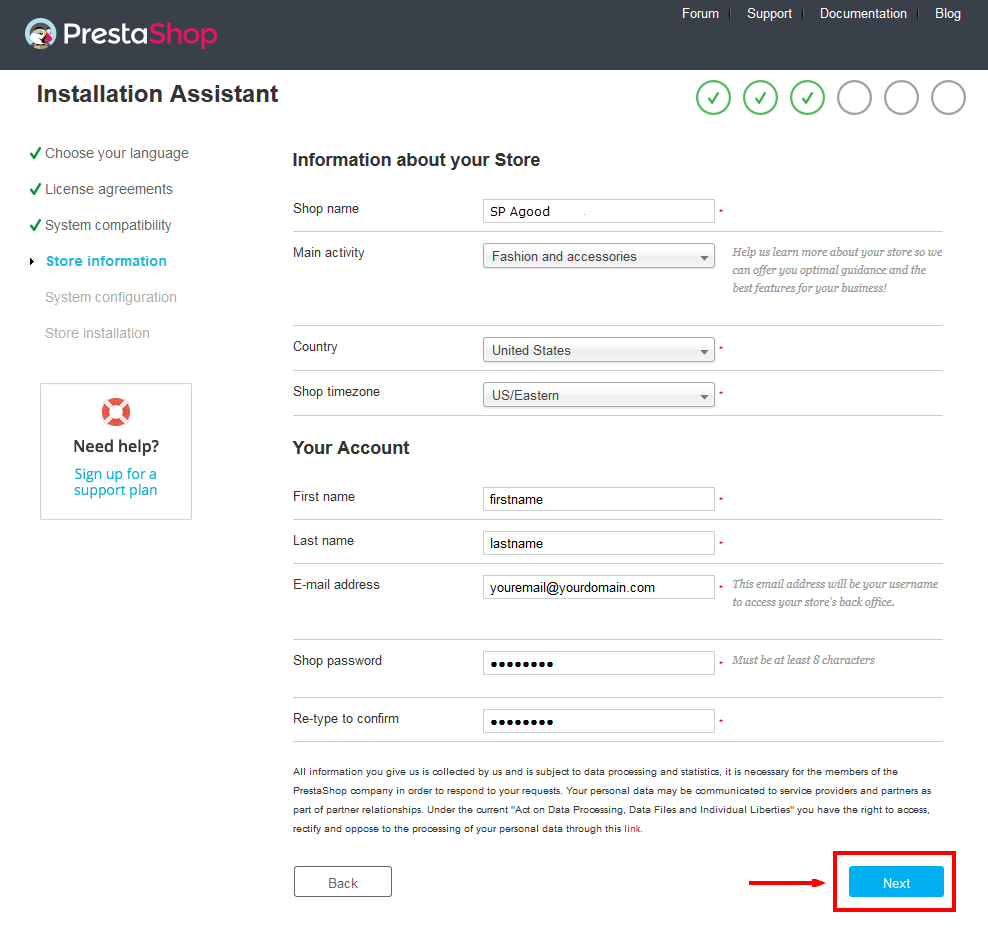
When you are done, click the ‘Next’ button.
- System Configuration
Here is the database configuration panel, we need to create database first.
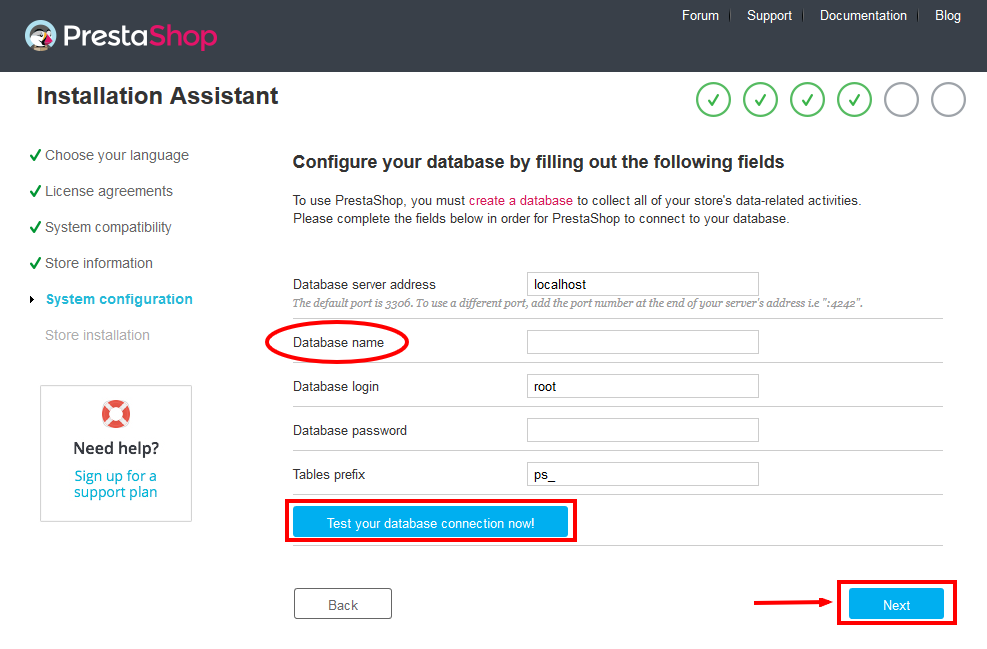
Access your database panel and create database for your site. Add database name and then click “Create” button.

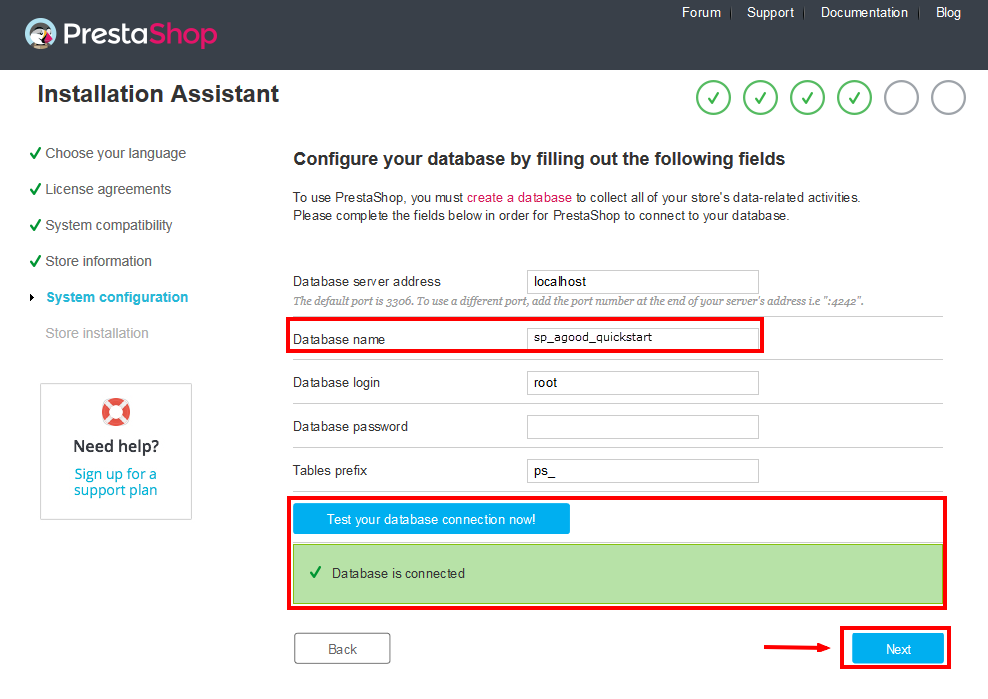
When the database is created successfully, copy and paste its name into the “Database name” field, then click the “Test your database connection now!” button to make sure that the entered settings are correct. If they are, you will see a Database is connected message. After that, you could click the “Next” button to move to next steps.
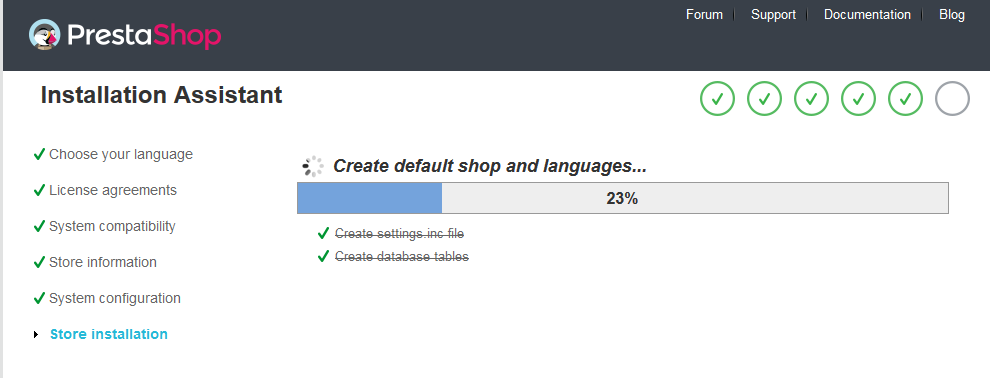
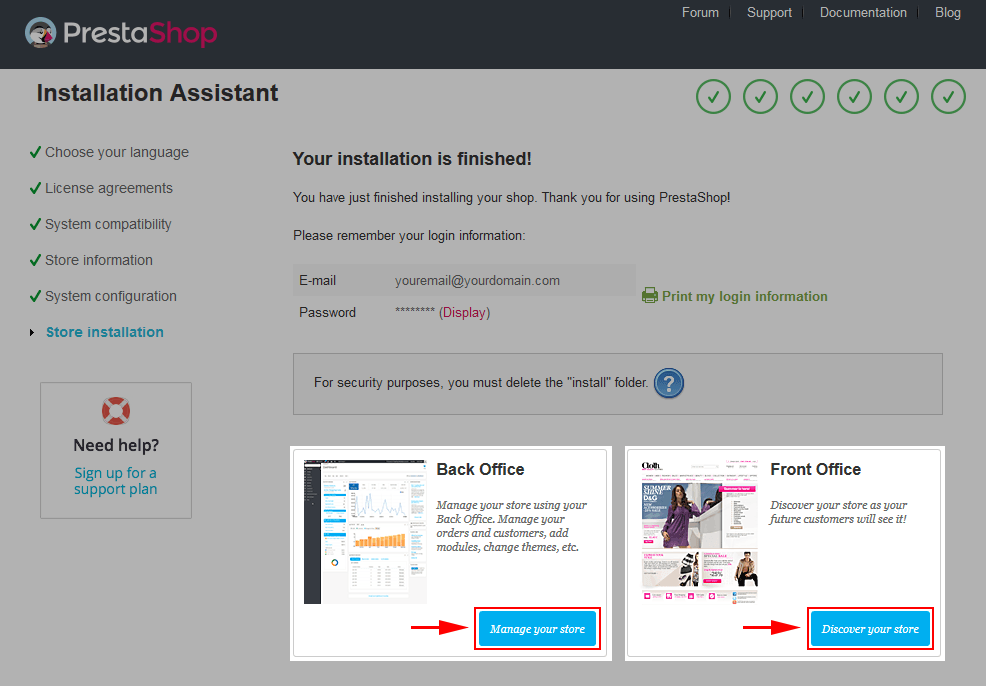
- Finish installation: This process could take a few minutes
Note: For security reasons you need to delete the install/ directory on your hosting server.
And finally, go to the Frontend or Backend as you want:
2.2 Theme Installation
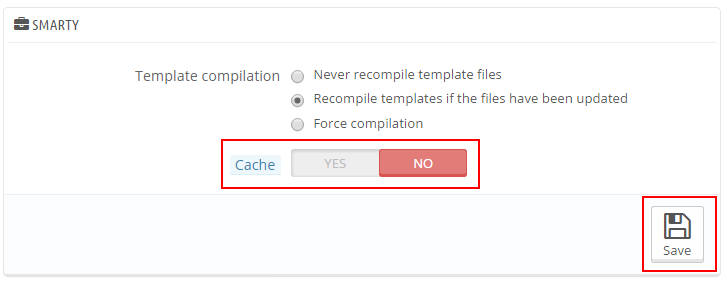
Note: Before installing theme, you must disable the cache. In your back office, please go to ADVANCED PARAMETERS >> Performance >> find “Cache” parameter >> Set “No” to disable cache >> Click “Save”.
SP Hurama Layout1 Theme Installation
Note: Here we will introduce you How To Install SP Hurama layout1 Theme, with layout2 do the same.
Firstly, you must EXTRACT the “sp_hurama_layout1_theme_p16_v1.0.0.zip” package and open the extracted folder. Here you will see:
-
module folder: contain of the smartblog.zip file, smartblogcategories.zip file and themeinstallator.zip file.
- override folder: contain of “FrontController.php” file in the folder URL: \override\classes\controller\ .
- and the sp_hurama_template_p16_v1.0.0.zip file.
STEP 1: Install “smartblog.zip”, “smartbloghomelatestnews.zip” and“smartblogcategories.zip” Module.
1. Login to your Prestashop admin panel and navigate to MODULES -> Modules. At the top of the page click the Add a new module button.

2. Choose “smartblog.zip” file and click “Upload this module” button
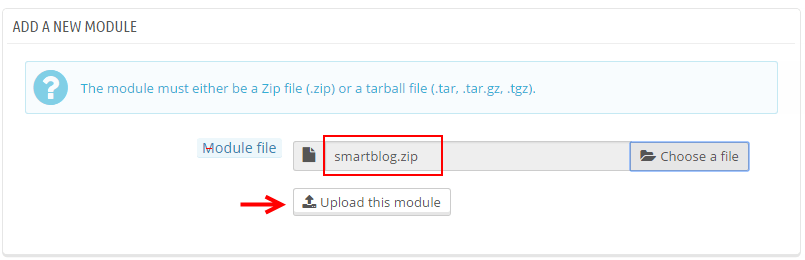
3. There is a message-box “The module was successfully downloaded.”

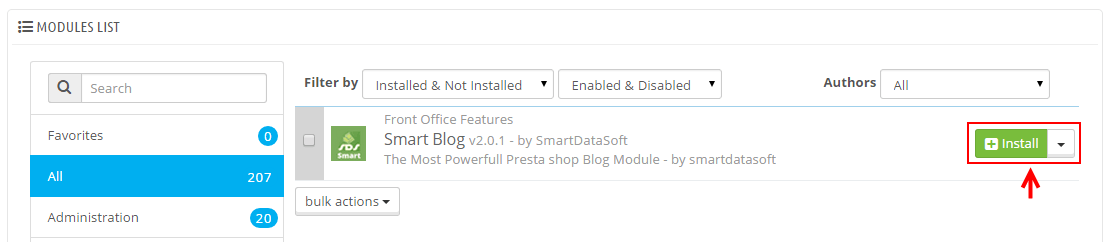
4. Please find to the uploaded module and click “Install” button to run it.
5. When a pop-up window displays, please click “Proceed with the installation” button.
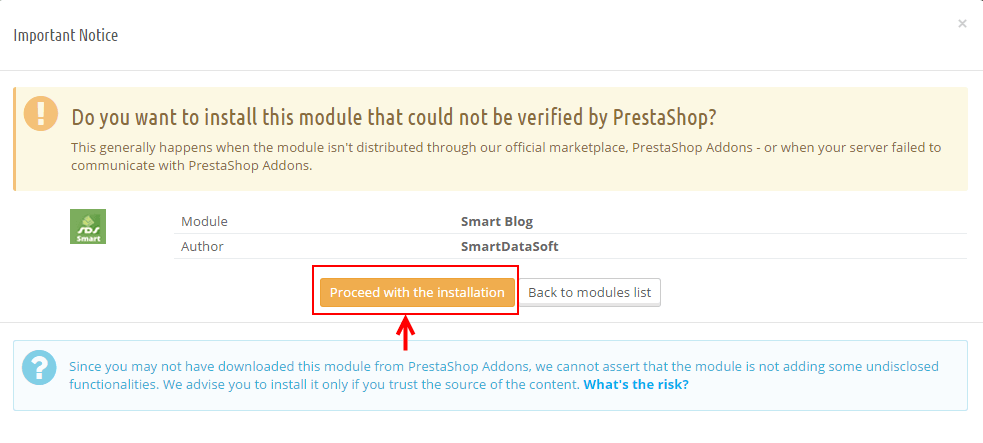
6. Finally, Module(s) installed successfully.
Note: Do the same with the “smartblogcategories.zip” and “smartbloghomelatestnews.zip” module’s installation
STEP 2: Install “themeinstallator” Module.
1. Login to your Prestashop admin panel and navigate to MODULES -> Modules. At the top of the page click the Add a new module button.
2. Select your file named “themeinstallator.zip” and click “Upload this module” button
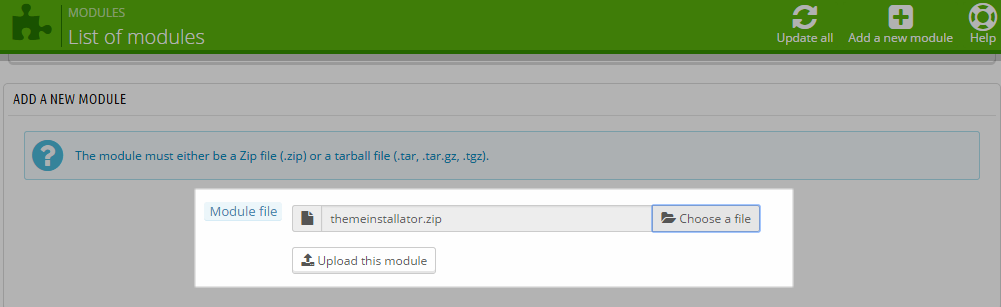
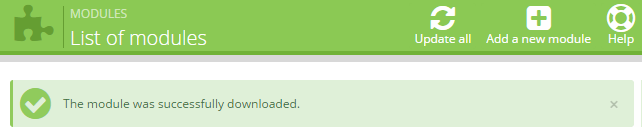
3. The uploading process will be started. You will see the message that the module has been successfully downloaded.
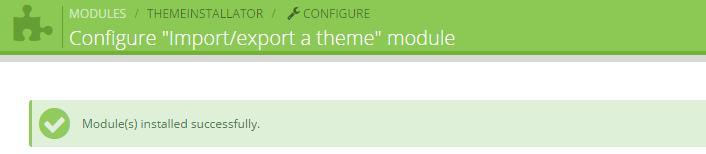
4. The new module is located in the modules list, so you can Search its name and click Install button to start the module.

5. Finally, you will see a notice message: "Module(s) installed successfully".
STEP 3: Install the “sp_hurama_template_p16_v1.0.0.zip” file.
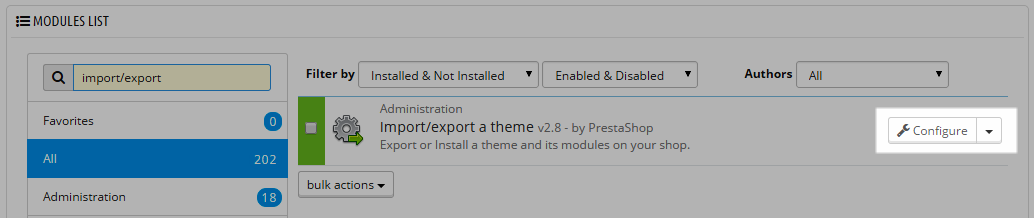
1. In the your Prestashop admin panel and navigate to MODULES >> Modules. Find to the module that you have installed and clicked on Configure button to configure the module.
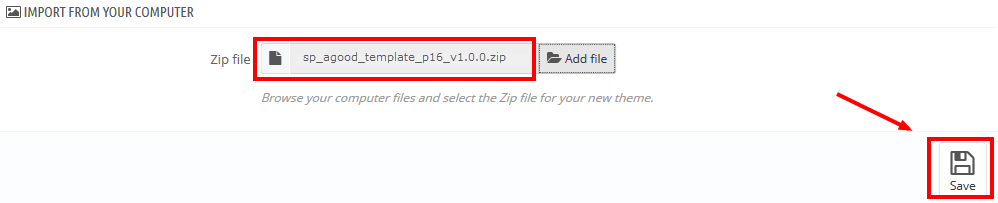
2. Navigate to “Import from your computer” >> choose the zip theme file as named “sp_hurama_template_p16_v1.0.0.zip” >> Next.
3. You will see a message that You are going to install the following theme SP Hurama version 1.0.0, please click “Next” button to continue.
4. Select the module that you want to install/disable >> click “Next” button to continue the installation process.

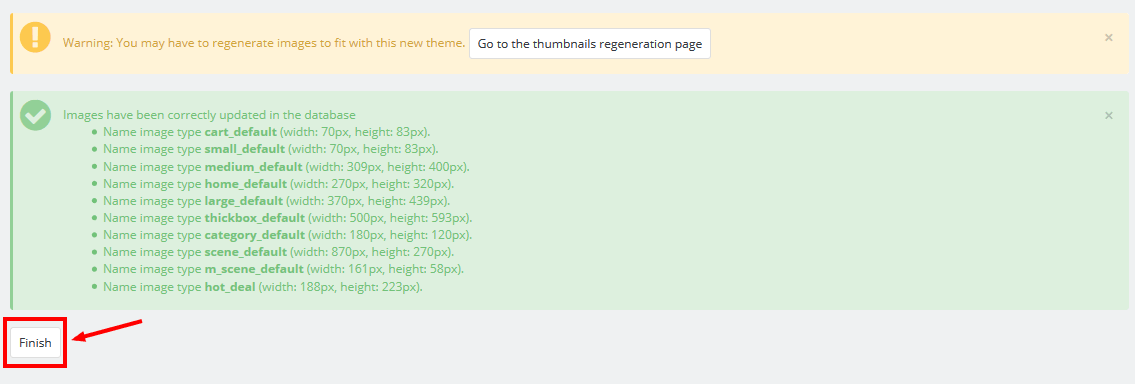
5. After that, a list of the installed/disabled modules will be showed out and you could click “Finish” button to finish the theme installation.
STEP 4: Override folder: copy the "FrontController.php" file into the installation folder with the URL: override\classes\controller.
3SP THEME CONFIGURATION
3.1 General Settings
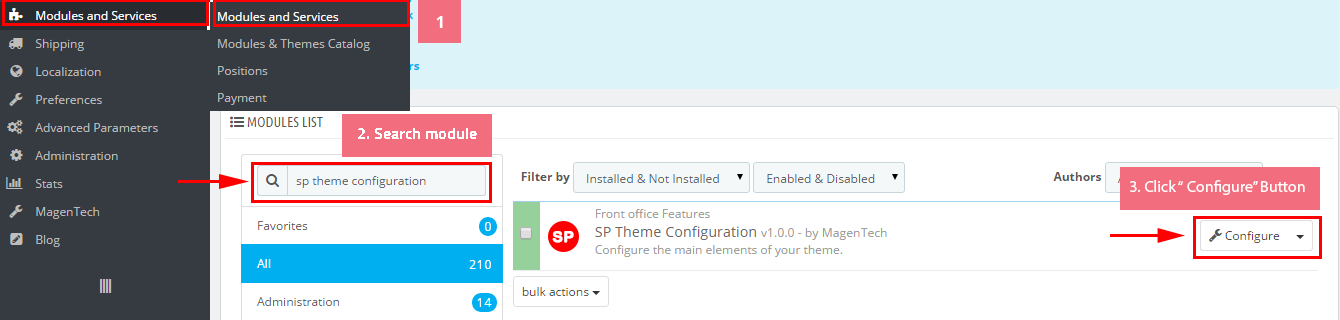
1. In your Prestashop Admin Dashboard, navigate to Modules and Services >> Modules and Services >> go to MODULES LIST section, search for “SP Theme configurator” module then click on Configure.
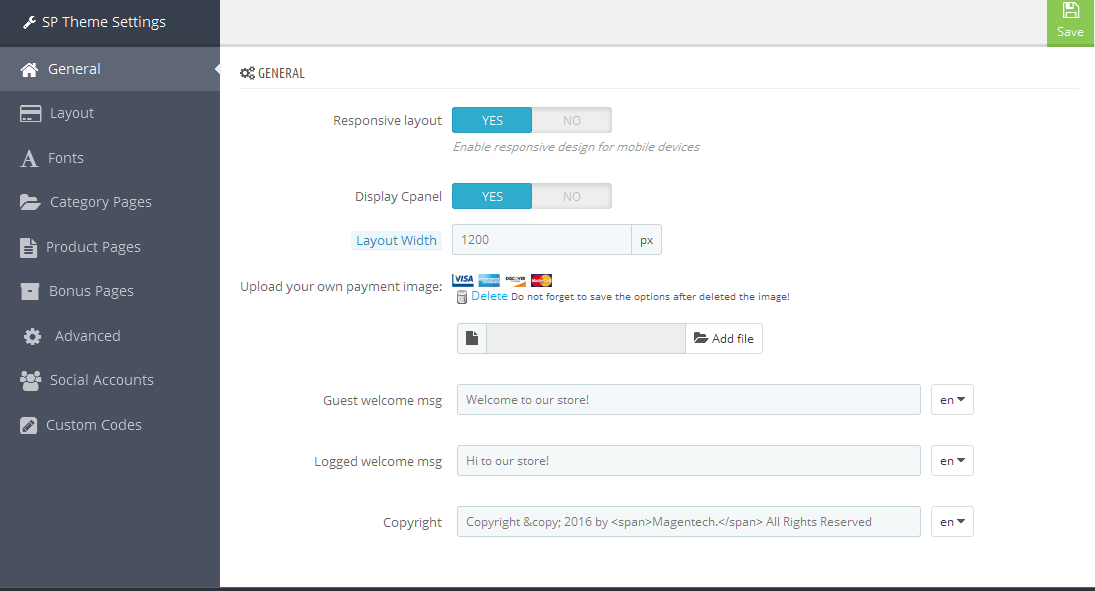
2. In the SP Theme Settings, choose “General” to configure the parameters in this section. After finishing, you could go to the front-end to view the changes.
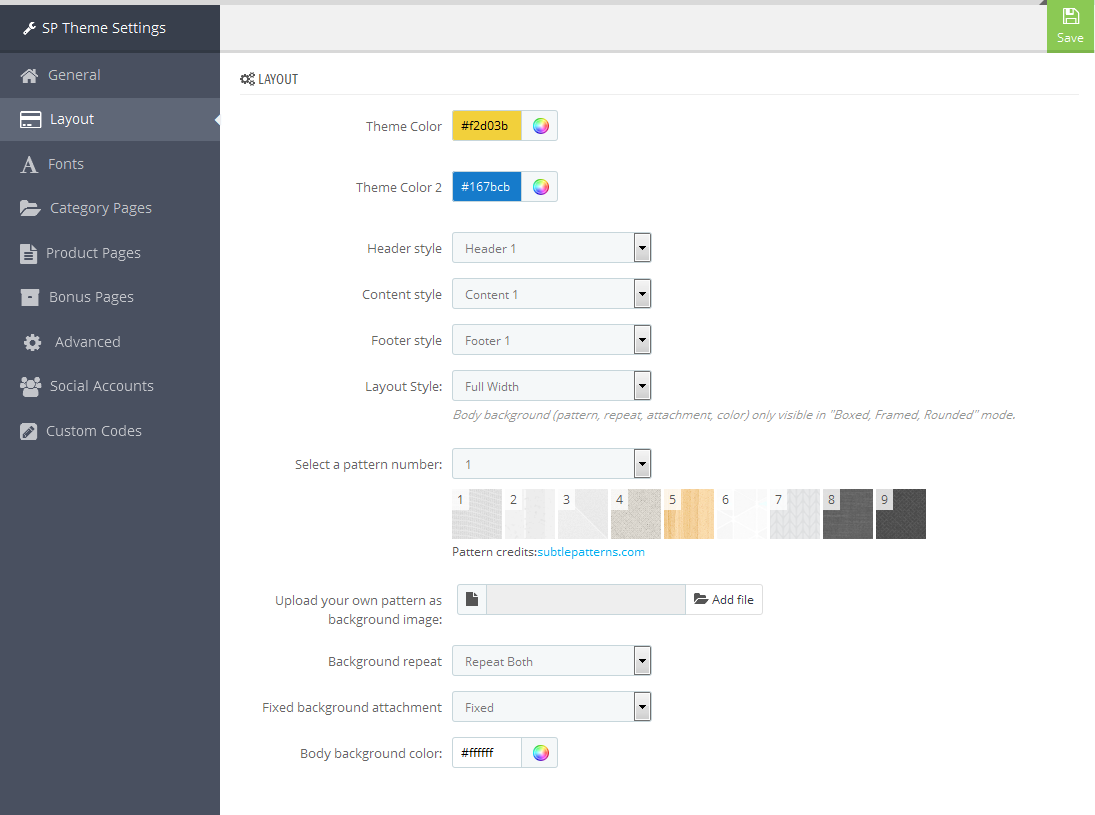
3.2 Layout Settings
1. In your Prestashop Admin Dashboard, navigate to Modules and Services >> Modules and Services >> go to MODULES LIST section, search for “SP Theme configurator” module then click on Configure.
2. In the SP Theme Settings, choose “Layout” to configure the parameters in this section. After finishing, you could go to the front-end to view the changes.
3.3 Fonts
1. In your Prestashop Admin Dashboard, navigate to Modules and Services >> Modules and Services >> go to MODULES LIST section, search for “SP Theme configurator” module then click on Configure.
2. In the SP Theme Settings, choose “Layout” to configure the parameters in this section. After finishing, you could go to the front-end to view the changes.
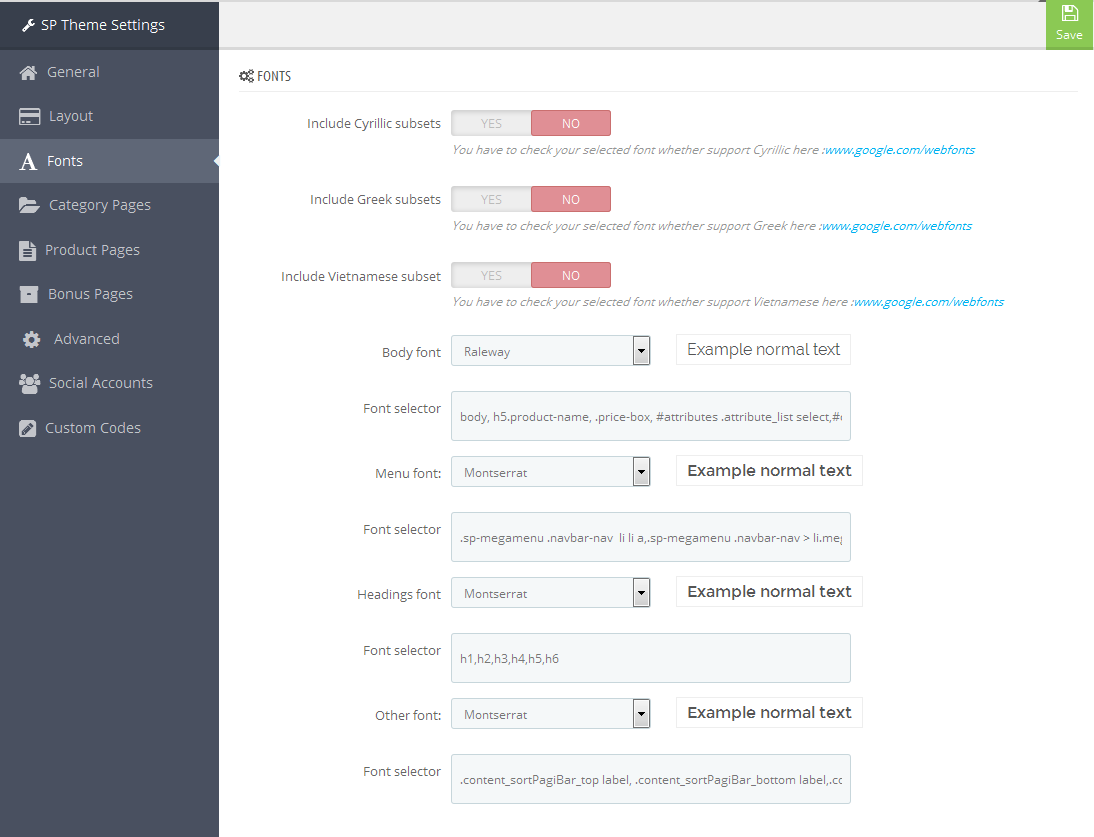
Note: Please copy and paste the following line into Font Selector tab:
1.
2.
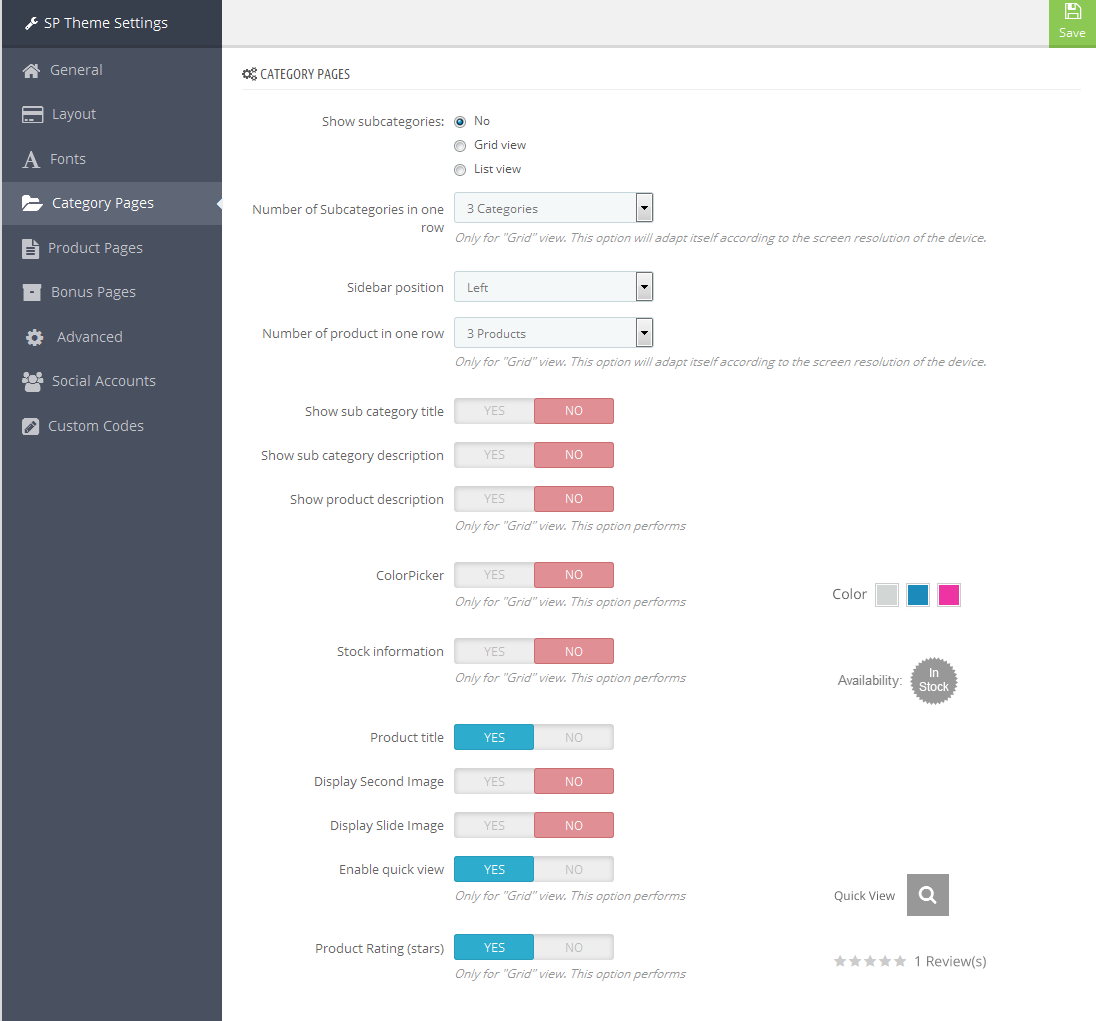
3.4 Category Pages
1. In your Prestashop Admin Dashboard, navigate to Modules and Services >> Modules and Services >> go to MODULES LIST section, search for “SP Theme configurator” module then click on Configure.
2. In the SP Theme Settings, choose “Category Pages” to configure the parameters in this section. After finishing, you could go to the front-end to view the changes.
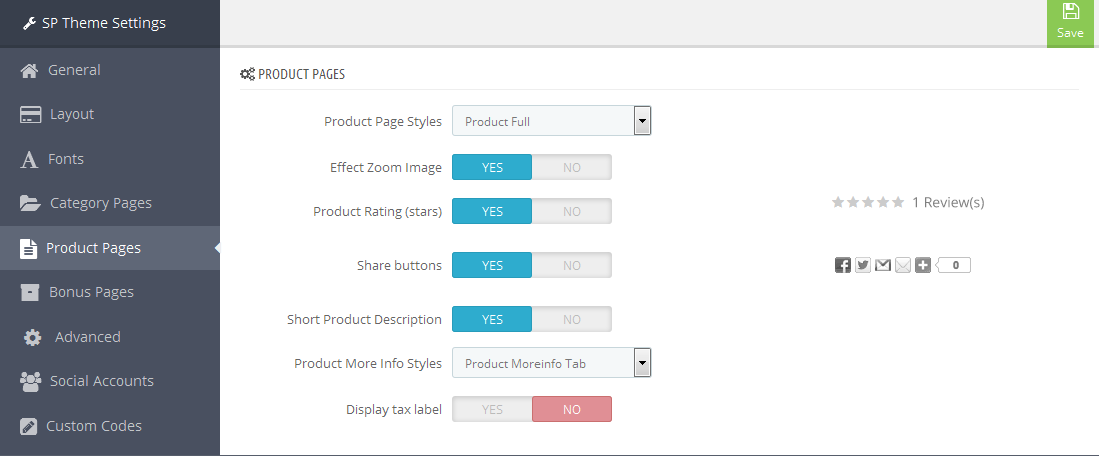
3.5 Product Pages
1. In your Prestashop Admin Dashboard, navigate to Modules and Services >> Modules and Services >> go to MODULES LIST section, search for “SP Theme configurator” module then click on Configure.
2. In the SP Theme Settings, choose “Product Pages” to configure the parameters in this section. After finishing, you could go to the front-end to view the changes.
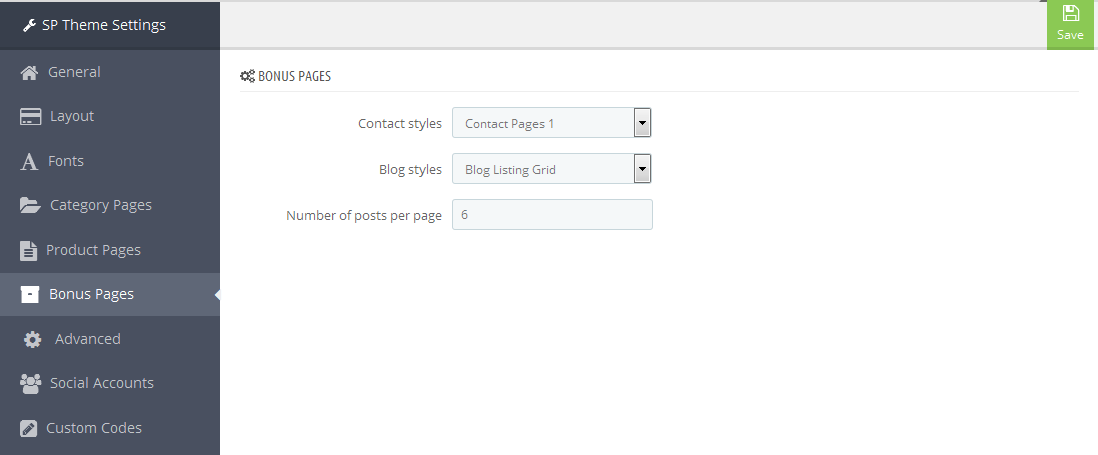
3.6 Bonus Pages
1. In your Prestashop Admin Dashboard, navigate to Modules and Services >> Modules and Services >> go to MODULES LIST section, search for “SP Theme configurator” module then click on Configure.
2. In the SP Theme Settings, choose “Bonus Pages” to configure the parameters in this section. After finishing, you could go to the front-end to view the changes.
3.7 Advanced Settings
1. In your Prestashop Admin Dashboard, navigate to Modules and Services >> Modules and Services >> go to MODULES LIST section, search for “SP Theme configurator” module then click on Configure.
2. In the SP Theme Settings, choose “Advanced” to configure the parameters in this section. After finishing, you could go to the front-end to view the changes.

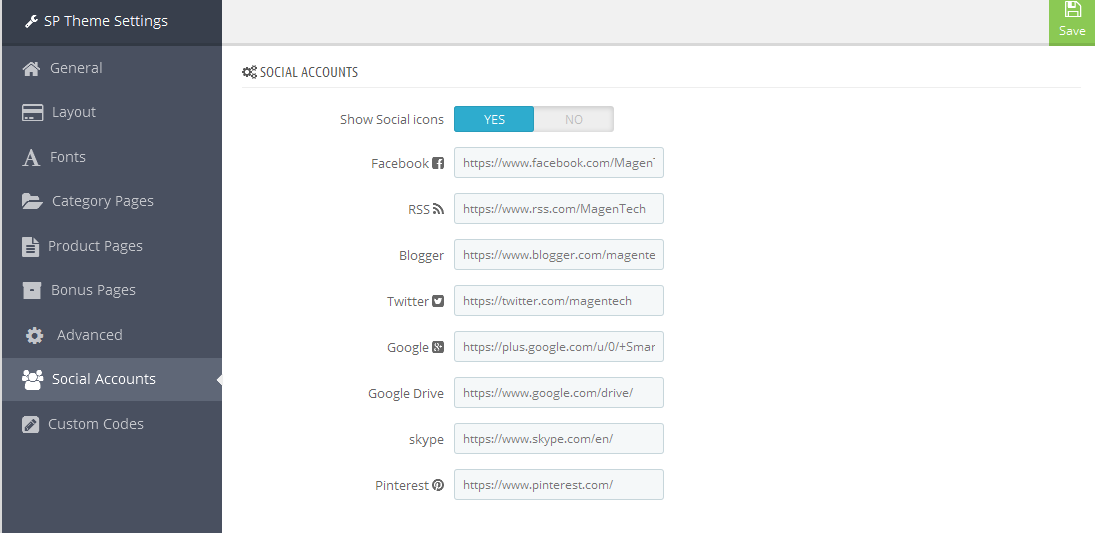
1. In your Prestashop Admin Dashboard, navigate to Modules and Services >> Modules and Services >> go to MODULES LIST section, search for “SP Theme configurator” module then click on Configure.
2. In the SP Theme Settings, choose “Social Accounts” to configure the parameters in this section. After finishing, you could go to the front-end to view the changes.
3.9 Setup Logo
1. To configure Logo for your store, navigate to PREFERENCES > Themes in your Prestashop Admin Dashboard. Go to Logo tab to set up your logo. Click “Add File” to upload the logo image as you want and “Save”.
![]()
2. Please check the front-end to view the changes.
3.10 Image Size Adjustment
In your Prestashop admin dashboard, navigate to: PREFERENCES >> Images to configure the image size for category, manufacturer, supplier, product, etc that fit your layout best.
1. Image size - You can choose the image size types that suit your products best.
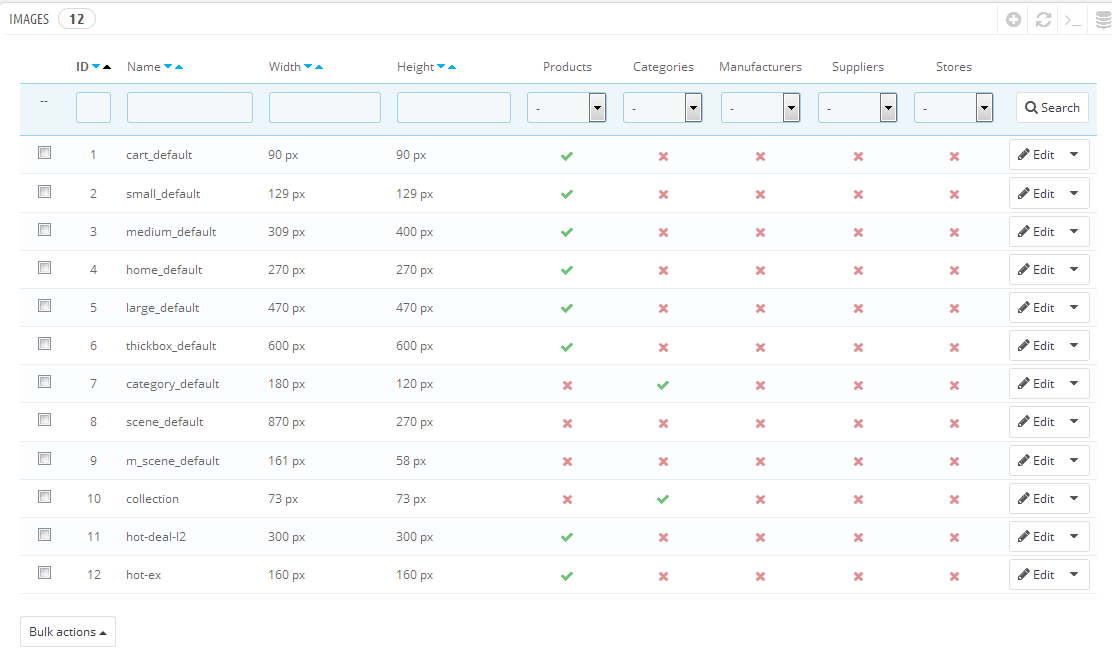
2. Image quality - You can set image quality in use on your site.

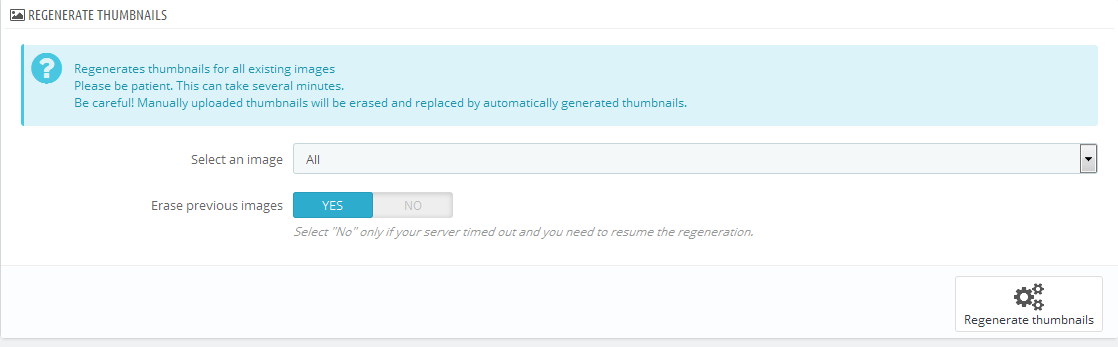
3. Regenerate thumbnails - To see the changes after you update the image sizes, image quality; you need to re-generate the images used in your site. Select option then click Regenerate thumbnails button.
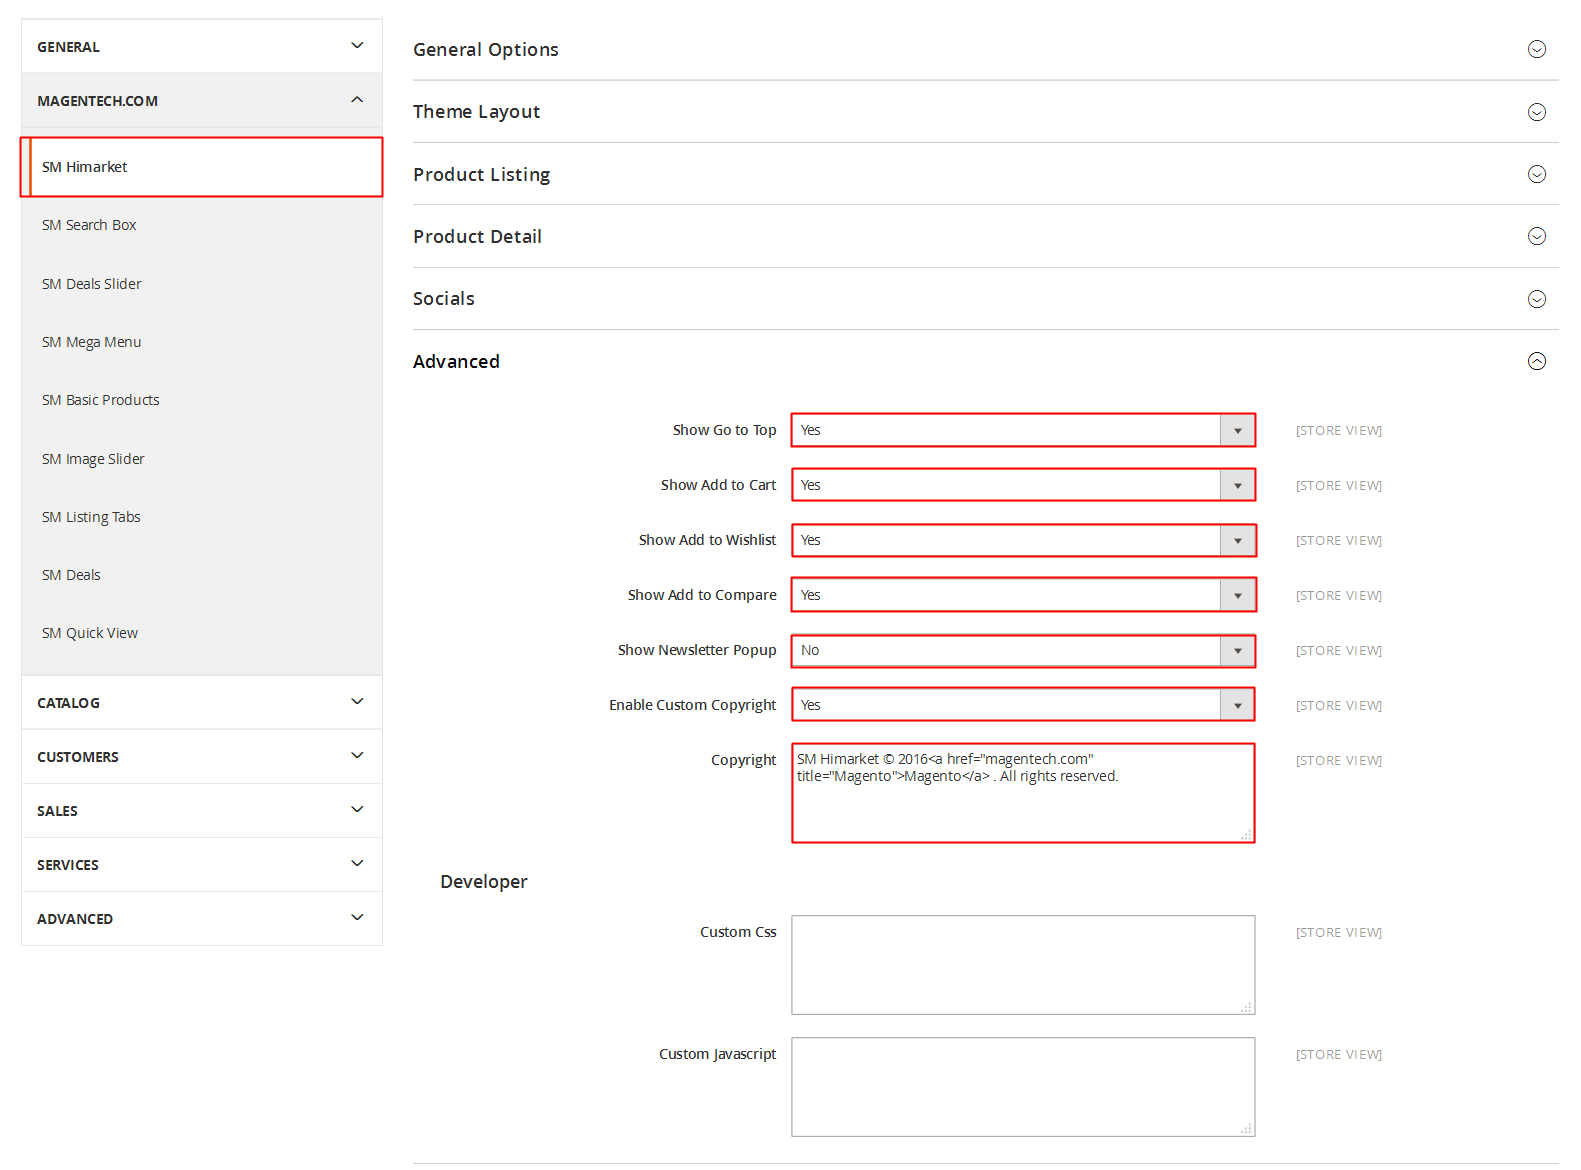
3.11 Edit Copyright
Frontend Appearance:

To edit Copyright, please follow these steps:
1. In your Prestashop Admin Dashboard, navigate to Modules and Services >> Modules and Services >> go to MODULES LIST section, search for “SP Theme configurator” module then click on Configure.
2. In the SP Theme Settings, choose “General” to configure the parameter named “Copyright” in this section. After finishing, you could go to the front-end to see the changes.
3.12 Edit Pop-up
Frontend Appearance:
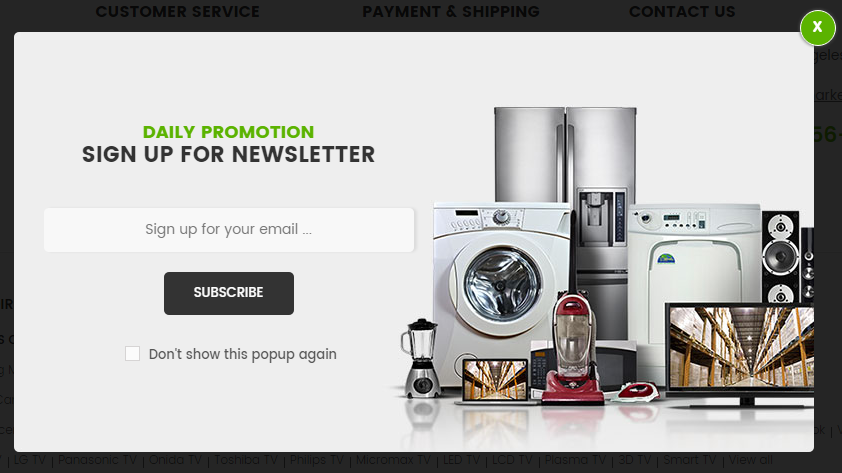
To edit this pop-up, please follow these steps:
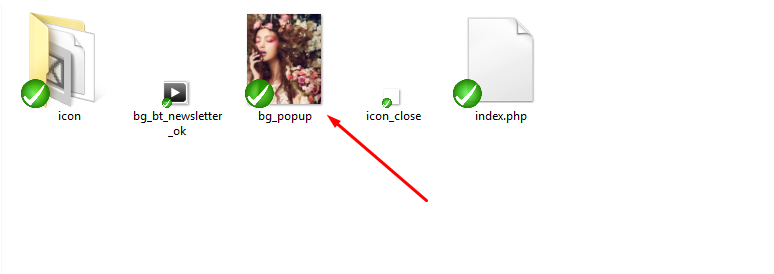
1. Change the image:
In your Website’s Directory, go to themes\sp_hurama\css\modules\spblocknewsletter\img folder. To change the image in this pop-up, you could replace our sample image named bg_popup.jpg by your image with the same name as our sample image.
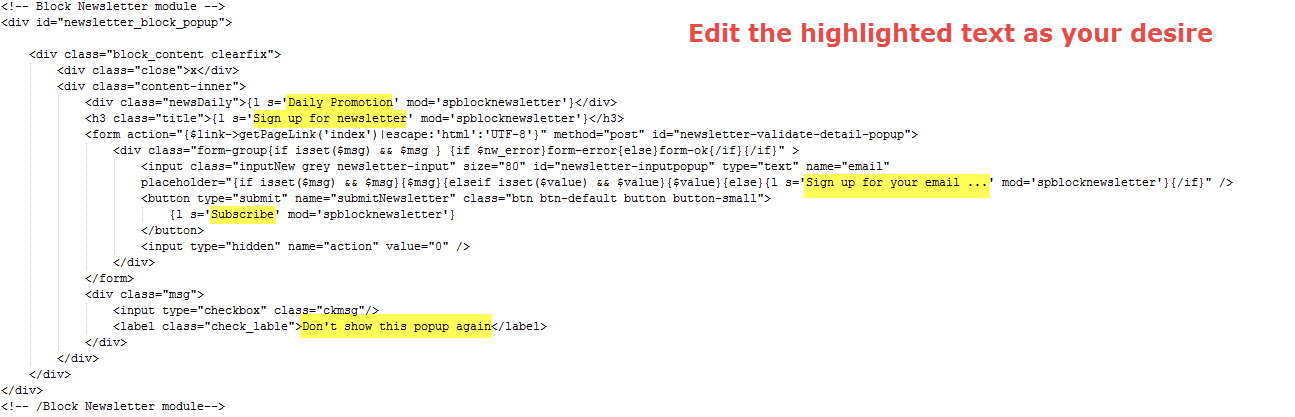
2. Change the text:
In your Website’s Directory, go to themes\sp_hurama\modules\spblocknewsletter folder. To change the text in this pop-up, in this folder, you could open the file named spblocknewsletterpopup.tpl by your editor program.
Find and change the following text in this file as you want:
|
1
|
Subscribe to the Hurama mailing list to receive updates on new arrivals, special offers and other discount information
|
3. After finishing, you could go to the front-end to see the changes.
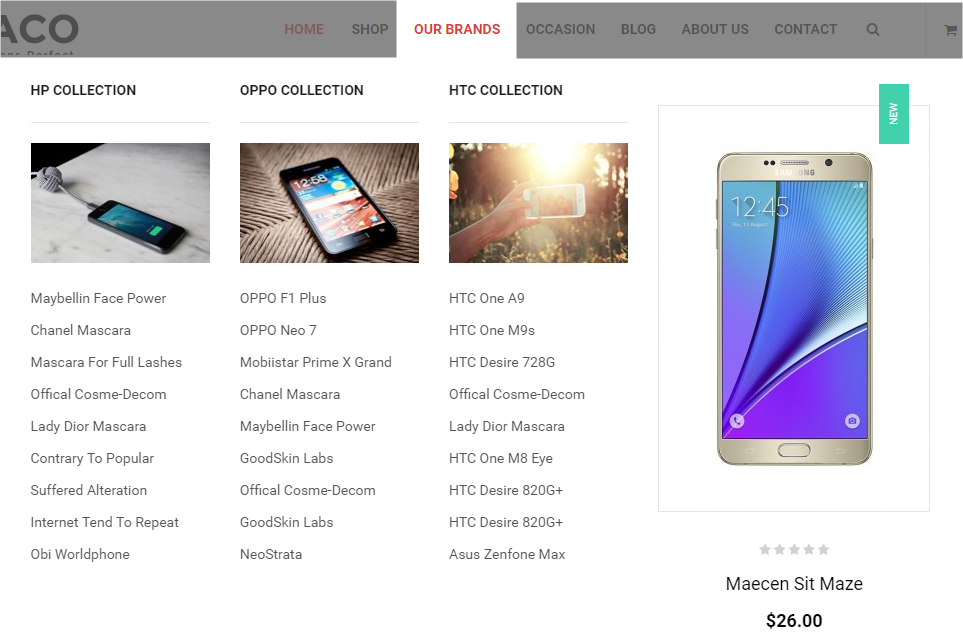
4SP MEGA MENU CONFIGURATION

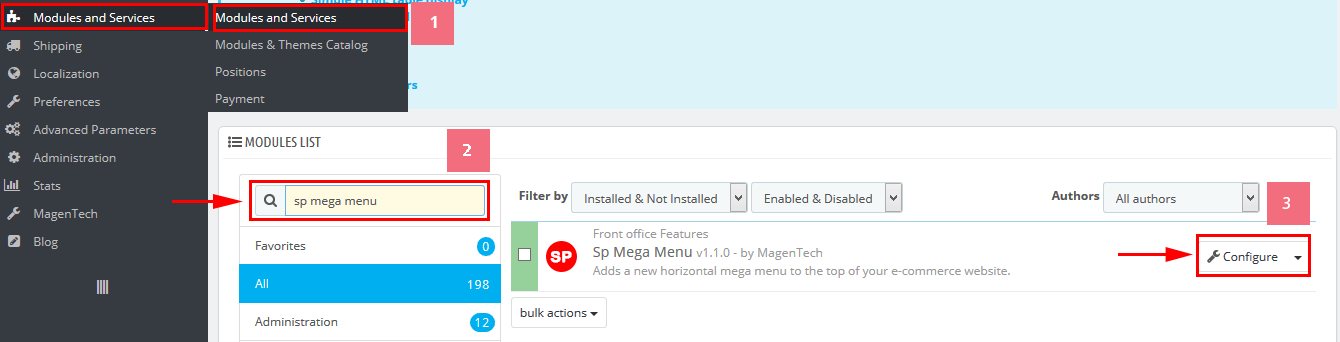
1. Navigate to Modules -> Modules >> look for SP Mega Menu >> Click the Configure button to access the module configuration page.
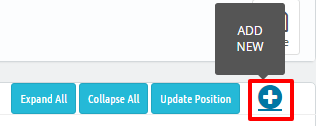
2. In the SP Mega Menu Panel, you could configure Add New Module by click on the button like the following image:
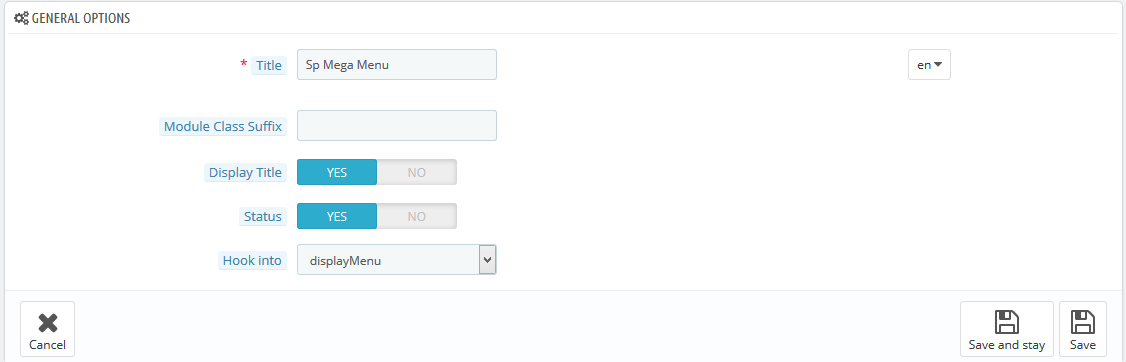
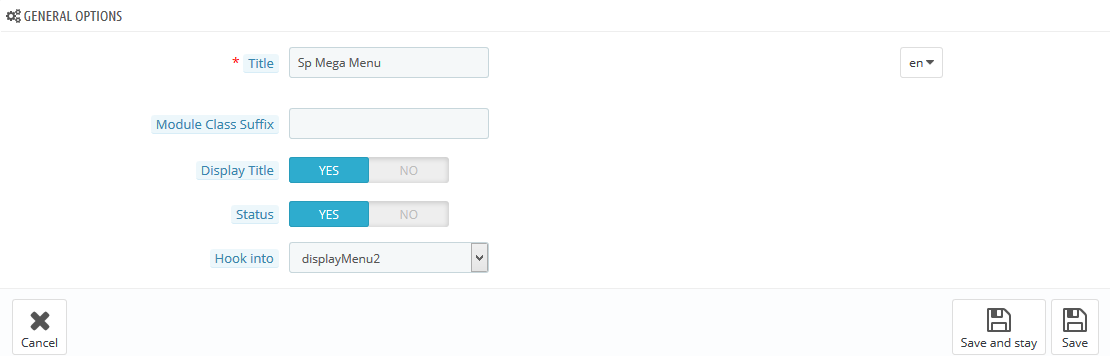
3. In the configuration page of new module, you could configure General Options as follows
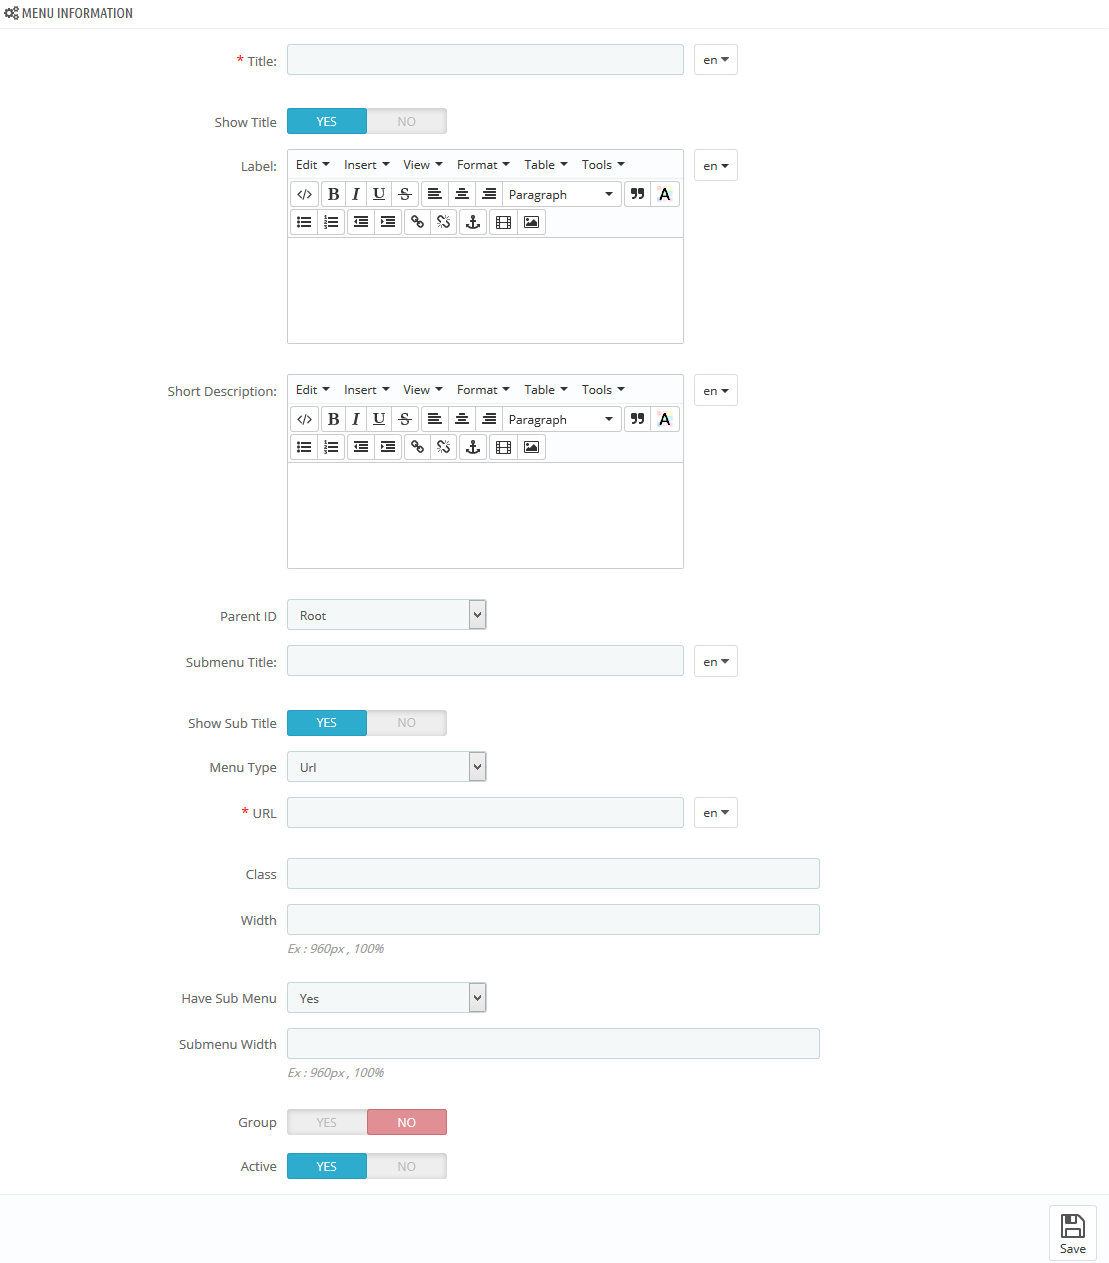
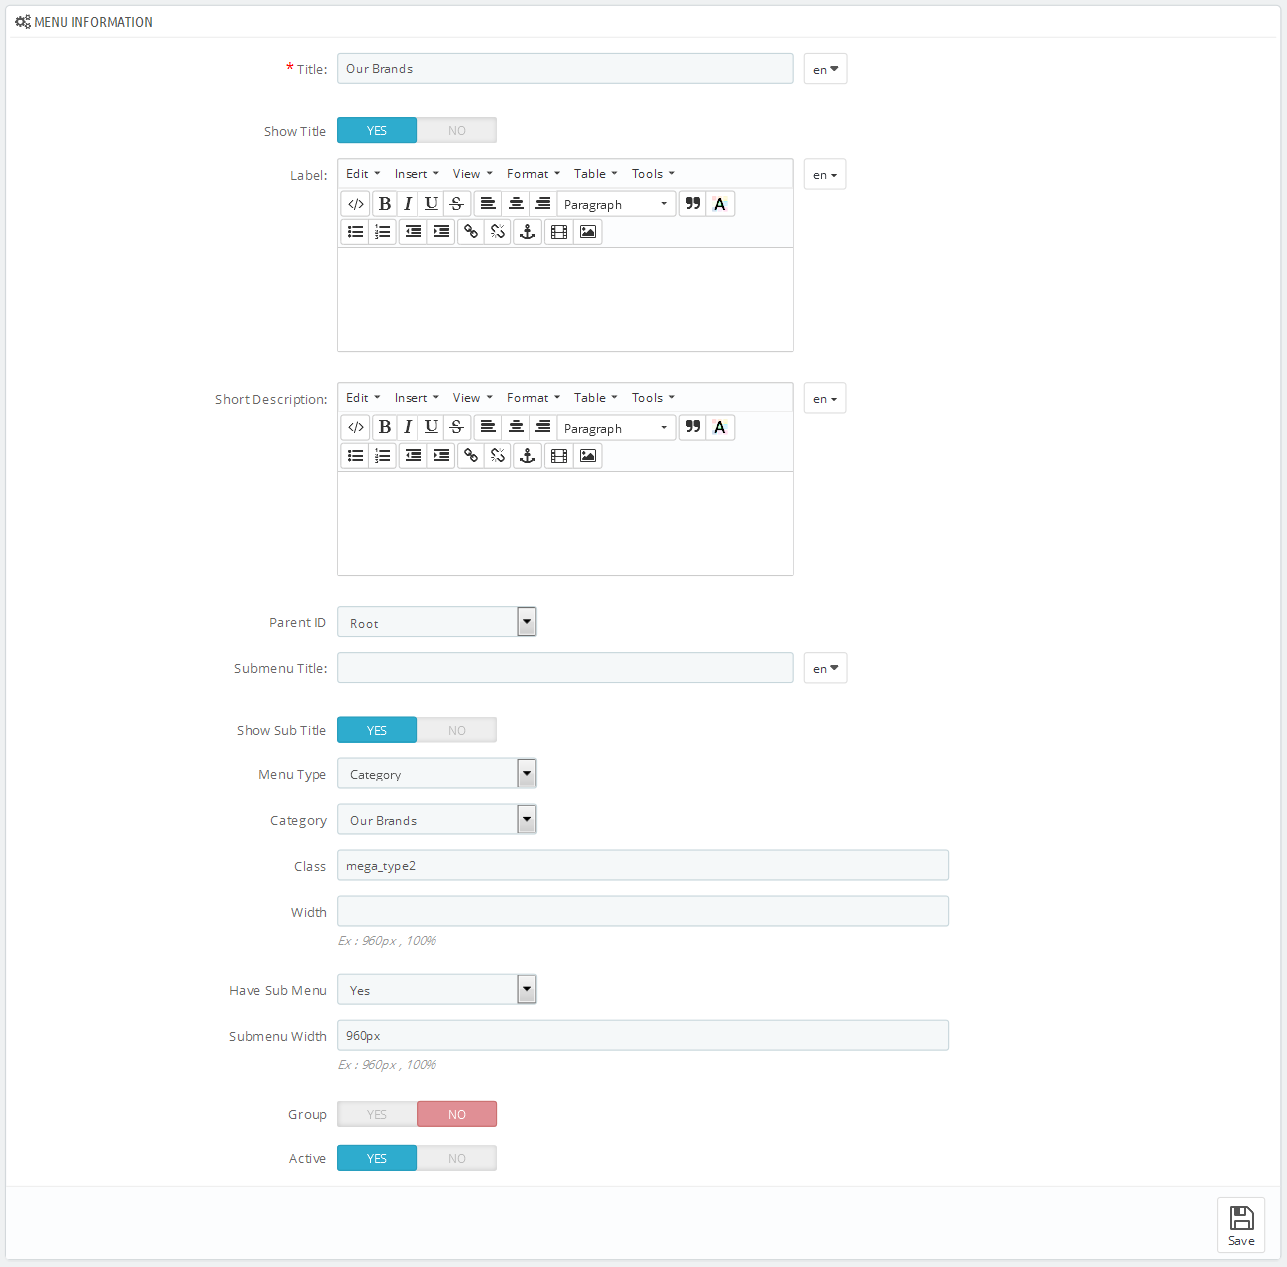
4. In the configuration page of new module, you could configure Menu Information as follows

5. In order to add menu items, to add items as you want, you need to click this button.
6. Menu list of Mega Menu You need to look at the menu list to configure easily.
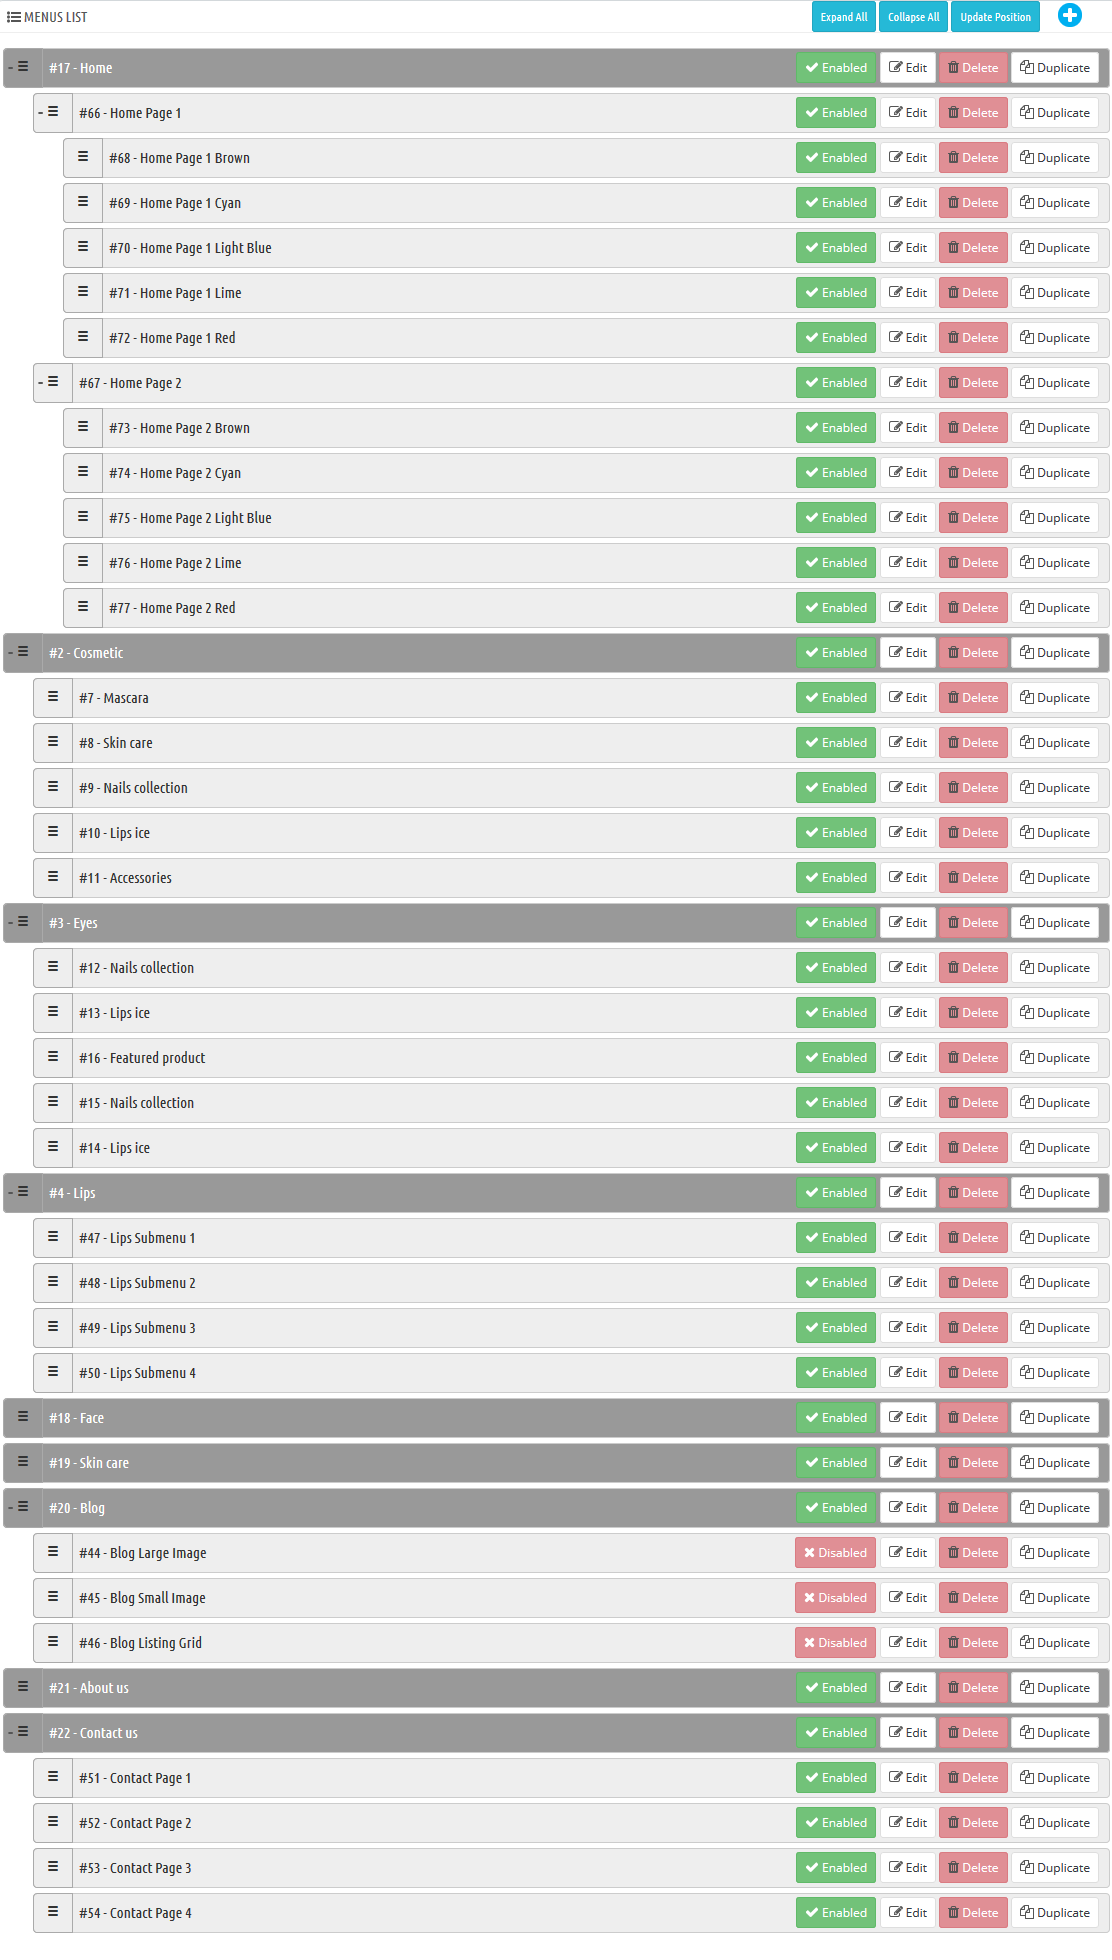
7. To configure each item, you need to click “Edit” button as follows:

Note: Go Here to readmore about the SP Mega Menu module.
Cosmetic
Frontend Appearance 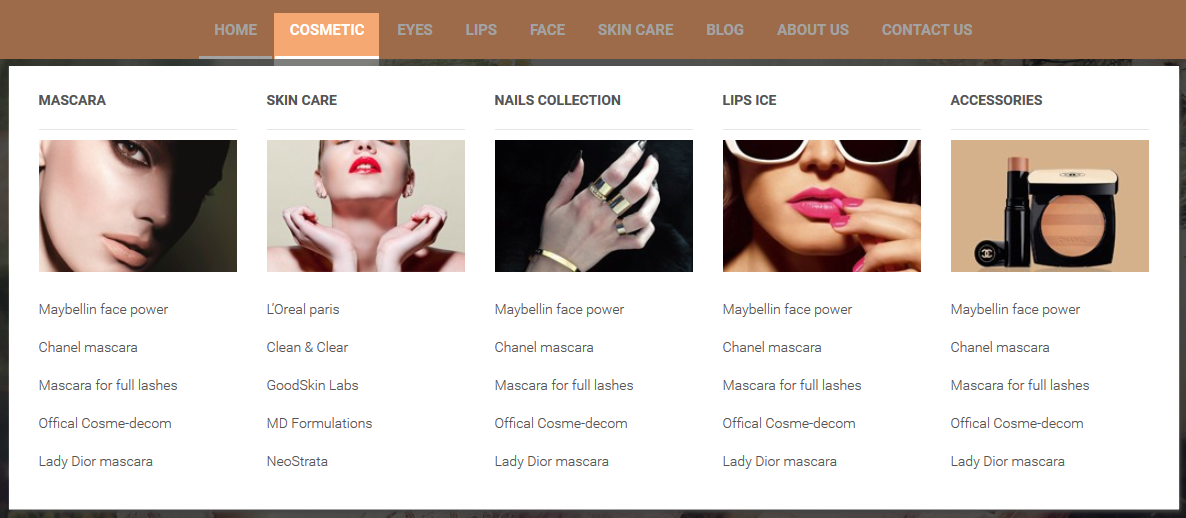
- Backend Settings : Please click Here to view.
- Backend Settings of Item ‘Mascara’: Please click Here to view.
- Backend Settings of Item ‘Skin Care’: Please click Here to view.
- Backend Settings of Item ‘Nails Collection’: Please click Here to view.
- Backend Settings of Item ‘Lips Ice’: Please click Here to view.
- Backend Settings of Item ‘Accessories’: Please click Here to view.
Eyes
Frontend Appearance 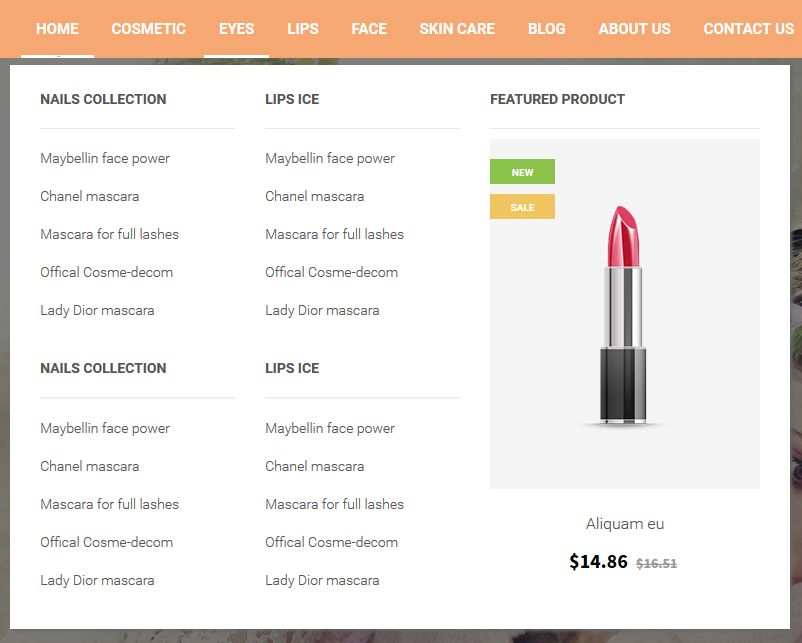
- Backend Settings : Please click Here to view.
- Backend Settings of Item ‘Nails Collections’: Please click Here to view.
- Backend Settings of Item ‘Lips Ice’: Please click Here to view.
- Backend Settings of Item ‘Featured Product’: Please click Here to view.
Note: Do the same with other items in this menu
Lips
Frontend Appearance 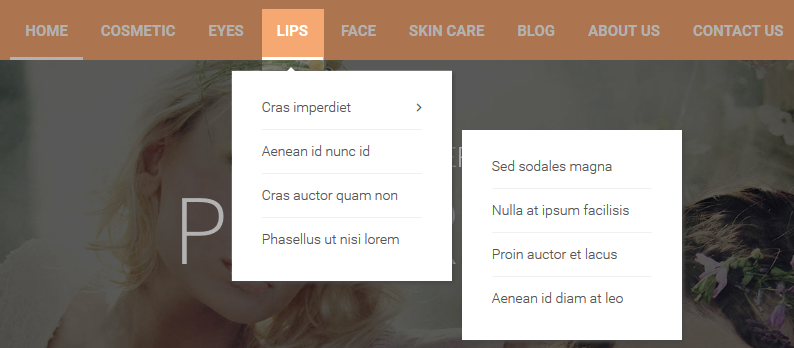
- Backend Settings : Please click Here to view.
- Backend Settings of Item ‘Lips Submenu 1′ : Please click Here to view.
- Backend Settings of Item ‘Lips Submenu 2′ : Please click Here to view.
Note: Do the same with other items in this menu
Face
Frontend Appearance 
- Backend Settings : Please click Here to view.
Note: Do the same with Skin Care, Blog, About Us
Contact Us
Frontend Appearance 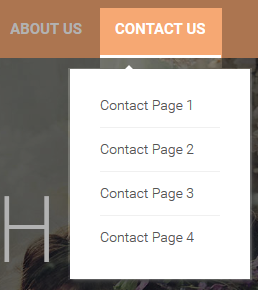
- Backend Settings : Please click Here to view.
- Backend Settings of Item ‘Contact Page 1′ : Please click Here to view.
Note: Do the same with other items in this menu

1. Navigate to Modules -> Modules >> look for SP Mega Menu >> Click the Configure button to access the module configuration page.
2. In the SP Mega Menu Panel, you could configure Add New Module by click on the button like the following image:
3. In the configuration page of new module, you could configure General Options as follows
4. In the configuration page of new module, you could configure Menu Information as follows
5. In order to add menu items, to add items as you want, you need to click this button.
6. Menu list of Mega Menu You need to look at the menu list to configure easily.
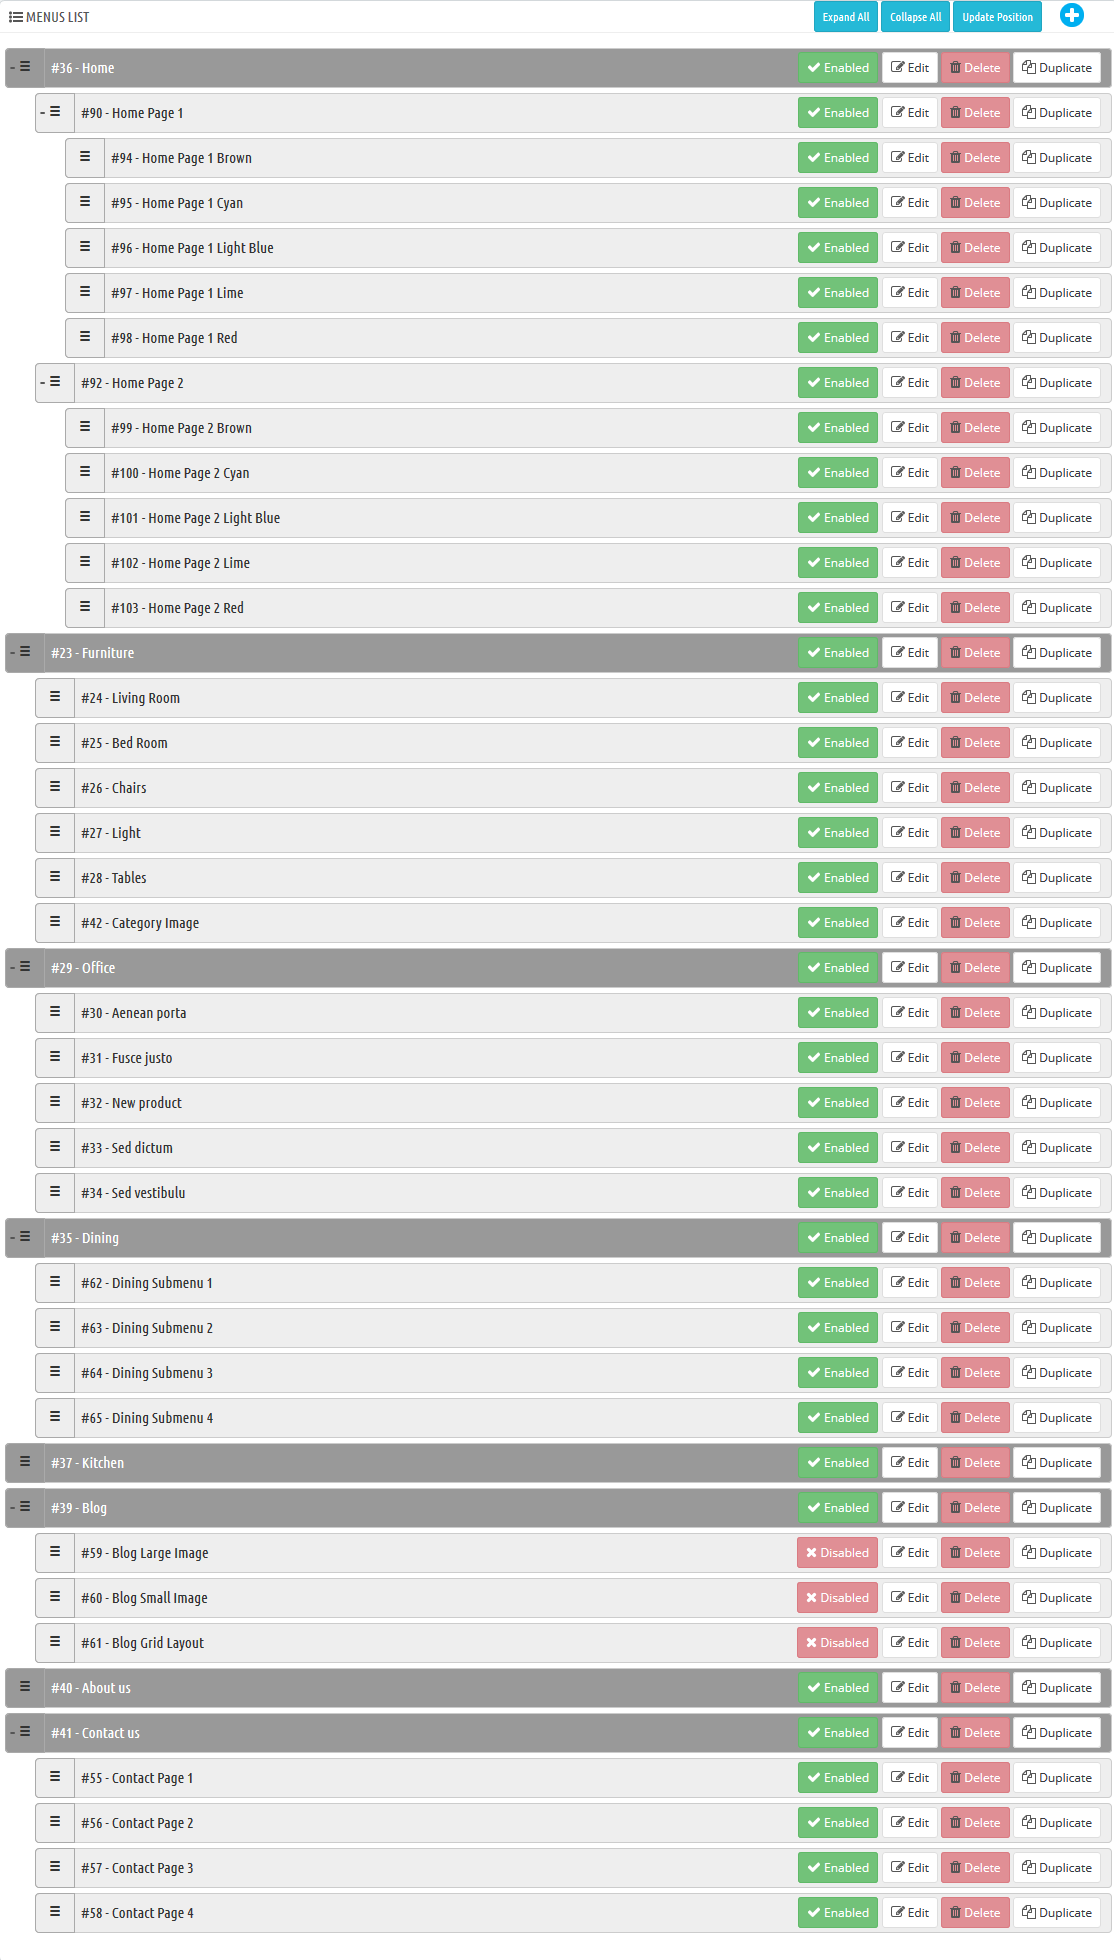
7. To configure each item, you need to click “Edit” button as follows:

Note: Go Here to readmore about the SP Mega Menu module.
Furniture
Frontend Appearance 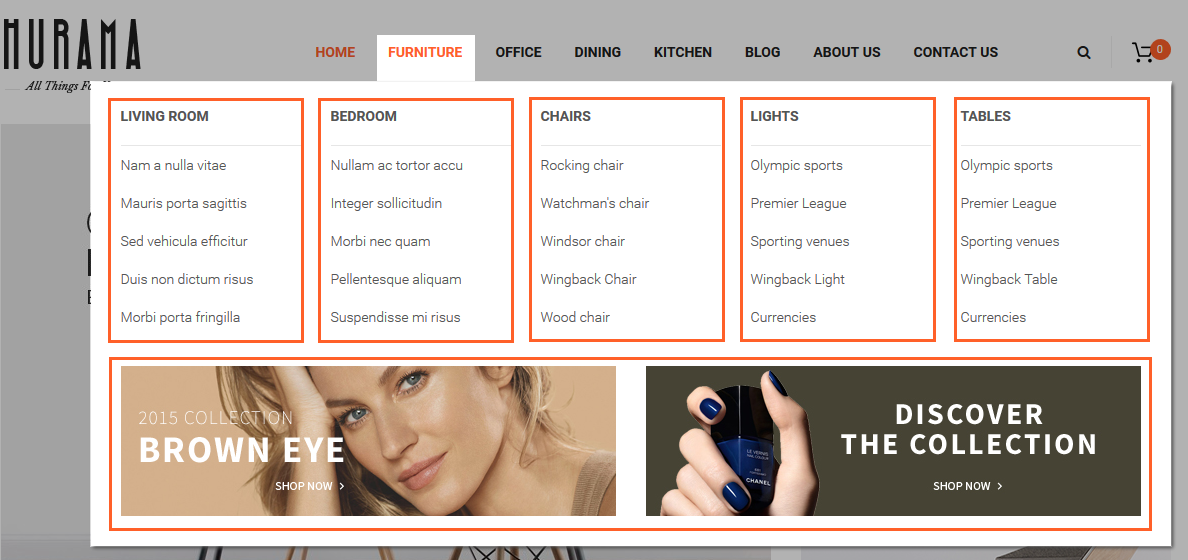
- Backend Settings : Please click Here to view.
- Backend Settings of Item ‘Living Room’: Please click Here to view.
Note: Do the same with these items: Bedroom, Chairs, Lights, Tables
- Backend Settings of Item ‘Category Image’ : Please click Here to view.
Copy and paste the following code into the content:
|
1
|
<div class="images_cat"><a class="img img1" href="#"><img src="sp_hurama/img/cms/image_cat1.jpg" alt="" width="495" height="150" /> </a><a class="img img2" href="#"><img src="sp_hurama/img/cms/image_cat2.jpg" alt="" width="495" height="150" /> </a></div>
|
Note: Edit the code by using your image’s URL.
Office
Frontend Appearance 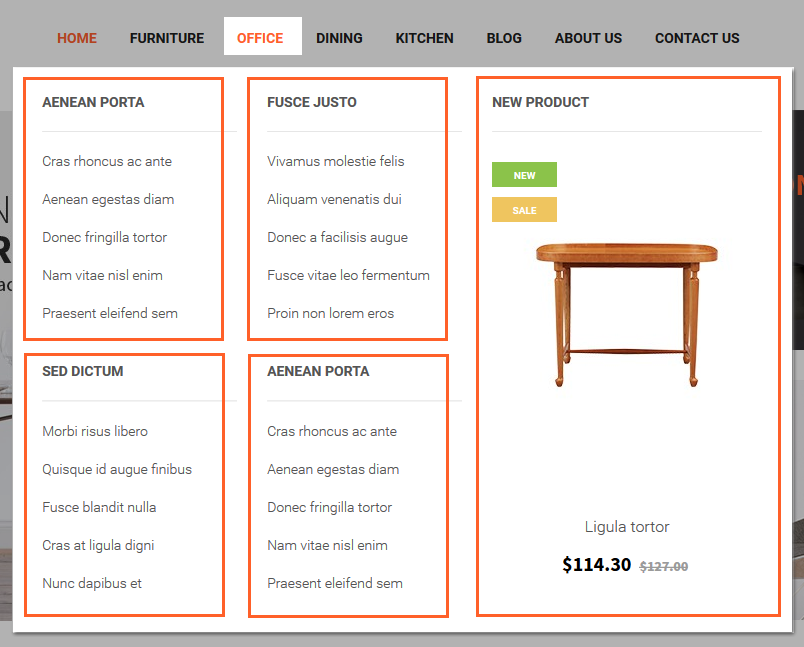
- Backend Settings : Please click Here to view.
- Backend Settings of Item ‘Aenean porta’: Please click Here to view.
Note: Do the same with these items: Fusce justo, Sed dictum, Sed vestibulu
- Backend Settings of Item ‘New Product: Please click Here to view.
Dining
Frontend Appearance 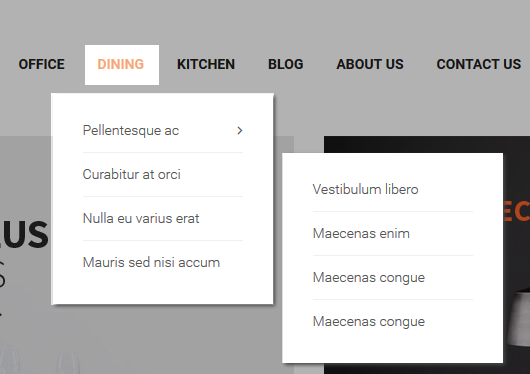
- Backend Settings : Please click Here to view.
- Backend Settings of Item ‘Dining Submenu 1′: Please click Here to view.
Note: Do the same with other items in this menu
Kitchen
Frontend Appearance 
- Backend Settings : Please click Here to view.
Note: Do the same with Blog, About Us
Contact Us
Frontend Appearance 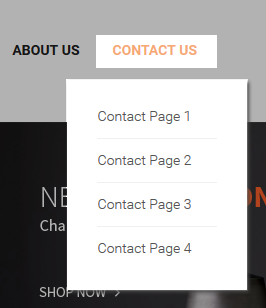
- Backend Settings : Please click Here to view.
- Backend Settings of Item ‘Contact Page 1′ : Please click Here to view.
Note: Do the same with other items in this menu
5EXTENSIONS CONFIGURATION
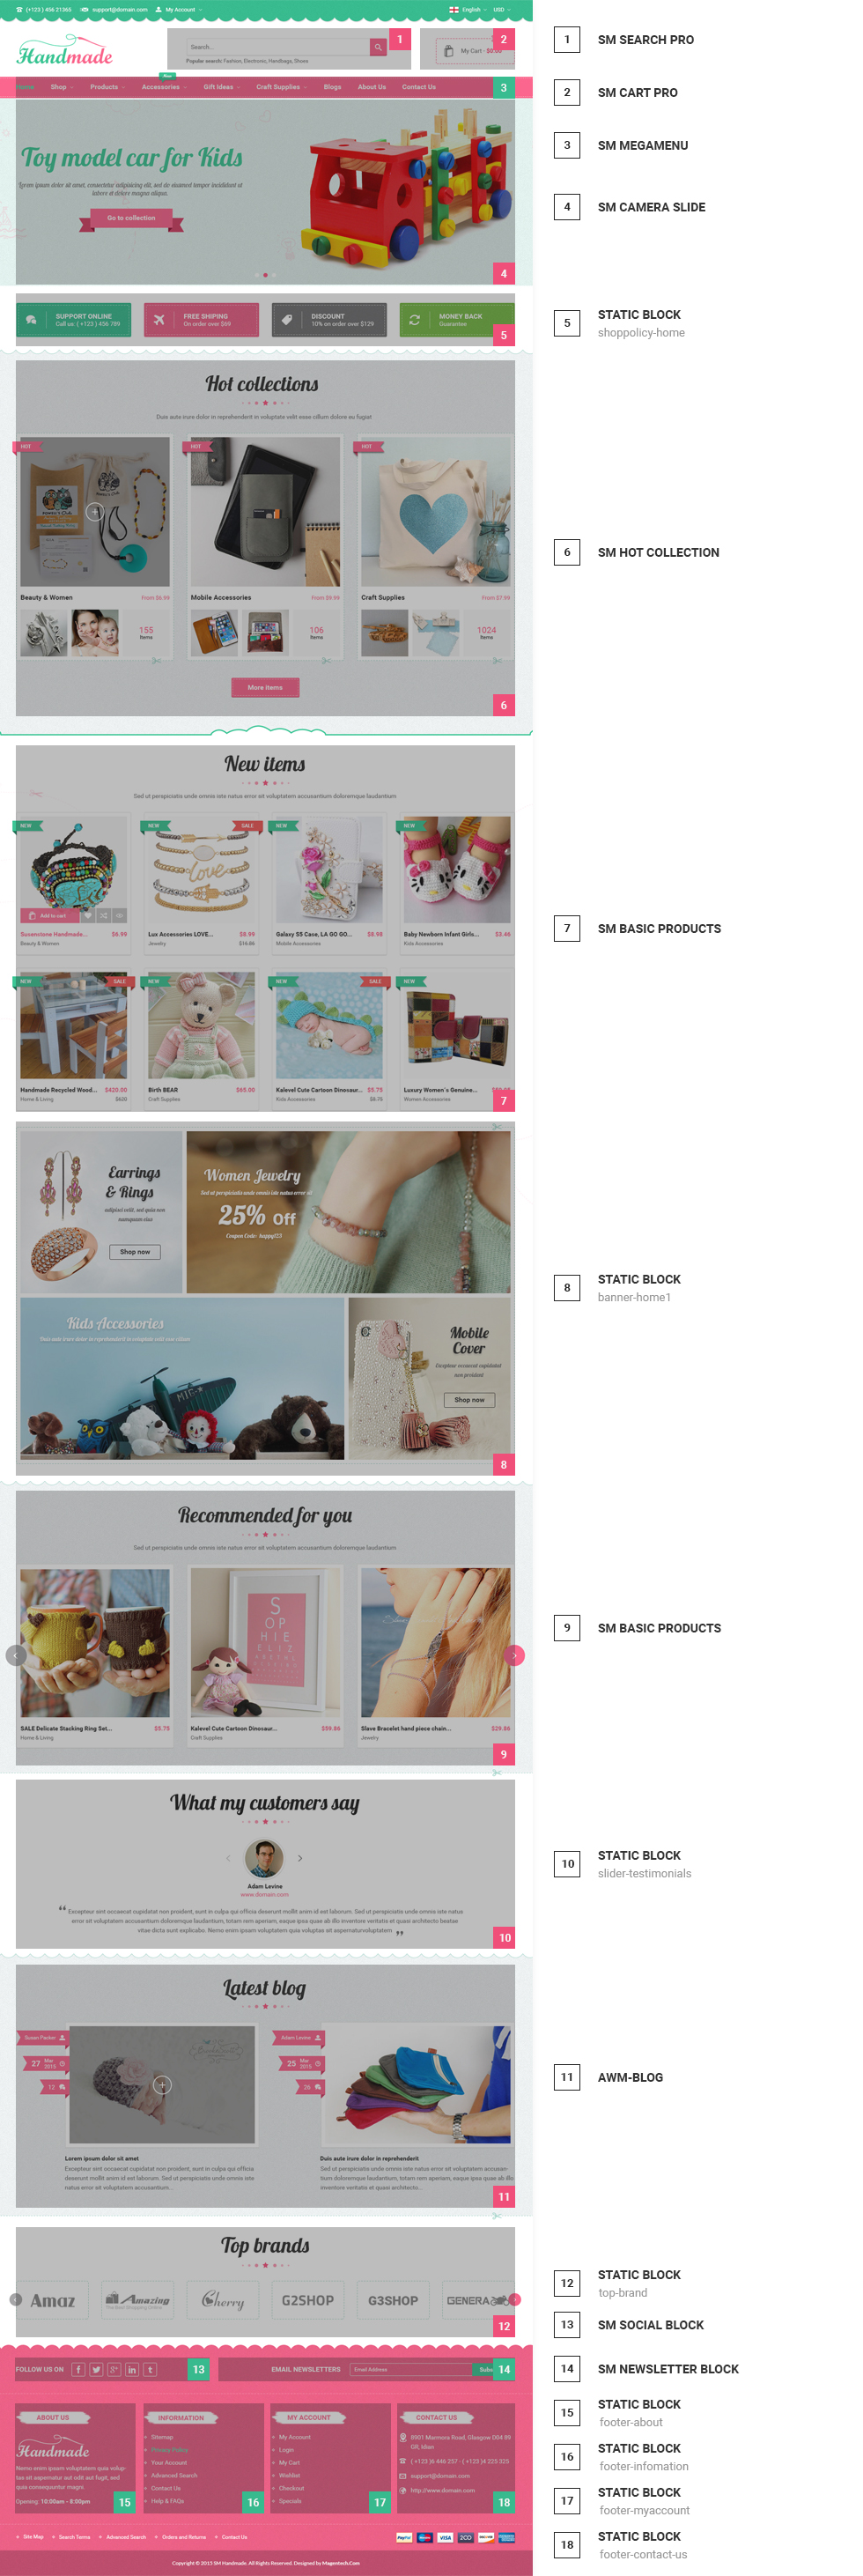
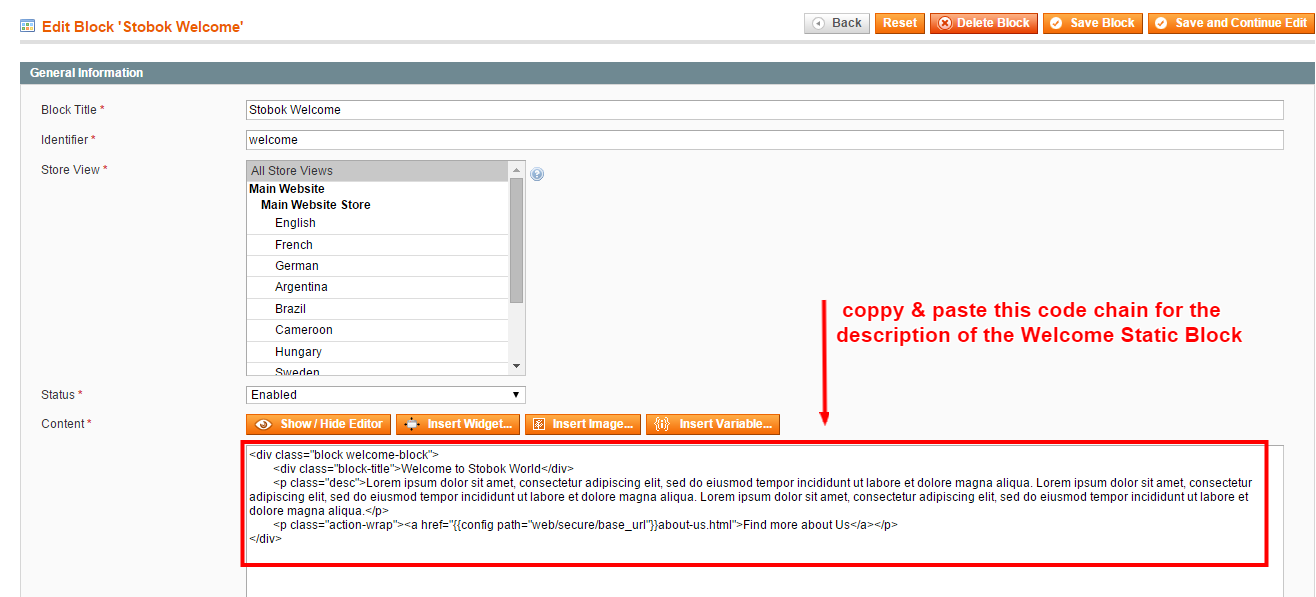
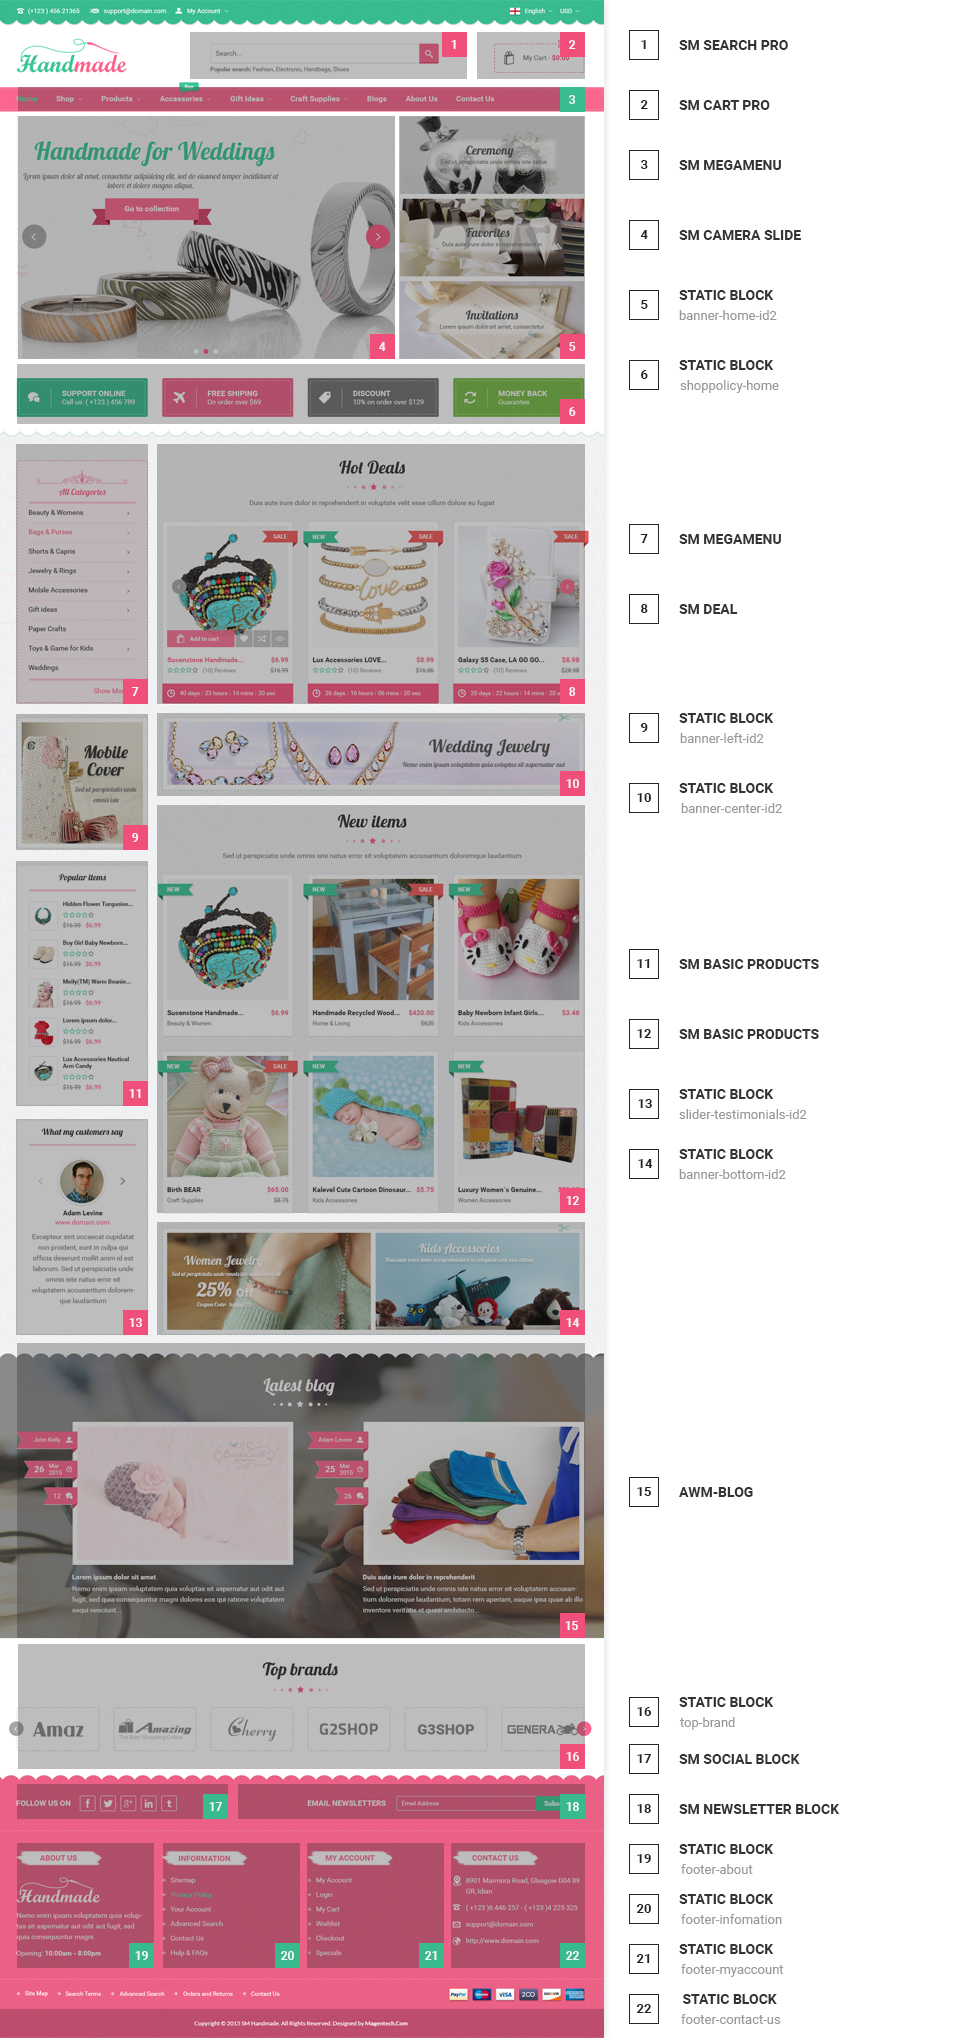
5.1 SP Hurama Home Page 1
SP Theme Configuration: Welcome Text
Frontend Appearance:

Backend Settings:
1. In your Prestashop Admin Dashboard, navigate to Modules and Services >> Modules and Services >> go to MODULES LIST section, search for “SP Theme configurator” module then click on Configure.
2. In the SP Theme Settings, choose “General” to configure the parameters in this section. After finishing, you could go to the front-end to view the changes.
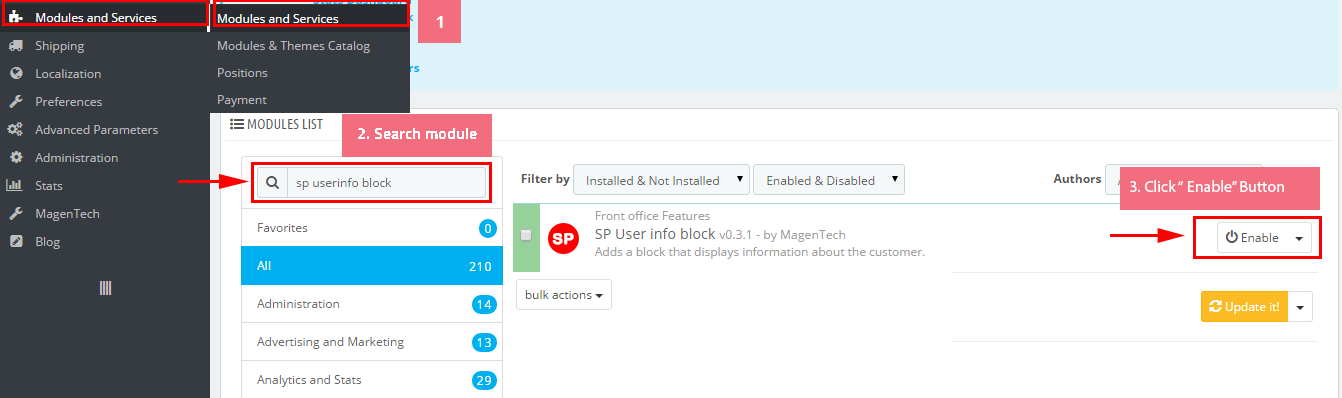
SP User Info Block
Frontend Appearance:
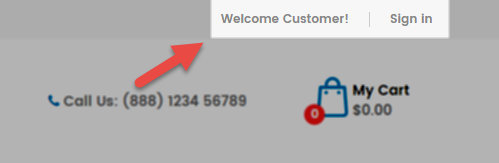
Backend Settings:
In the Pretashop Admin Panel, navigate to Modules and Services >> Modules and Services >> look for “SP User Info Block” module >> click “Enable” button to enable this module.
SP Language
Frontend Appearance:
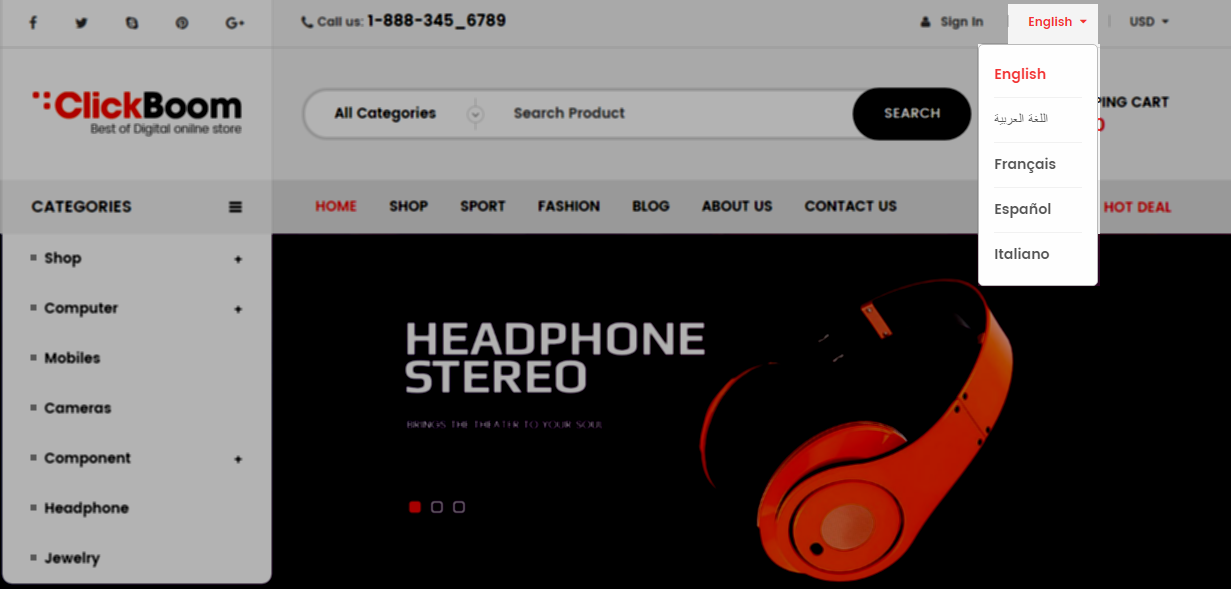
Backend Settings:
Step 1: To add language as you want. For example: To add “Arabic” language, in your Admin Panel >> navigate to LOCALIZATION >> Languages >> click  button in the right corner to “ADD NEW”.

Step 2: Fill information into the required field (*) as below:
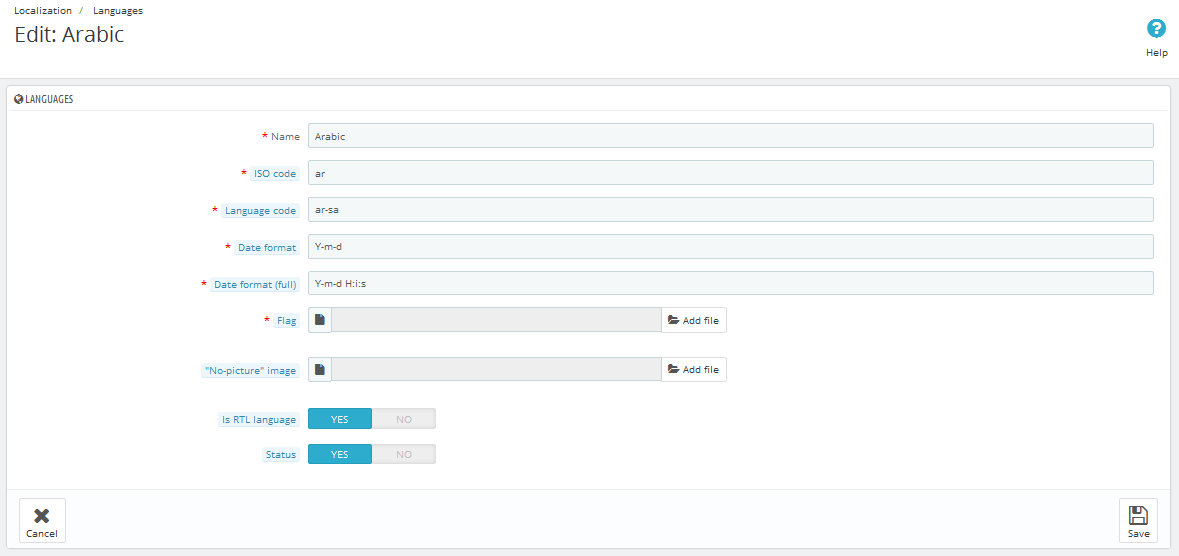
Step 3: Click “Save” button and view shop to see the changes.
Note: When you add any language as you want, for example: Arabic language as above. At the frontend , some images will display “?” image as following:
.
To resolve this error, please make the steps following:
1. In your administator, please find to position of this module, for example: Position - SP CustomHTML(Banner Top); Module: SP Custom HTML.
.
2. And click source code to add “../” at before the image url >> Click “OK”.
.
3. Click “Save” button and go to the frontend to view the changes.
.
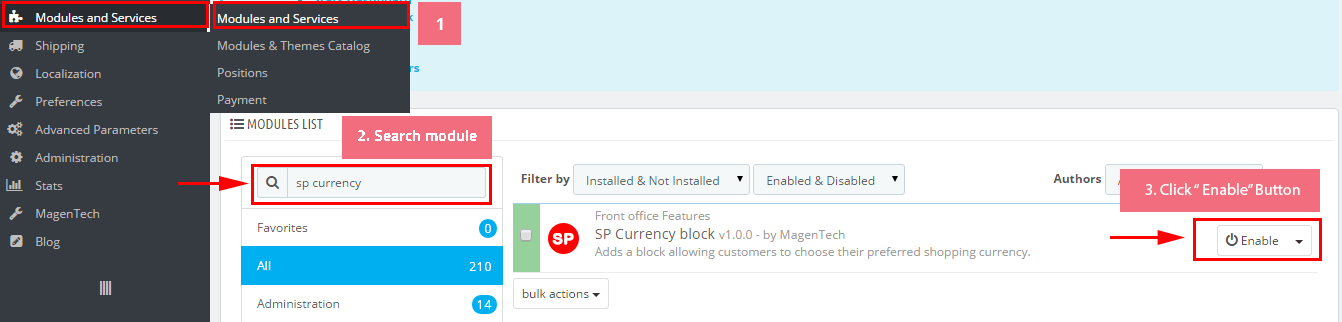
SP Currency Block
Frontend Appearance:

Backend Settings:
In the Pretashop Admin Panel, navigate to Modules and Services >> Modules and Services >> look for “SP Currency Block” >> click “Enable” button to enable this module.
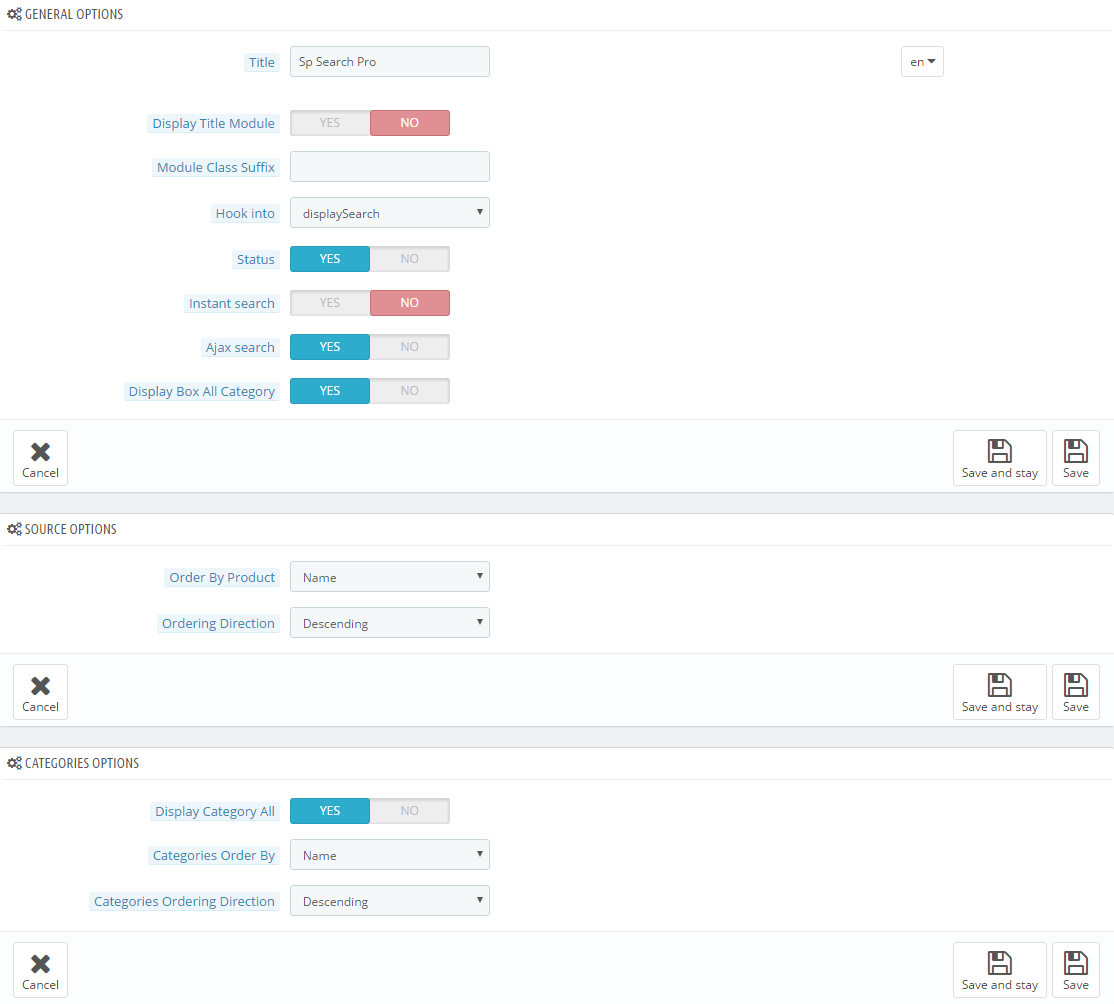
SP Search Block
Frontend Appearance:

Backend Settings:
In the Pretashop Admin Panel, navigate to Modules and Services >> Modules and Services >> look for “SP Search Pro” module >> click “Configure” button to configure this module.
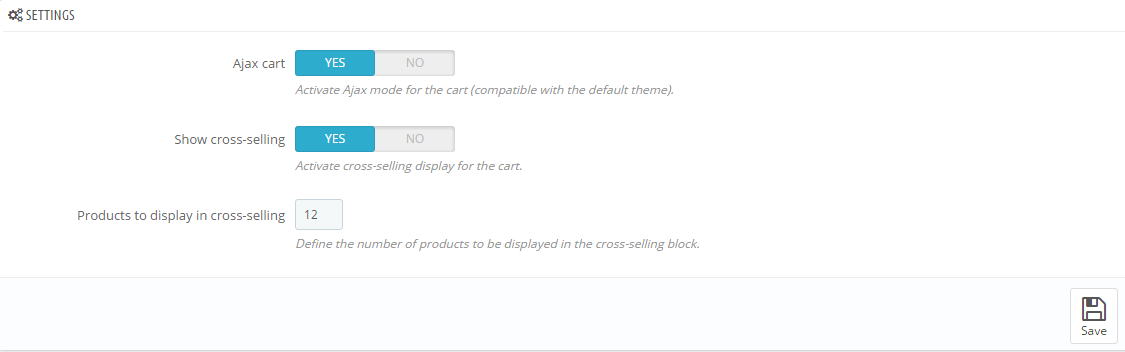
SP Cart Block
Frontend Appearance:

Backend Settings:
In the Pretashop Admin Panel, navigate to Modules and Services >> Modules and Services >> look for “SP Cart Block” module >> click “Configure” button to configure this module.
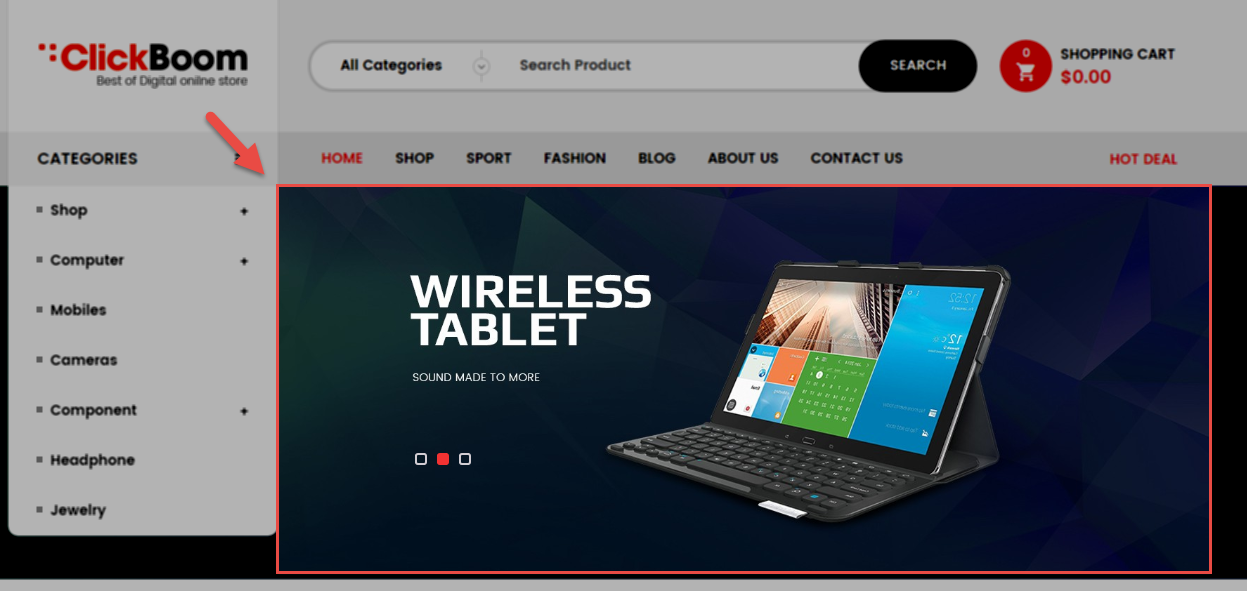
SP Slider For Your Homepage: Home Slide Layout1
Frontend Appearance:
Backend Settings:
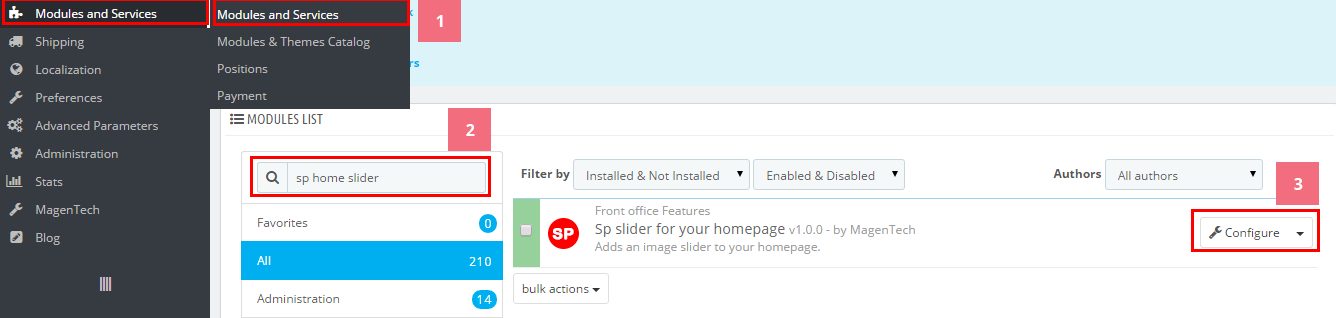
Step 1: In the Pretashop Admin Panel, navigate to Modules and Services >> Modules and Services >> look for “SP Home Slider” module >> click “Configure” button to configure.
Step 2: In the “SP Slider For Your Homepage” configuration page, click button in the right corner to “ADD NEW MODULE”.
Step 3: You could configure this module like the following image.
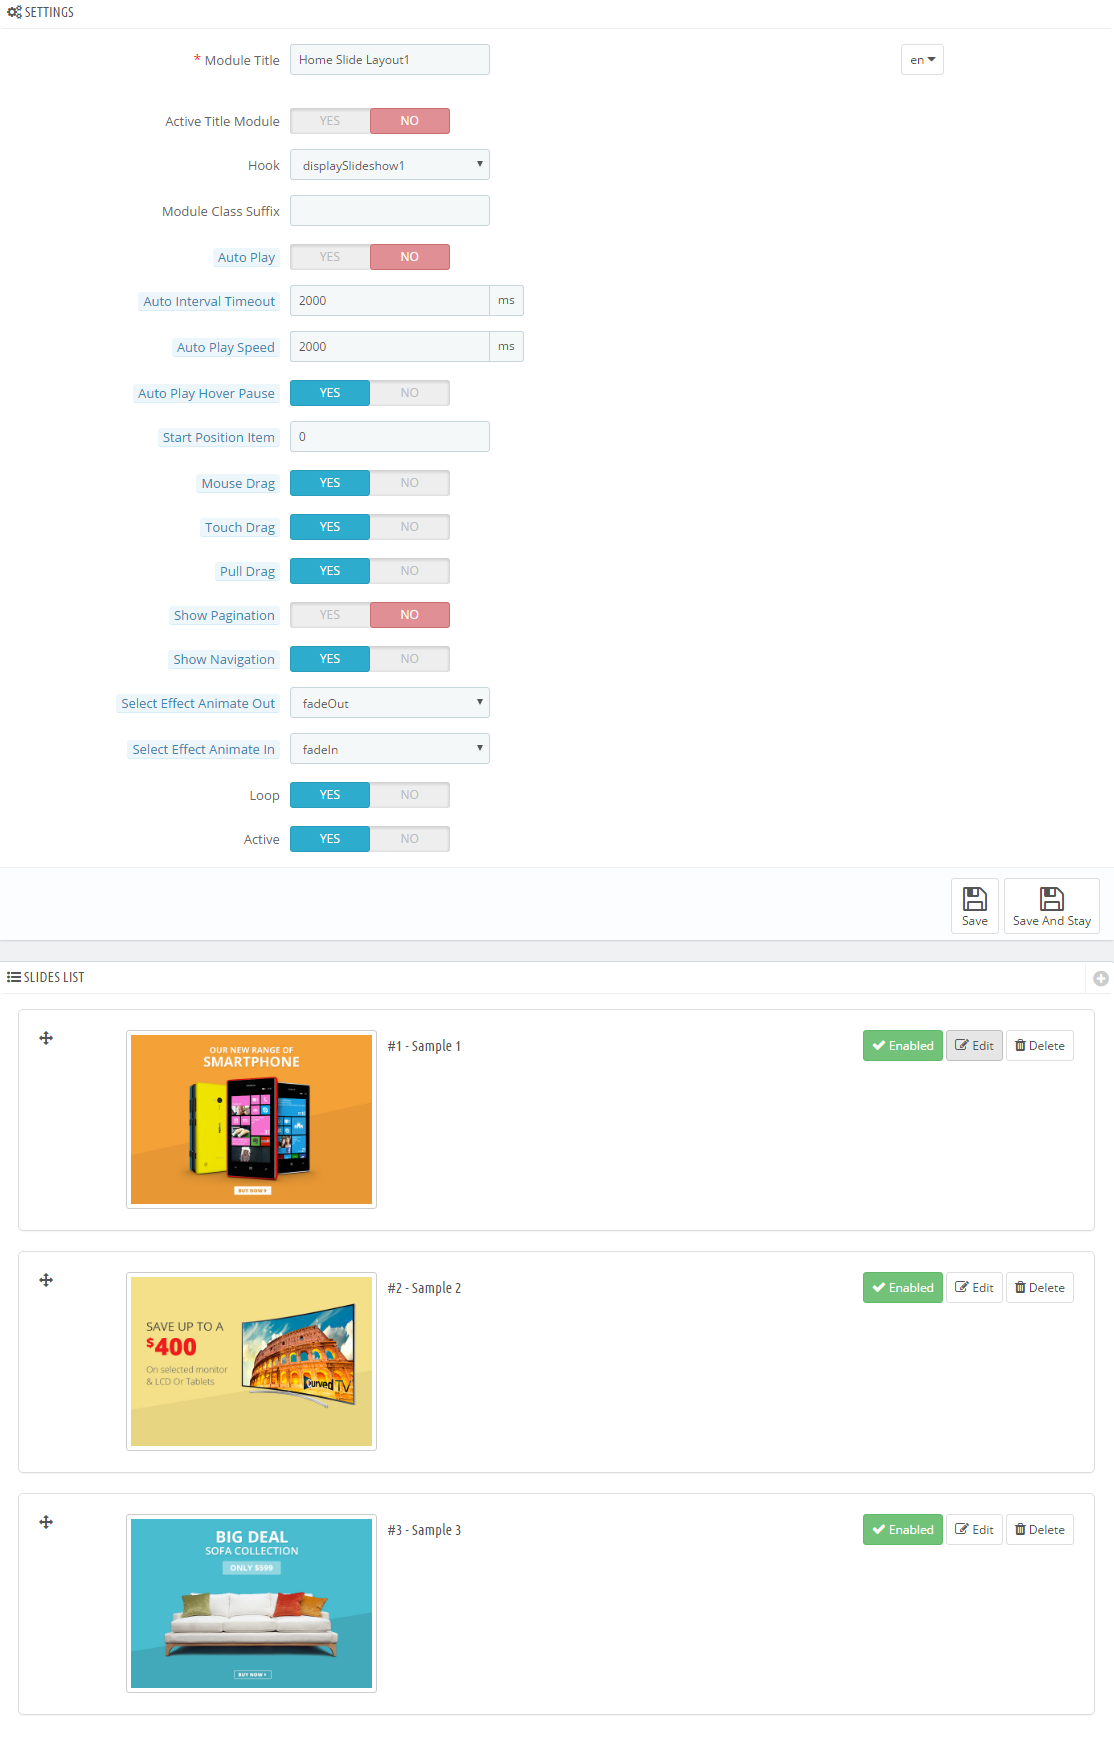
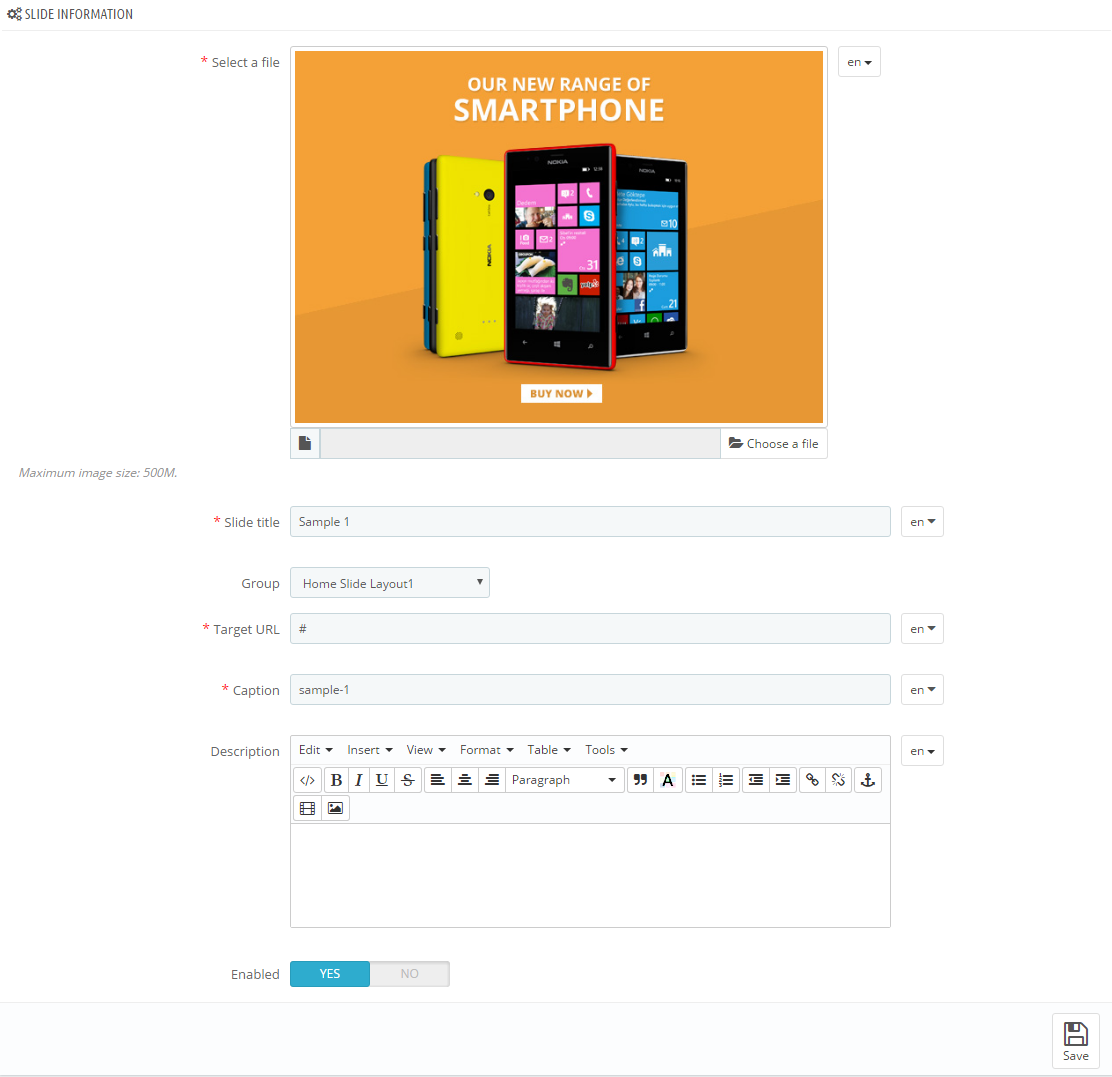
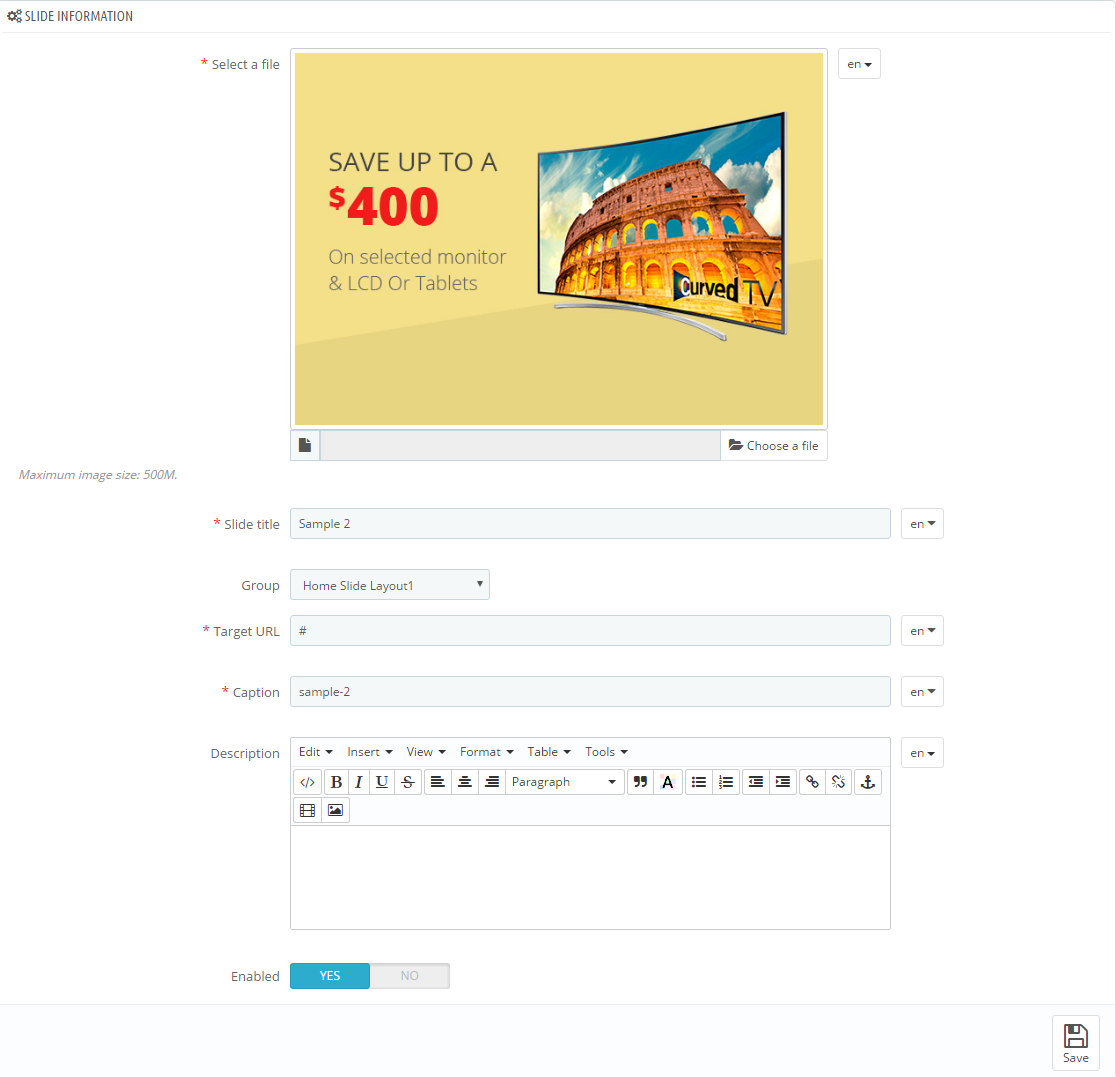
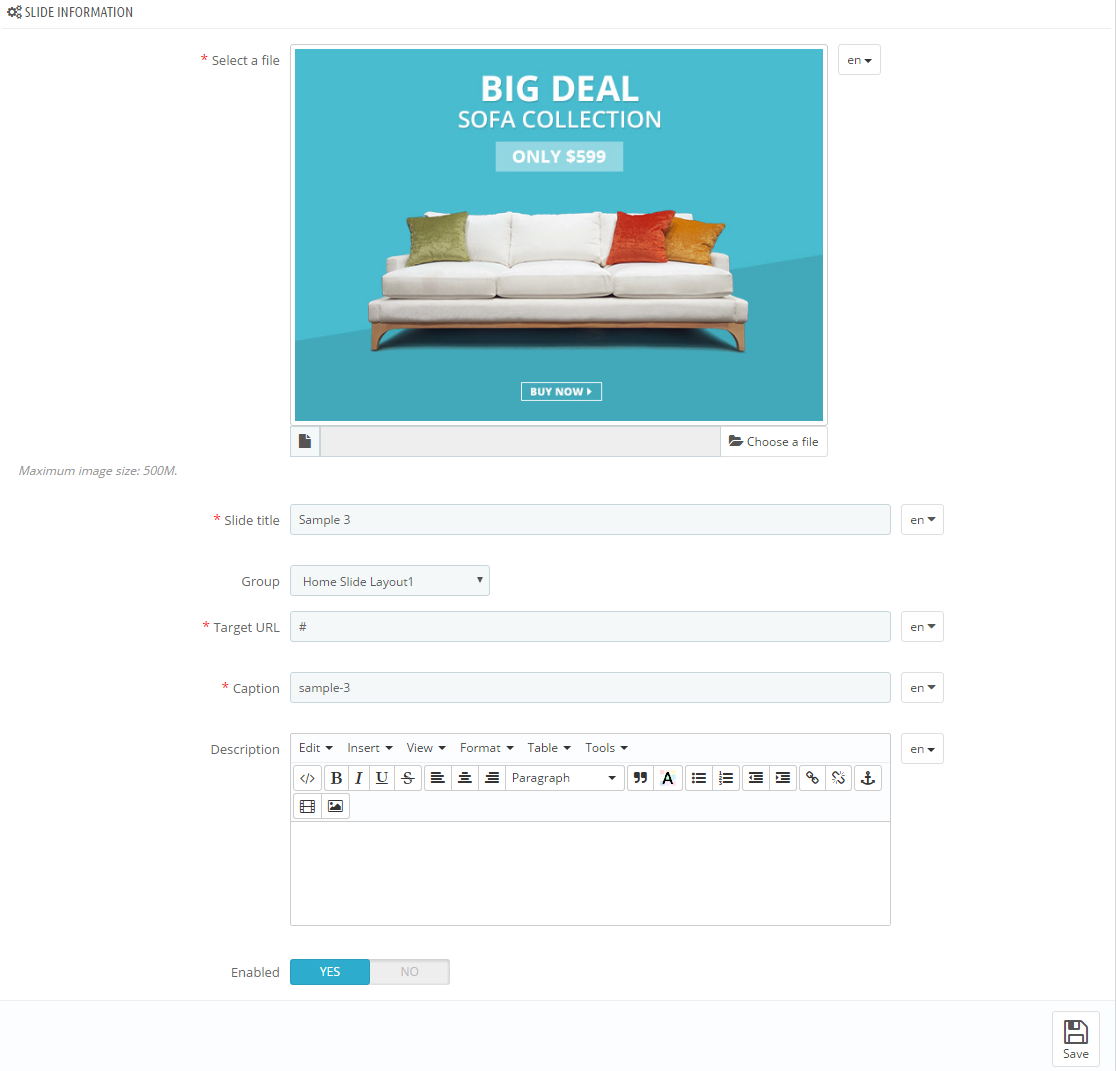
Step 4: In the last part named Slides List of this configuration page, click button in the right corner to add new slide and edit slide’s information as follows:
- Sample 1:
- Sample 2:
- Sample 3:
Copy and paste the following code into the content:
|
1
2
3
|
<h3>kiss it covered</h3>
<h2>probrush</h2>
<h4><a class="shopnow" href="#">shop now</a></h4>
|
Copy and paste the following code into the content:
|
1
2
3
|
<h3>Donec imperdiet</h3>
<h2>condimentum</h2>
<h4><a class="shopnow" href="#">shop now</a></h4>
|
Copy and paste the following code into the content:
|
1
2
3
|
<h3>Aenean ac urna</h3>
<h2>Cras suscipit</h2>
<h4><a class="shopnow" href="#">shop now</a></h4>
|
SP Custom HTML: Text Message
Frontend Appearance:

Backend Settings:
Step 1: In the Pretashop Admin Panel, navigate to Modules and Services >> Modules and Services >> look for “SP Custom HTML” module >> click “Configure” button to configure.

Step 2: In the “SP Custom HTML” configuration page, click button in the right corner to “ADD NEW MODULE”.
Step 3: You could configure this module like the following image.
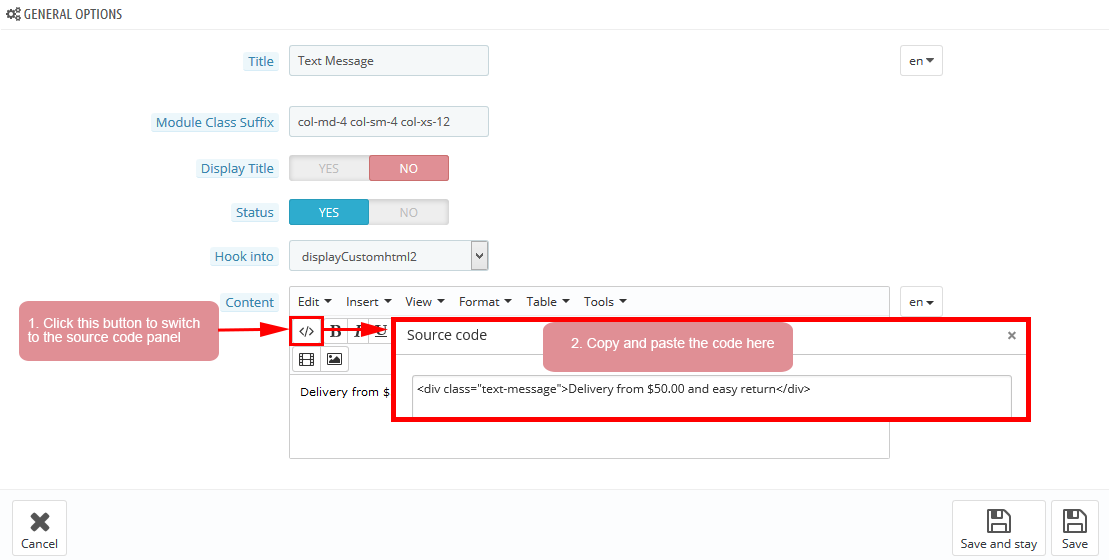
Copy and paste the following code into the content:
|
1
|
<div class="text-message">Last day! <strong>Freeshipping</strong> on all orders over <strong>$12.00</strong> with code magentech</div>
|
SP Custom HTML: Banner Top
Frontend Appearance:
Backend Settings:
Step 1: In the Pretashop Admin Panel, navigate to Modules and Services >> Modules and Services >> look for “SP Custom HTML” module >> click “Configure” button to configure.
Step 2: In the “SP Custom HTML” configuration page, click button in the right corner to “ADD NEW MODULE”.
Step 3: You could configure this module like the following image.
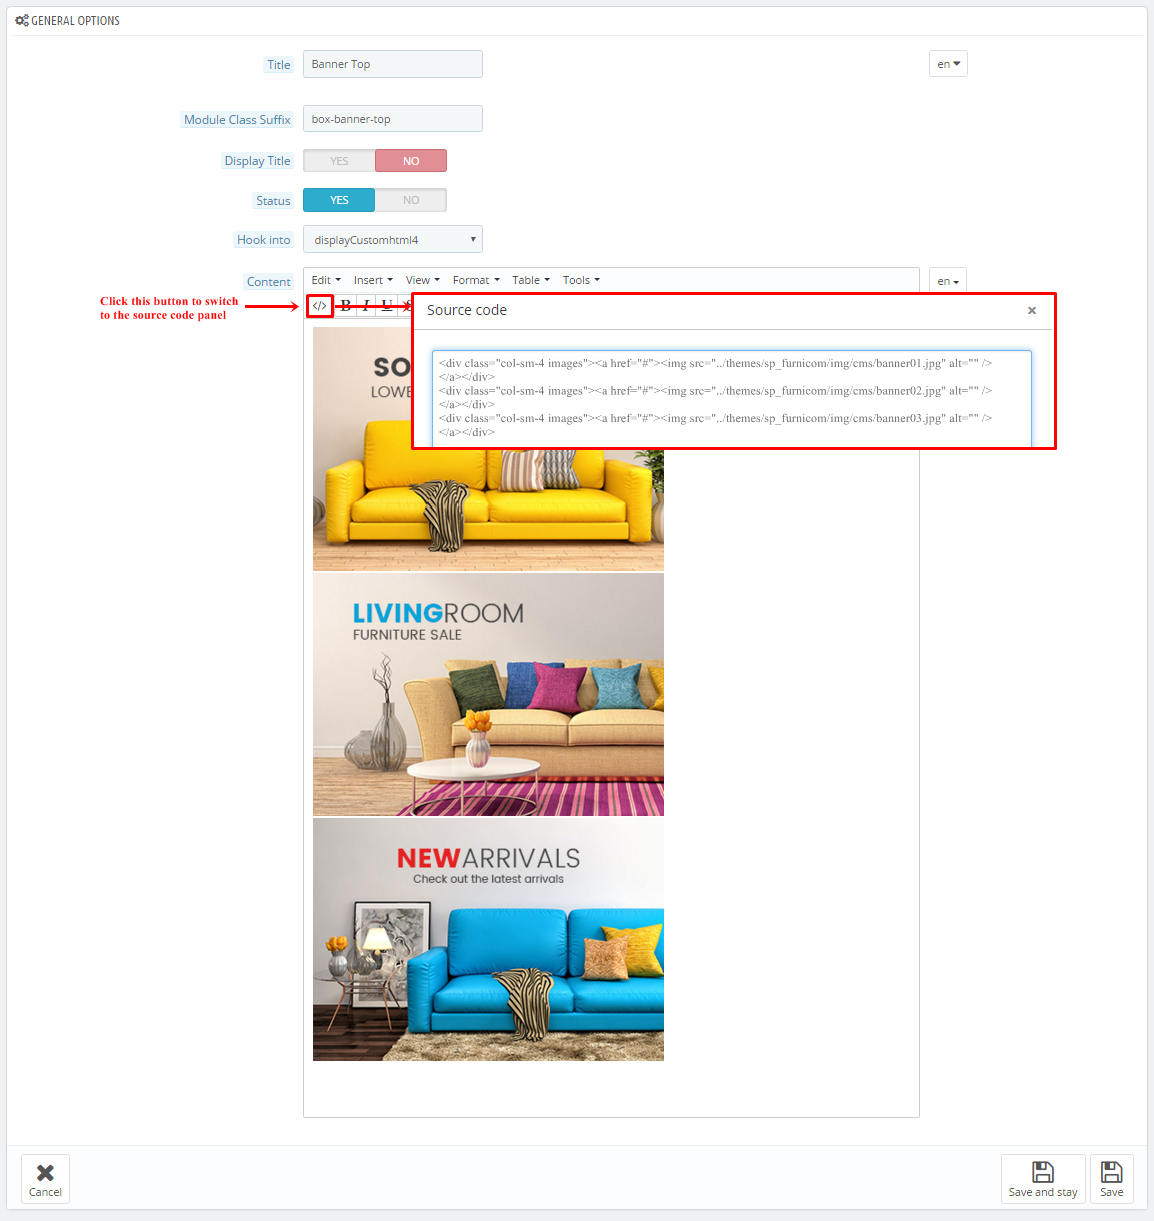
Copy and paste the following code into the content:
|
1
2
3
4
5
6
|
<div class="banner">
<div class="row">
<div class="col-sm-9"><a class="image img1" href="#"><img src="/themes/sp_hurama/img/cms/banner01.jpg" alt="#" /></a></div>
<div class="col-sm-3"><a class="image img2" href="#"><img src="/themes/sp_hurama/img/cms/banner02.jpg" alt="#" /></a></div>
</div>
</div>
|
SP Extra Slider: What’s new
Frontend Appearance:
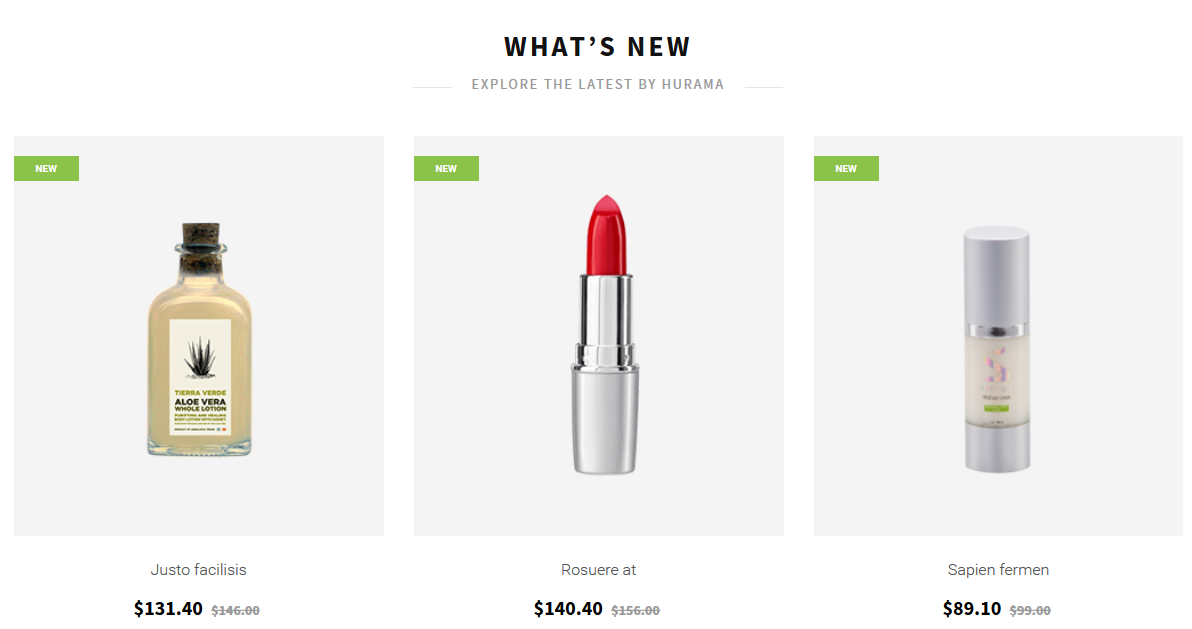
Backend Settings:
Step 1: In the Pretashop Admin Panel, navigate to Modules and Services >> Modules and Services >> look for “SP Custom HTML” module >> click “Configure” button to configure.
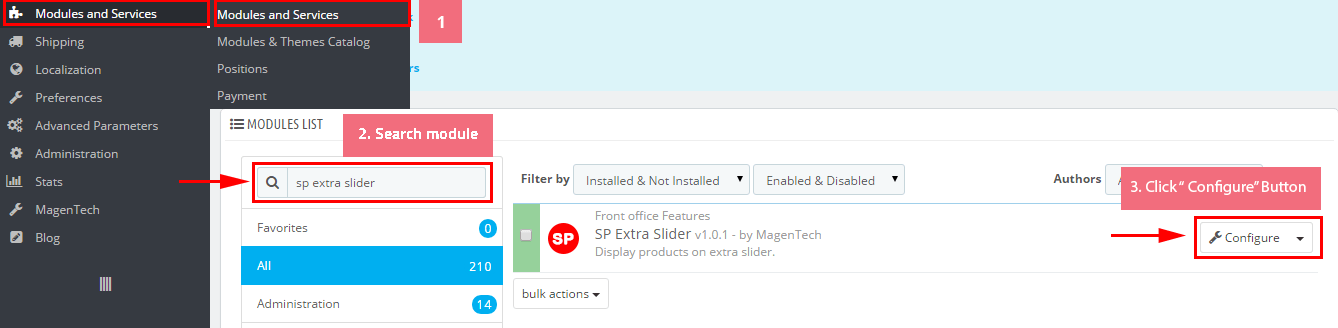
Step 2: In the “SP Custom HTML” configuration page, click button in the right corner to “ADD NEW MODULE”.
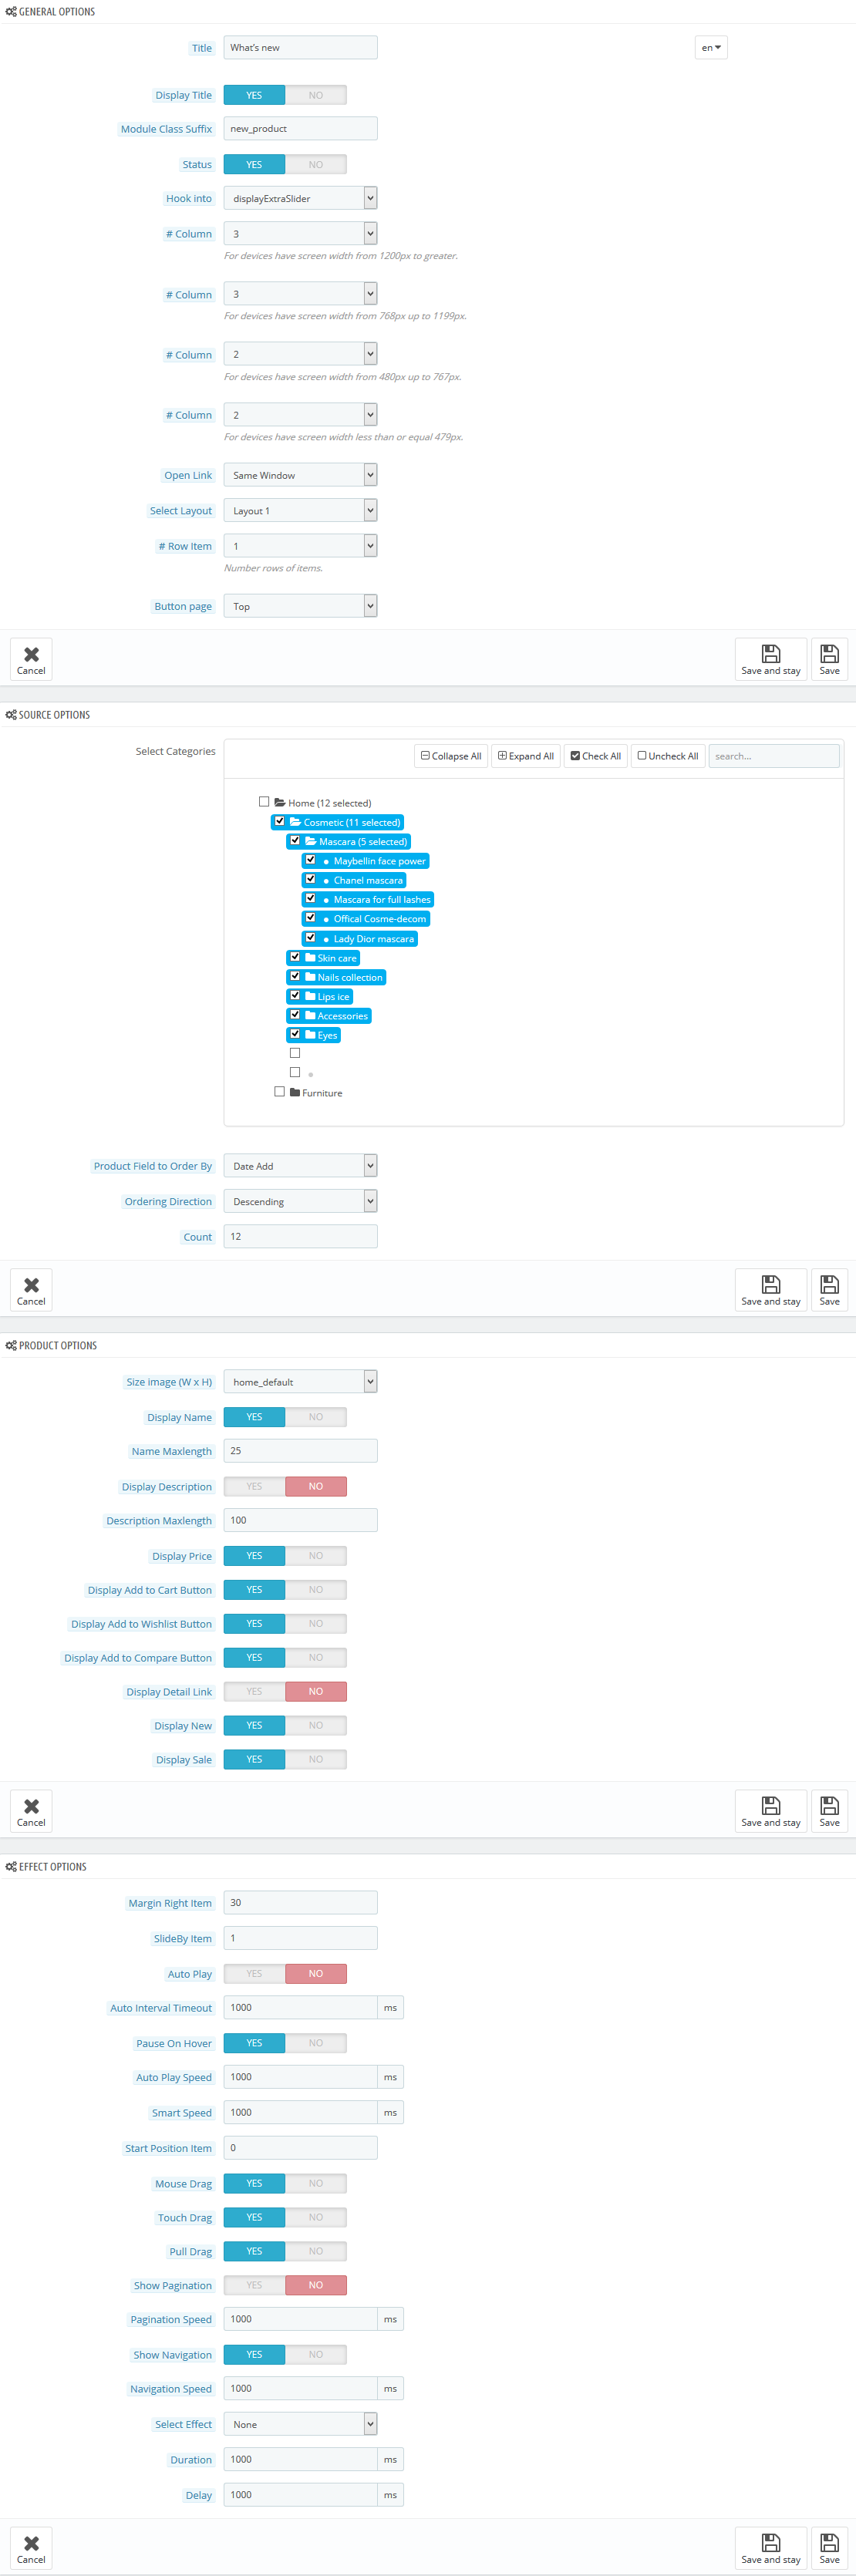
Step 3: You could configure this module like the following image.
SP Custom HTML: Banner Center
Frontend Appearance:
Backend Settings:
Step 1: In the Pretashop Admin Panel, navigate to Modules and Services >> Modules and Services >> look for “SP Custom HTML” module >> click “Configure” button to configure.
Step 2: In the “SP Custom HTML” configuration page, click button in the right corner to “ADD NEW MODULE”.
Step 3: You could configure this module like the following image.
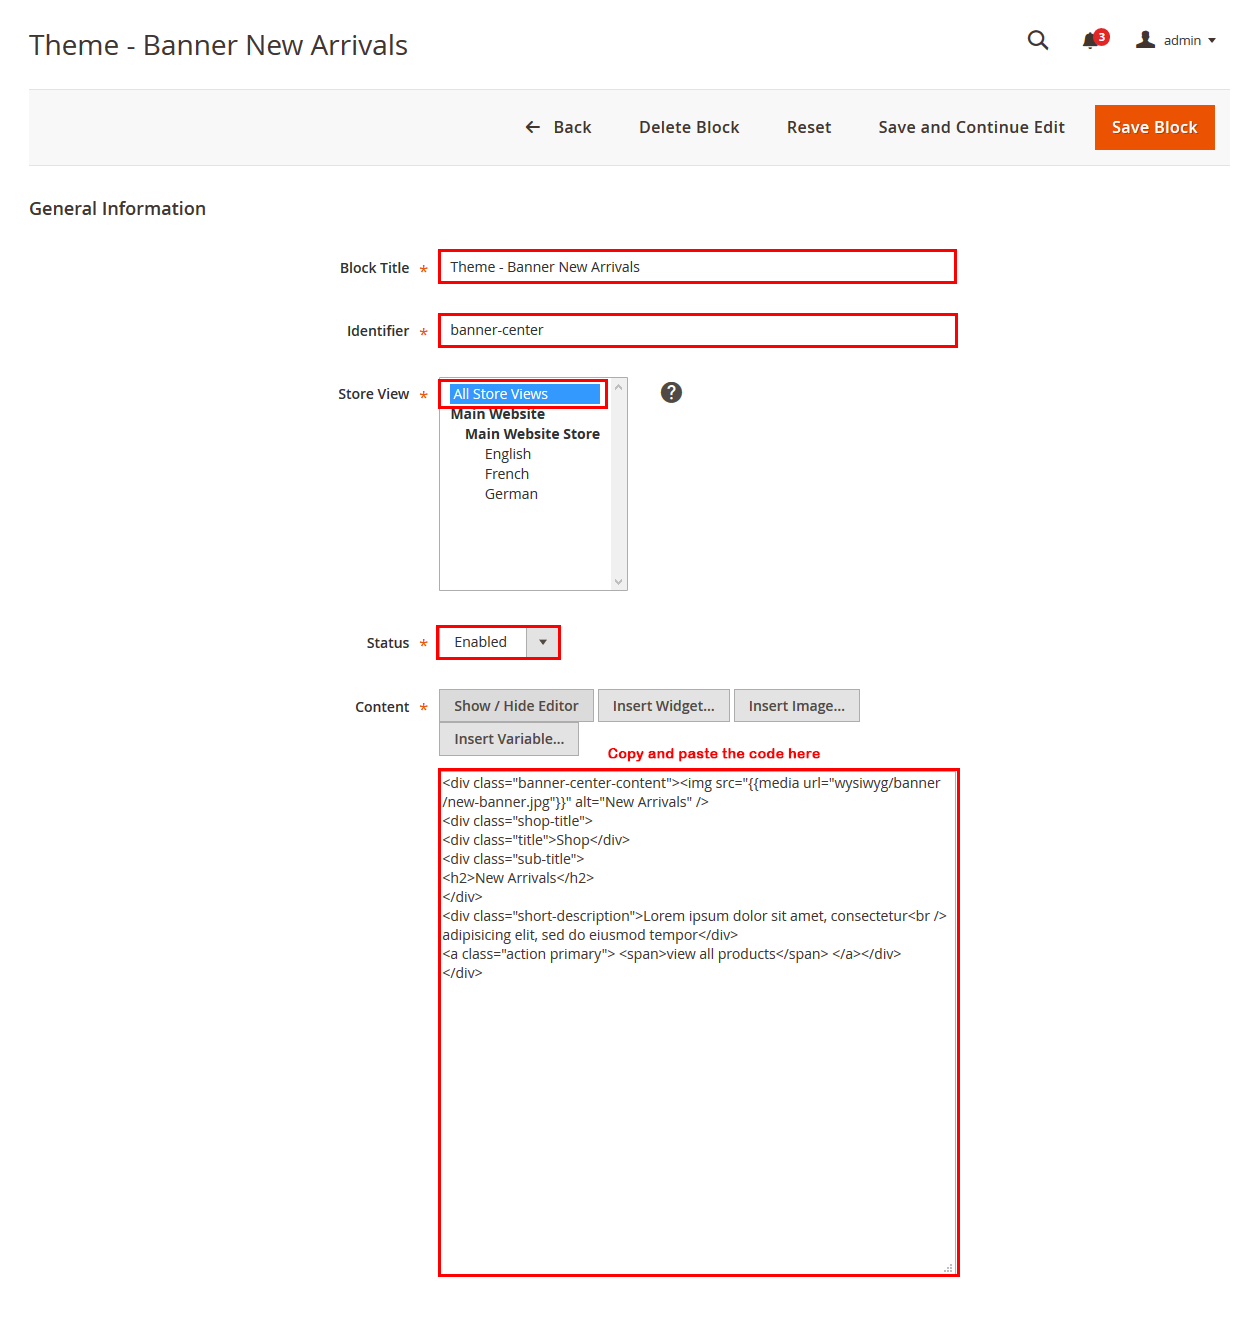
Copy and paste the following code into the content:
|
1
|
<div class="banner"><a href="#"><img src="/themes/sp_hurama/img/cms/banner03.jpg" alt="#" /></a></div>
|
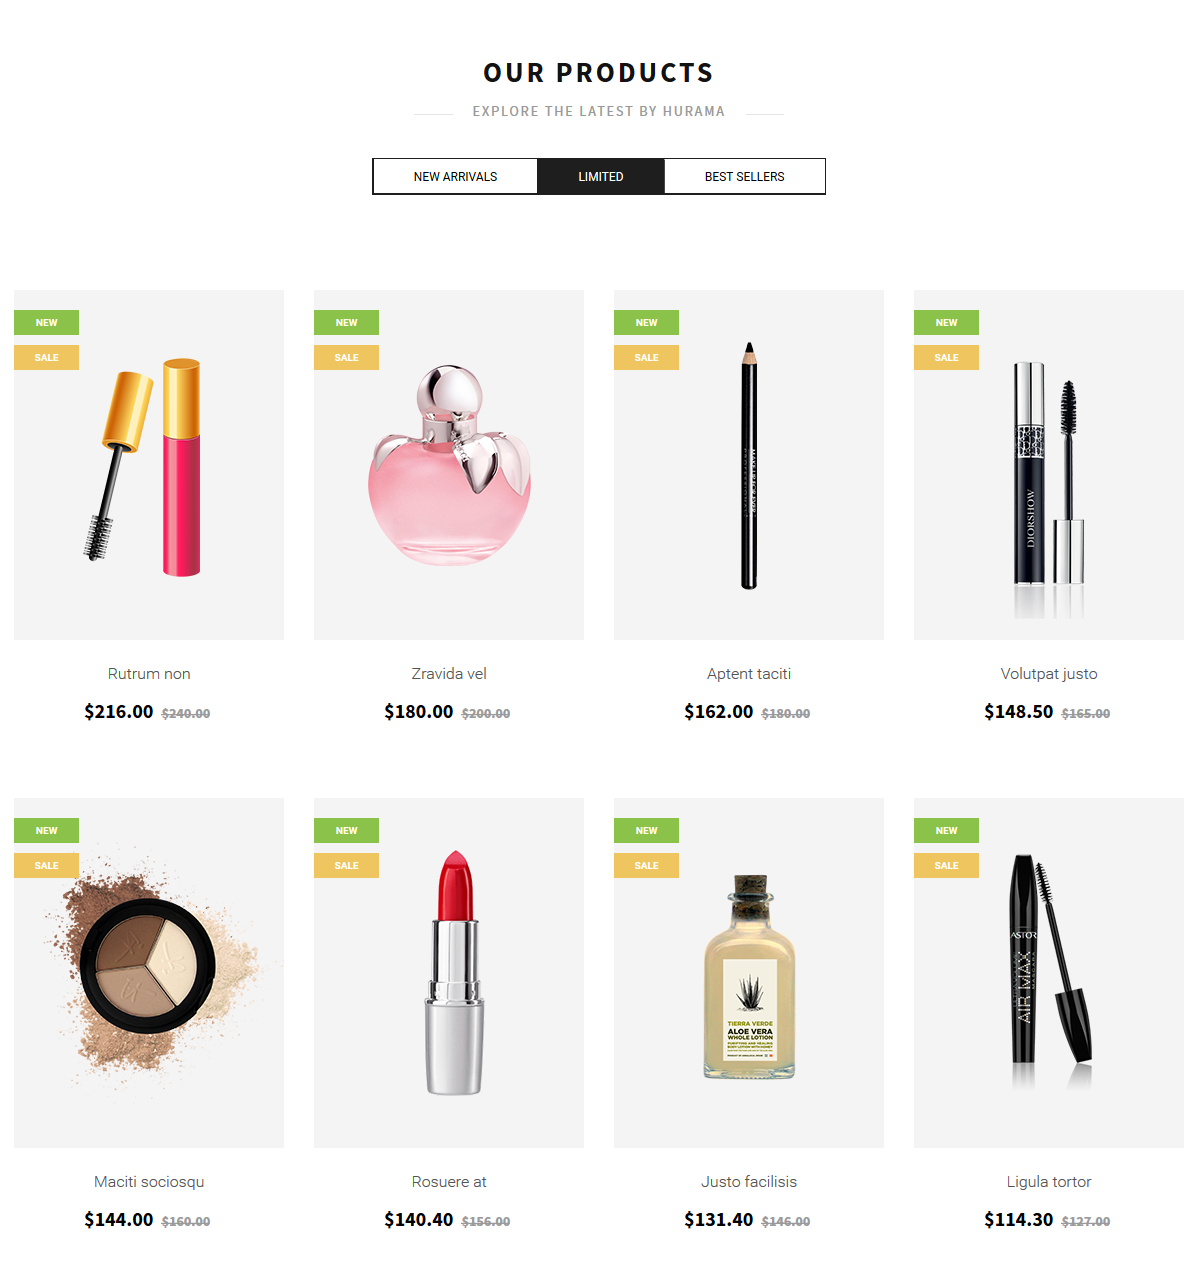
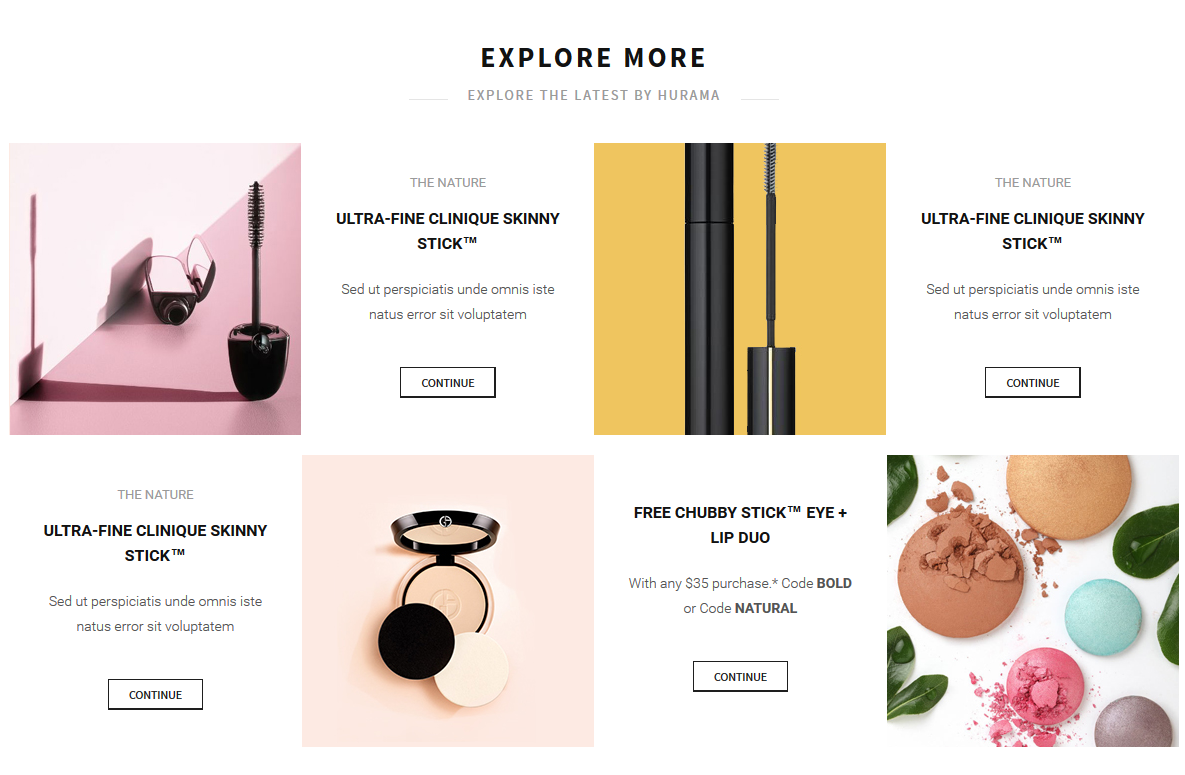
SP Super Category: Our Products
Frontend Appearance:
Backend Settings:
Step 1: In the Pretashop Admin Panel, navigate to Modules and Services >> Modules and Services >> look for “SP Super Category” module.
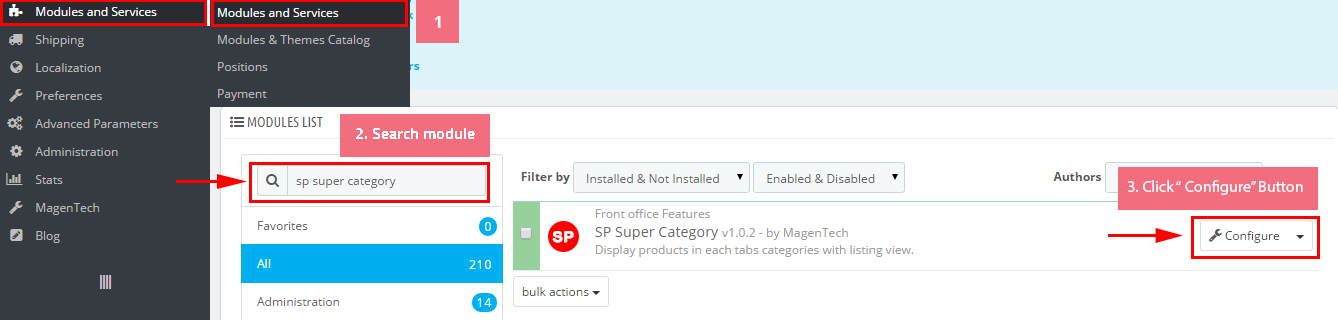
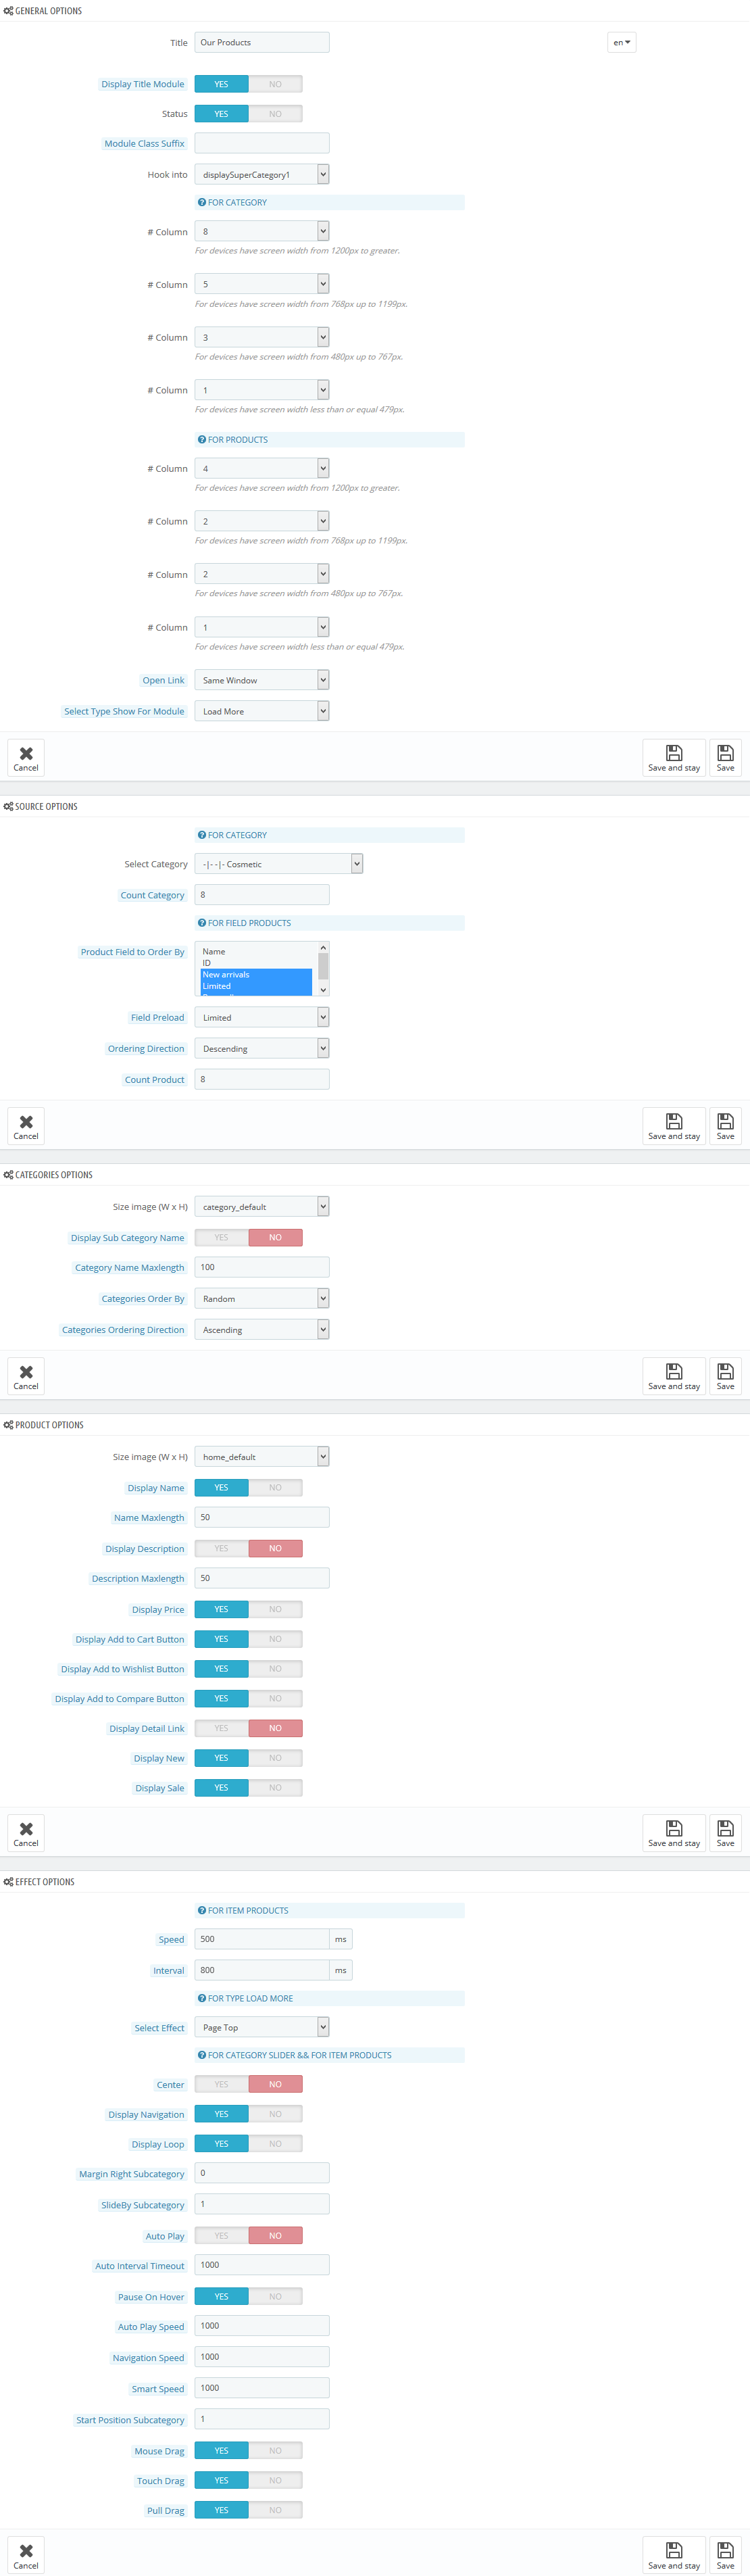
Step 2: In the “SP Super Category” configuration page, click button in the right corner to “ADD NEW MODULE”.
Step 3: You could configure this module like the following image.
SP Custom HTML: Banner Center
Frontend Appearance:
Backend Settings:
Step 1: In the Pretashop Admin Panel, navigate to Modules and Services >> Modules and Services >> look for “SP Custom HTML” module >> click “Configure” button to configure.
Step 2: In the “SP Custom HTML” configuration page, click button in the right corner to “ADD NEW MODULE”.
Step 3: You could configure this module like the following image.
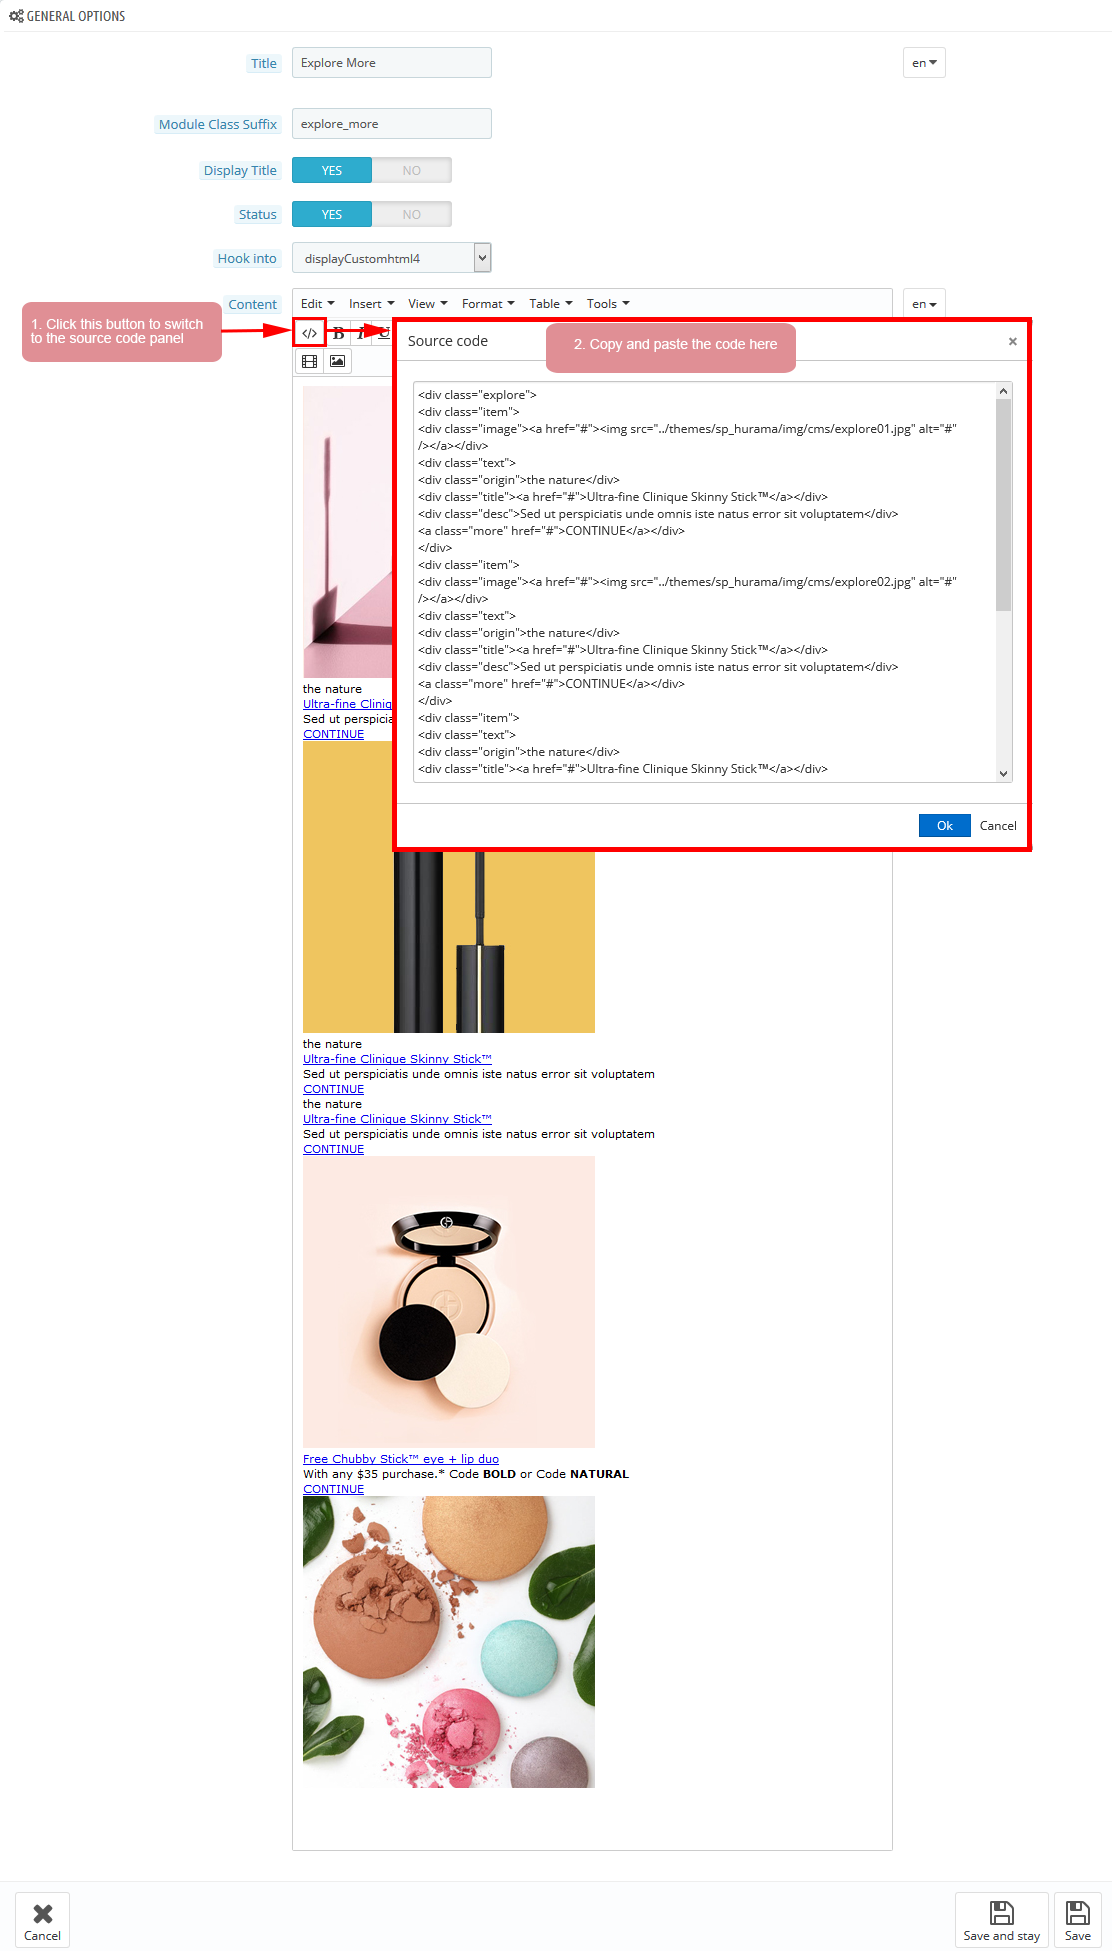
Copy and paste the following code into the content:
|
1
2
3
4
5
6
7
8
9
10
11
12
13
14
15
16
17
18
19
20
21
22
23
24
25
26
27
28
29
30
31
32
33
|
<div class="explore">
<div class="item">
<div class="image"><a href="#"><img src="/themes/sp_hurama/img/cms/explore01.jpg" alt="#" /></a></div>
<div class="text">
<div class="origin">the nature</div>
<div class="title"><a href="#">Ultra-fine Clinique Skinny Stick™</a></div>
<div class="desc">Sed ut perspiciatis unde omnis iste natus error sit voluptatem</div>
<a class="more" href="#">CONTINUE</a></div>
</div>
<div class="item">
<div class="image"><a href="#"><img src="/themes/sp_hurama/img/cms/explore02.jpg" alt="#" /></a></div>
<div class="text">
<div class="origin">the nature</div>
<div class="title"><a href="#">Ultra-fine Clinique Skinny Stick™</a></div>
<div class="desc">Sed ut perspiciatis unde omnis iste natus error sit voluptatem</div>
<a class="more" href="#">CONTINUE</a></div>
</div>
<div class="item">
<div class="text">
<div class="origin">the nature</div>
<div class="title"><a href="#">Ultra-fine Clinique Skinny Stick™</a></div>
<div class="desc">Sed ut perspiciatis unde omnis iste natus error sit voluptatem</div>
<a class="more" href="#">CONTINUE</a></div>
<div class="image"><a href="#"><img src="/themes/sp_hurama/img/cms/explore03.jpg" alt="#" /></a></div>
</div>
<div class="item">
<div class="text">
<div class="title"><a href="#">Free Chubby Stick™ eye + lip duo</a></div>
<div class="desc">With any $35 purchase.* Code <strong>BOLD</strong> or Code <strong>NATURAL</strong></div>
<a class="more" href="#">CONTINUE</a></div>
<div class="image"><a href="#"><img src="/themes/sp_hurama/img/cms/explore04.jpg" alt="#" /></a></div>
</div>
</div>
|
SP SmartBlog Home Lastest
Frontend Appearance:
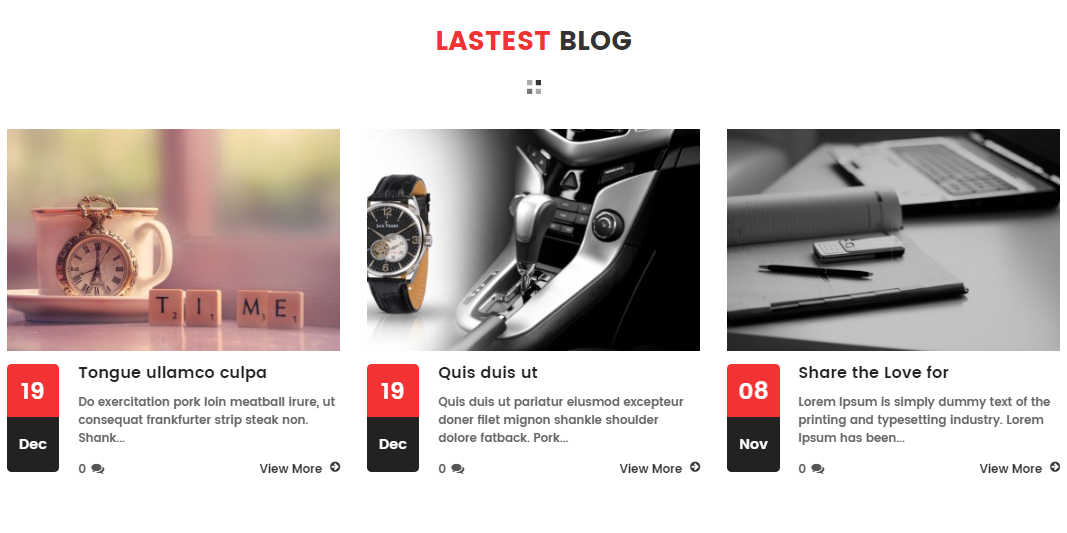
Backend Settings:
Step 1: In the Pretashop Admin Panel, navigate to Modules and Services >> Modules and Services >> look for “SmartBlog Home Lastest” module.

Step 2: You could configure this module like the following image.

SP Manufacture Slider: Our Brands
Frontend Appearance:
Backend Settings:
Step 1: In the Pretashop Admin Panel, navigate to Modules and Services >> Modules and Services >> look for “SP Custom HTML” module >> click “Configure” button to configure.
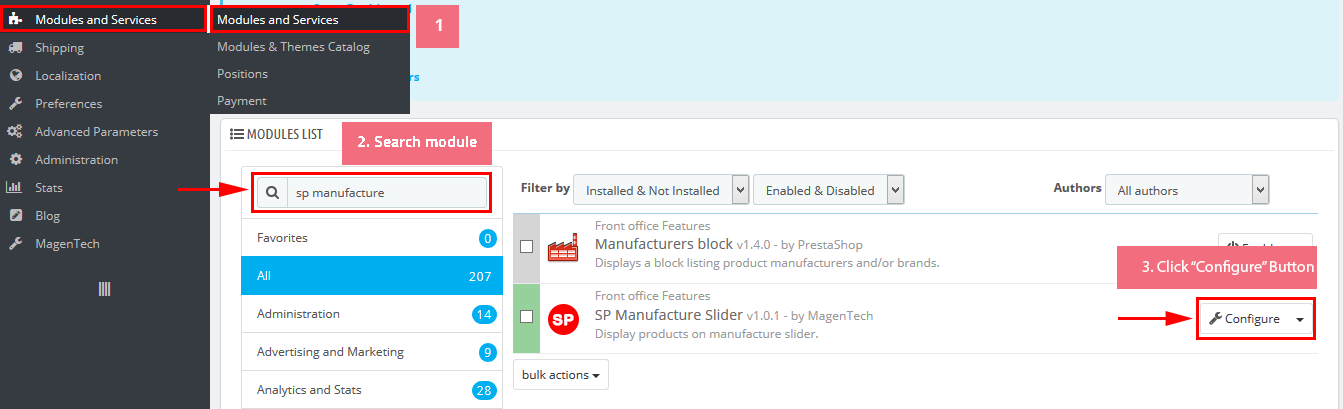
Step 2: In the “SP Custom HTML” configuration page, click button in the right corner to “ADD NEW MODULE”.
Step 3: You could configure this module like the following image.
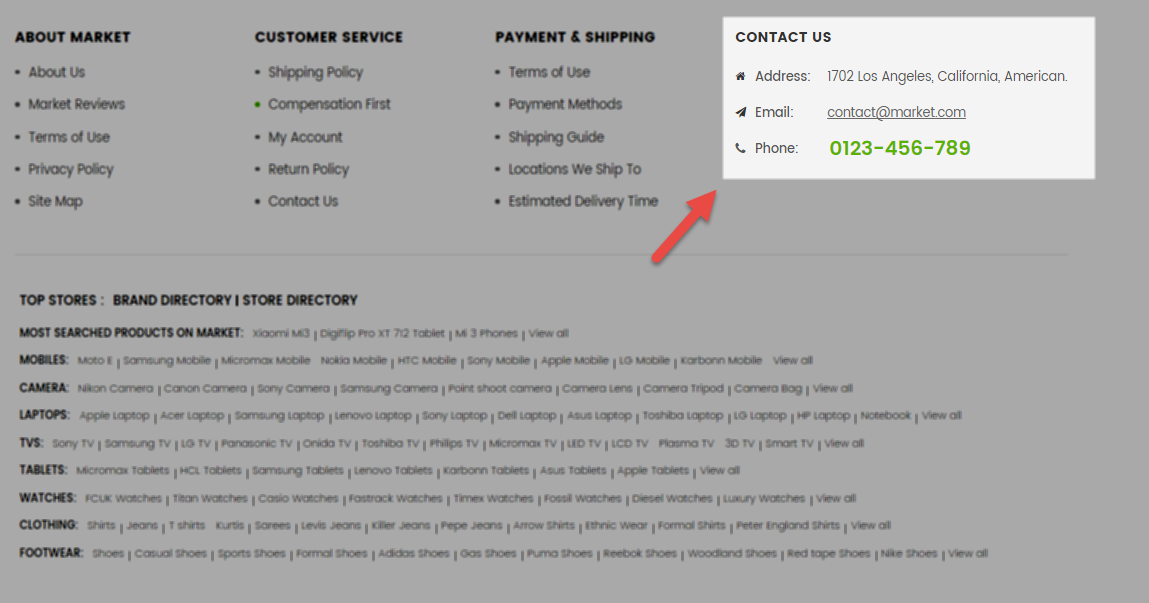
Contact Information Block
Frontend Appearance:
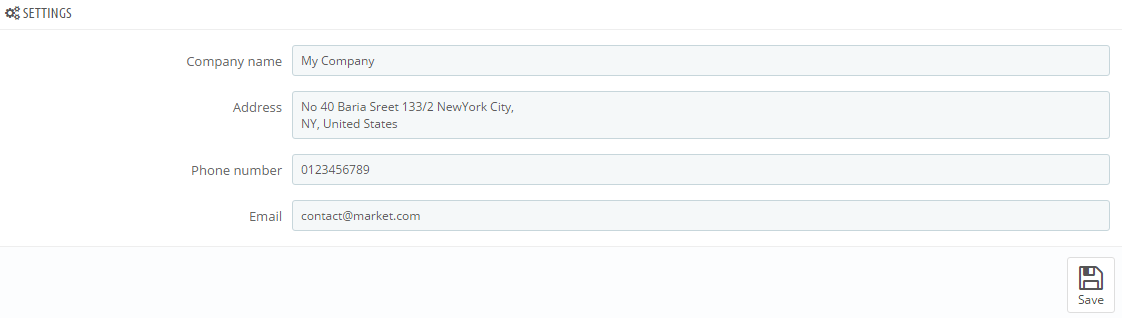
Backend Settings:
Step 1: In the Pretashop Admin Panel, navigate to Modules and Services >> Modules and Services >> look for “Contact Information Block” module.

Step 2: You could configure this module like the following image.
Note: Change the text
In your Website’s Directory, go to themes\sp_hurama\modules\blockcontactinfos folder. To change the text in this pop-up, in this folder, you could open the file named blockcontactinfos.tpl by your editor program.
Find and change the following text in this file as you want:
After finishing, you could go to the front-end to see the changes.

SP Theme Configuration
Frontend Appearance:
Backend Settings:
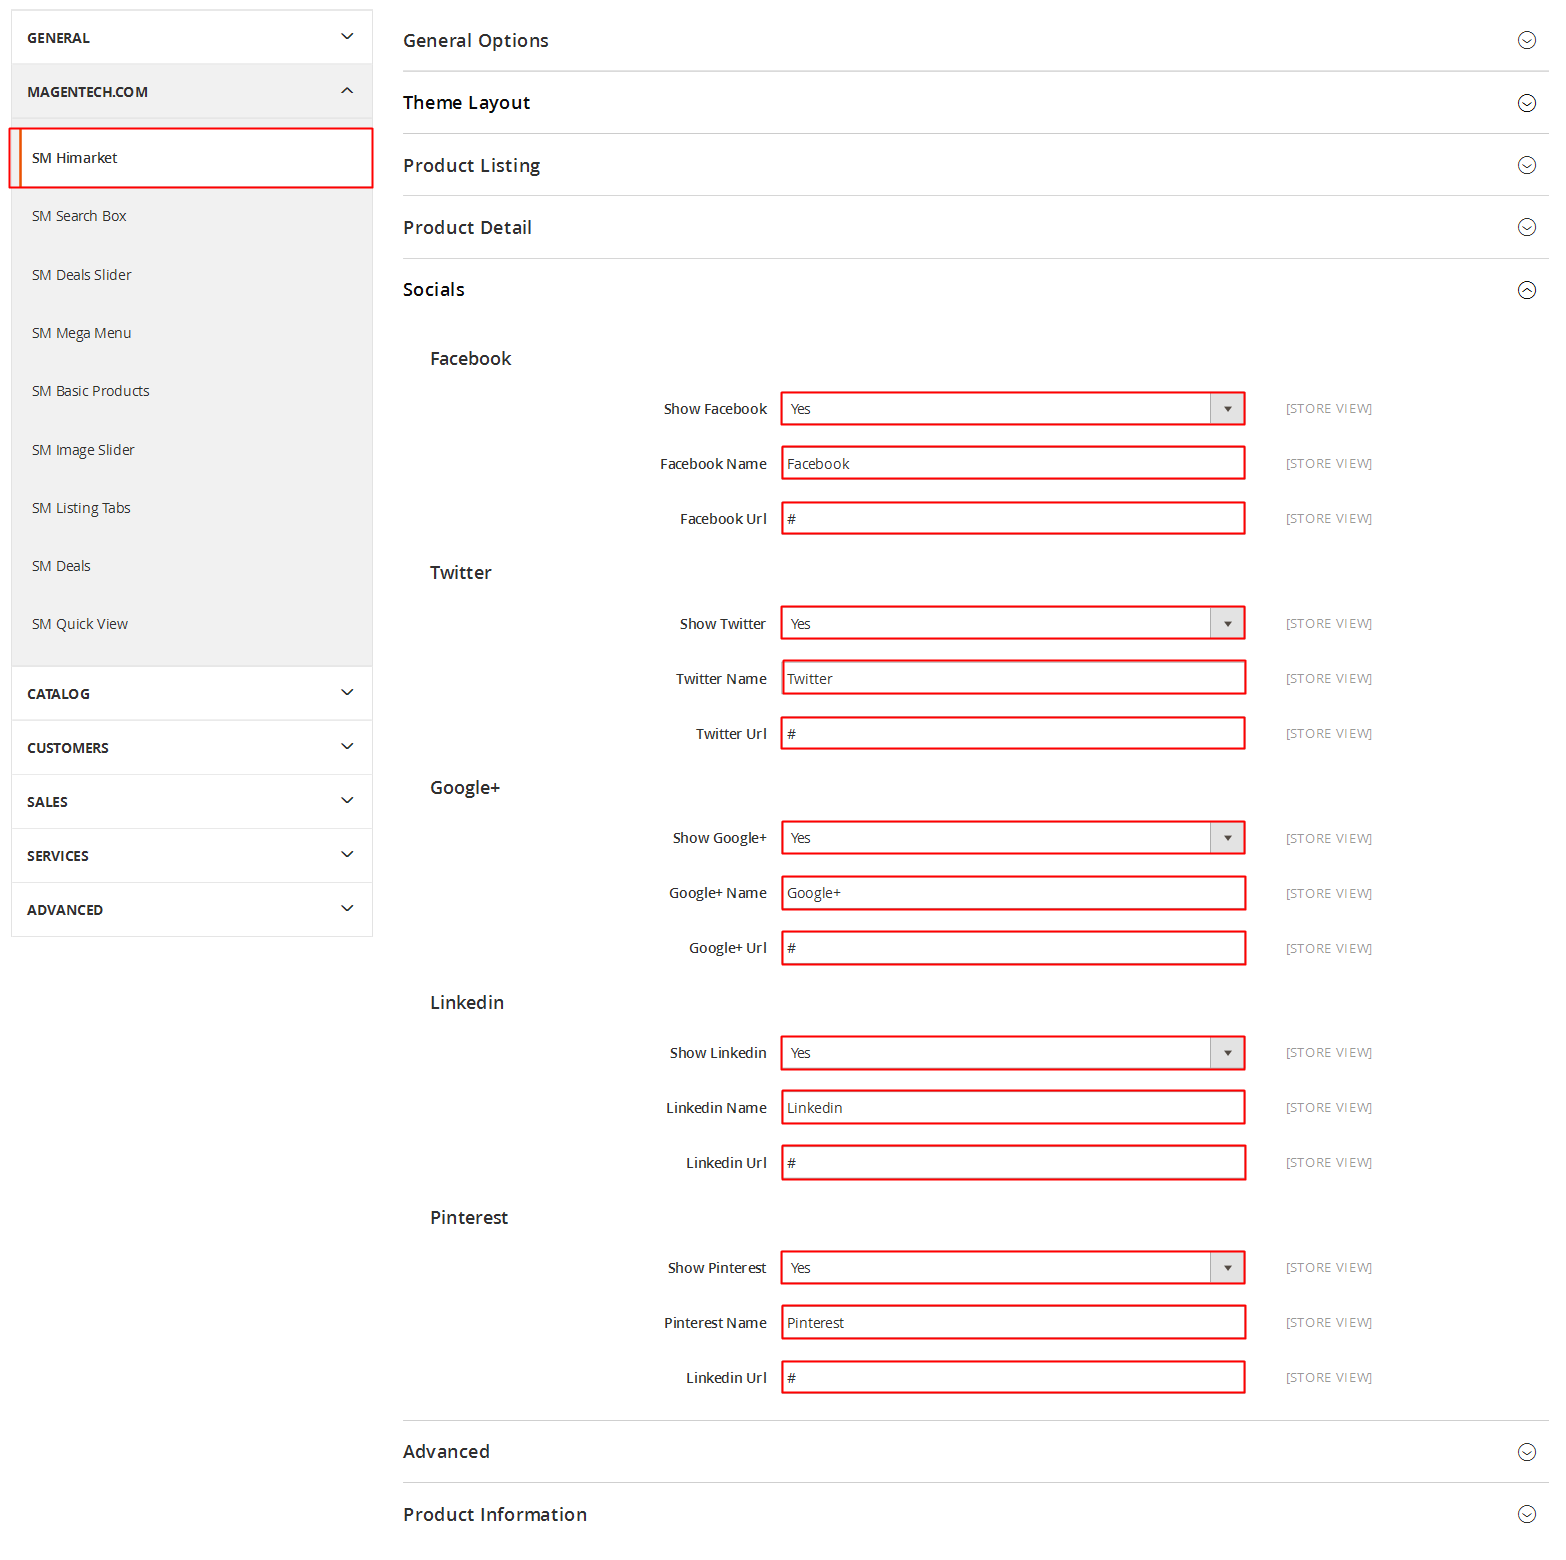
1. In your Prestashop Admin Dashboard, navigate to Modules and Services >> Modules and Services >> go to MODULES LIST section, search for “SP Theme configurator” module then click on Configure.
2. In the SP Theme Settings, choose “Social Accounts” to configure the parameters in this section. After finishing, you could go to the front-end to view the changes.
SP Newsletter Block
Frontend Appearance:

Backend Settings:
Step 1: In the Pretashop Admin Panel, navigate to Modules and Services >> Modules and Services >> look for “SP Newsletter Block” module.
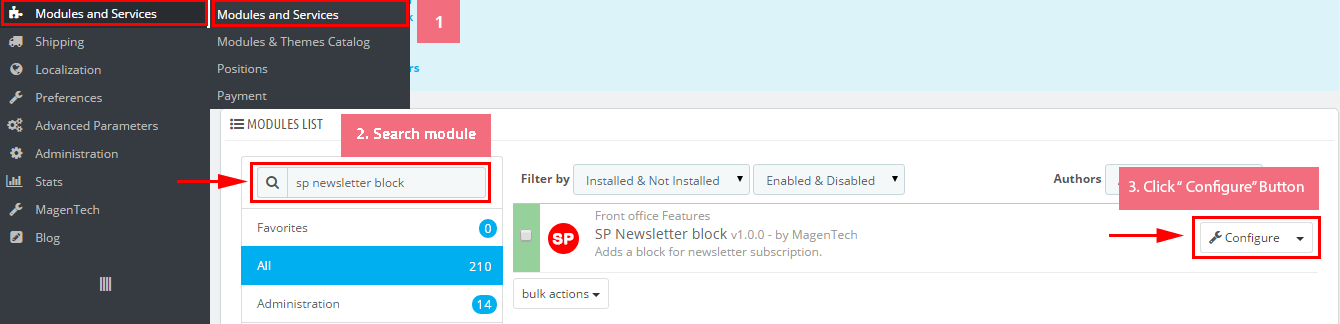
Step 2: You could configure this module like the following image.

SP Custom HTML: My Account
Frontend Appearance:

Backend Settings:
Step 1: In the Pretashop Admin Panel, navigate to Modules and Services >> Modules and Services >> look for “SP Custom HTML” module >> click “Configure” button to configure.
Step 2: In the “SP Custom HTML” configuration page, click button in the right corner to “ADD NEW MODULE”.
Step 3: You could configure this module like the following image.
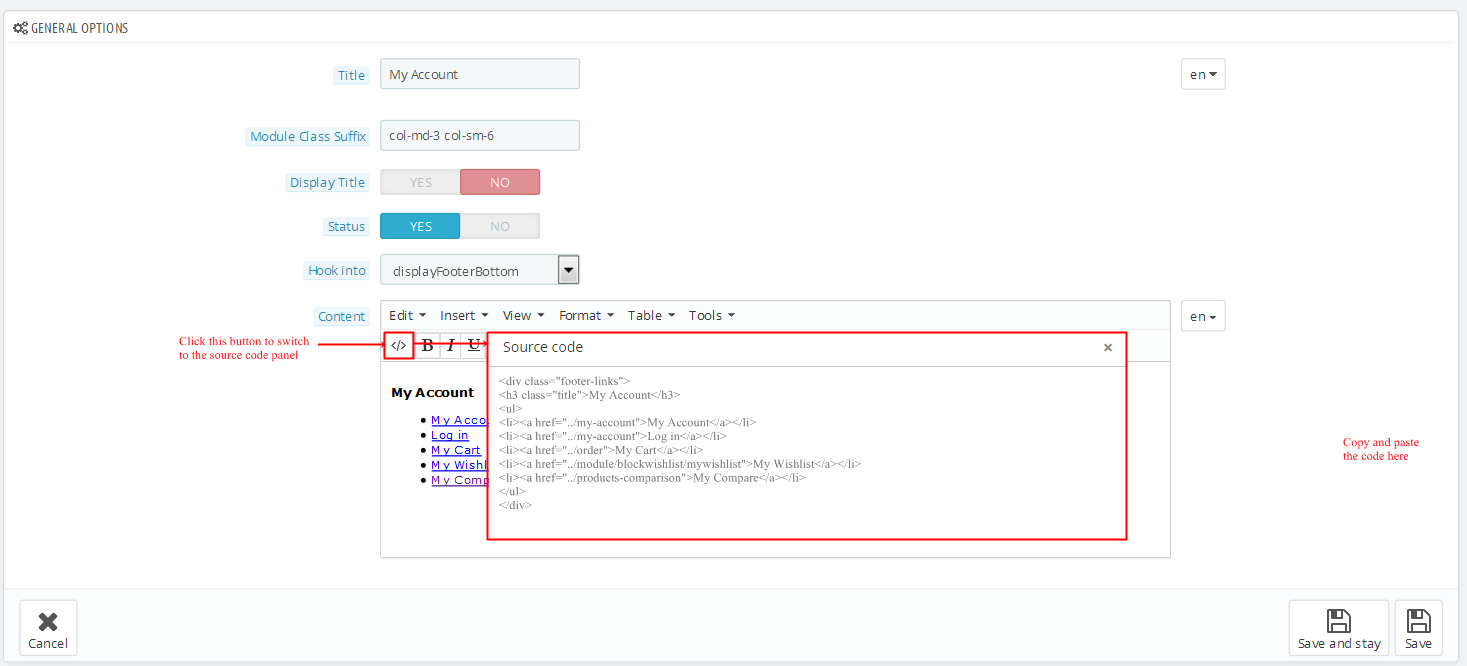
Copy & Paste the code into your editor:
|
1
2
3
4
5
6
7
8
9
10
|
<div class="footer-links">
<h3 class="title">My Account</h3>
<ul>
<li><a href="/my-account">My Account</a></li>
<li><a href="/my-account">Log in</a></li>
<li><a href="/order">My Cart</a></li>
<li><a href="/module/blockwishlist/mywishlist">My Wishlist</a></li>
<li><a href="/products-comparison">My Compare</a></li>
</ul>
</div>
|
SP Custom HTML: Information
Frontend Appearance:
Backend Settings:
Step 1: In the Pretashop Admin Panel, navigate to Modules and Services >> Modules and Services >> look for “SP Custom HTML” module >> click “Configure” button to configure.
Step 2: In the “SP Custom HTML” configuration page, click button in the right corner to “ADD NEW MODULE”.
Step 3: You could configure this module like the following image.
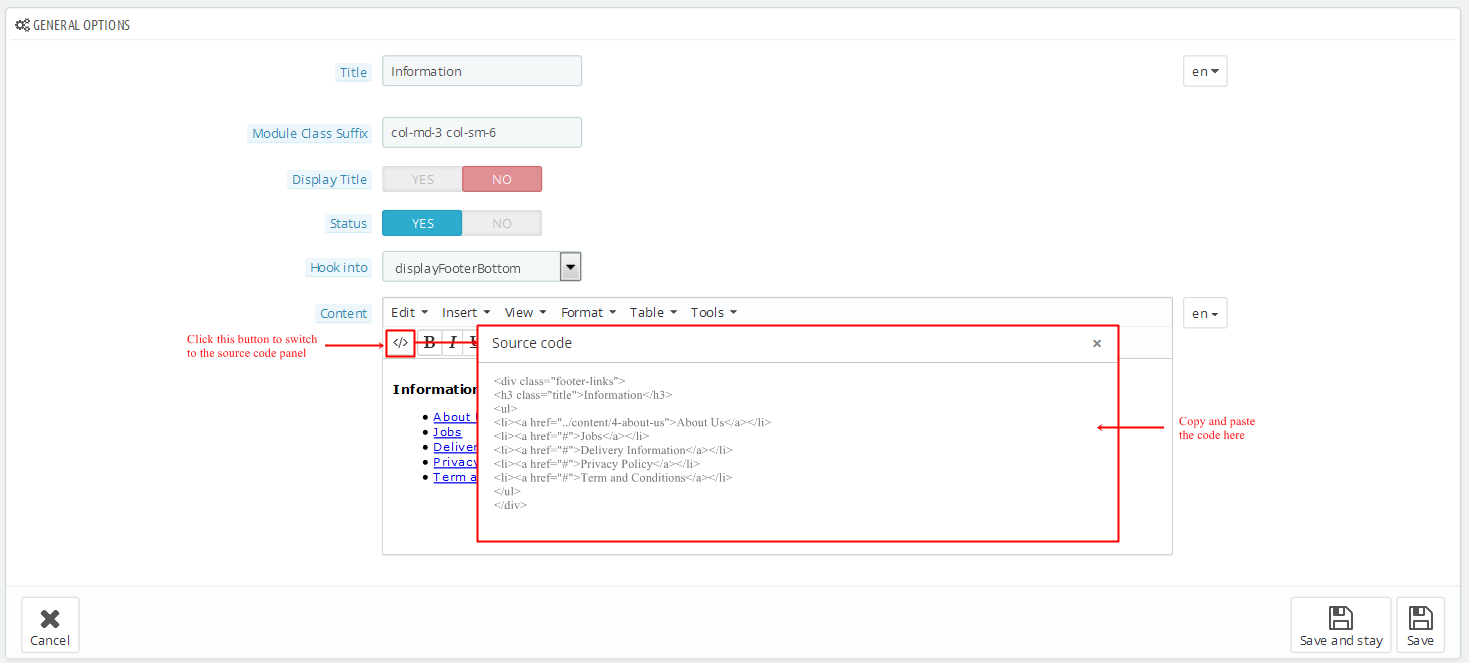
Copy & Paste the code into your editor:
|
1
2
3
4
5
6
7
8
9
10
|
<div class="footer-links">
<h3 class="title">Information</h3>
<ul>
<li><a href="/content/4-about-us">About Us</a></li>
<li><a href="#">Jobs</a></li>
<li><a href="#">Delivery Information</a></li>
<li><a href="#">Privacy Policy</a></li>
<li><a href="#">Term and Conditions</a></li>
</ul>
</div>
|
SP Custom HTML: Other Pages
Frontend Appearance:
Backend Settings:
Step 1: In the Pretashop Admin Panel, navigate to Modules and Services >> Modules and Services >> look for “SP Custom HTML” module >> click “Configure” button to configure.
Step 2: In the “SP Custom HTML” configuration page, click button in the right corner to “ADD NEW MODULE”.
Step 3: You could configure this module like the following image.
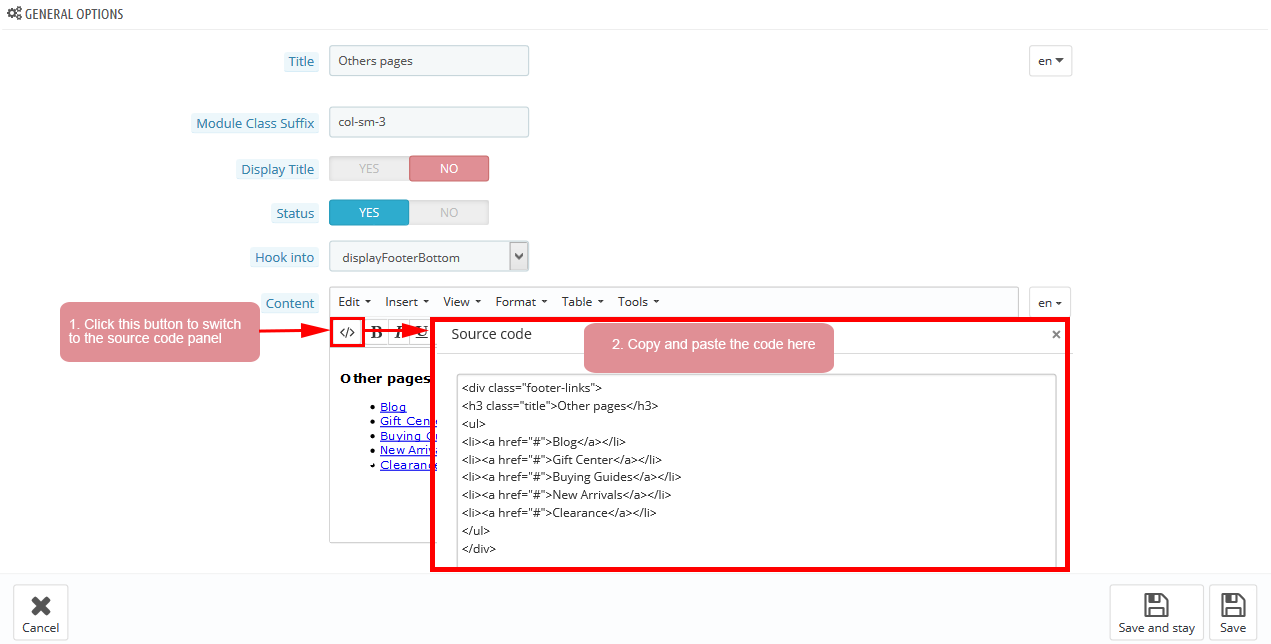
Copy & Paste the code into your editor:
|
1
2
3
4
5
6
7
8
9
10
|
<div class="footer-links">
<h3 class="title">Other pages</h3>
<ul>
<li><a href="#">Blog</a></li>
<li><a href="#">Gift Center</a></li>
<li><a href="#">Buying Guides</a></li>
<li><a href="#">New Arrivals</a></li>
<li><a href="#">Clearance</a></li>
</ul>
</div>
|
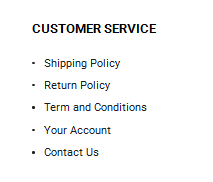
SP Custom HTML: Customer Service
Frontend Appearance:
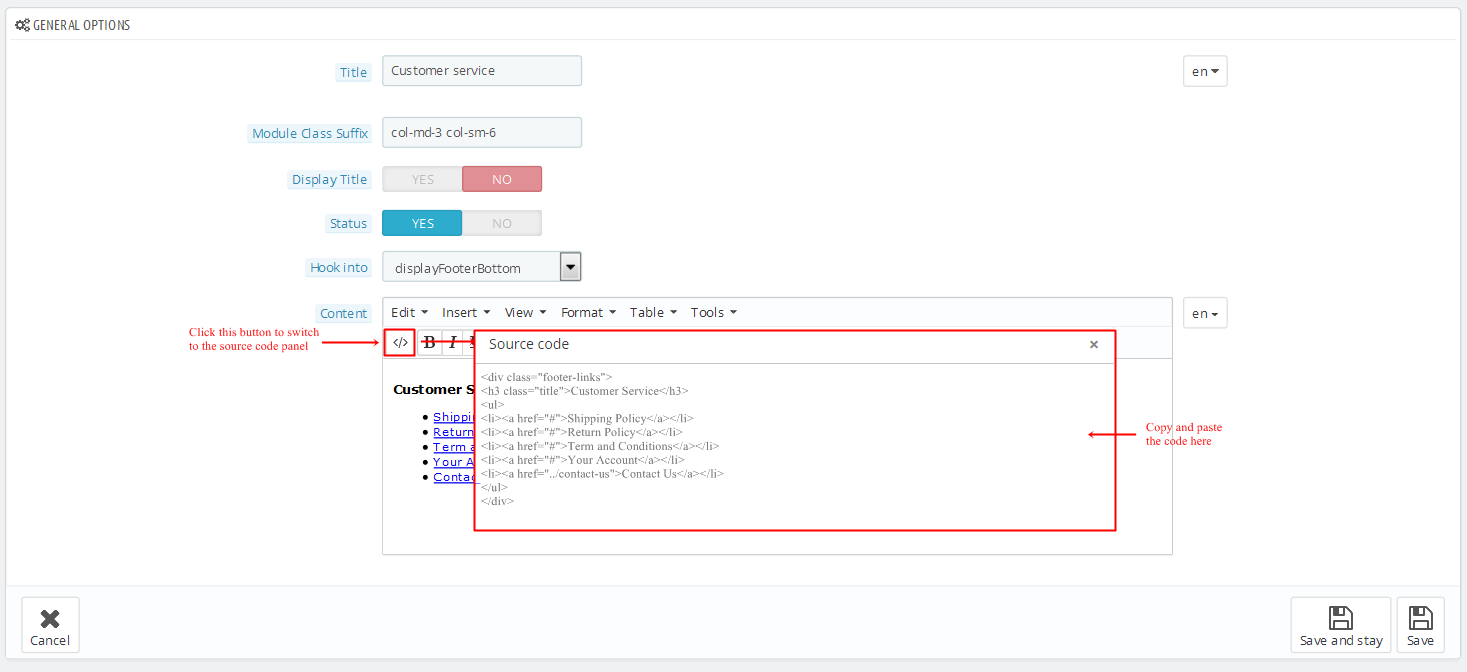
Backend Settings:
Step 1: In the Pretashop Admin Panel, navigate to Modules and Services >> Modules and Services >> look for “SP Custom HTML” module >> click “Configure” button to configure.
Step 2: In the “SP Custom HTML” configuration page, click button in the right corner to “ADD NEW MODULE”.
Step 3: You could configure this module like the following image.
Copy & Paste the code into your editor:
|
1
2
3
4
5
6
7
8
9
10
|
<div class="footer-links">
<h3 class="title">Customer Service</h3>
<ul>
<li><a href="#">Shipping Policy</a></li>
<li><a href="#">Return Policy</a></li>
<li><a href="#">Term and Coditions</a></li>
<li><a href="#">Your Account</a></li>
<li><a href="/contact-us">Contact Us</a></li>
</ul>
</div>
|
SP Theme Configuration: Copyright
Frontend Appearance:
Backend Settings:
Go Here to see the backend settings.
SP Theme Configuration: Payment
Frontend Appearance:
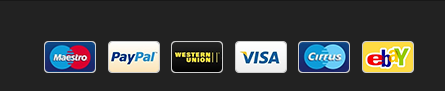
Backend Settings:
Go Here to see the backend settings.
5.2 SP Hurama Home Page 2
SP Slider For Your Homepage: Home Slide Layout2
Frontend Appearance:

Backend Settings:
Step 1: In the Pretashop Admin Panel, navigate to Modules and Services >> Modules and Services >> look for “SP Home Slider” module >> click “Configure” button to configure.
Step 2: In the “SP Slider For Your Homepage” configuration page, click button in the right corner to “ADD NEW MODULE”.
Step 3: You could configure this module like the following image.
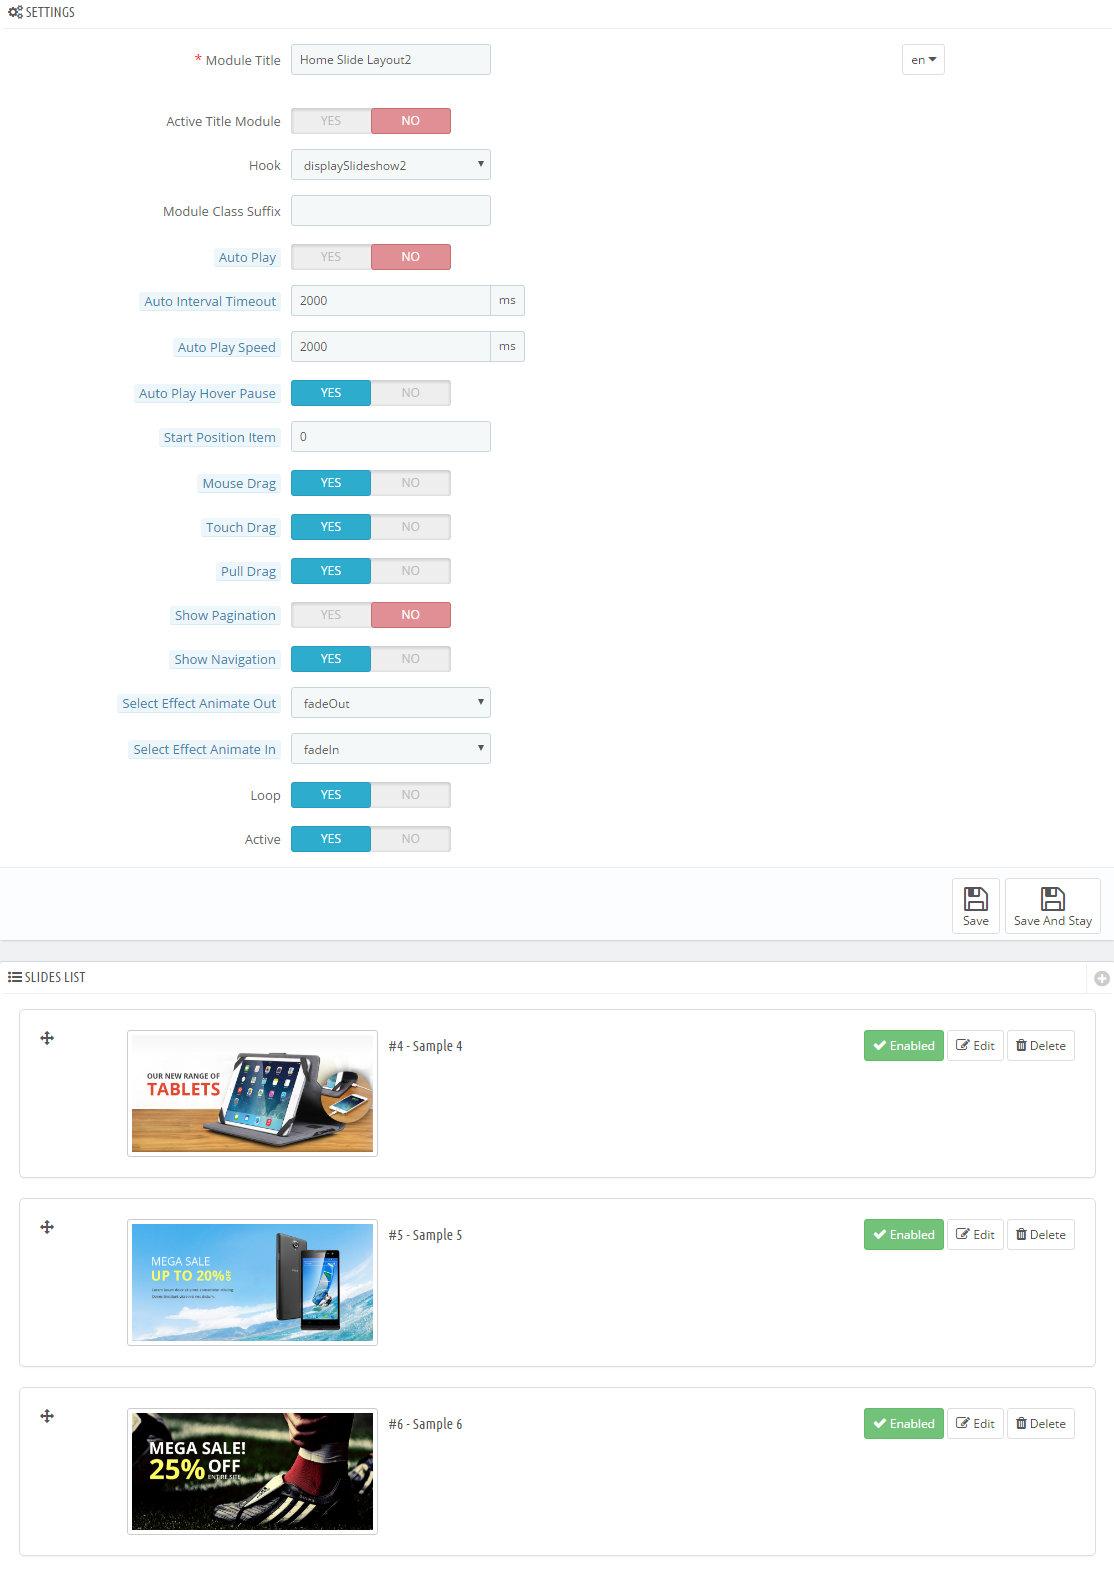
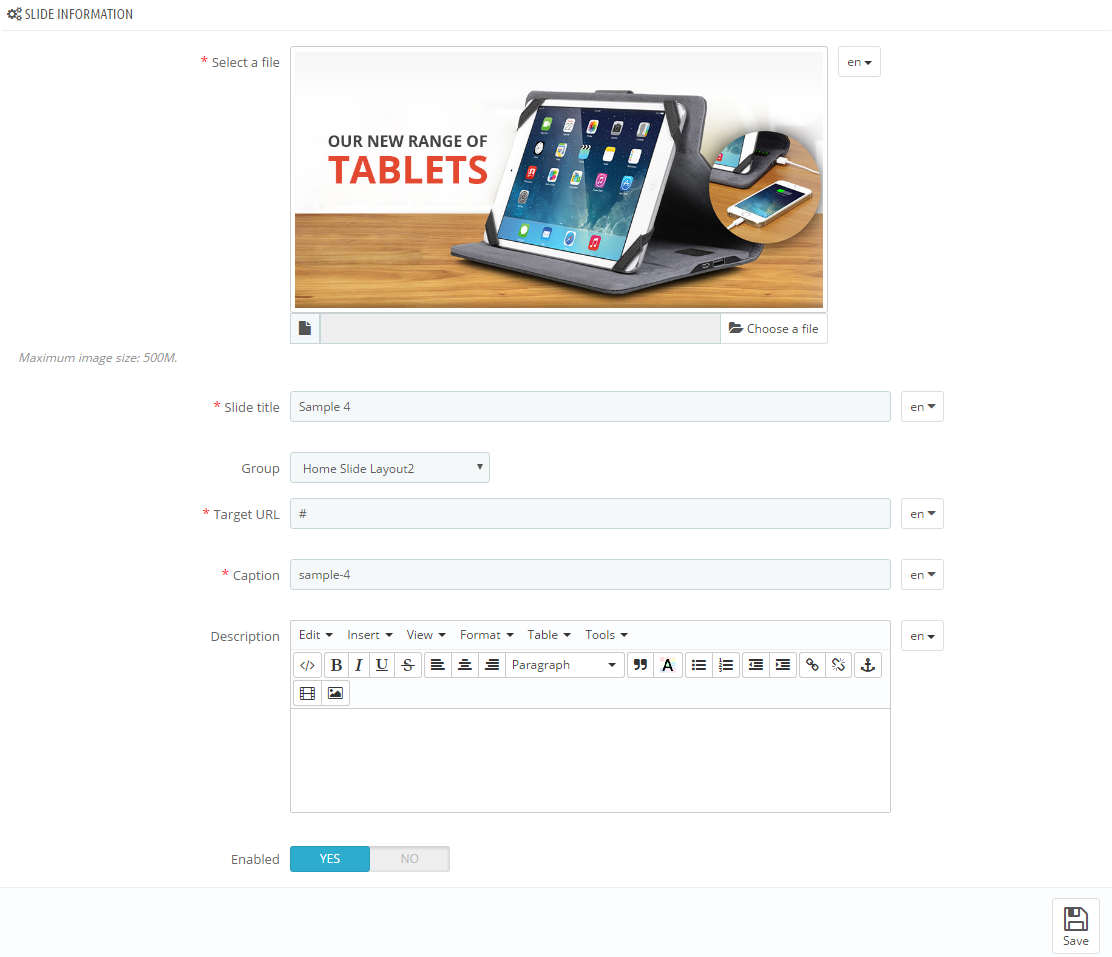
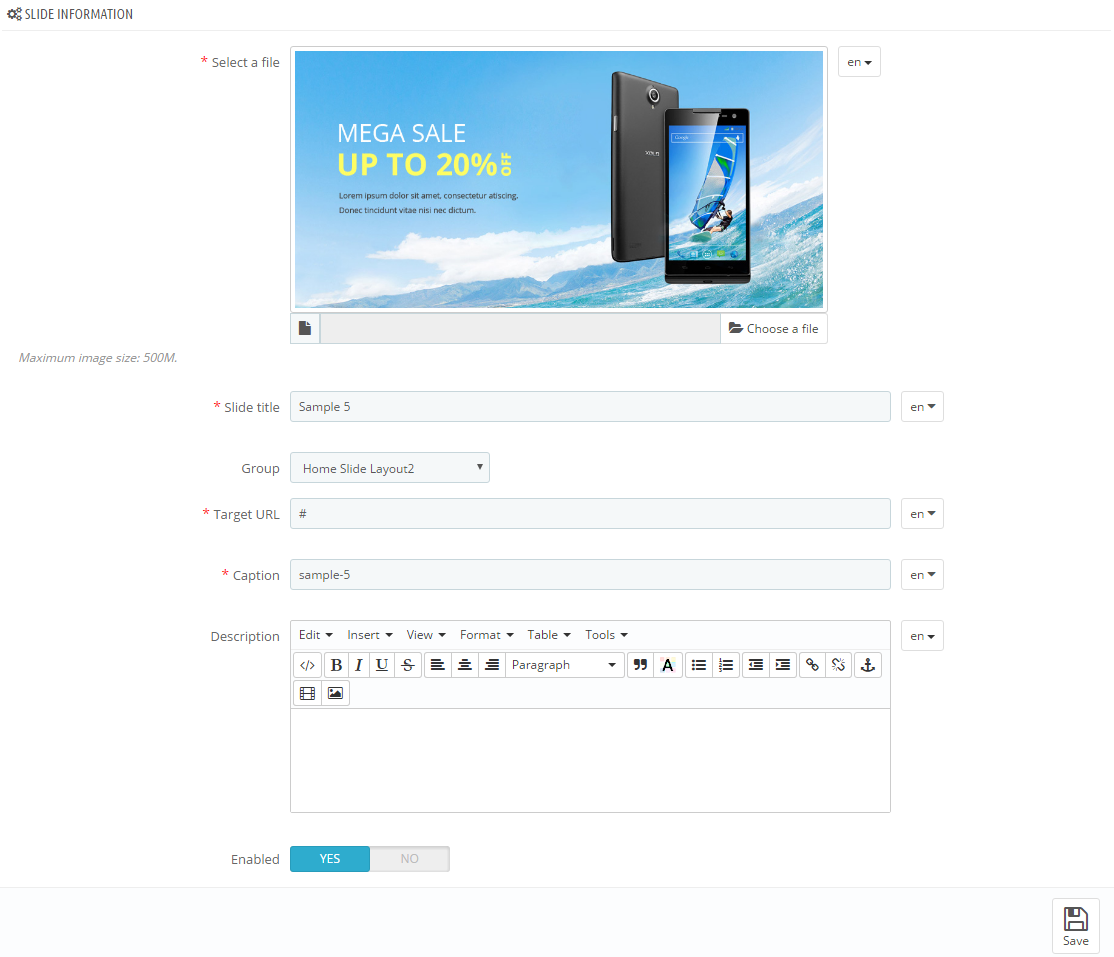
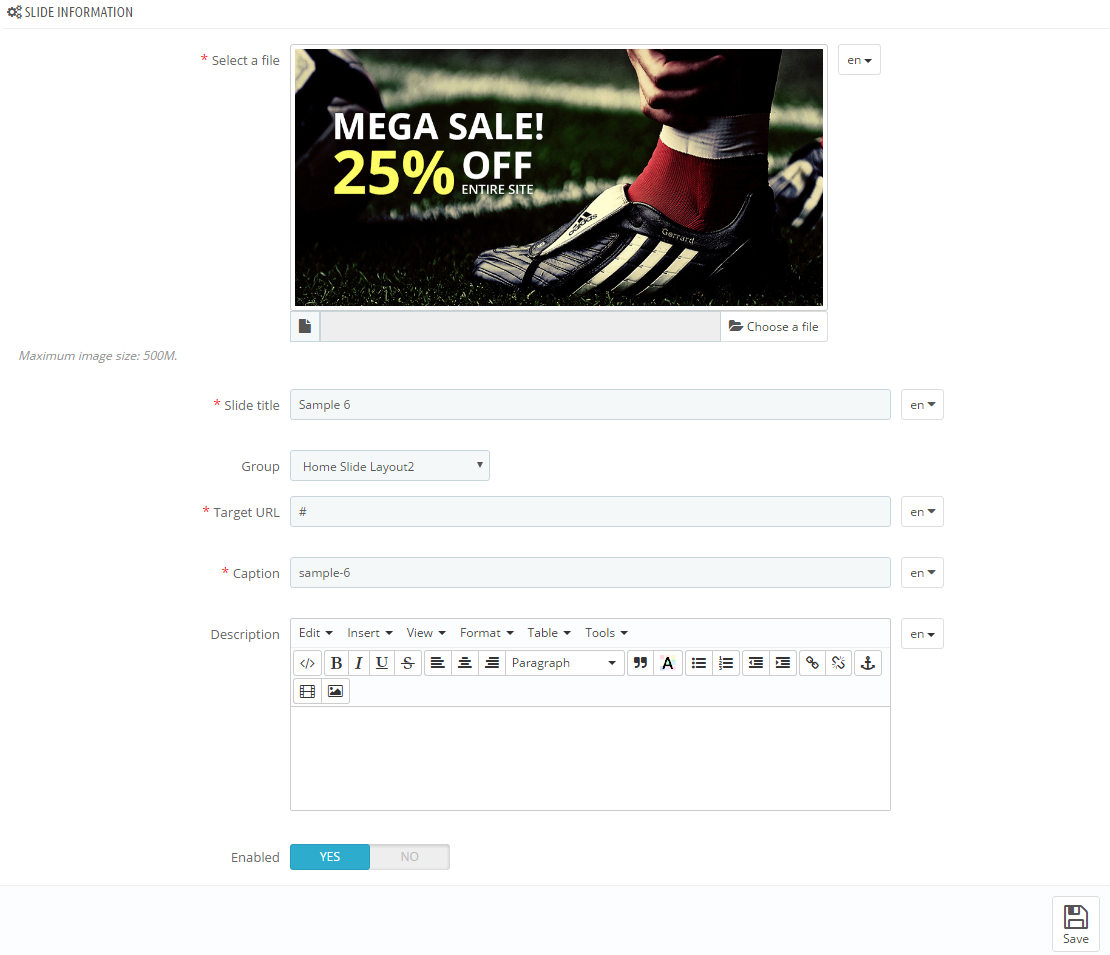
Step 4: In the last part named Slides List of this configuration page, click button in the right corner to add new slide and edit slide’s information as follows:
- Sample 4:
- Sample 5:
- Sample 6:
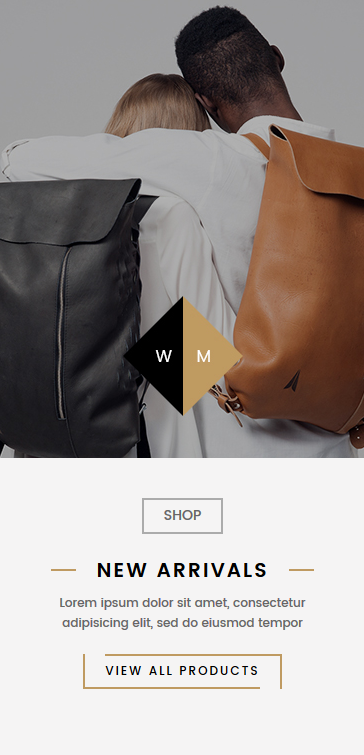
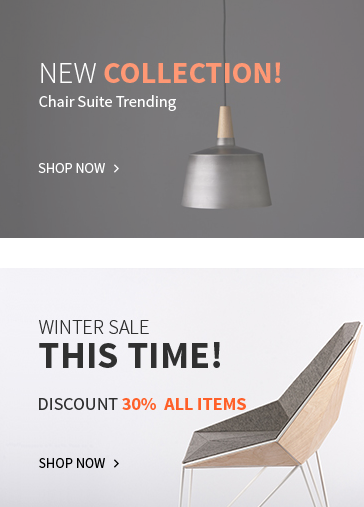
SP Custom HTML: Banner Top Layout2
Frontend Appearance:
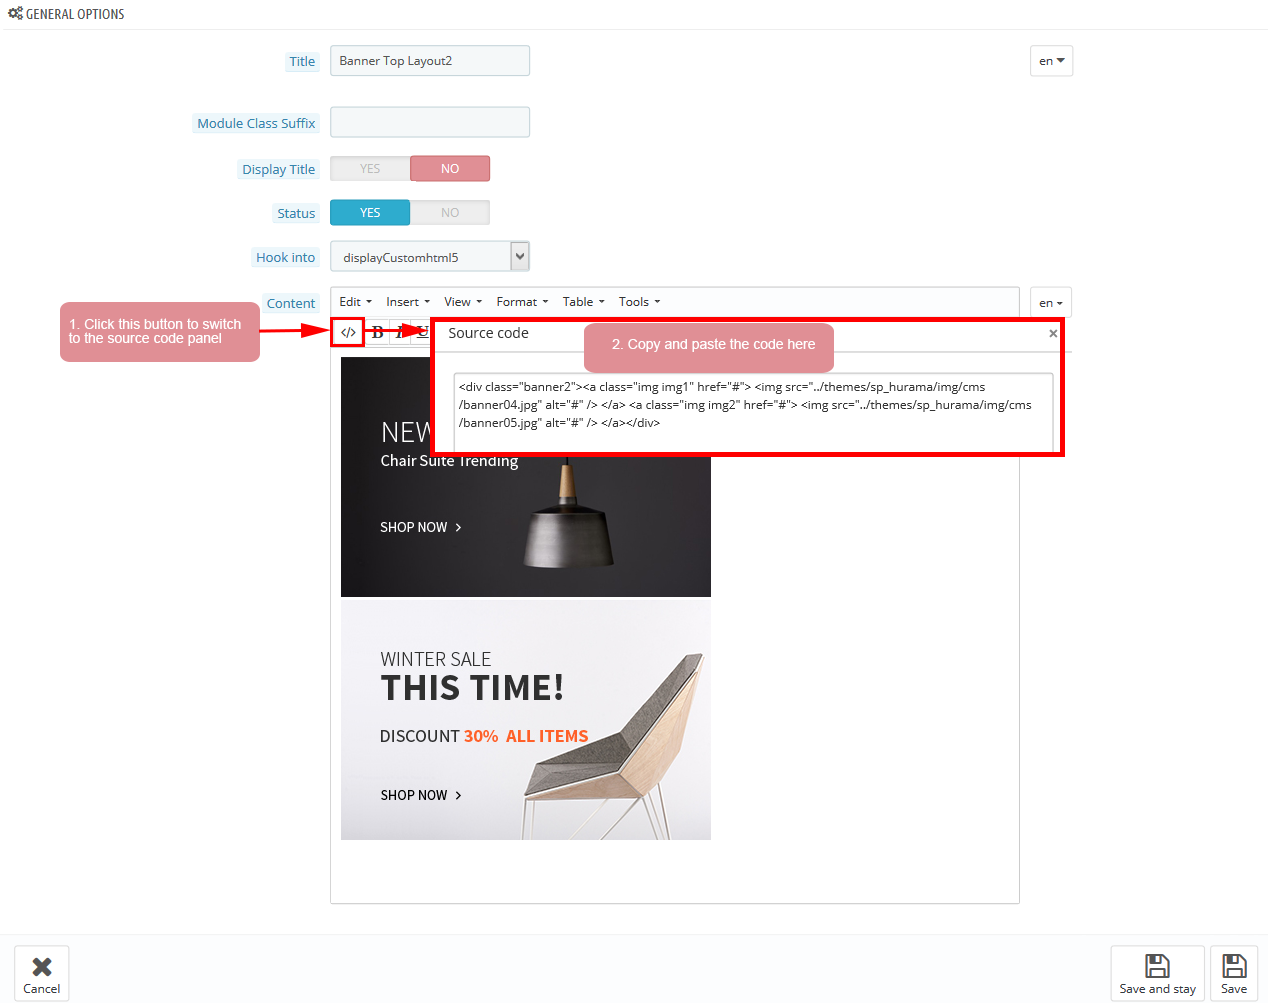
Backend Settings:
Step 1: In the Pretashop Admin Panel, navigate to Modules and Services >> Modules and Services >> look for “SP Custom HTML” module >> click “Configure” button to configure.
Step 2: In the “SP Custom HTML” configuration page, click button in the right corner to “ADD NEW MODULE”.
Step 3: You could configure this module like the following image.
Copy & Paste the code into your editor:
|
1
|
<div class="banner2"><a class="img img1" href="#"> <img src="/themes/sp_hurama/img/cms/banner04.jpg" alt="#" /> </a> <a class="img img2" href="#"> <img src="/themes/sp_hurama/img/cms/banner05.jpg" alt="#" /> </a></div>
|
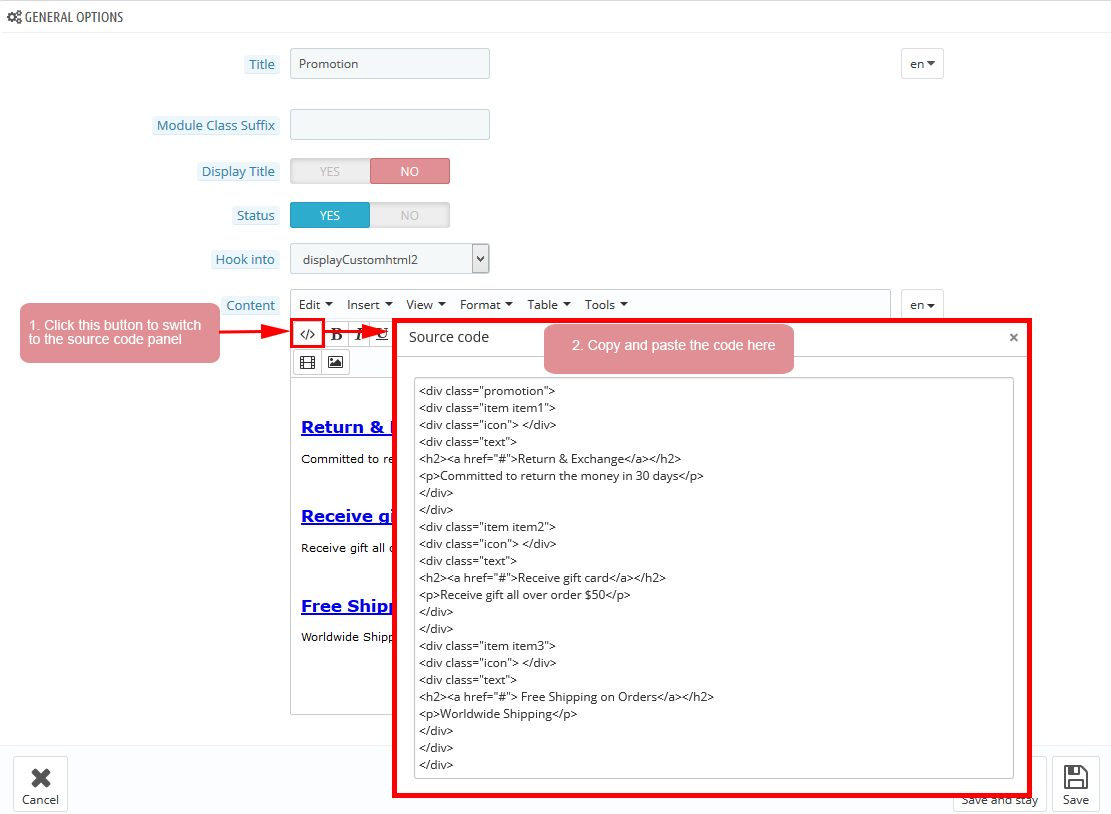
SP Custom HTML: Promotion Block
Frontend Appearance:

Backend Settings:
Step 1: In the Pretashop Admin Panel, navigate to Modules and Services >> Modules and Services >> look for “SP Custom HTML” module >> click “Configure” button to configure.
Step 2: In the “SP Custom HTML” configuration page, click button in the right corner to “ADD NEW MODULE”.
Step 3: You could configure this module like the following image.
Copy & Paste the code into your editor:
|
1
2
3
4
5
6
7
8
9
10
11
12
13
14
15
16
17
18
19
20
21
22
23
24
25
26
27
28
29
30
31
|
<div class="promotion-block">
<div class="row">
<div class="col-sm-4">
<div class="item item1">
<div class="icon">Icon</div>
<div class="text">
<h2><a href="#">100% MONEY BACK</a></h2>
<h4>GUARANTEE</h4>
</div>
</div>
</div>
<div class="col-sm-4">
<div class="item item2">
<div class="icon">Icon</div>
<div class="text">
<h2><a href="#">free shipping</a></h2>
<h4>when order over $150</h4>
</div>
</div>
</div>
<div class="col-sm-4">
<div class="item item3">
<div class="icon">Icon</div>
<div class="text">
<h2><a href="#">24-Hours</a></h2>
<h4>life time support</h4>
</div>
</div>
</div>
</div>
</div>
|
SP Deal
Frontend Appearance:
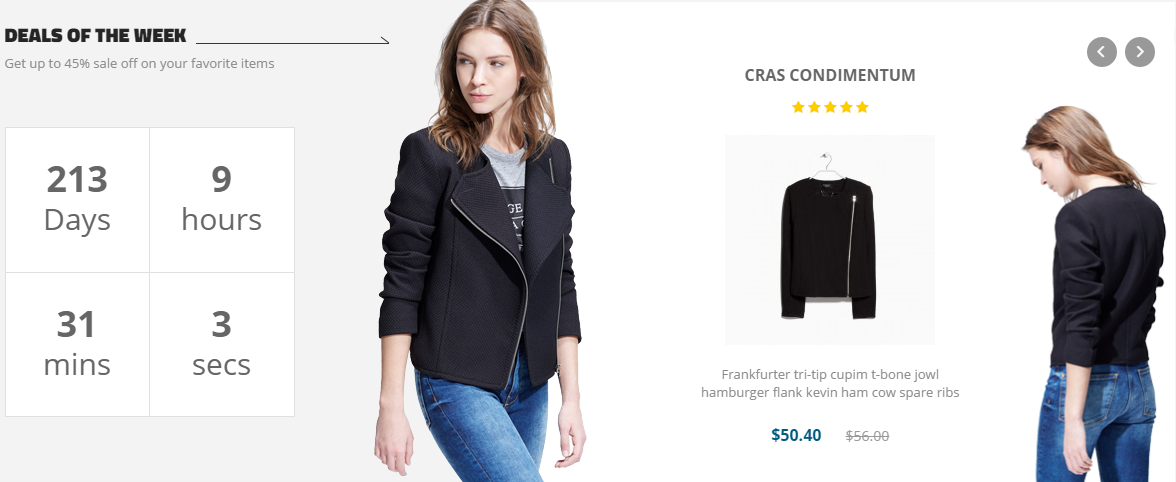
Backend Settings:
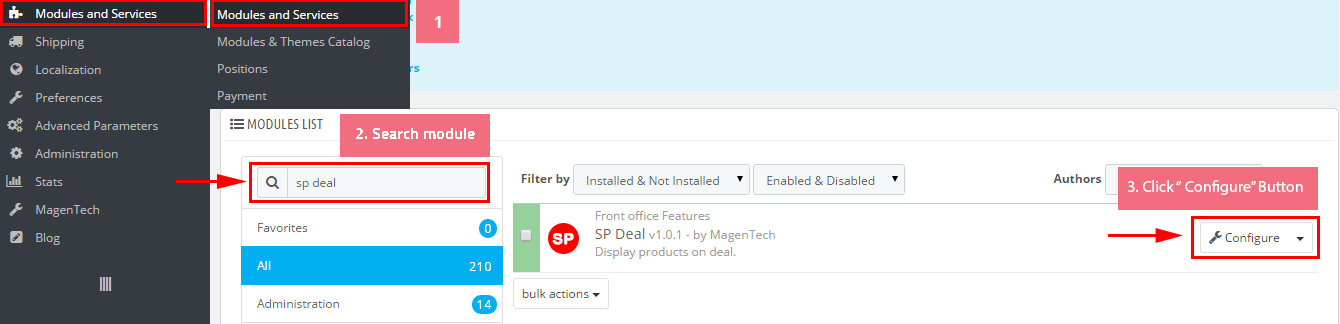
Step 1: In the Pretashop Admin Panel, navigate to Modules and Services >> Modules and Services >> look for “SP Deal” module.
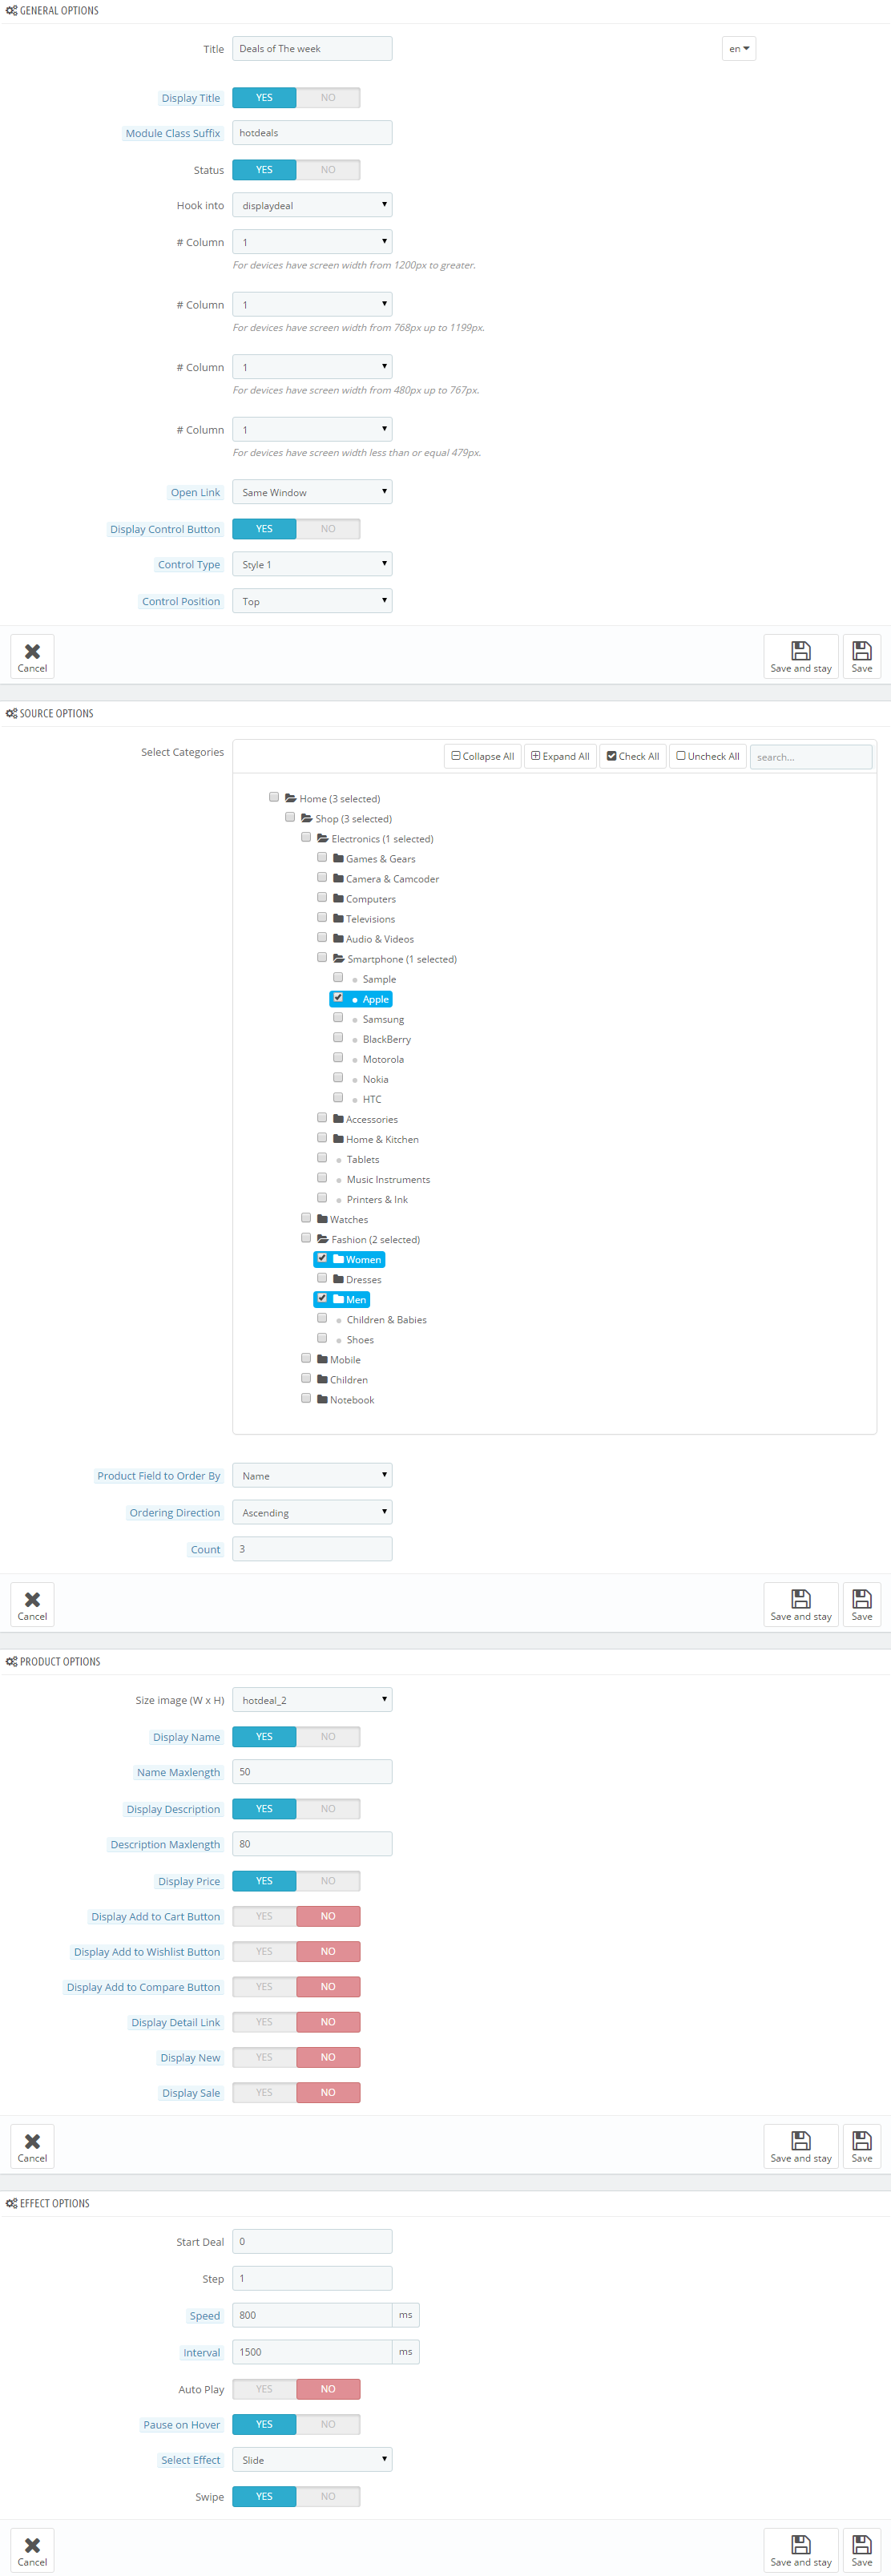
Step 2: In the “SP Deal” configuration page, click button in the right corner to “ADD NEW MODULE”.
Step 3: You could configure this module like the following image.
SP Custom HTML: Banner Center Layout2
Frontend Appearance:

Backend Settings:
Step 1: In the Pretashop Admin Panel, navigate to Modules and Services >> Modules and Services >> look for “SP Custom HTML” module >> click “Configure” button to configure.
Step 2: In the “SP Custom HTML” configuration page, click button in the right corner to “ADD NEW MODULE”.
Step 3: You could configure this module like the following image.
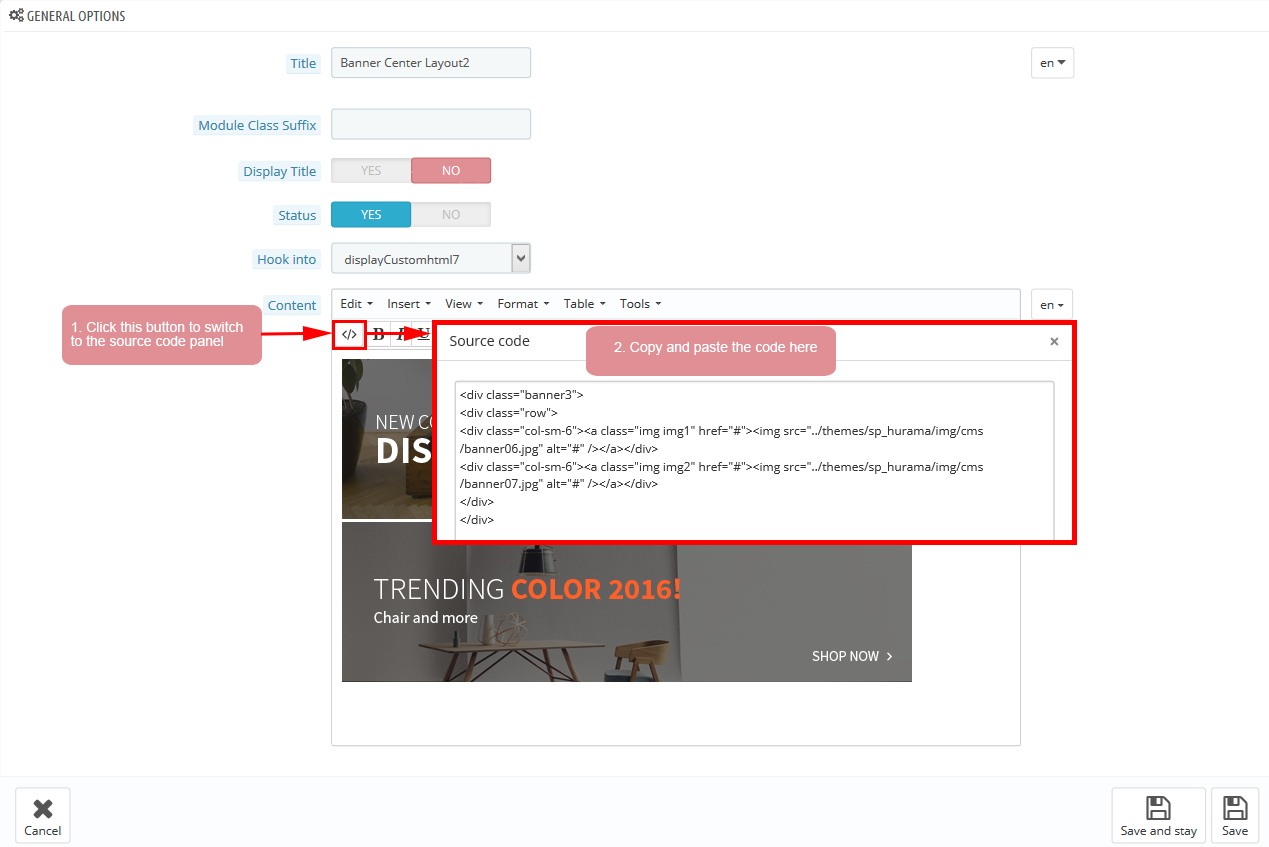
Copy & Paste the code into your editor:
|
1
2
3
4
5
6
|
<div class="banner3">
<div class="row">
<div class="col-sm-6"><a class="img img1" href="#"><img src="/themes/sp_hurama/img/cms/banner06.jpg" alt="#" /></a></div>
<div class="col-sm-6"><a class="img img2" href="#"><img src="/themes/sp_hurama/img/cms/banner07.jpg" alt="#" /></a></div>
</div>
</div>
|
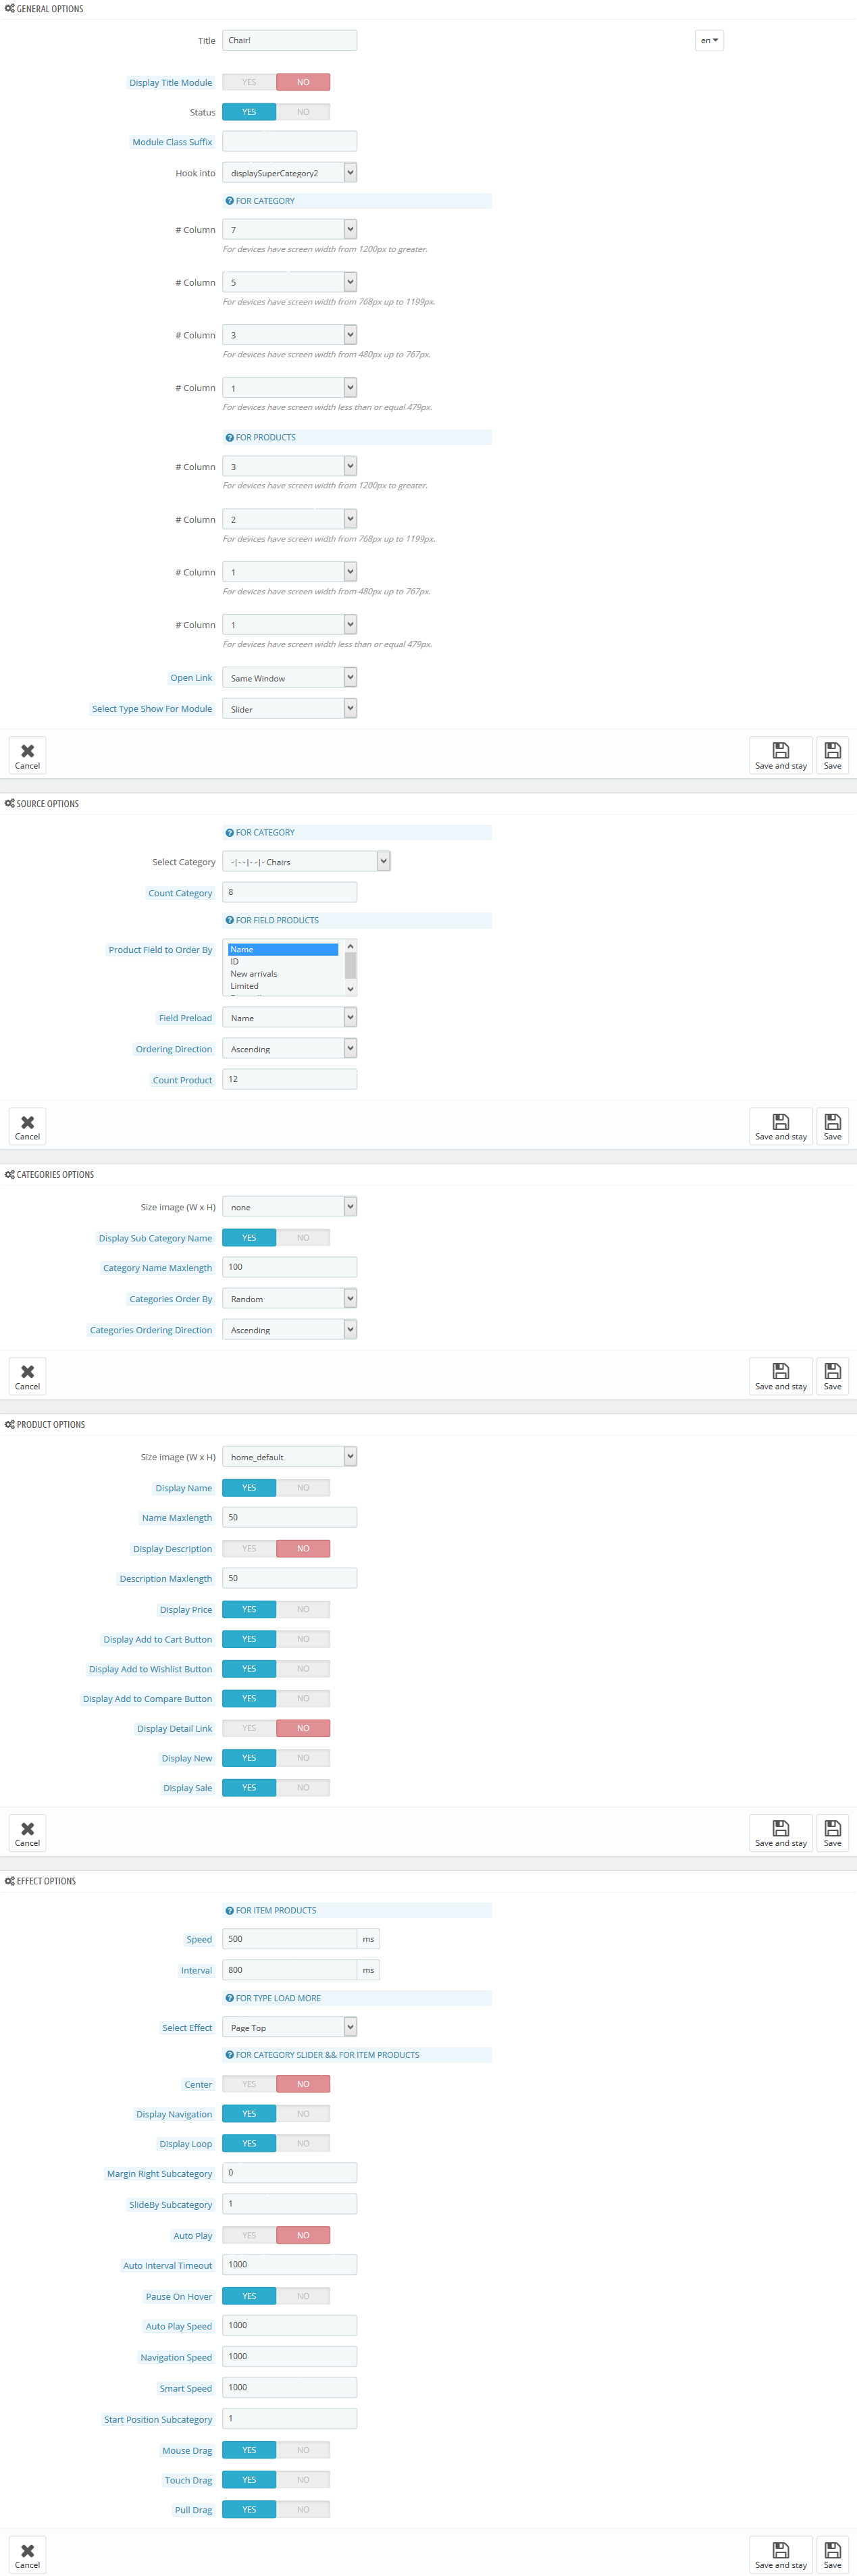
SP Super Category: Chair
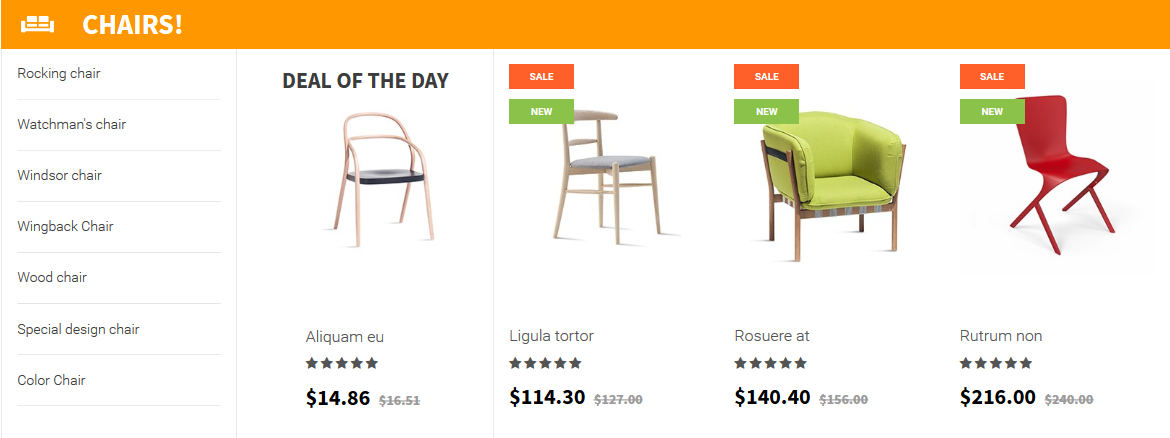
Frontend Appearance:
Backend Settings:
Step 1: In the Pretashop Admin Panel, navigate to Modules and Services >> Modules and Services >> look for “SP Super Category” module.
Step 2: In the “SP Super Category” configuration page, click button in the right corner to “ADD NEW MODULE”.
Step 3: You could configure this module like the following image.
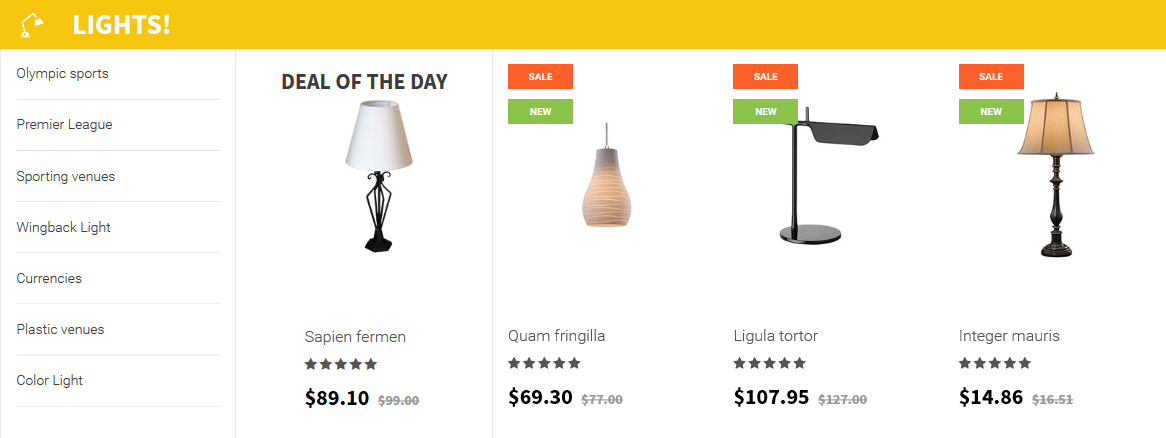
SP Super Category: Lights
Frontend Appearance:
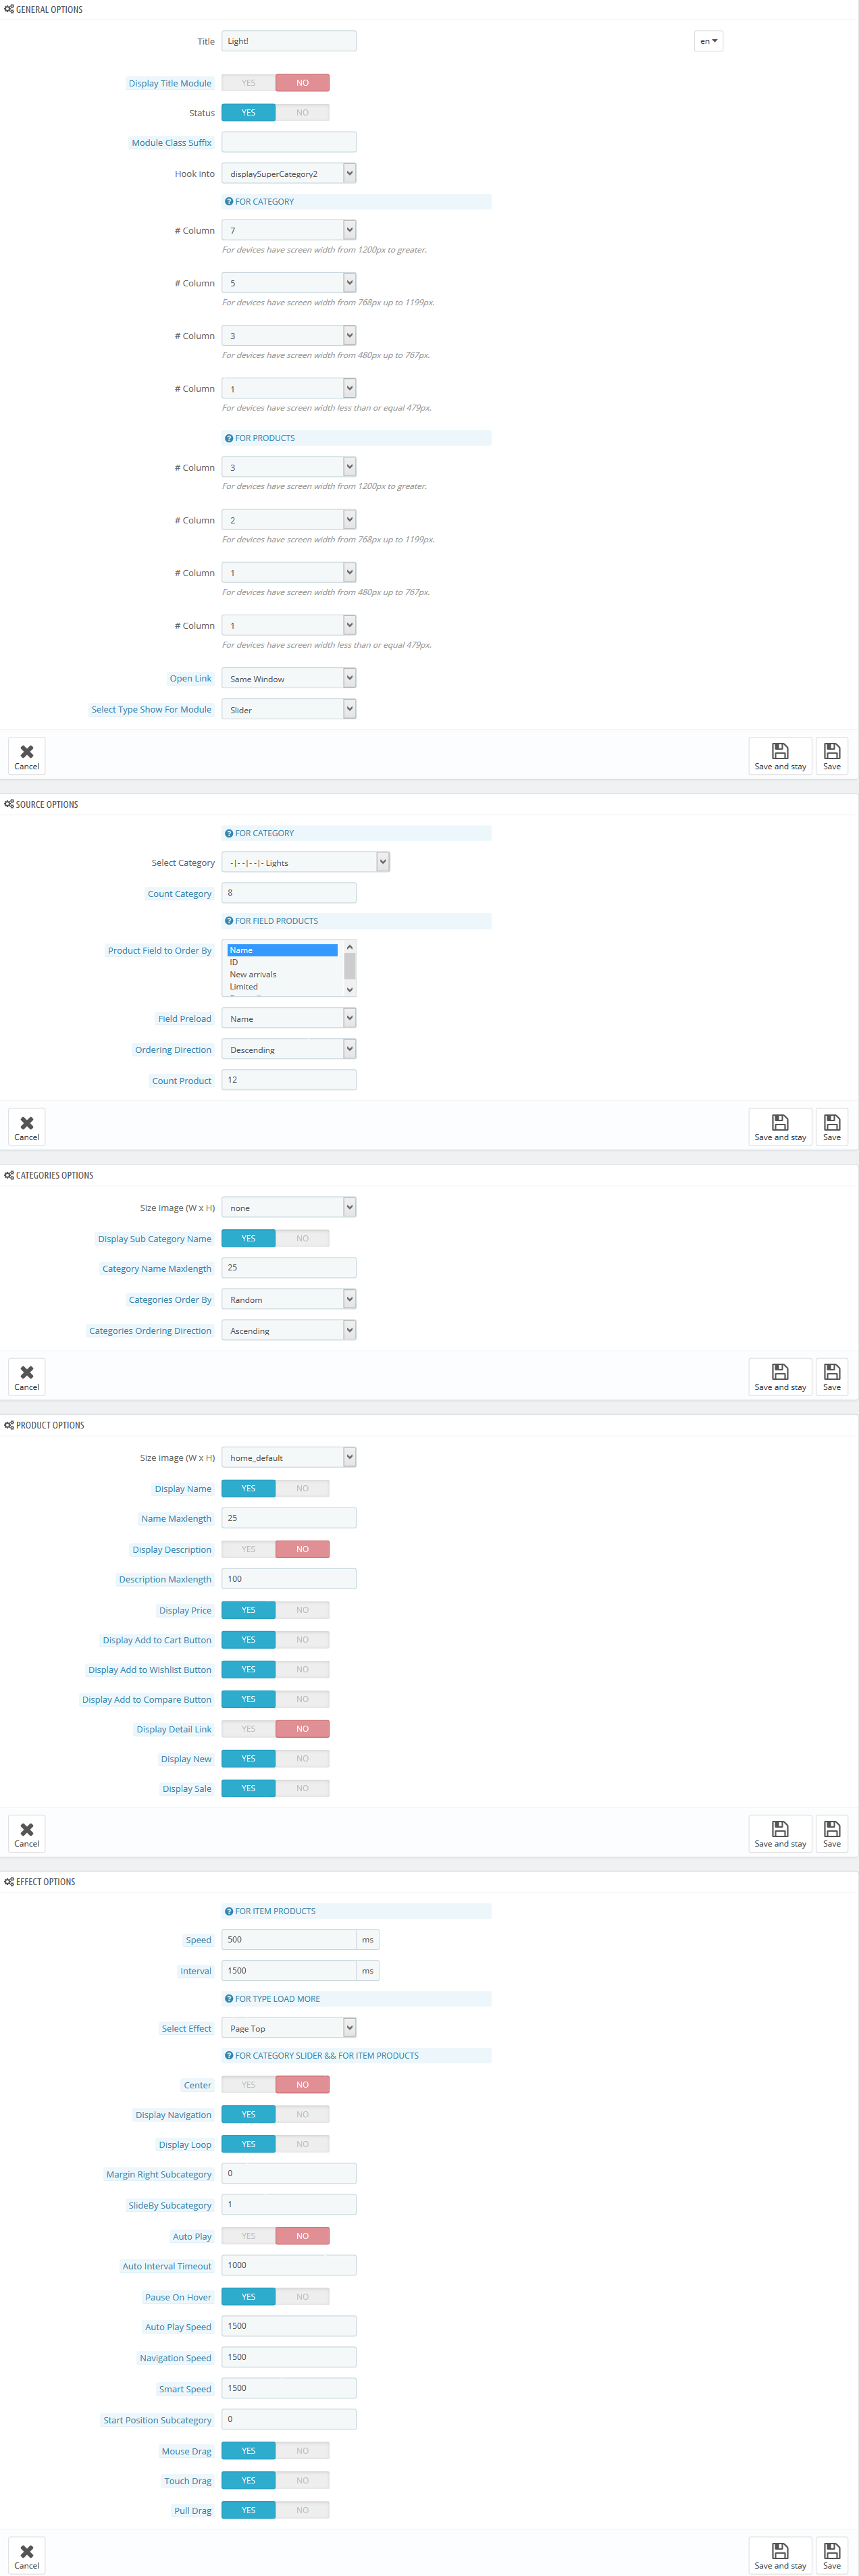
Backend Settings:
Step 1: In the Pretashop Admin Panel, navigate to Modules and Services >> Modules and Services >> look for “SP Super Category” module.
Step 2: In the “SP Super Category” configuration page, click button in the right corner to “ADD NEW MODULE”.
Step 3: You could configure this module like the following image.
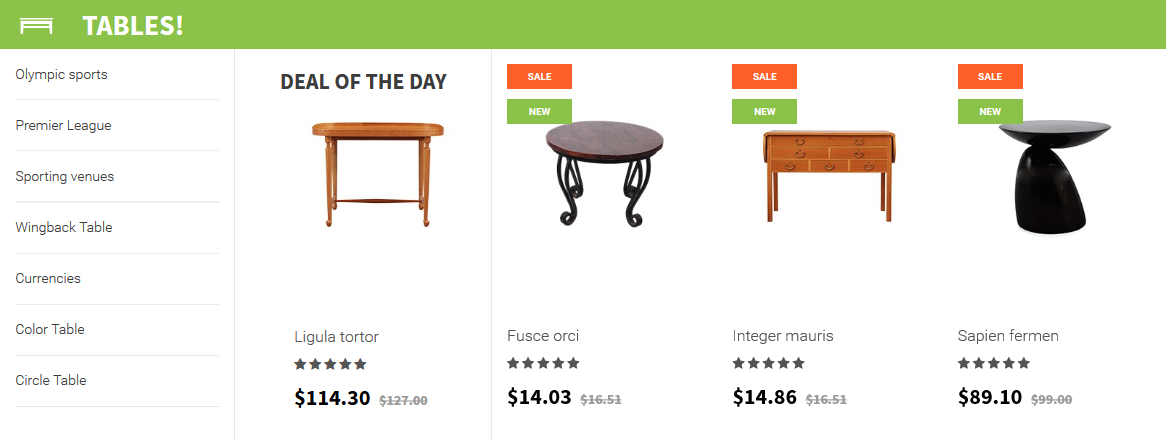
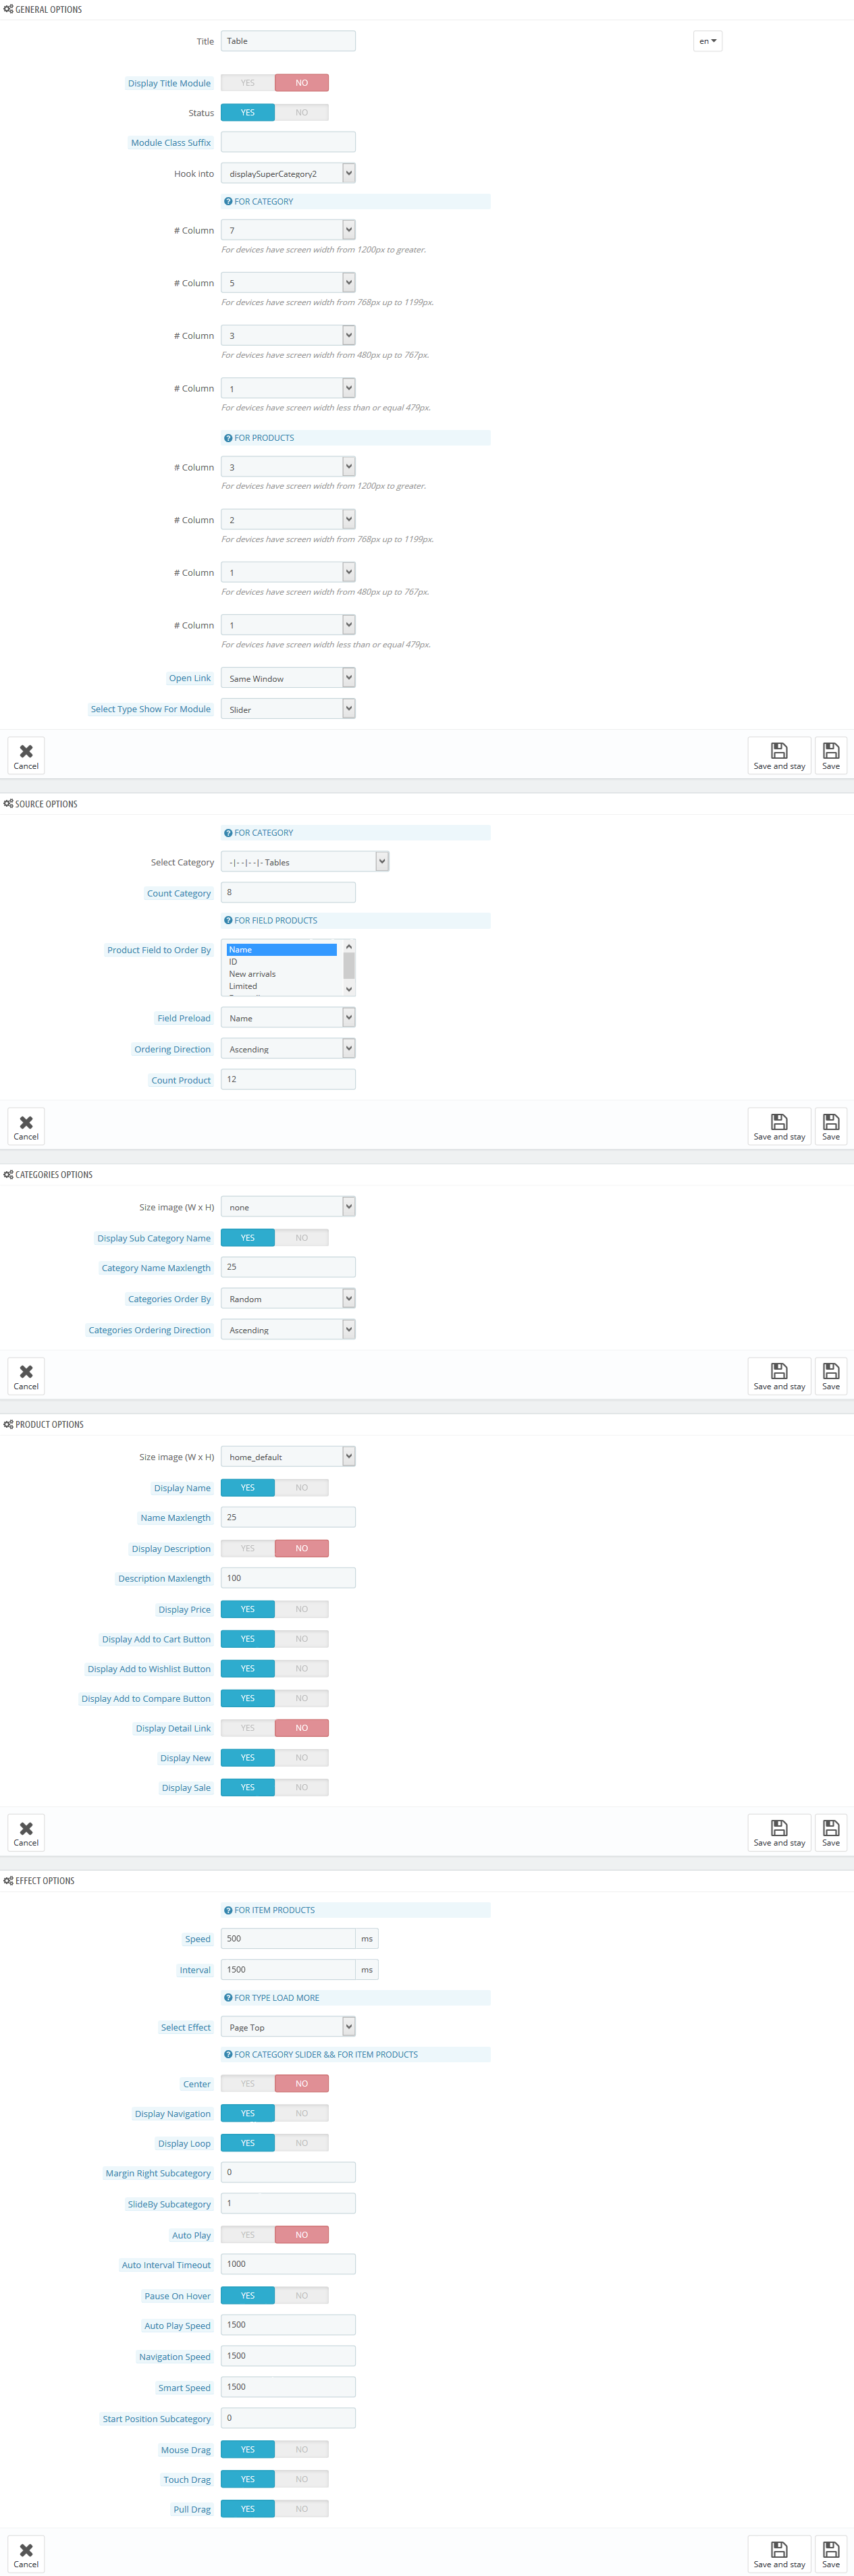
SP Super Category: Table
Frontend Appearance:
Backend Settings:
Step 1: In the Pretashop Admin Panel, navigate to Modules and Services >> Modules and Services >> look for “SP Super Category” module.
Step 2: In the “SP Super Category” configuration page, click button in the right corner to “ADD NEW MODULE”.
Step 3: You could configure this module like the following image.
6
SUPPORT
- SUPPORT - If you have any questions that are beyond the scope of this help file, please feel free to send us via: Support Tickets System
- FAQs - Go to Here to view more the Frequently Asked Questions.