1 Preparations - Back to top
The PrestaShop e-commerce engine requires a MySQL database to store data. Prior to installing PrestaShop, please make sure you have already created a MySQL database. This can be done through your hosting control panel using the phpMyAdmin tool.
Please check the detailed tutorial on how to create a MySQL database. If any issues occur, please contact your hosting provider for further assistance.
While installing your MySQL database, you will need to specify the database name, username, password and the database server. Remember these details as you will need them for PrestaShop installation.
2 Server Requirement - Back to top
Please make sure your hosting server meets thePrestaShop requirements:
- System: Unix, Linux or Windows. Unix is highly recommended.
- Web server: Apache Web server 1.3 or later, Microsoft’s IIS Web server 6.0 or later.
- PHP 5.2* or later.
- MySQL 5.0 or later.
- At least 32 Mb of RAM on your server (64 Mb is comfortable, the more the better).
Note: PrestaShop will work with PHP 5.1 or later, but the versions lower than 5.2 have bugs which might prevent some functions from working as expected (like invalid date timezone).
3 How To Download Pretashop - Back to top
To install PrestaShop, you need to download the PrestaShop engine package from the official website at prestashop
Just insert your name and e-mail into the Download box input and click the ‘Download’ button.
Please make sure your version of PrestaShop engine matches the template requirements (SP Nik Theme is Compatible with Pretashop version 1.6.x). All versions of PrestaShop are available at SourceForge.
4 How To Extract Files - Back to top
Once the PrestaShop engine package is downloaded, you will need to extract its files and folders from the archive.
This can be done with any archive manager like WinZip(PC), StuffitExpander(MAC), etc.
Please note: if your hosting control panel has the option to ‘Extract’ files, you can use it to extract the files directly on your server after the .zip file is uploaded.
5 How To Upload PrestaShop engine files - Back to top
If you have extracted the files locally to your computer, you will need to upload them to your hosting server.
This can be done using the hosting control panel File Manager or third party FTP Manager applications like FileZilla, TotalCommander, CuteFTP, etc.
6 How To Install - Back to top
There are two ways to install SP Nik Theme
- Quickstart Installation: By using this package, you will set the theme exactly as our Demo with sample data.
- Manual Installation (include of Theme Installation Package): You will need only be using the zipped files in “Theme” folders.
6.1 Quickstart Installation
We provide SP Nik package for each theme which aims to ease the installation for users. It will help you save much time of installing and configuring if you plan to start your site from the beginning. Please following steps below:
- Step 1: Download a quickstart package
- Step 2: Extract the downloaded package “sp_nik_quickstart_p16_v1.0.0.zip” in your localhost (or your hosting). In Quickstart folder you will see the extracted folder that include all sample data
- Step 3: Start installation by opening browser and navigate to your URL (where the Quickstart uploaded) to load default Pretashop installer. Please follow each step of the Installer so that the installation process can be set.
- Installation Assistant (Choose your language)
Please select the installation language
Please note: the installation language option will not affect your store language. By default PrestaShop is offered in English. You can install additional localization packages to change the store language.
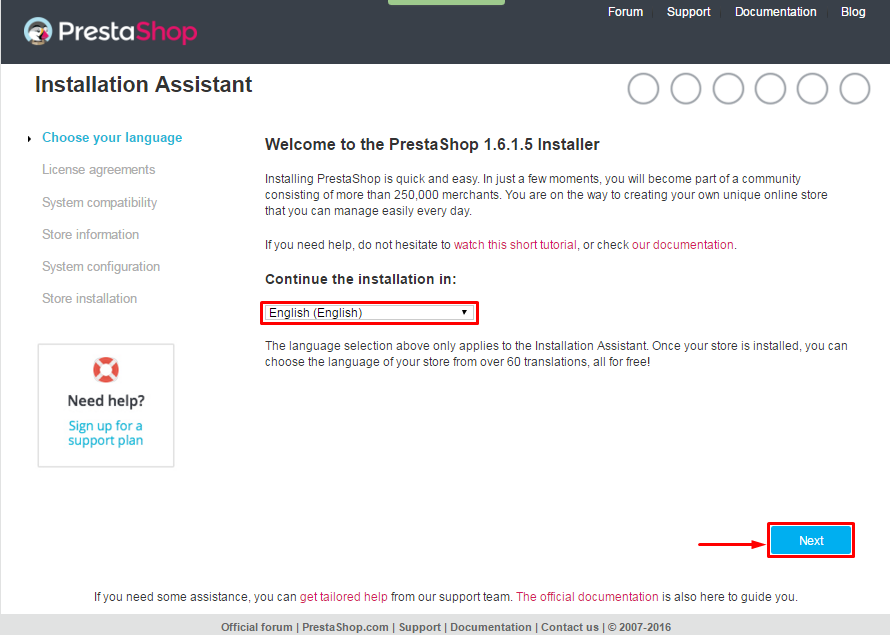
When you are done, click the ‘Next’ button.
- Installation Assistant (License agreements)
Please check the license agreement.
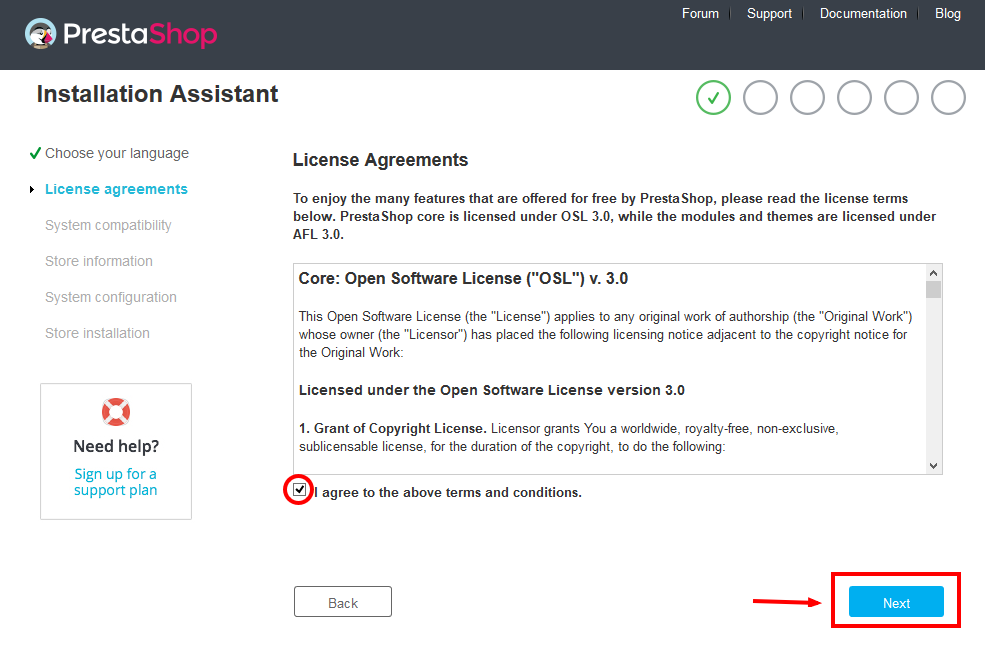
When you are done, click the ‘Next’ button.
- System Compatibility
Check the PHP settings and directory permissions. In case of any errors, please contact your hosting provider for further assistance.
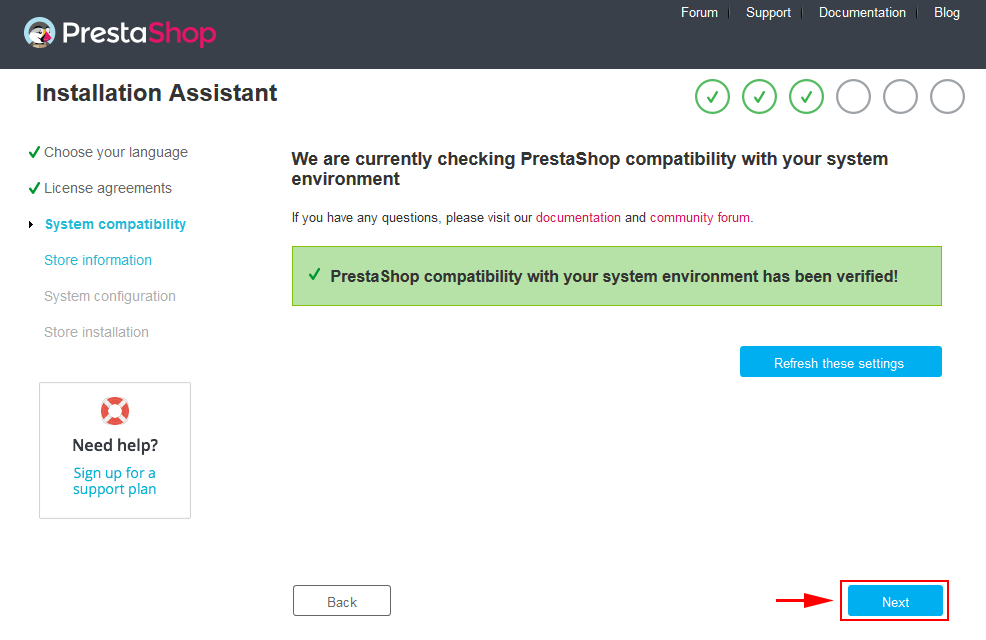
If everything is correct, click the ‘Next’ button.
- Store Information
Now add required information for your store: Shop name, Main activity, Country, Shop timezone and add the account info: first name, last name, email and password. The information is very important so please make sure you store it somewhere. Click “Next” to next step.
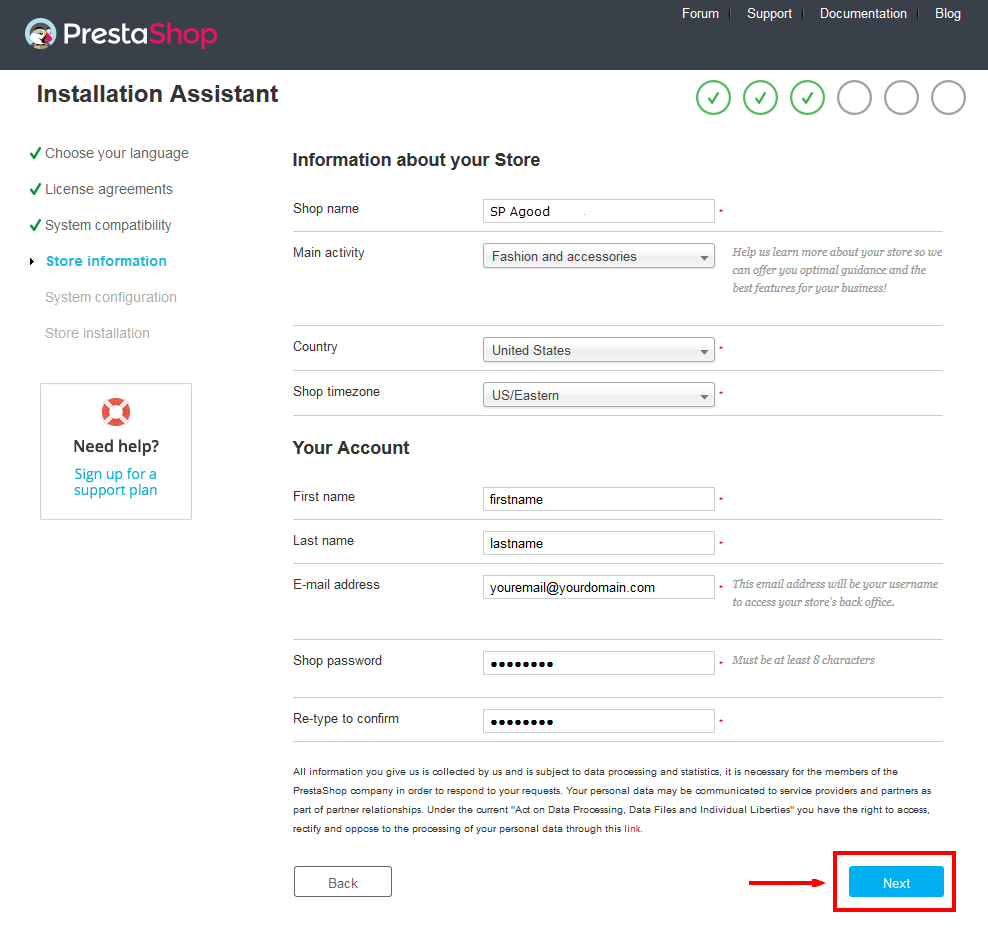
When you are done, click the ‘Next’ button.
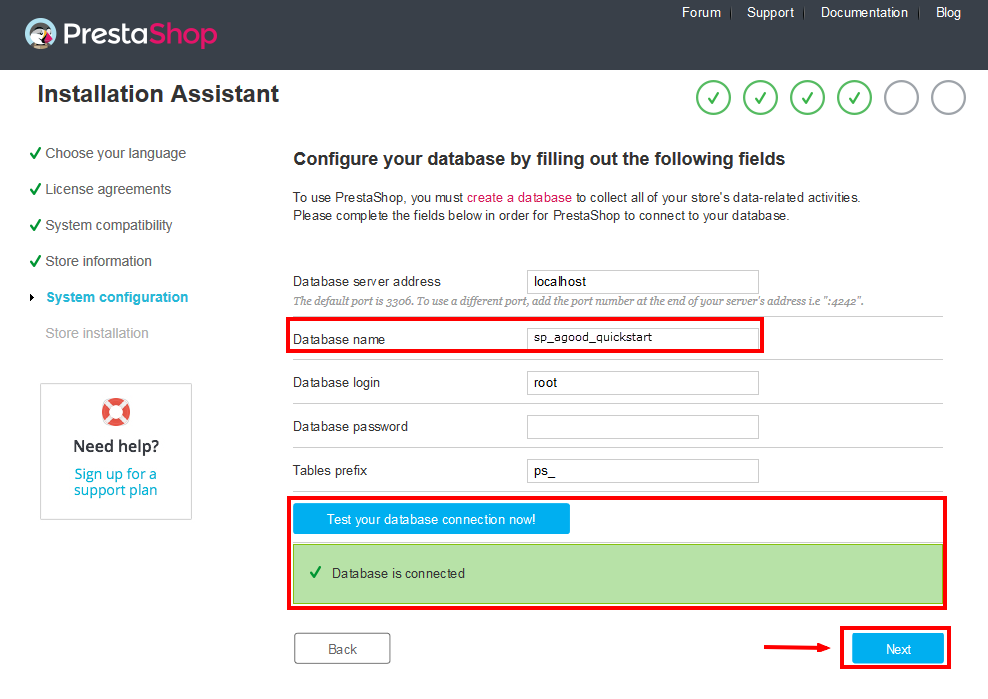
- System Configuration
Here is the database configuration panel, we need to create database first.
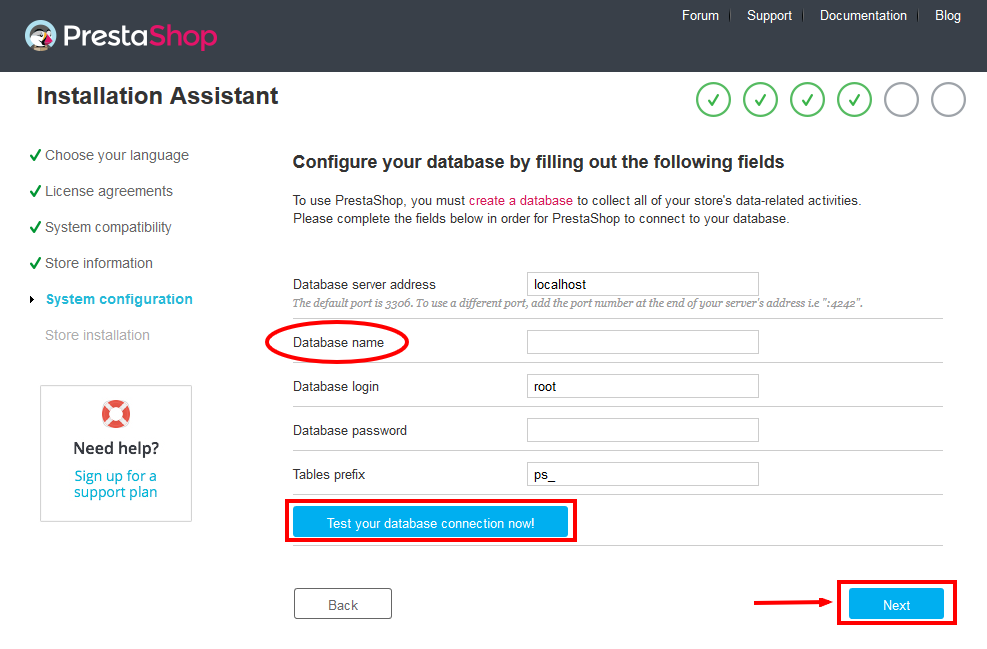
Access your database panel and create database for your site. Add database name and then hit “Create” button.

Database is created successfully, copy the database name, paste database name in the “Database name” field and then you can test to see if database configuration is correct or not. Database configuration is connected, click “Next” to move to next step.
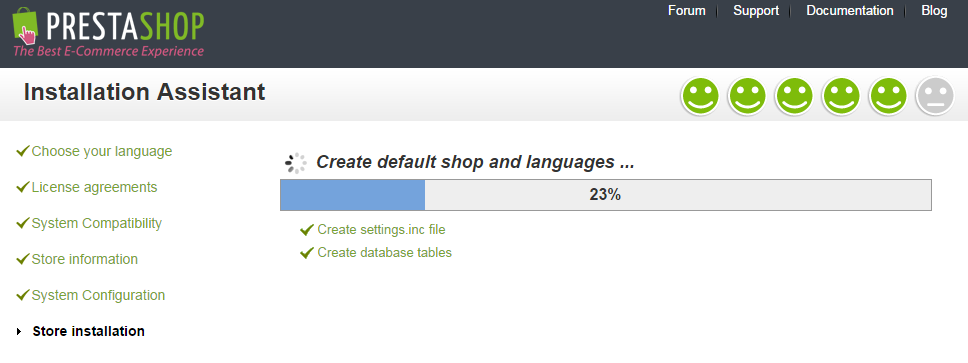
- Finish installation: This process could take you some time
And finally, go to the frontend or backend as you want:
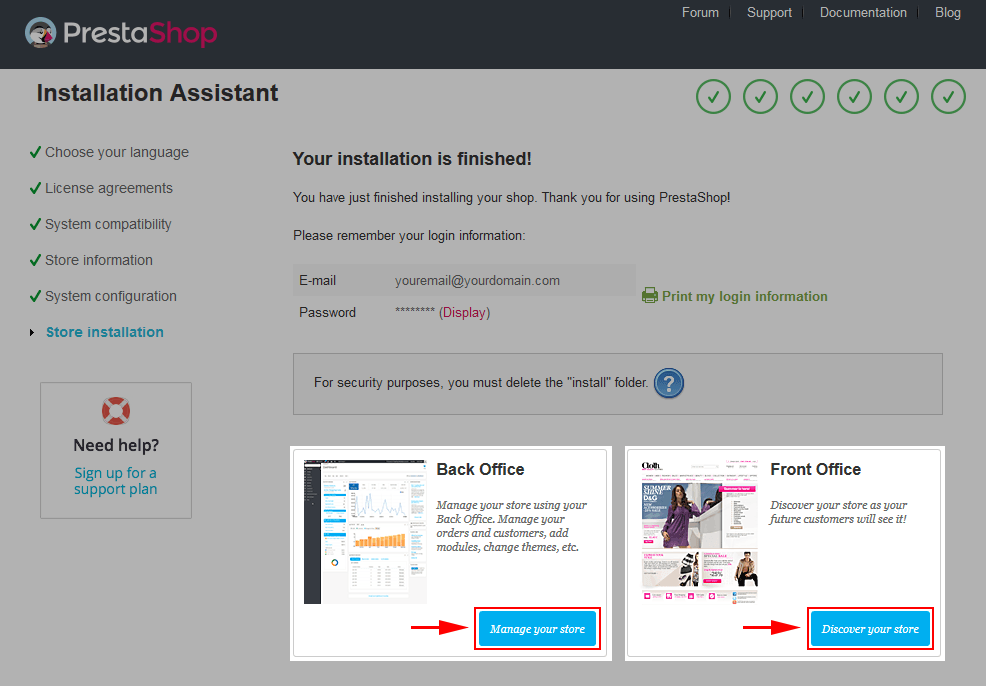
For security reasons you need to delete the /install/ directory on your hosting server.
6.2 Manual Installation
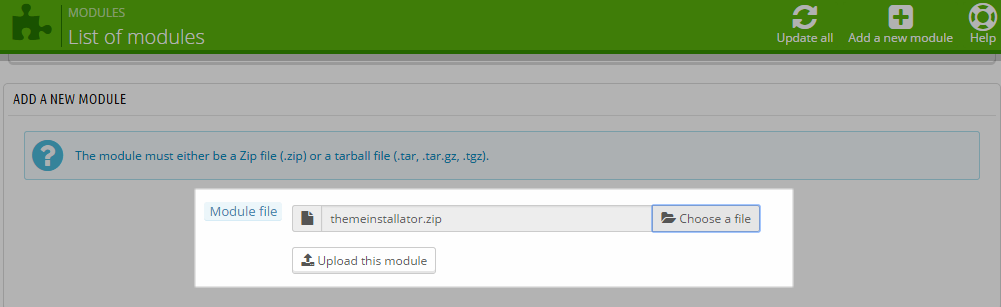
Step 1: Install “themeinstallator” Module.
1. Login to your Prestashop admin panel and navigate to MODULES -> Modules. At the top of the page click the Add a new module button.

2. Select your module.zip file “themeinstallator.zip” and click “Upload this module” button
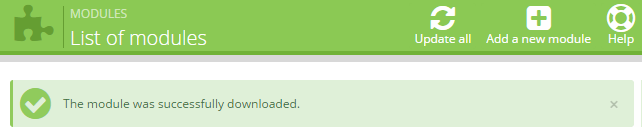
3. The uploading process will be started. You will see the message that the module has been successfully downloaded
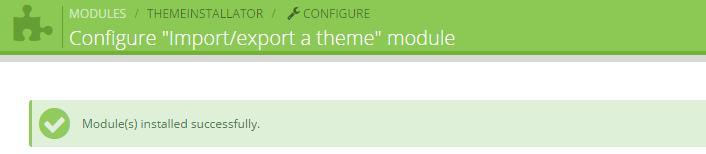
4. The new module will be located in the modules list. Search the name of module and Click on the Install button to install the module.

5. Finally, you will see a notice message: “Module(s) installed successfully”.
Step 2: Install Theme
Note: To install theme, firstly you must extract the theme folder and get “theme.zip” file to install.
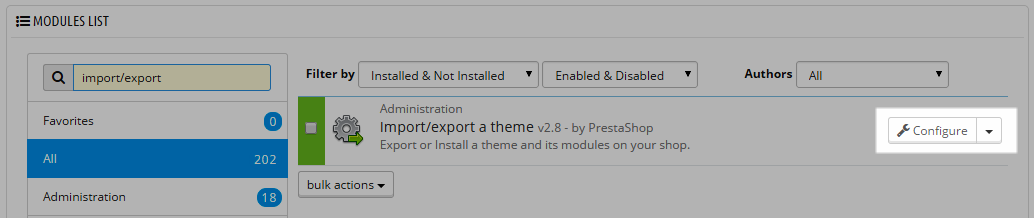
1. Find to the module that you have installed and clicked on Configure button to configure the module.
2. Navigate to “Import from your computer” >> choose your theme.zip file in theme folder >> Next.
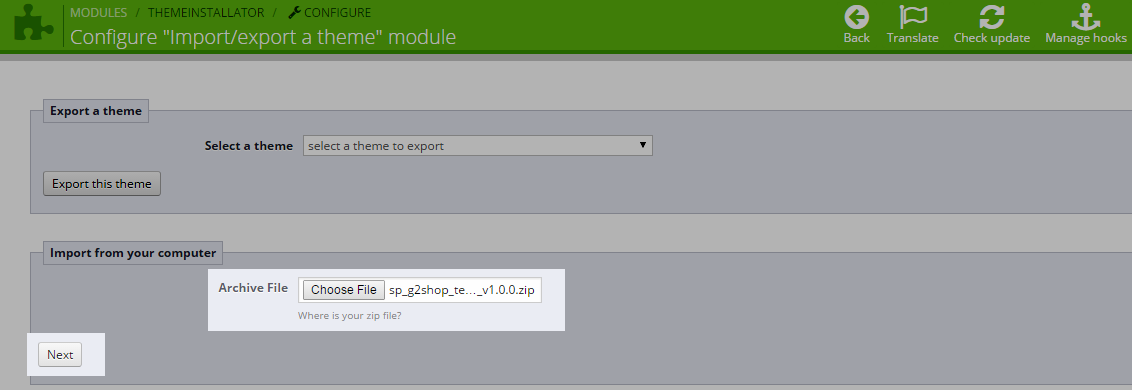
3. The uploading process will be started. You will see the message that the theme has been successfully uploaded. Your new theme preview will appear in the list of installed themes.
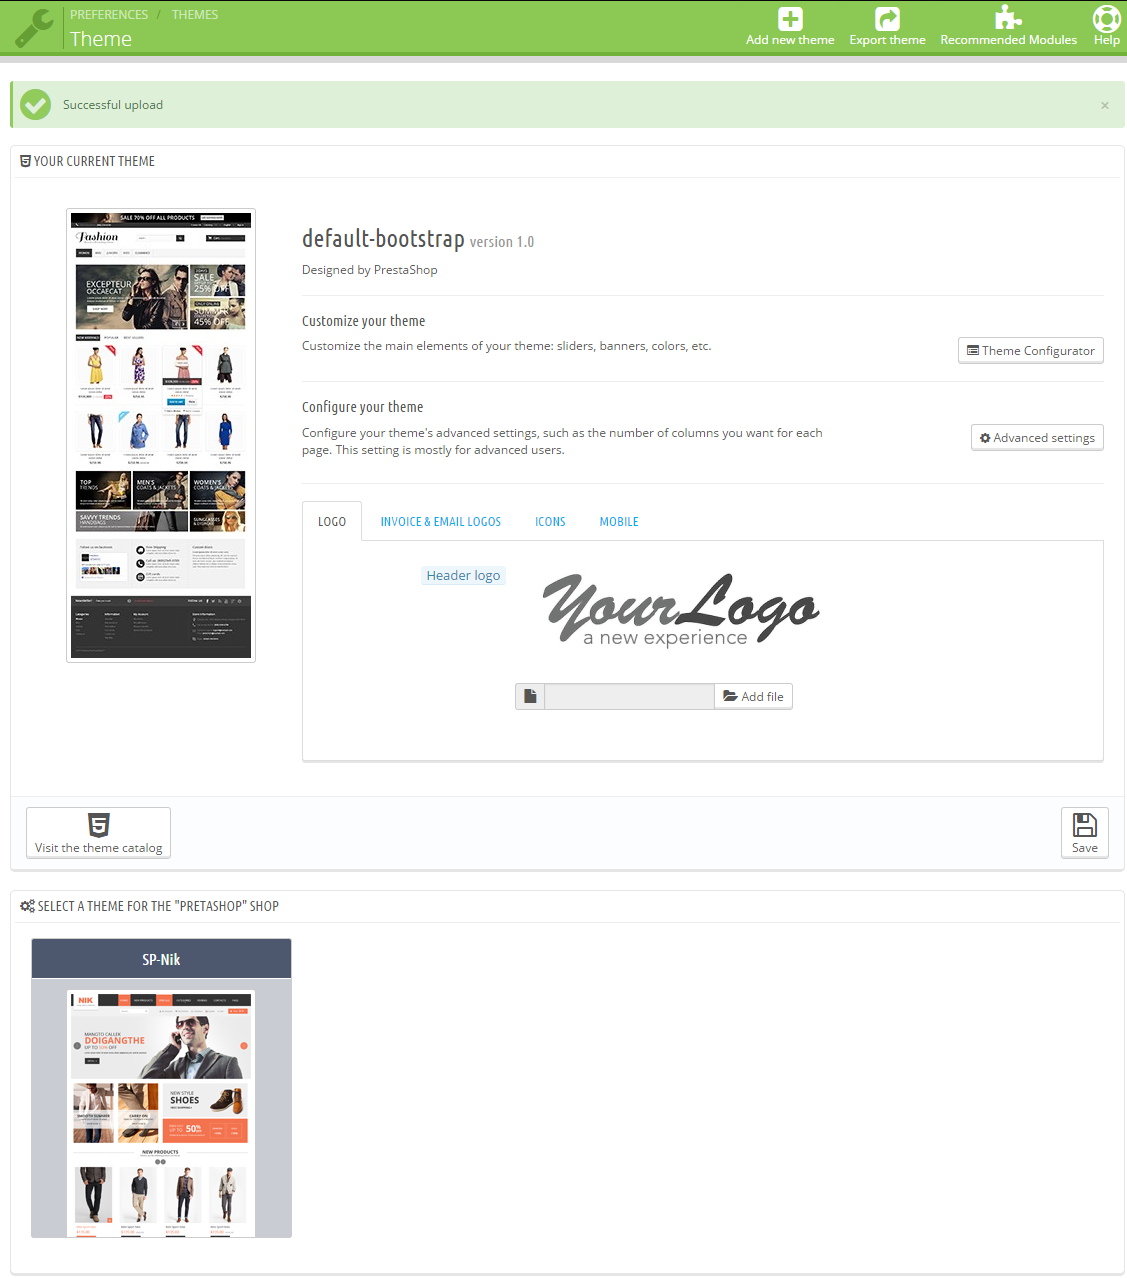
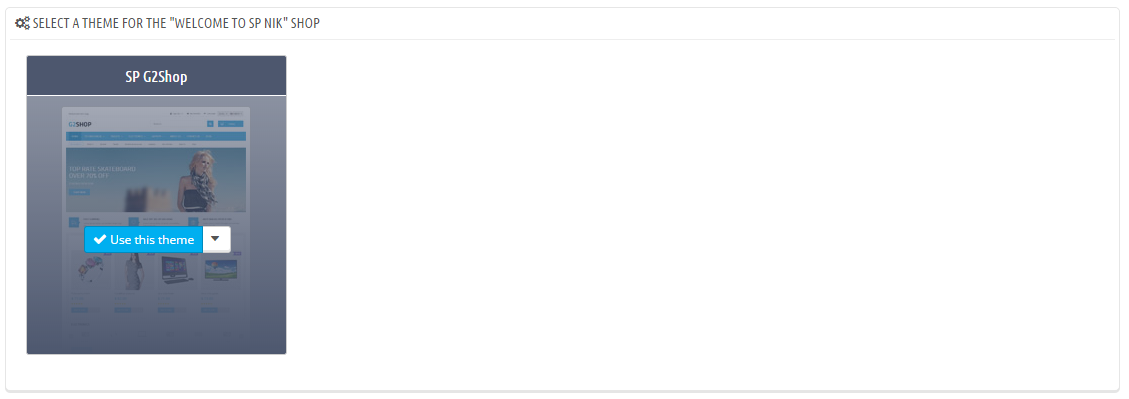
4. In order to activate the theme, roll-over cursor at the theme preview icon and click Use this theme.
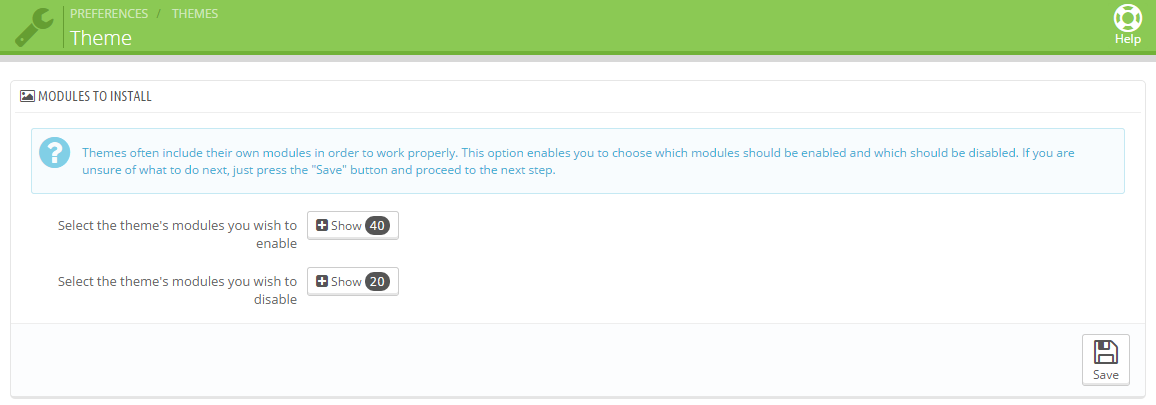
5. You should see the screen with the information of the modules used in the theme, the number of modules that are turned on and off. Click Save in order to continue.
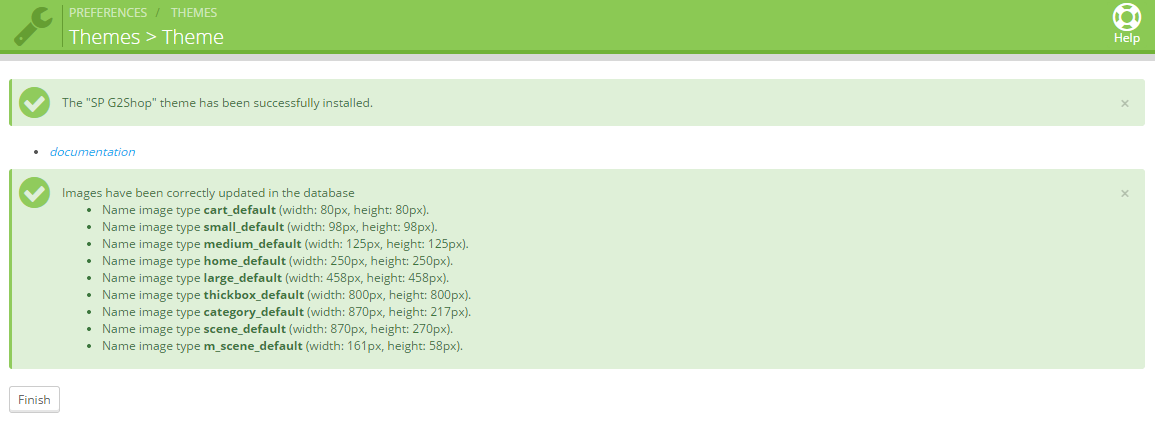
6. After this you will see the pop-up with the message about successful theme activation: the theme has been installed successfully, images have been re-generated up to the defined in theme dimensions. To finish installation click Finish button.
7 Basic Tutorials - Back to top
7.1 How to change store name
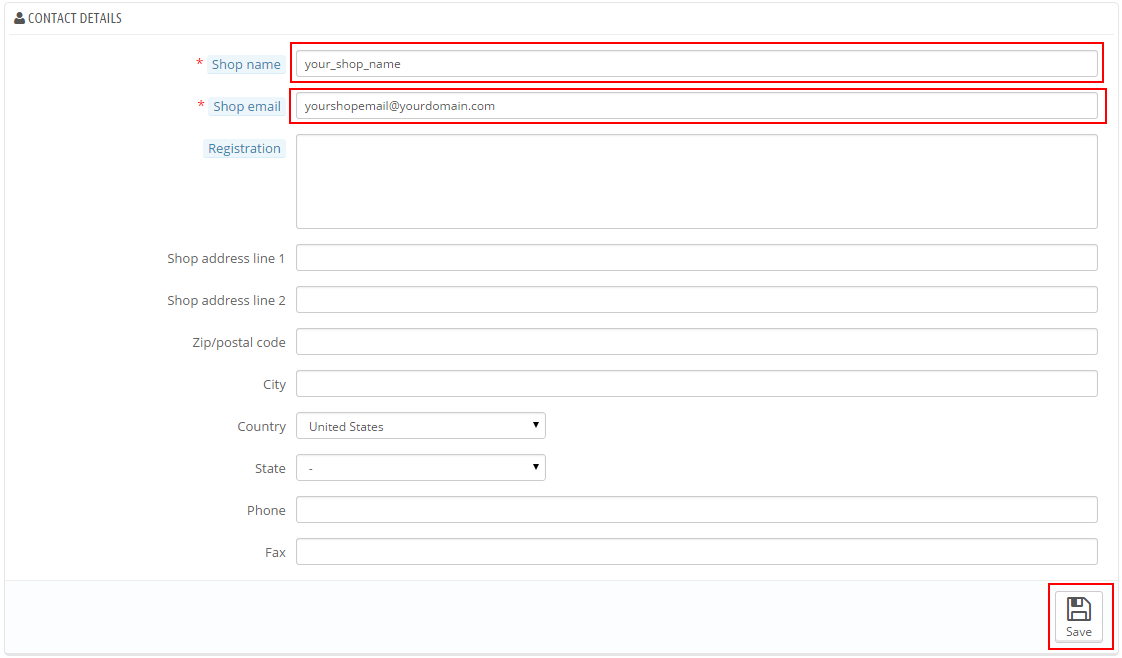
In order to change your store title, open the PrestaShop admin panel and go to Preferences > Store Contacts, the Contact details section.
In the Shop name field, type in your store name and click the Save button to save your changes.
7.2 How to edit slider
To edit slider images, find the Image slider for your homepage module on the Modules page of your PrestaShop store. It is located in the Front Office Features modules section. Click the Configure button to edit the module.

8CONFIGURATION - Back to top
8.1 How To Create Categories Menu
Step 1: Creating a new category
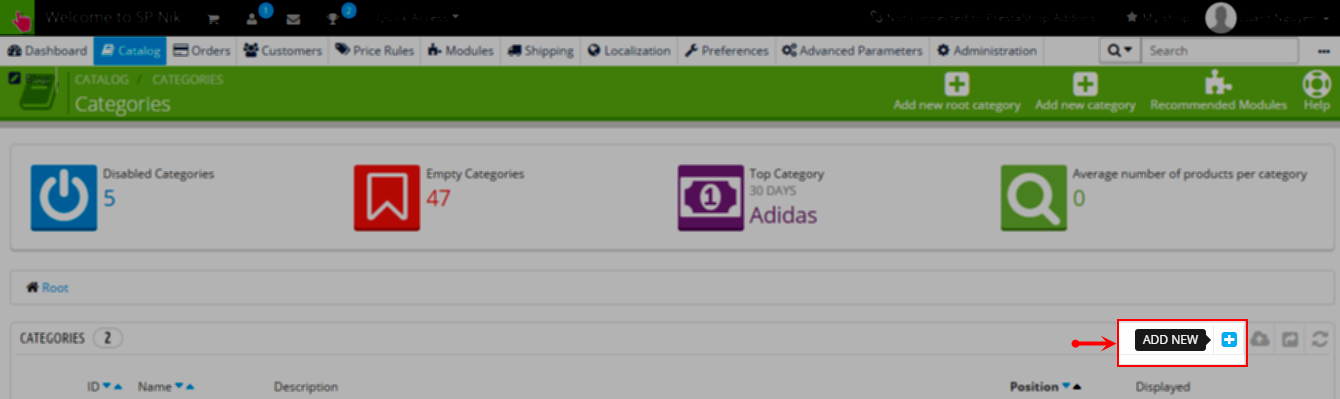
- Log into your PrestaShop Admin Panel.
- Navigate to the Catalog >> Categories menu.
- To create a new category, click the Add New button.
-
When the page with the category settings appears, enter the data required:
- Name: give your category a name. You can also put category titles for different languages in this field if you’re using a multi-language store.
- Displayed: choose to enable or disable your category.
- Parent Category: if you wish to create a subcategory for a category other than the home page, choose the category under which it will appear.
- Description: add the content you need to the new category. You can use the visual editor to format your text, insert images, and turn on the source HTML code of the description.
- Image : click the Add file button to upload an image from your computer.
- Thumbnails : you can add three thumbnail images that will be shown in the menu drop down on your front end.
- Meta title: the title that will appear on the search engines when a request is made by a customer.
- Meta description: your category description that will appear in search engine results.
- Meta Keywords: keywords to make your store recognizable by search engines. You can enter several of them, separated by commas, as well as expressions which must be indicated in quotation marks.
- Friendly URL : enables you to rewrite the addresses of your categories as you wish.
- Group access : the option to restrict access to the category and its products for certain customer groups.
- Click the Save button to save your new category.
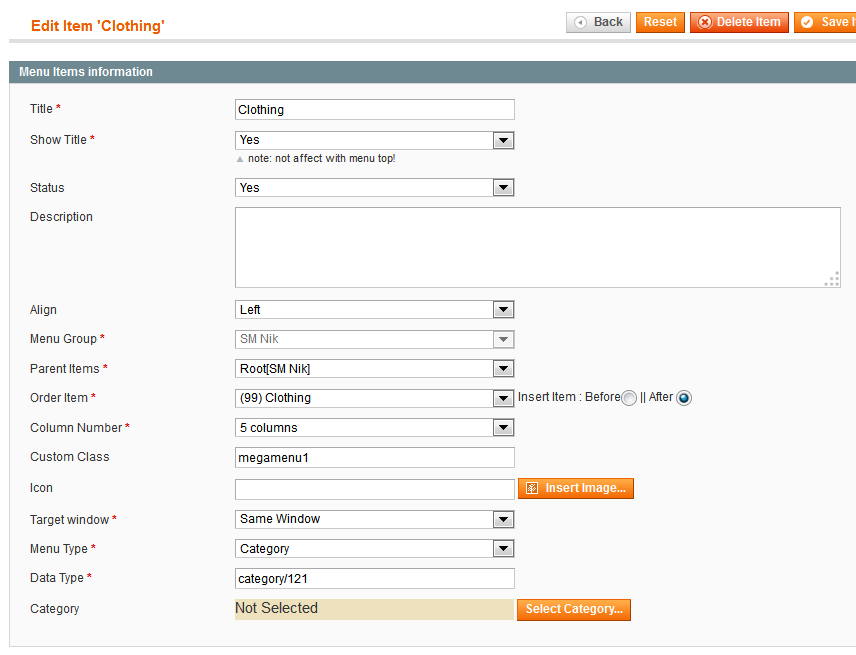
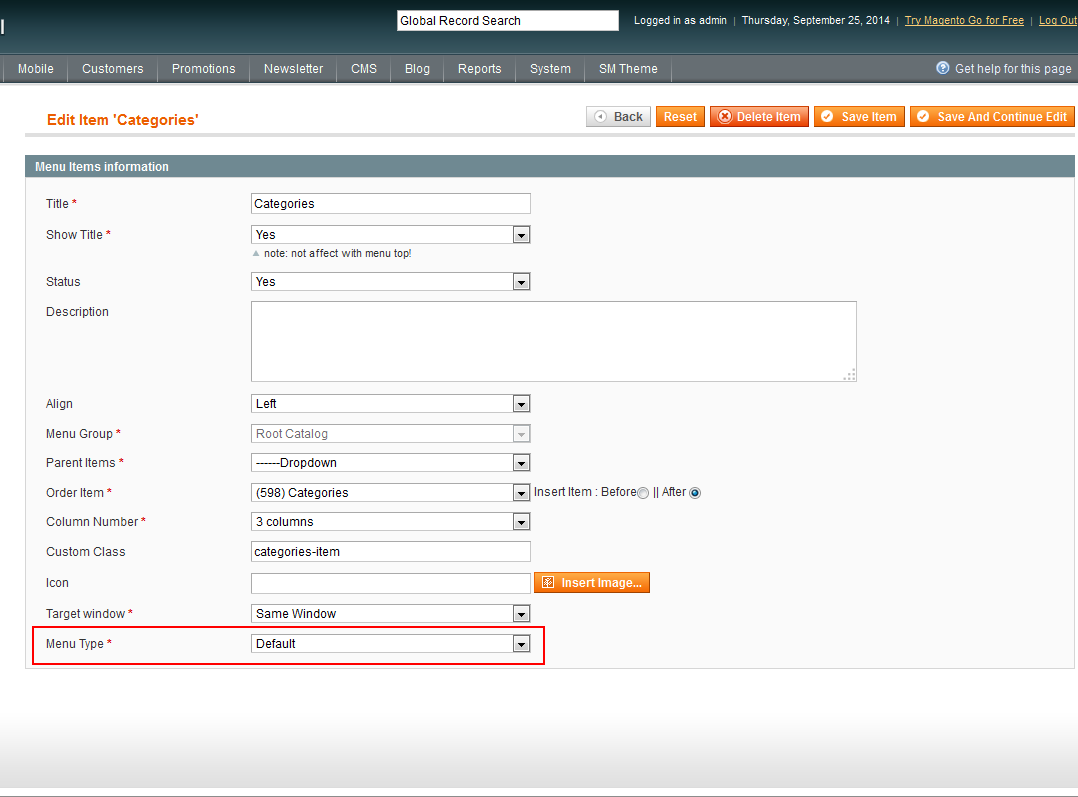
Step 2: Adding a new category link to the top menu
- Navigate to Modules -> Modules and look for Top horizontal menu.
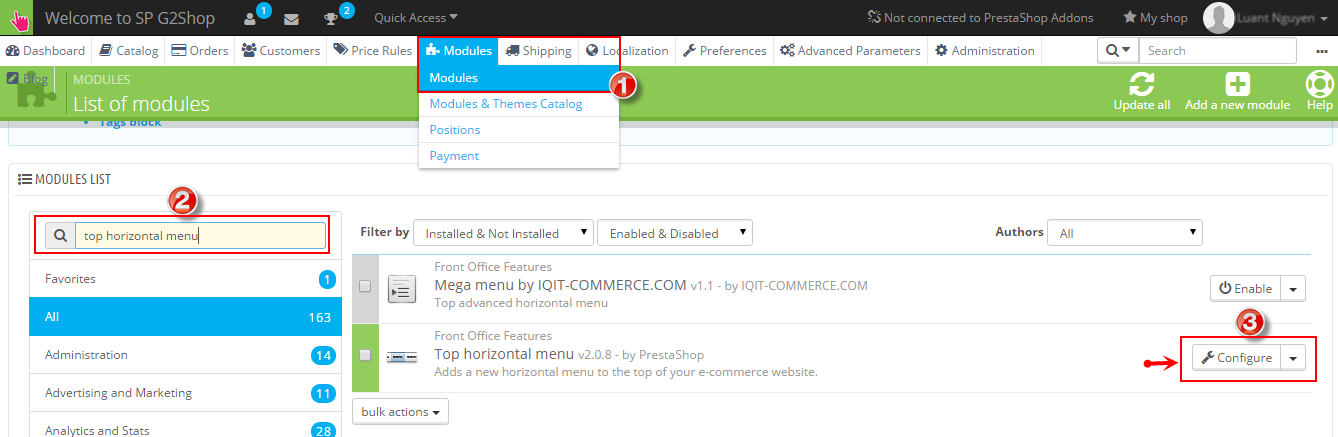
- Click the Configure button to access the module configuration page.
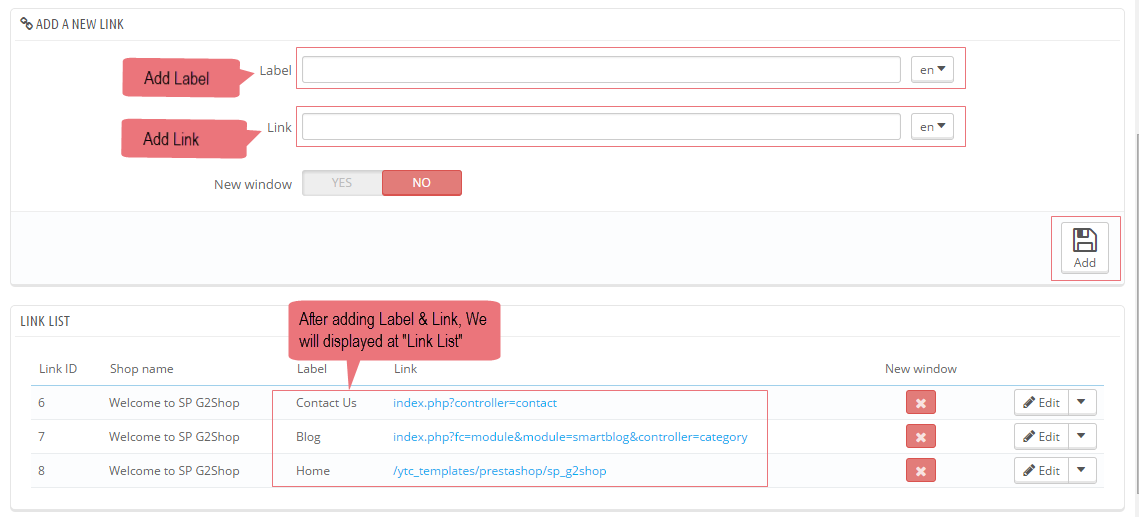
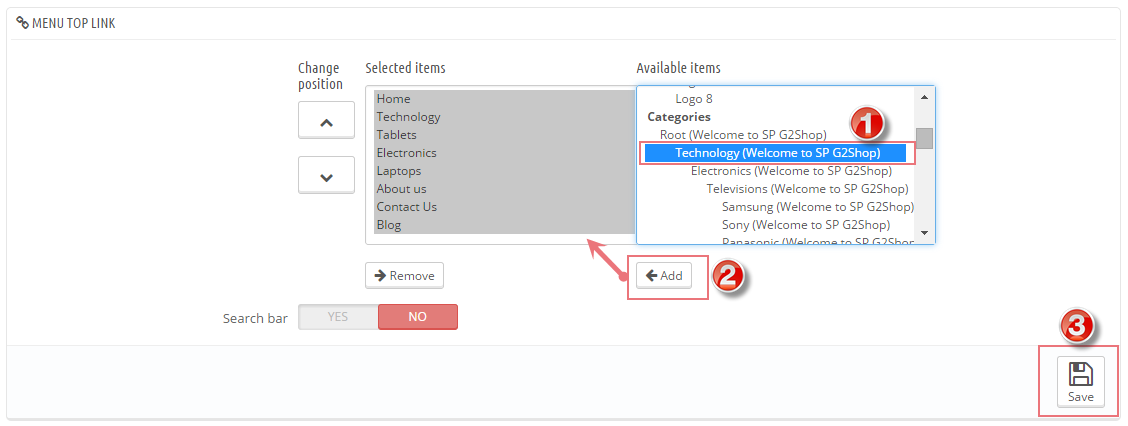
- The left column displays current menu elements and the right one displays available menu elements. You will see the list of all your categories, CMS pages, manufacturers and suppliers as well as the option to add the link to the product page. You may also add custom links to the menu list using the Add a new link section.
- To add a new element to the frontend menu, you should select the required element on the right and click the Add button.
- Click Save to confirm adding a new menu item for the top menu.
- Please check your web-store frontend. We added a new category and linked it to the top menu successfully.

8.2 How To Configure Extensions
Note: Please readmore here about How to work with prestashop modules
List of modules position are used in SP Nik Theme:
- Quick search block
- User info block
- Currency block
- Language selector block
- Cart block
- Image slider for your homepage
- Theme configurator
- SP New Product
- Newsletter block
- SP Bestseller Products
- SP Twitter Slider
- SP Manufacturer Slider
- Custom CMS information block
Quick search block
Frontend Appearance:

Backend Settings:
In the Pretashop Admin Panel, navigate to Modules >> Modules >> look for “Quick search block” module >> click arrow down in the right corner, it will display a list box that you can configure such as “Disable on mobiles, Disable on tablets, Disable on computers, Reset, Uninstall, Mark as favorite, Delete”.
- Disable on mobiles: This will disable the front-office view of the module only for mobile devices (smartphones, etc.).
- Disable on tablets: This will disable the front-office view of the module only for tables.
- Disable on computers: This will disable the front-office view of the module only for desktop computers.
-
Reset: This will restore the module’s settings to their defaults.
- Uninstall: This will disable the module and delete its data
- Mark as favorite: This will add the module to your Favorites list
- Delete: This will remove the module from the modules list, and delete its files and folders from your server.
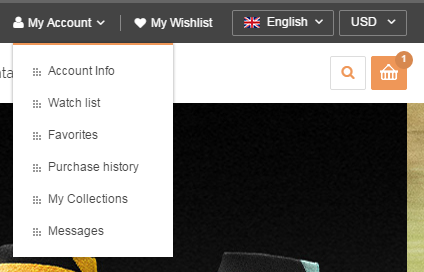
User info block
Frontend Appearance:

Backend Settings:
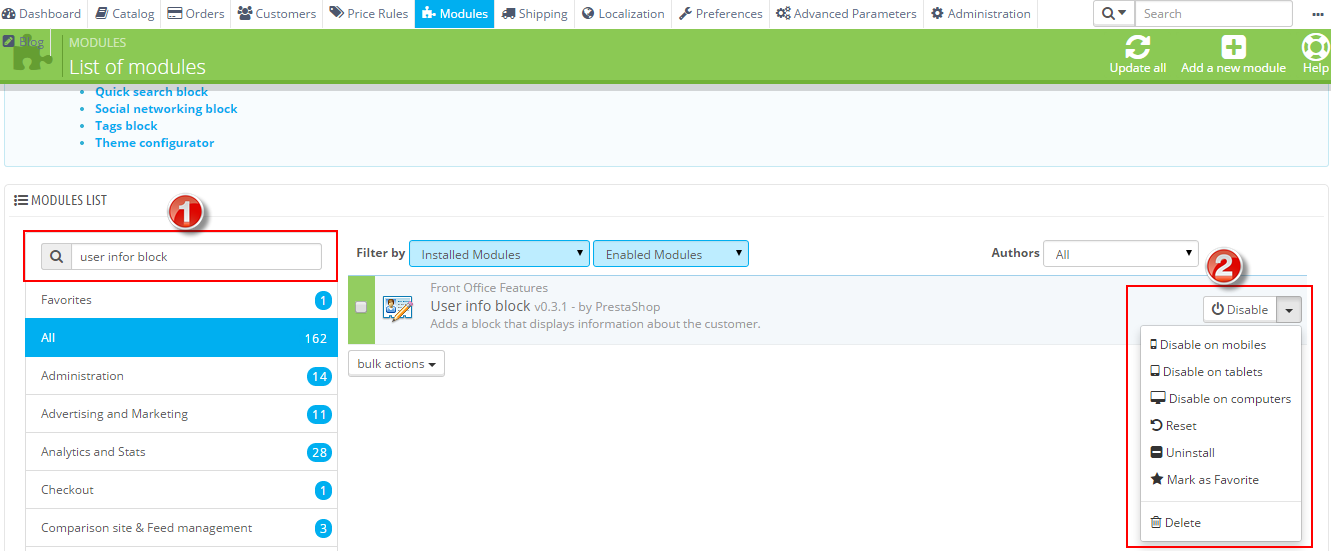
In the Pretashop Admin Panel, navigate to Modules >> Modules >> look for “User info block” module >> click arrow down in the right corner, it will display a list box that you can configure.
Currency block
Frontend Appearance:
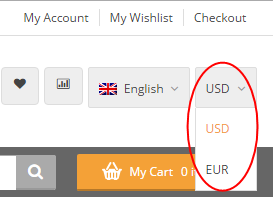
Backend Settings:
In the Pretashop Admin Panel, navigate to Modules >> Modules >> look for “Currency block” module >> click arrow down in the right corner, it will display a list box that you can configure.
Language selector block
Frontend Appearance:
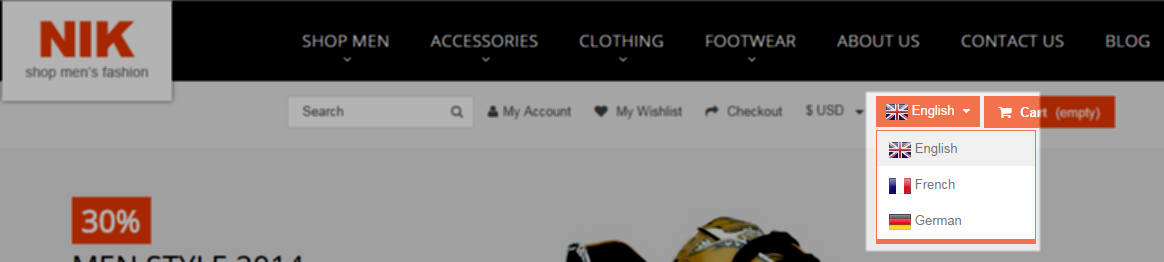
Backend Settings:
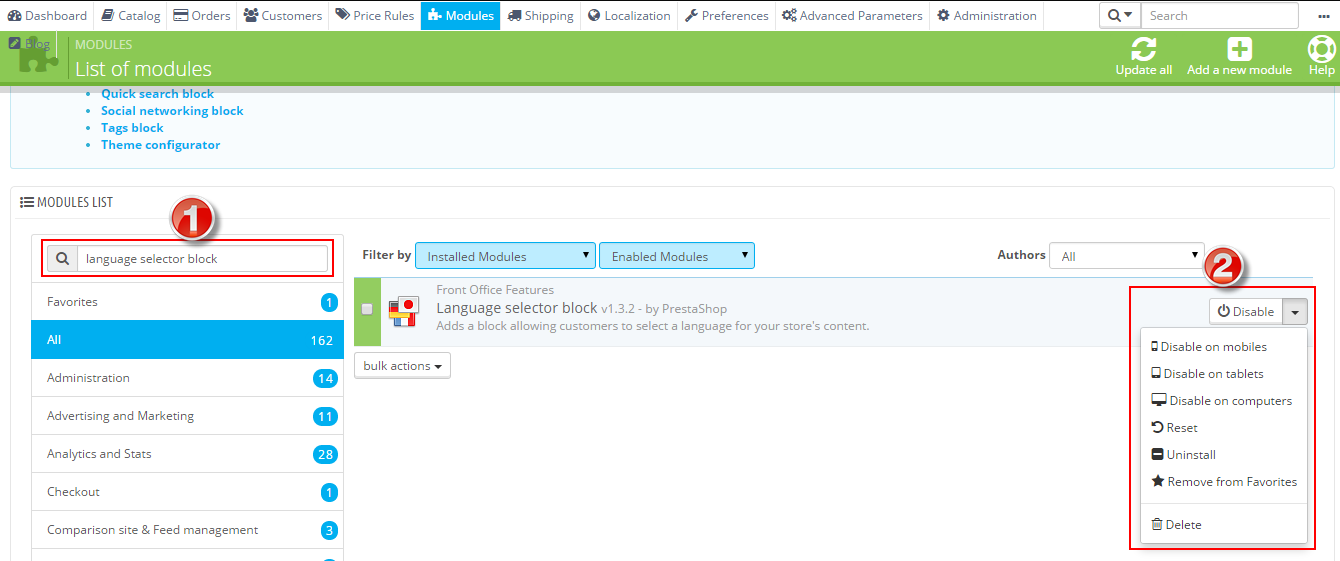
In the Pretashop Admin Panel, navigate to Modules >> Modules >> look for “Language selector block” module >> click arrow down in the right corner, it will display a list box that you can configure.
Cart block
Frontend Appearance:
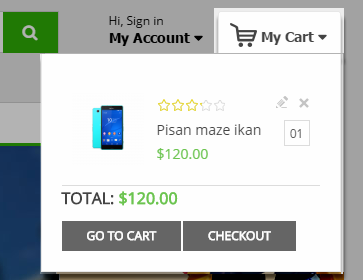
Backend Settings:
In the Pretashop Admin Panel, navigate to Modules >> Modules >> look for “Cart block” module >> click “Configure” button to configure.

Below is the configuration of “Cart Block” Module.
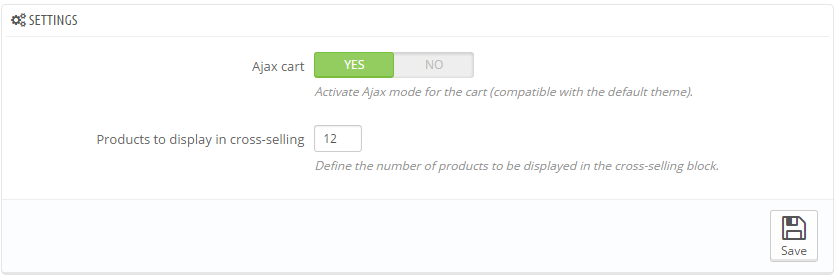
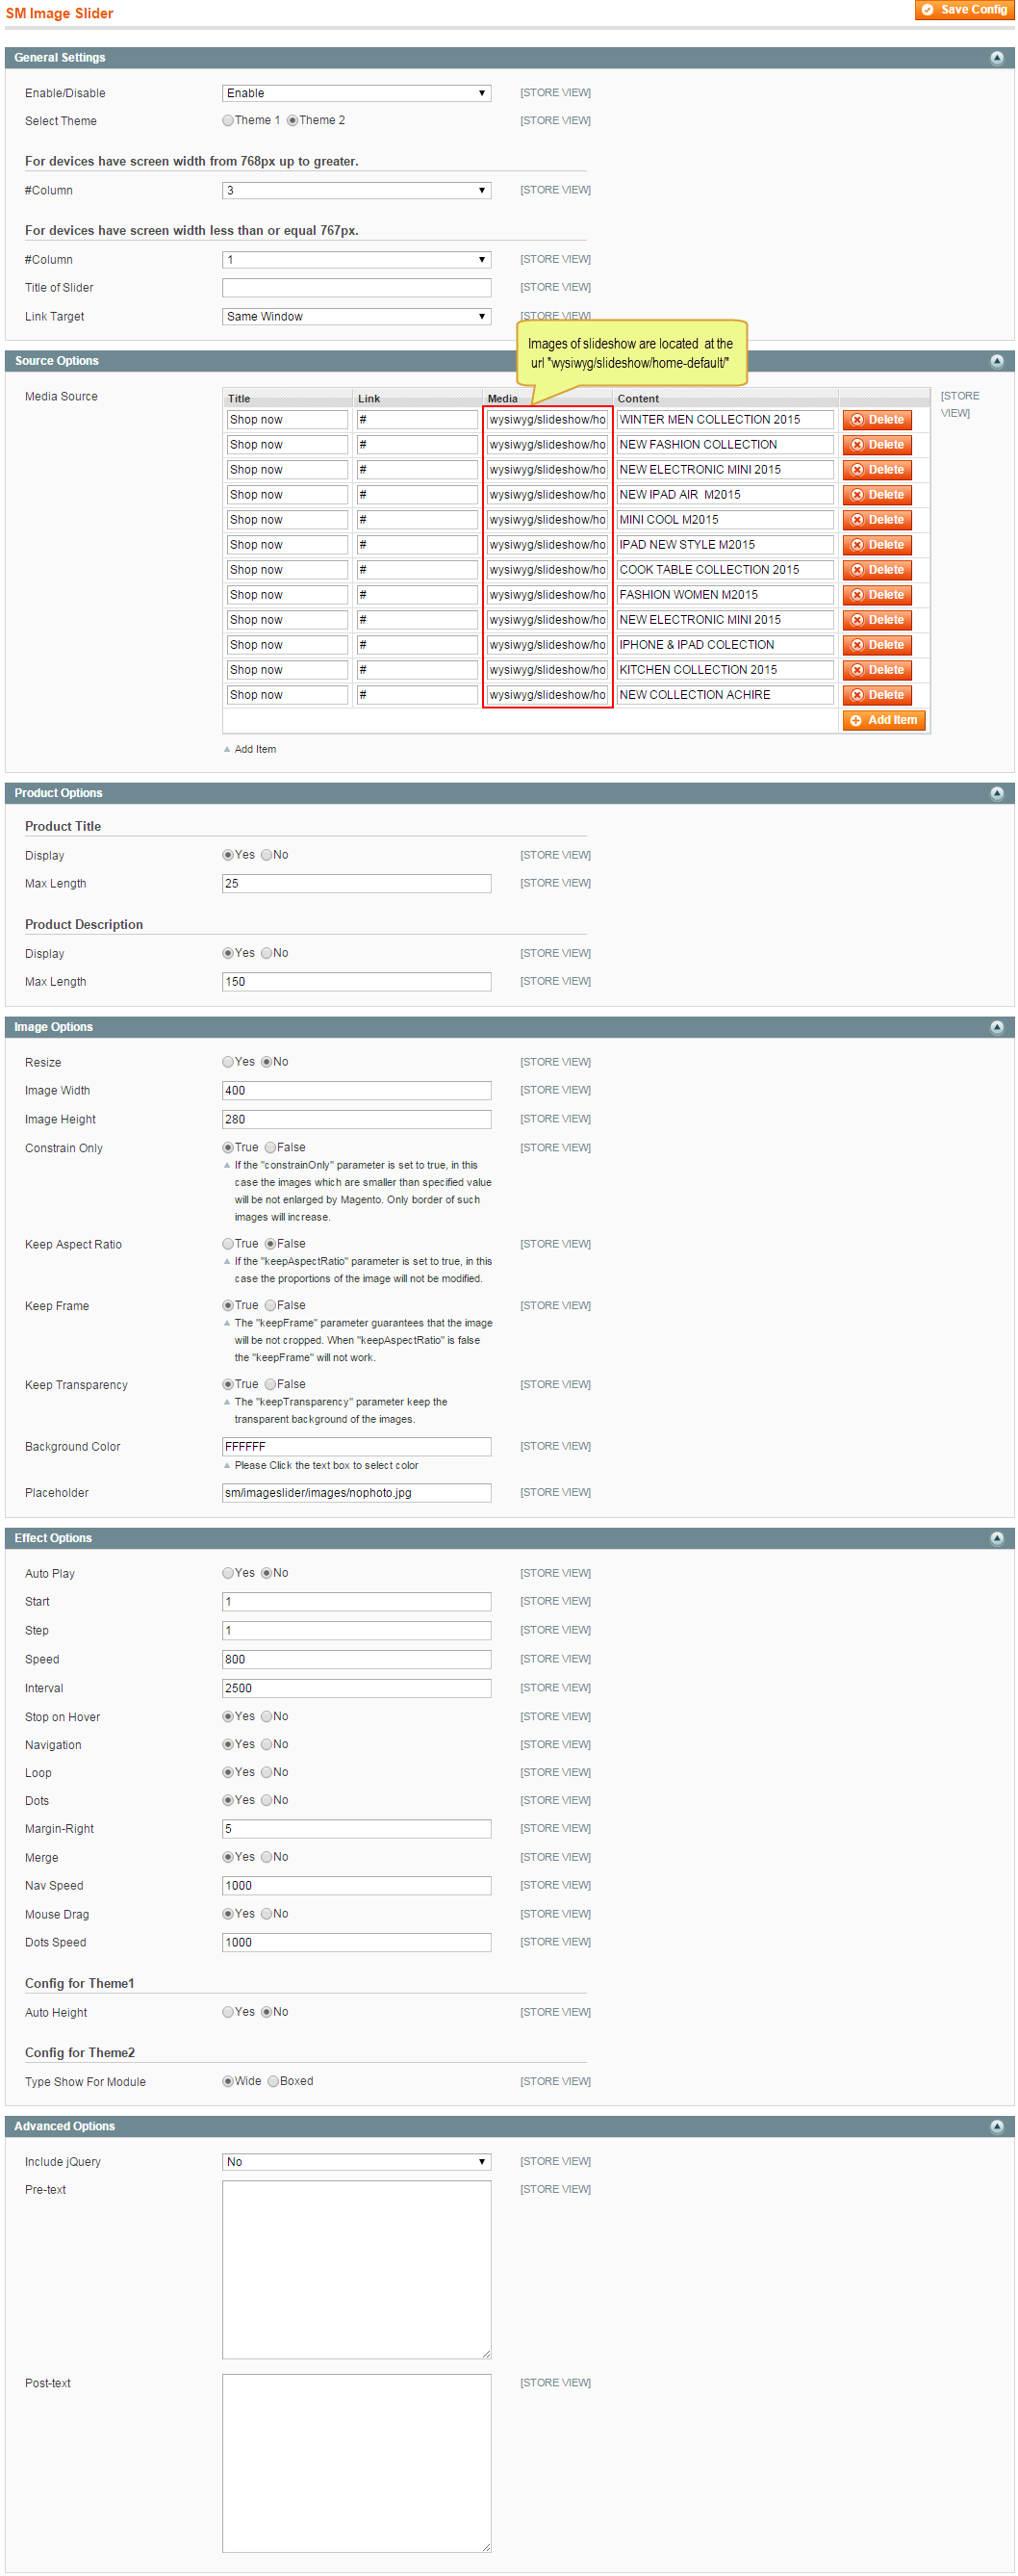
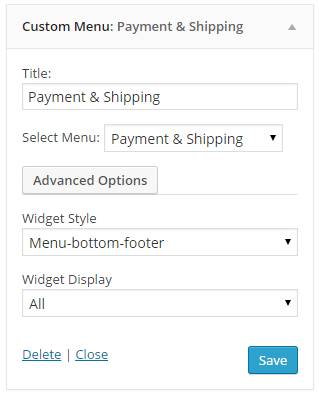
Image slider for your homepage
Frontend Appearance:
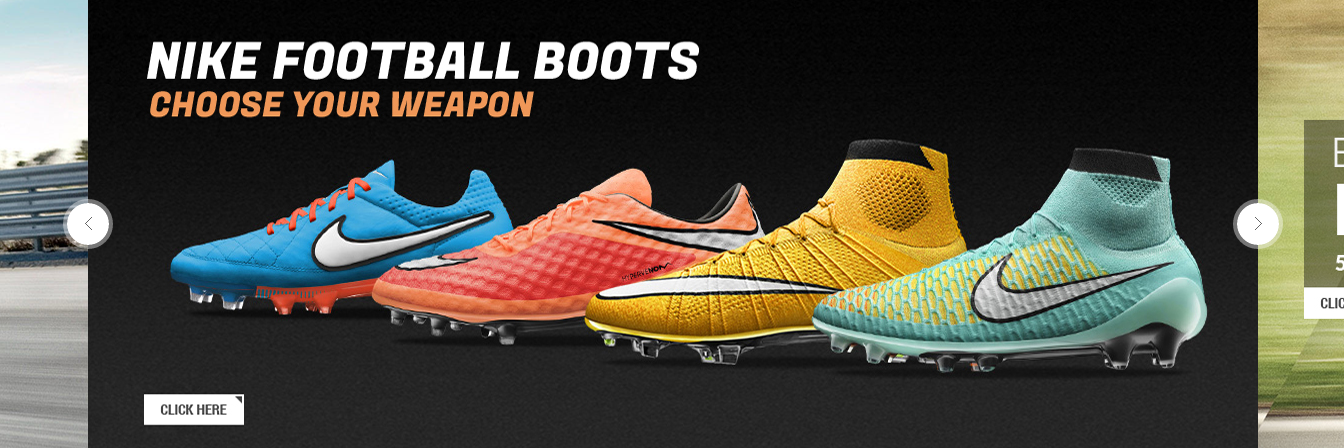
Backend Settings:
In the Pretashop Admin Panel, navigate to Modules >> Modules >> look for “Image slider for your homepage” module >> click “Configure” button to configure.
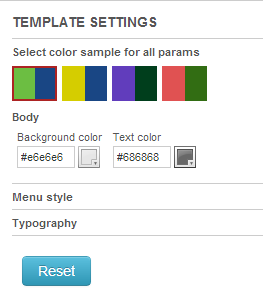
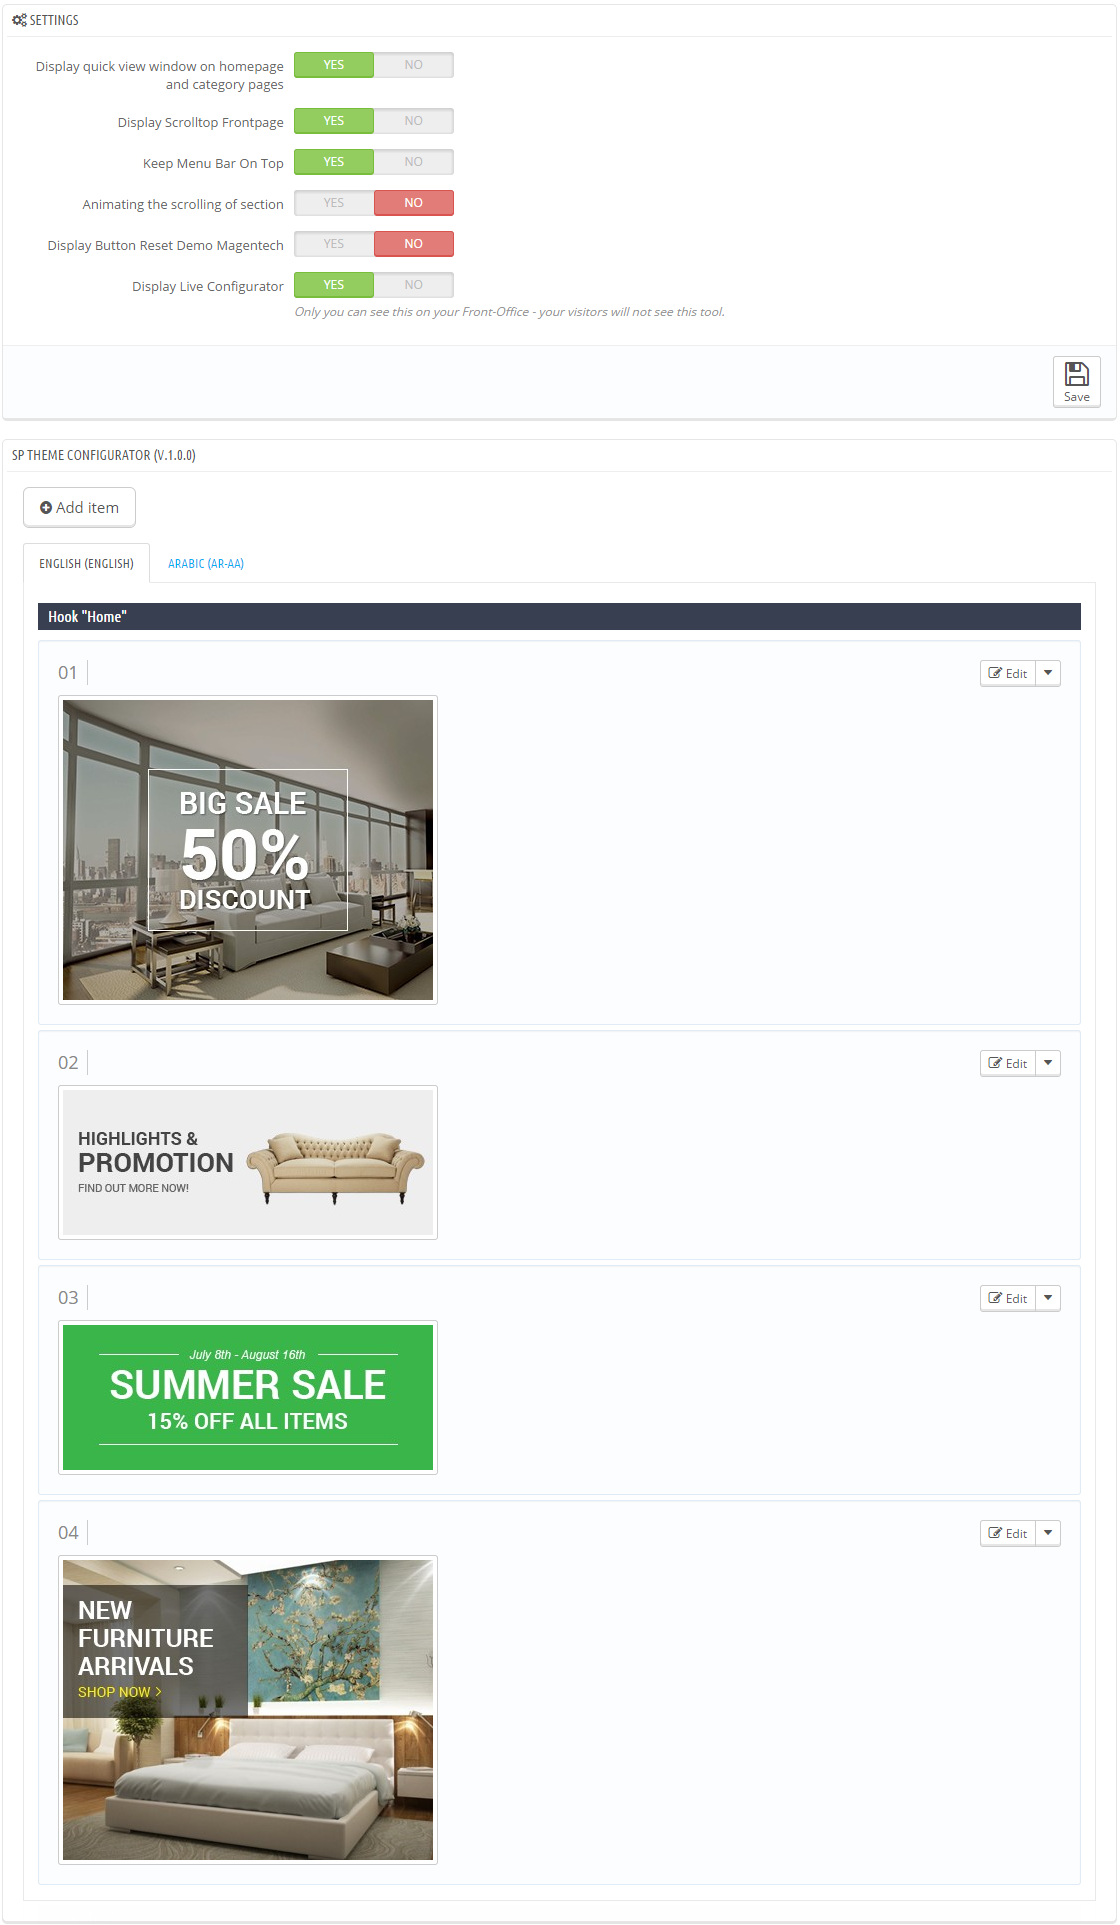
Theme configurator
Frontend Appearance:

Backend Settings:
In the Pretashop Admin Panel, navigate to Modules >> Modules >> look for “Theme configurator” module >> click “Configure” button to configure.

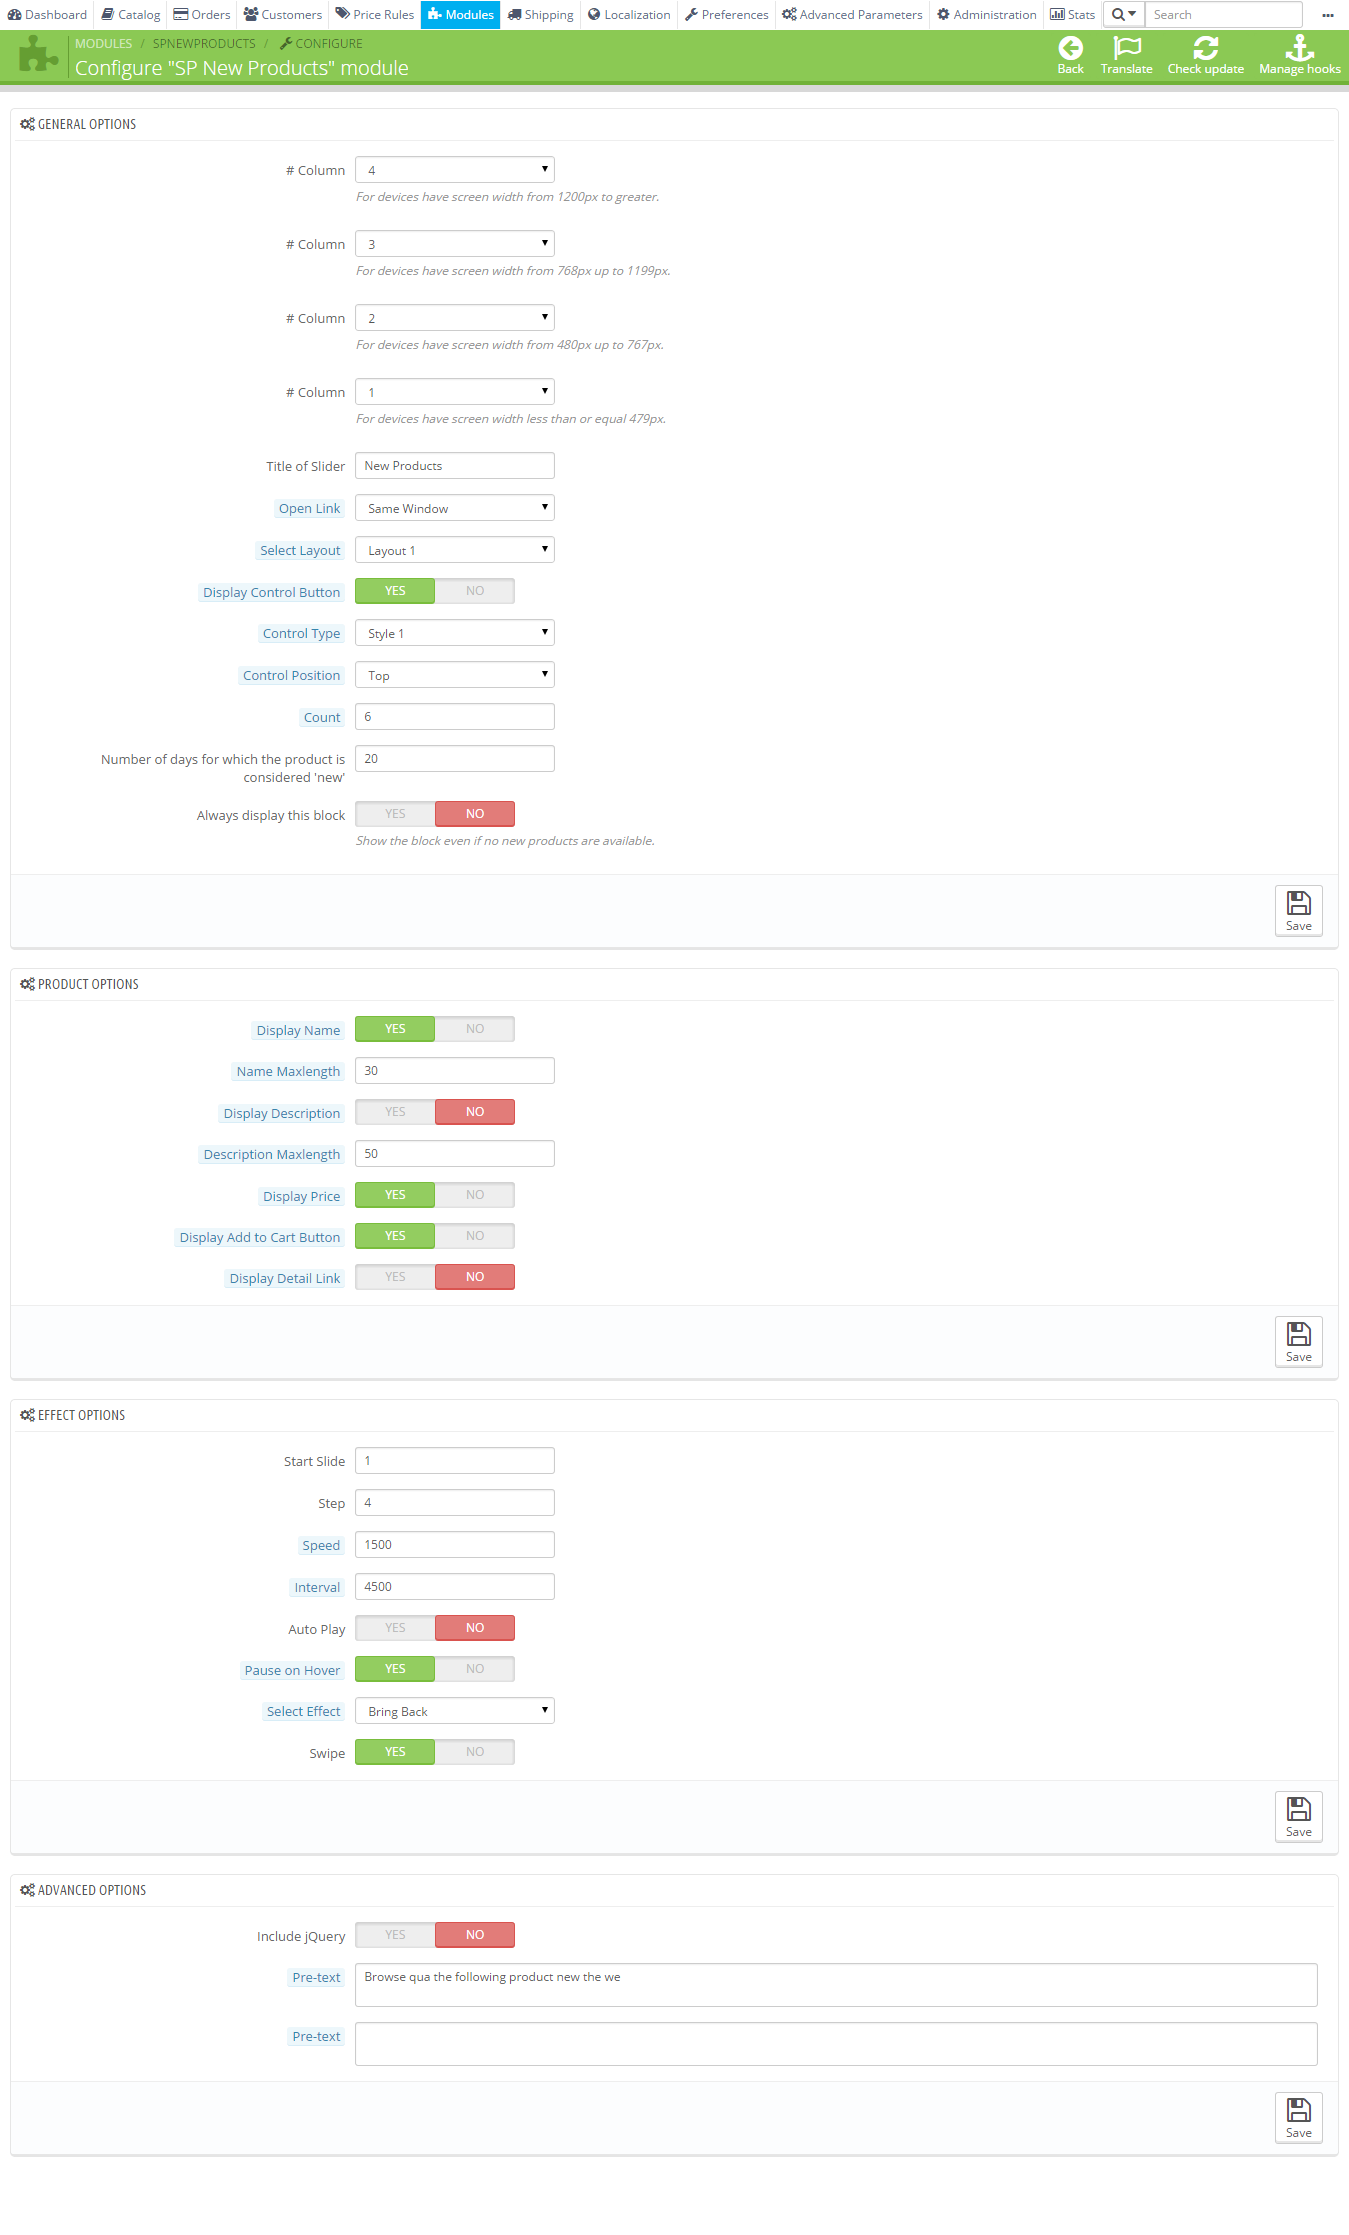
SP New Product
Frontend Appearance:

Backend Settings:
In the Pretashop Admin Panel, navigate to Modules >> Modules >> look for “SP New Product” module >> click “Configure” button to configure.
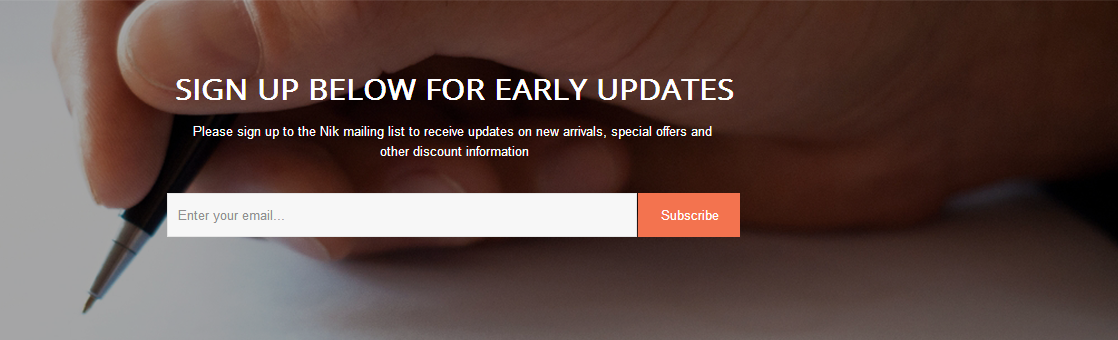
Newsletter block
Frontend Appearance:
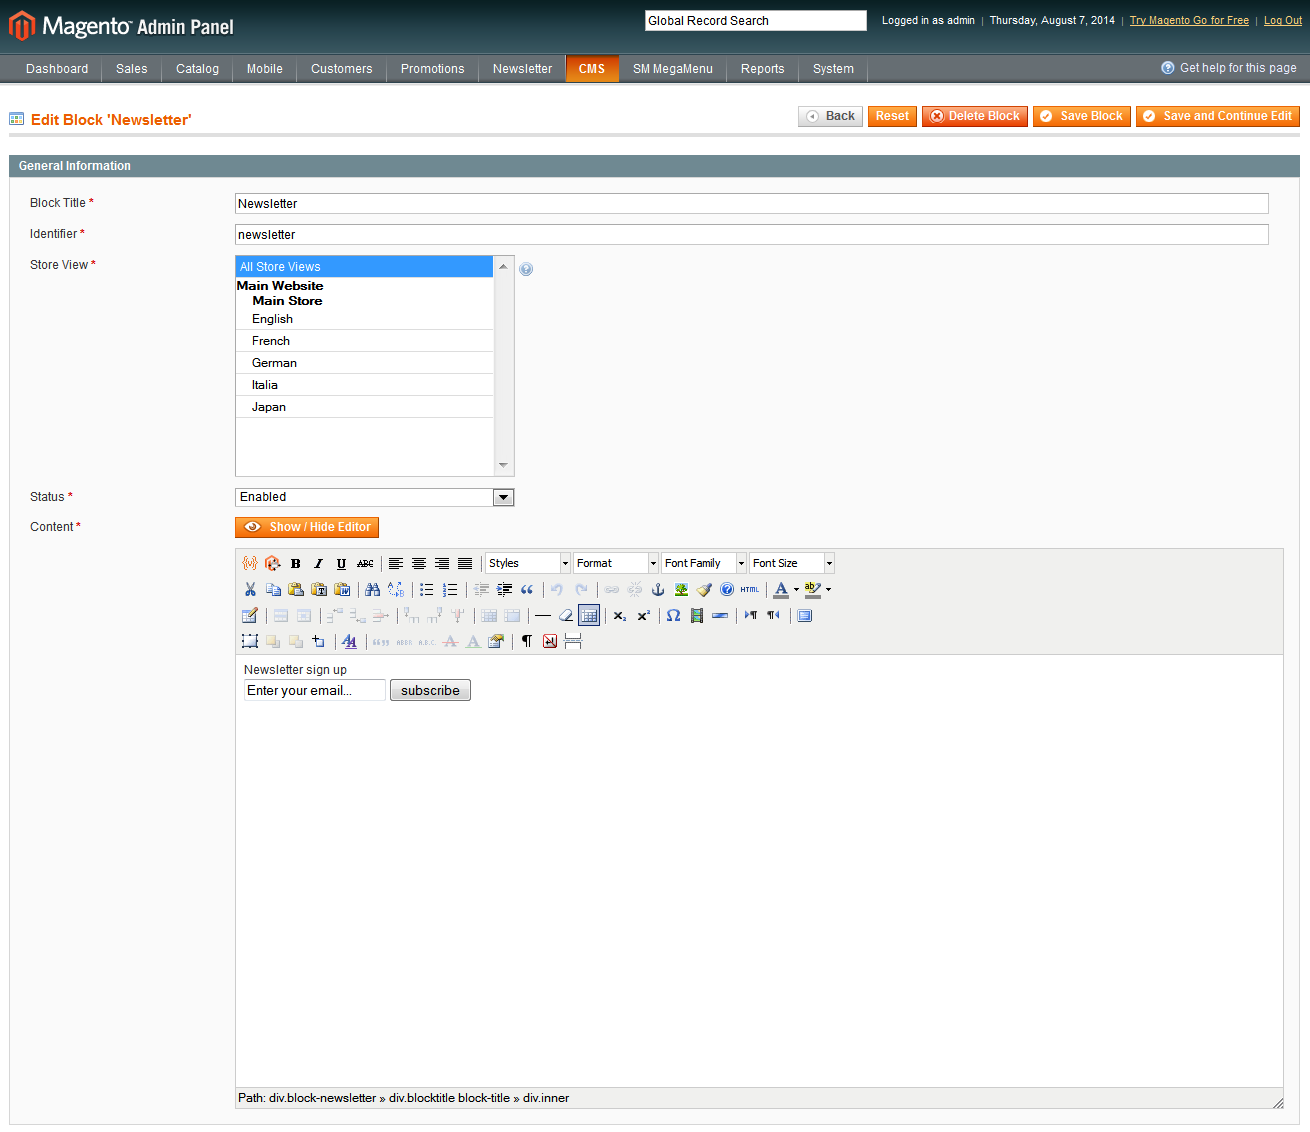
Backend Settings:
In the Pretashop Admin Panel, navigate to Modules >> Modules >> look for “Newsletter block” module >> click “Configure” button to configure.
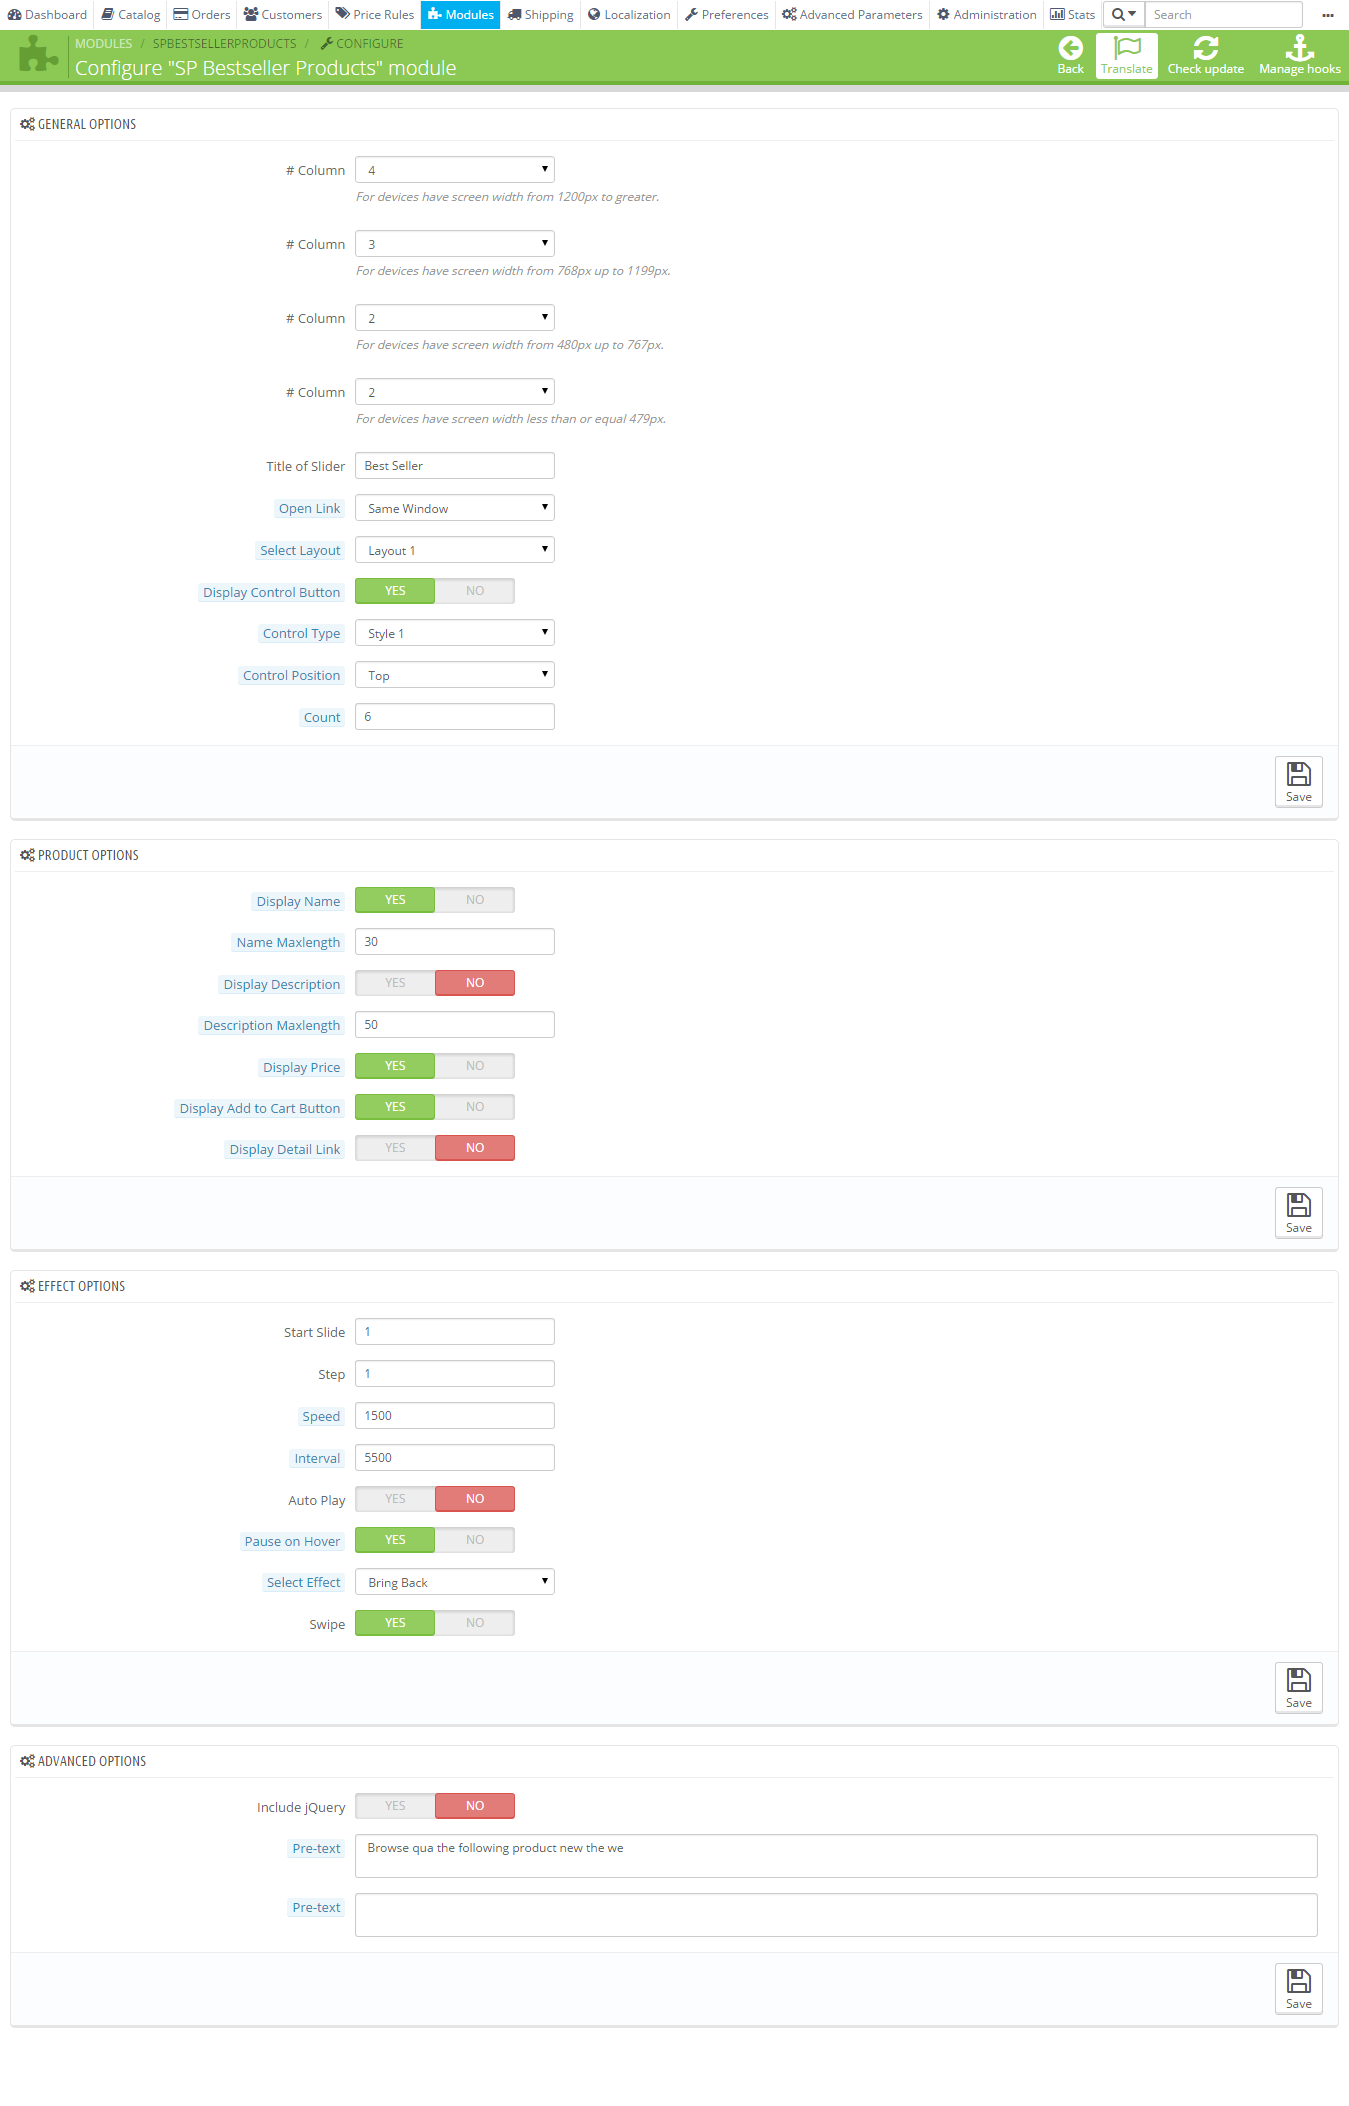
SP Bestseller Products
Frontend Appearance:
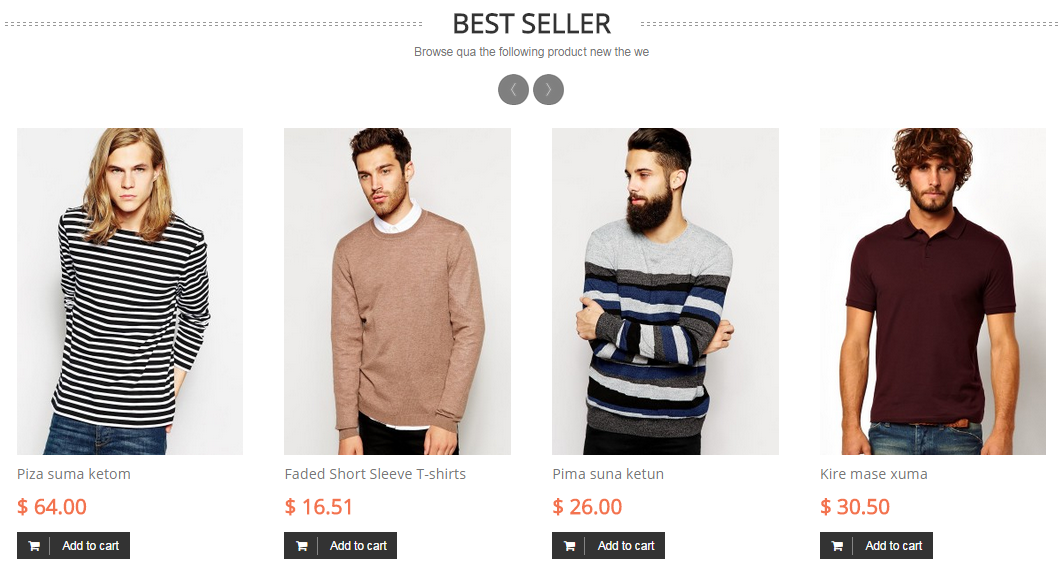
Backend Settings:
In the Pretashop Admin Panel, navigate to Modules >> Modules >> look for “SP Bestseller Products” module >> click “Configure” button to configure.
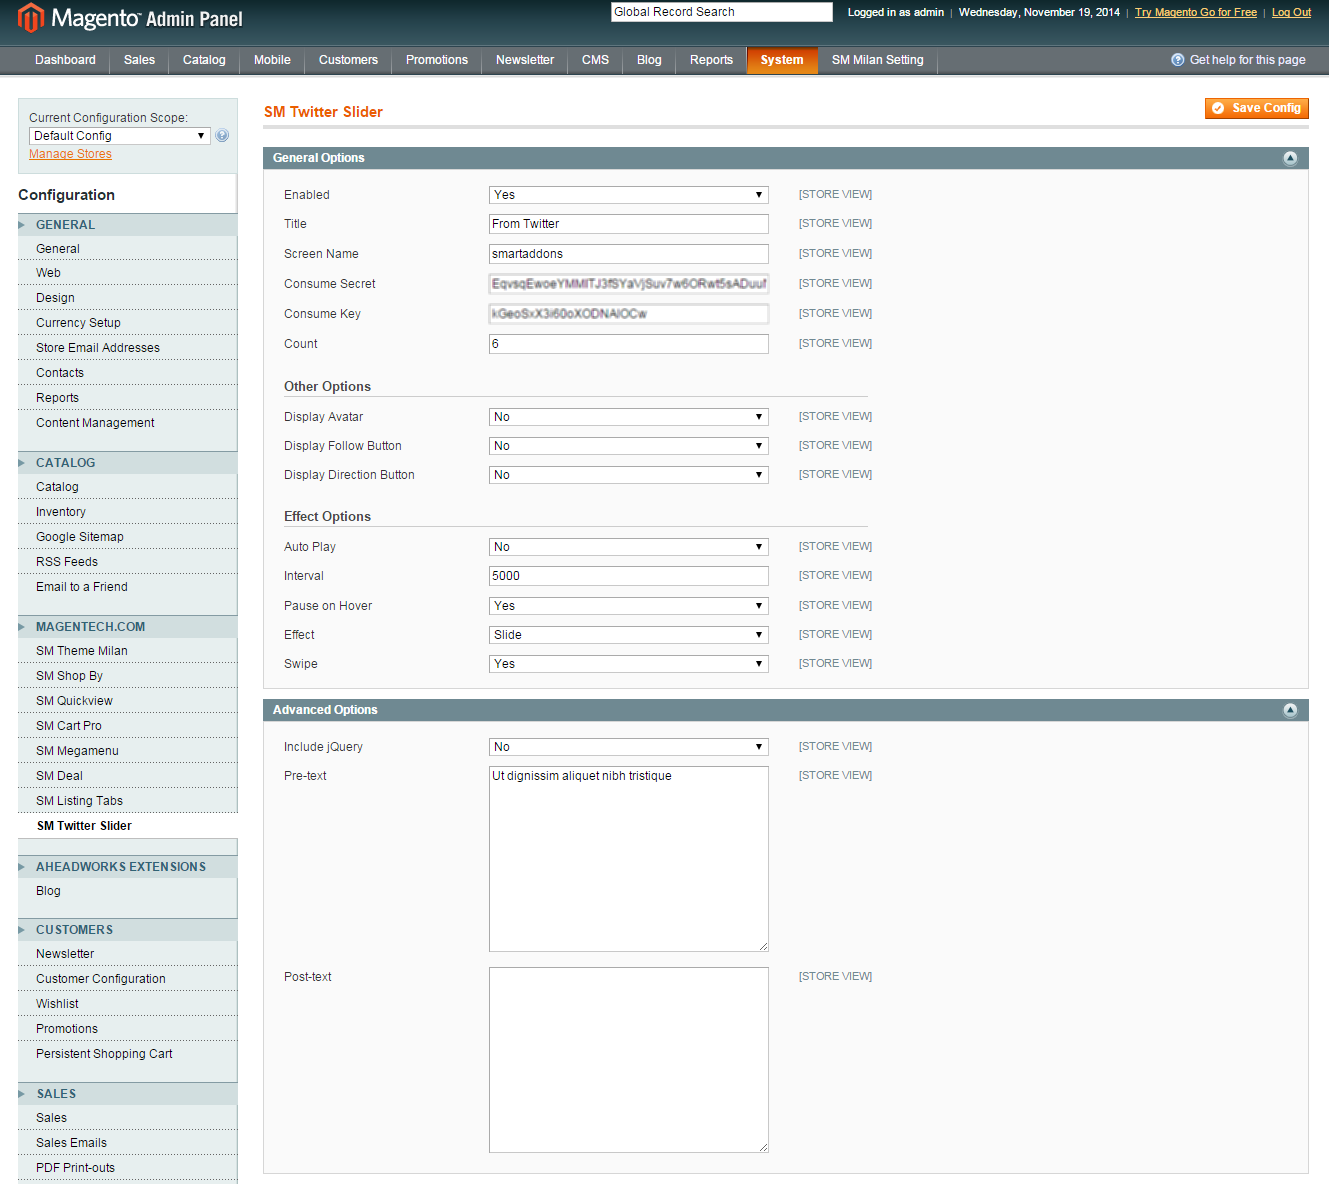
SP Twitter Slider
Frontend Appearance:
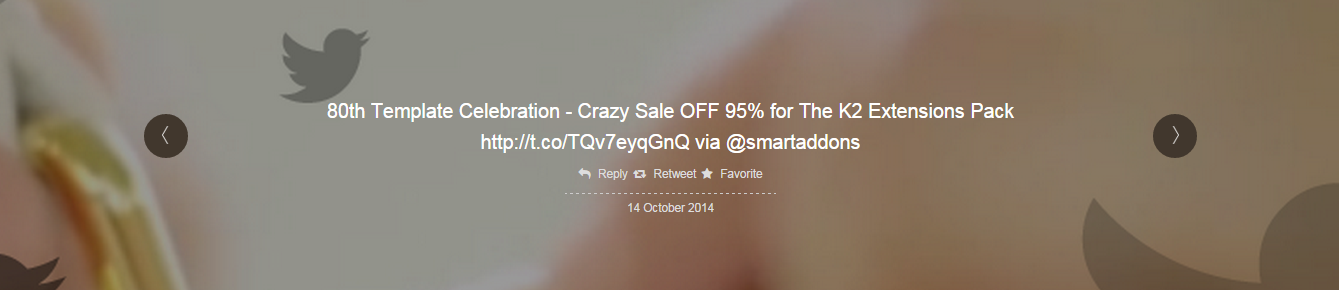
Backend Settings:
In the Pretashop Admin Panel, navigate to Modules >> Modules >> look for “SP Twitter Slider” module >> click “Configure” button to configure.
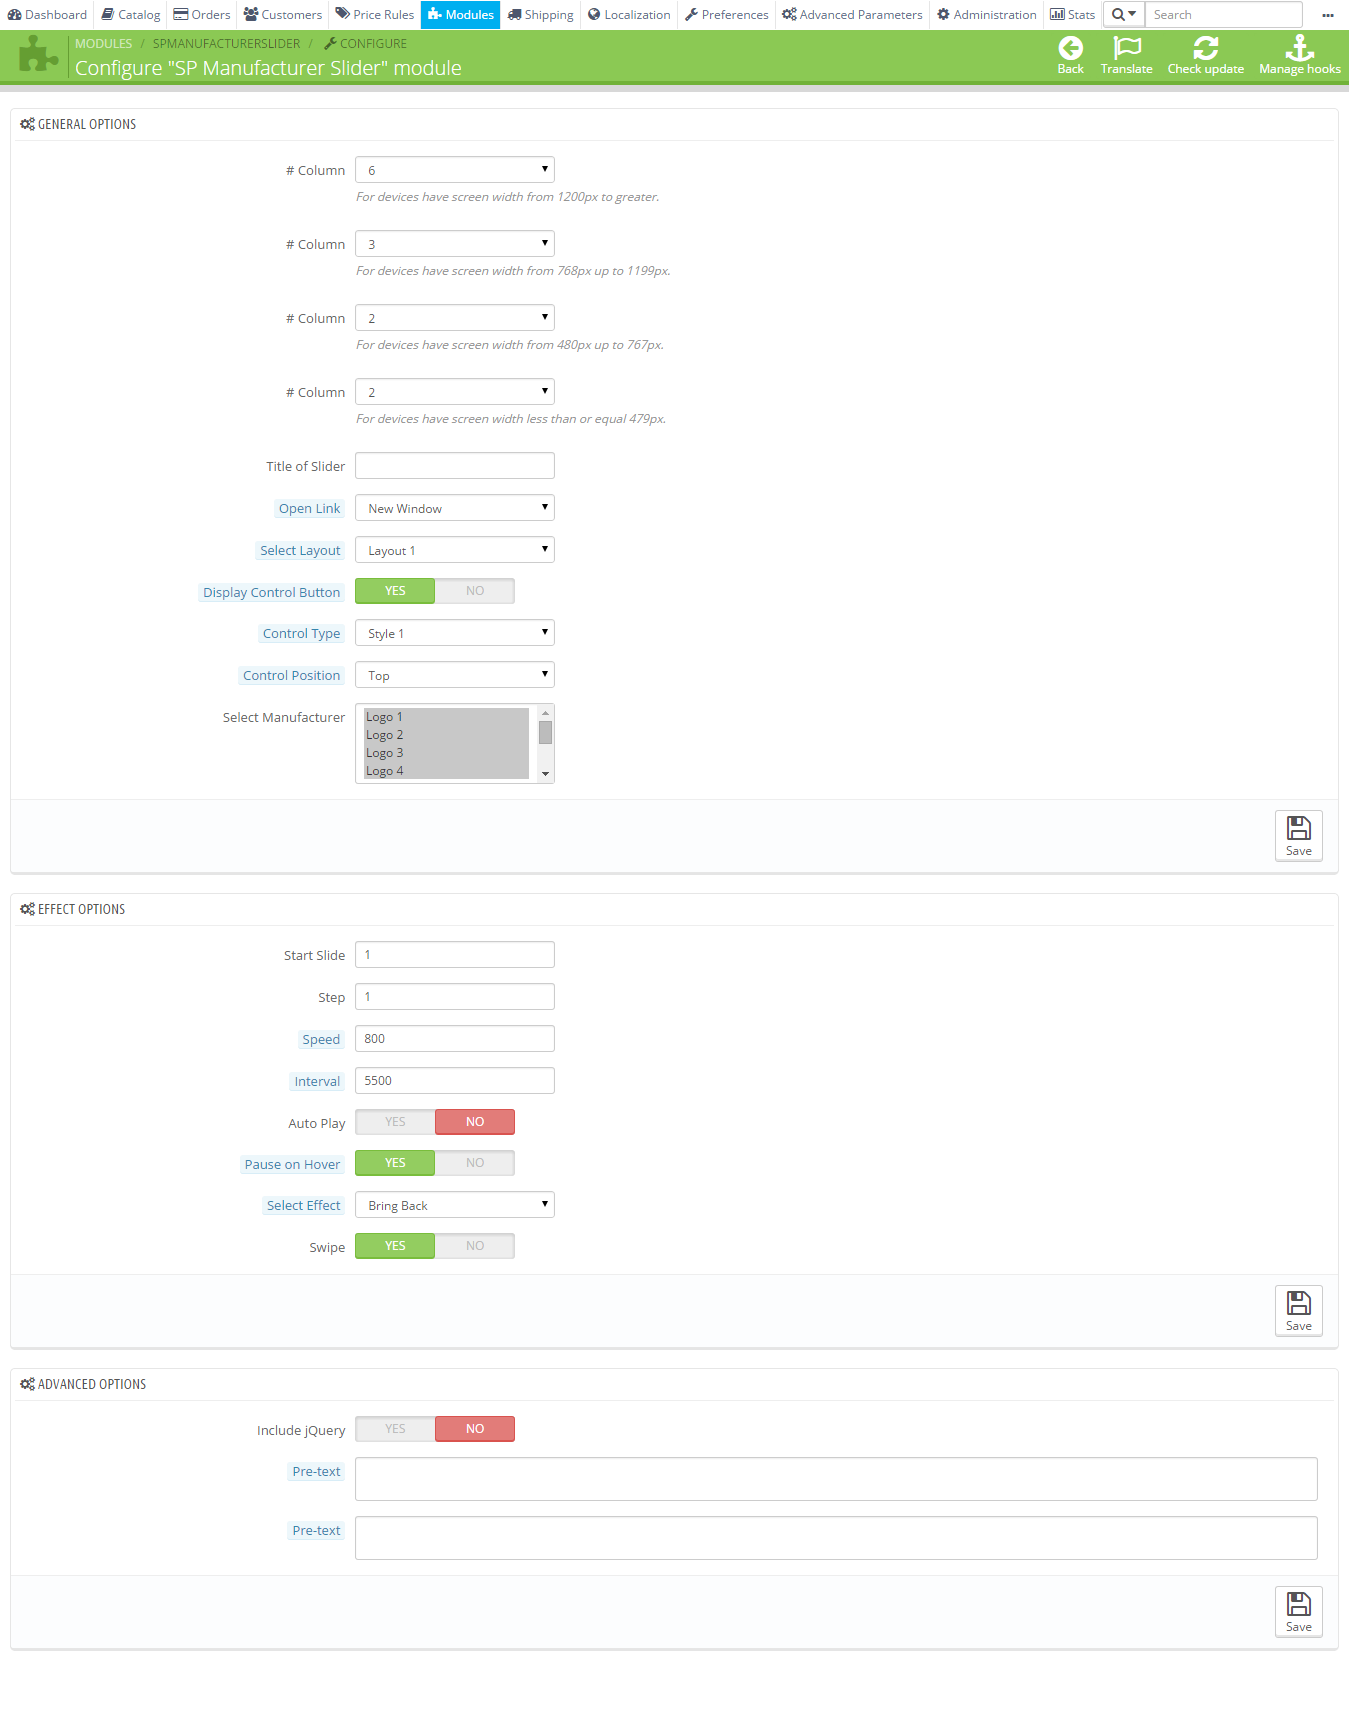
SP Manufacturer Slider
Frontend Appearance:

Backend Settings:
In the Pretashop Admin Panel, navigate to Modules >> Modules >> look for “SP Manufacturer Slider” module >> click “Configure” button to configure.
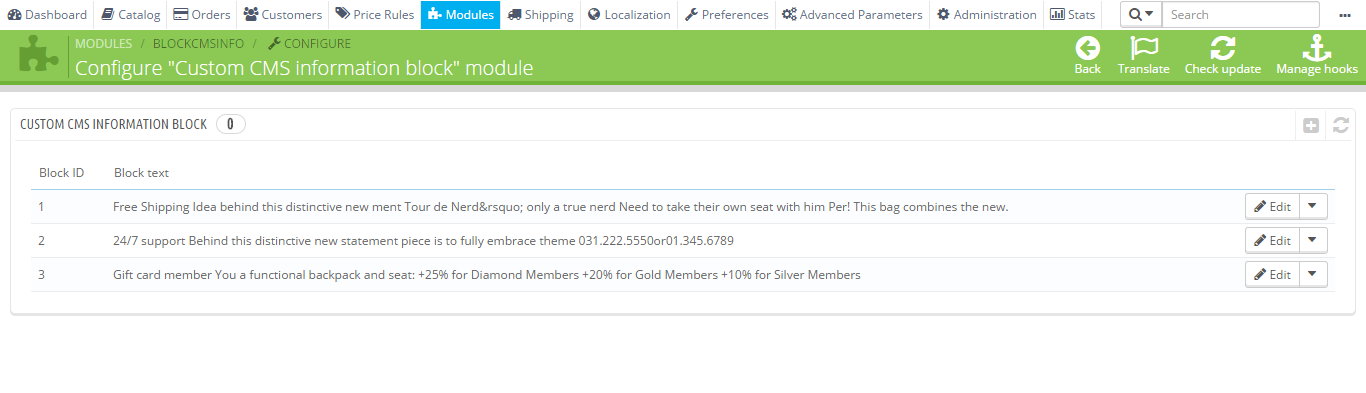
Custom CMS information block
Frontend Appearance:

Backend Settings:
In the Pretashop Admin Panel, navigate to Modules >> Modules >> look for “Custom CMS information block” module >> click “Configure” button to configure.
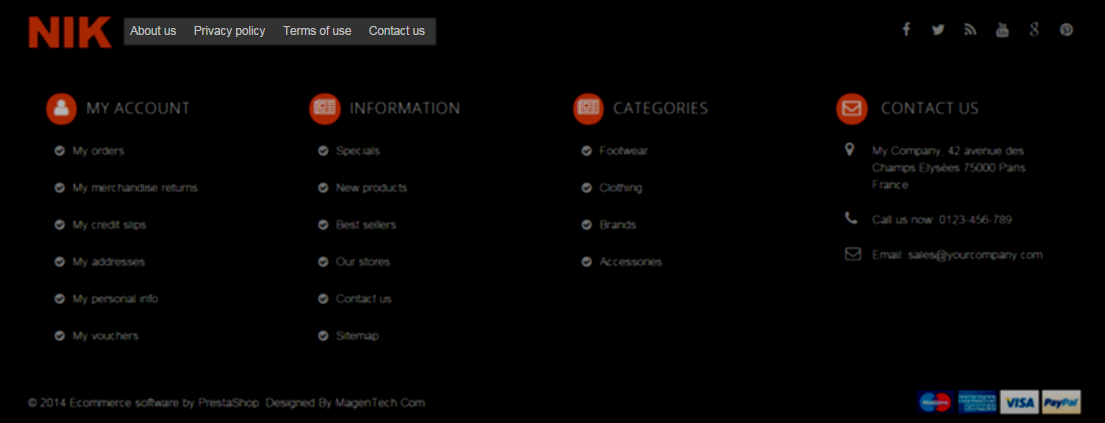
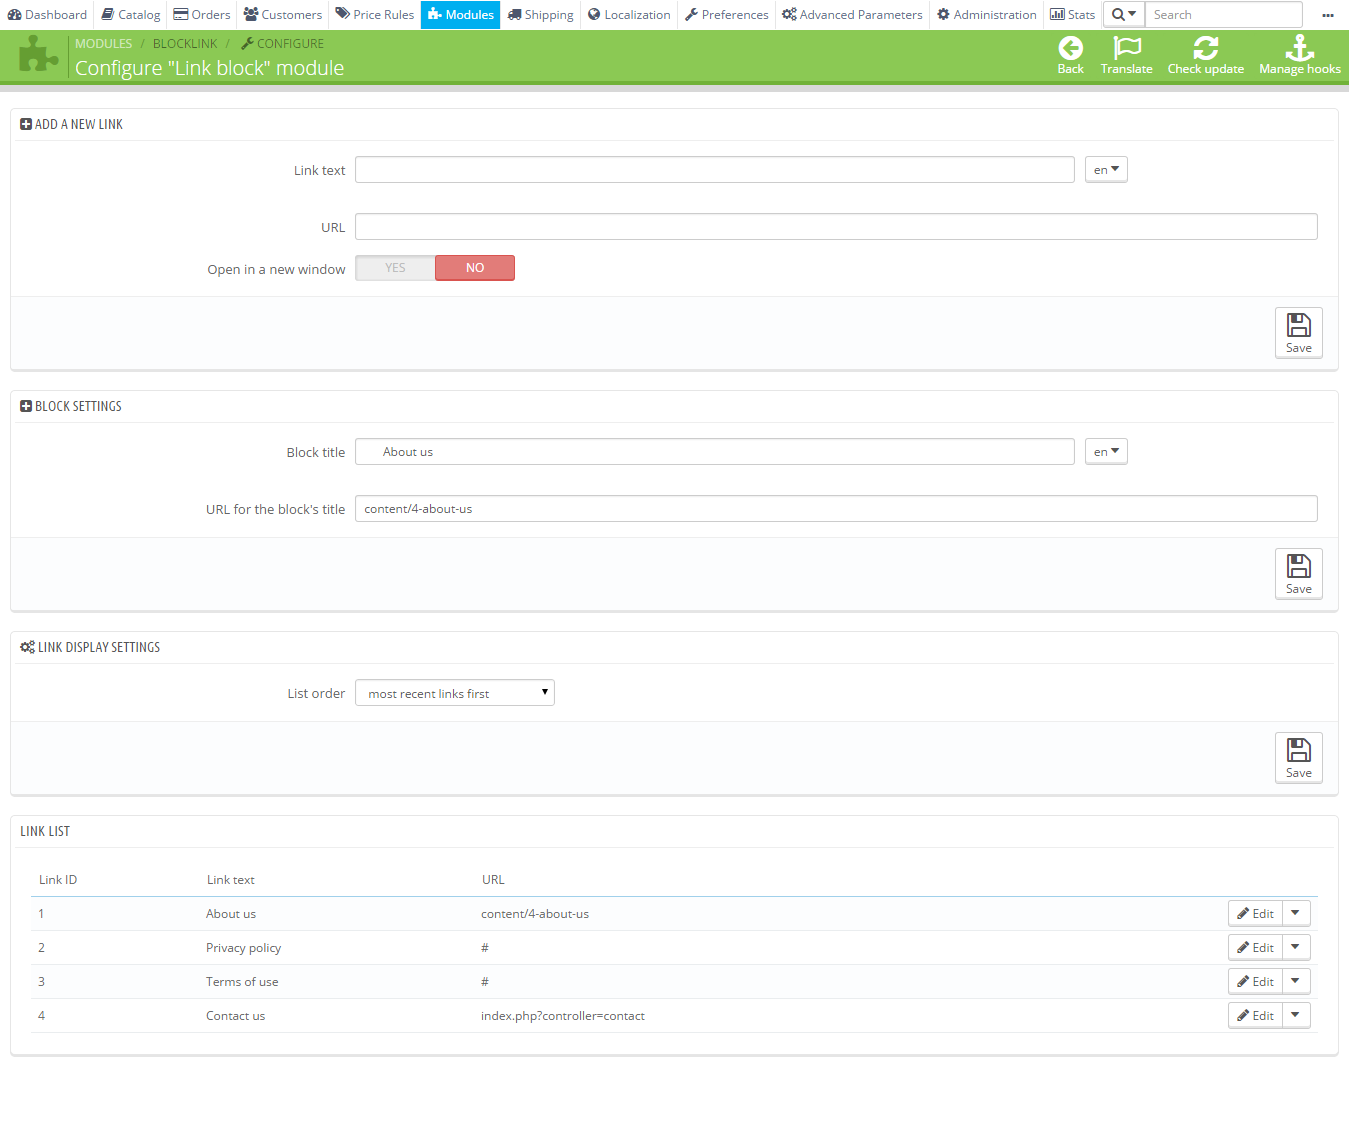
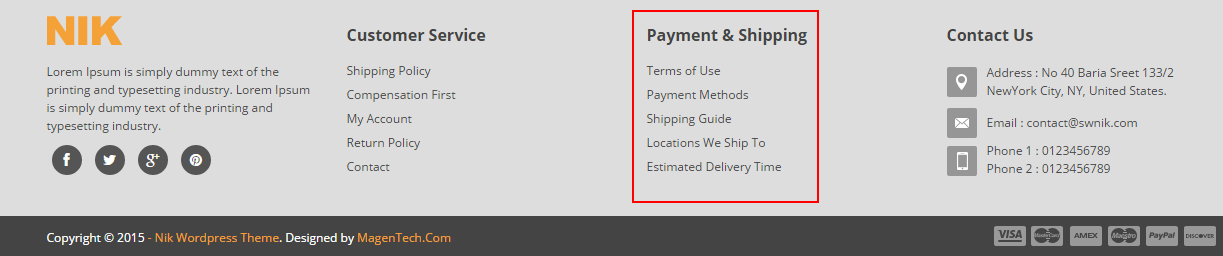
Link block
Frontend Appearance:
Backend Settings:
In the Pretashop Admin Panel, navigate to Modules >> Modules >> look for “Link block” module >> click “Configure” button to configure.
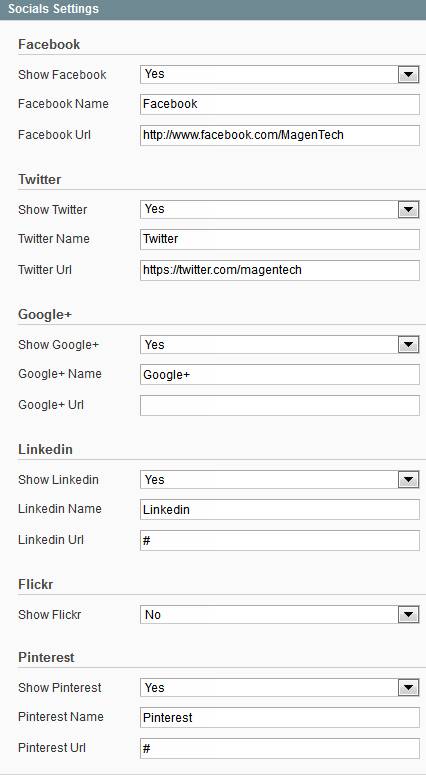
Social networking block
Frontend Appearance:
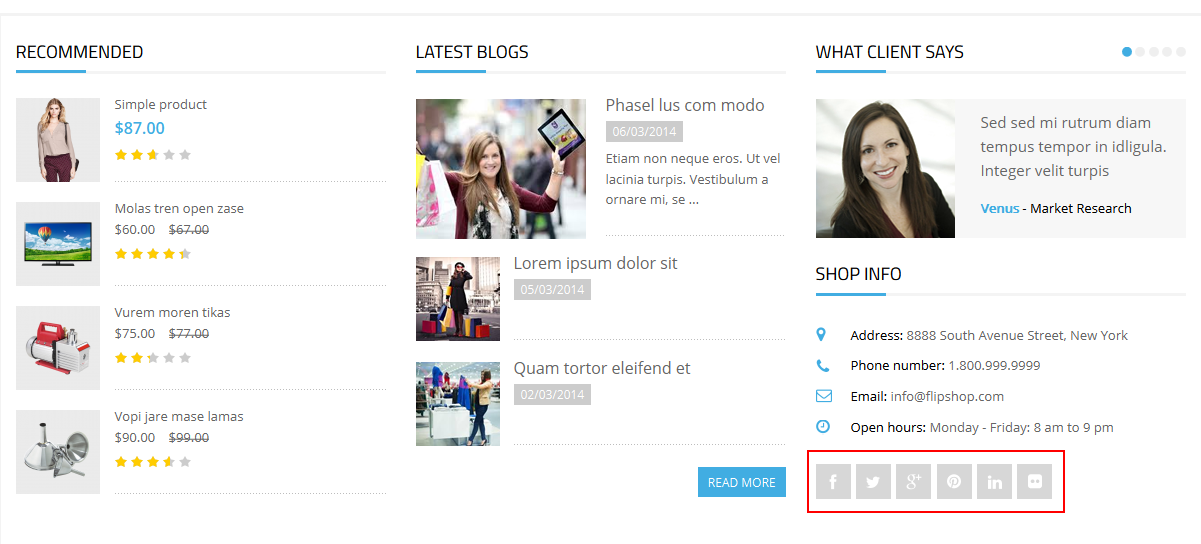
Backend Settings:
In the Pretashop Admin Panel, navigate to Modules >> Modules >> look for “Social networking block” module >> click “Configure” button to configure.
My account block for your website’s footer
Frontend Appearance:
Backend Settings:
In the Pretashop Admin Panel, navigate to Modules >> Modules >> look for “My account block for your website’s footer” module >> click “Configure” button to configure.

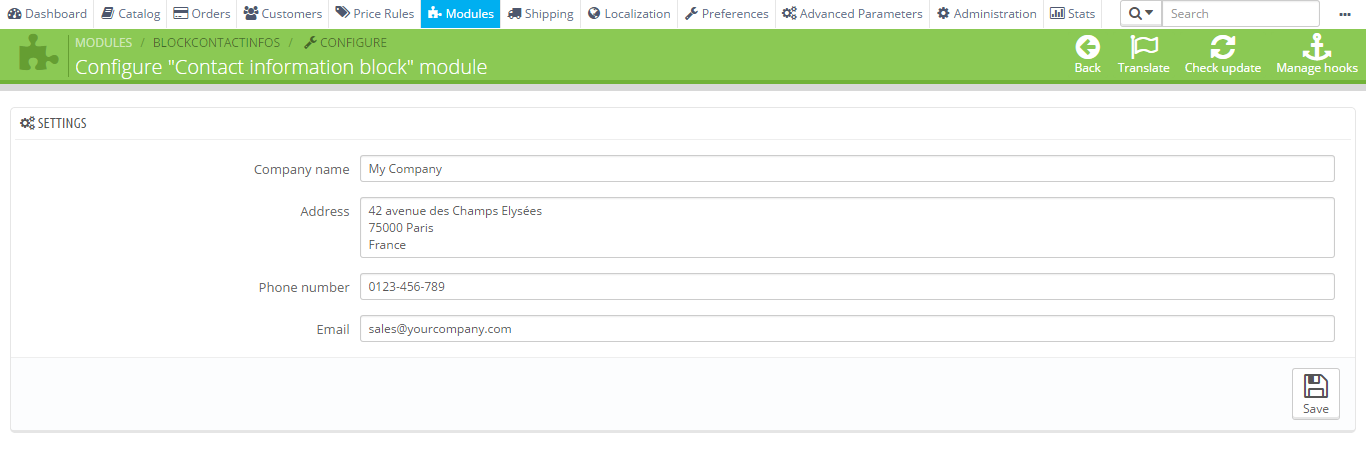
Contact information block
Frontend Appearance:
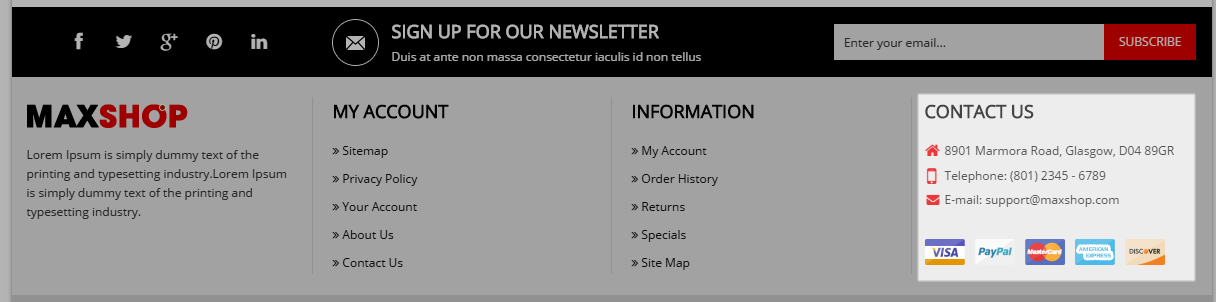
Backend Settings:
In the Pretashop Admin Panel, navigate to Modules >> Modules >> look for “Contact information block” module >> click “Configure” button to configure.
Categories block
Frontend Appearance:
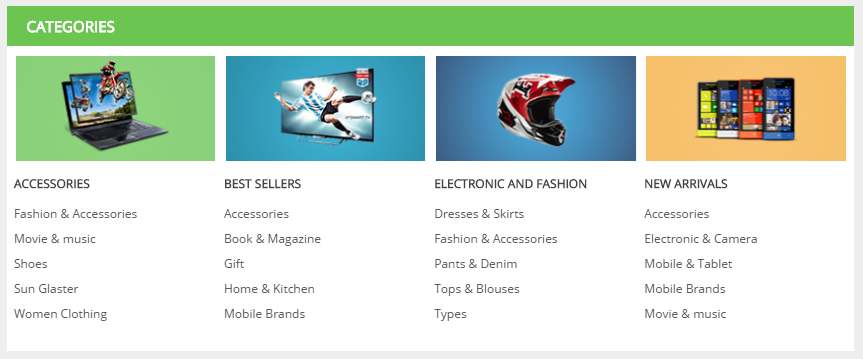
Backend Settings:
In the Pretashop Admin Panel, navigate to Modules >> Modules >> look for “Categories block” module >> click “Configure” button to configure.
Payment logos block
Frontend Appearance:
Backend Settings:
In the Pretashop Admin Panel, navigate to Modules >> Modules >> look for “Payment logos block” module >> click “Configure” button to configure.
9How To Configure cPanel – Back to top
Frontend Appearance:
If you want to save Theme Color, Font, Box Layout that you have selected in Cpanel then please make a step as following:
- Step 1: You must create a account Or Registered.

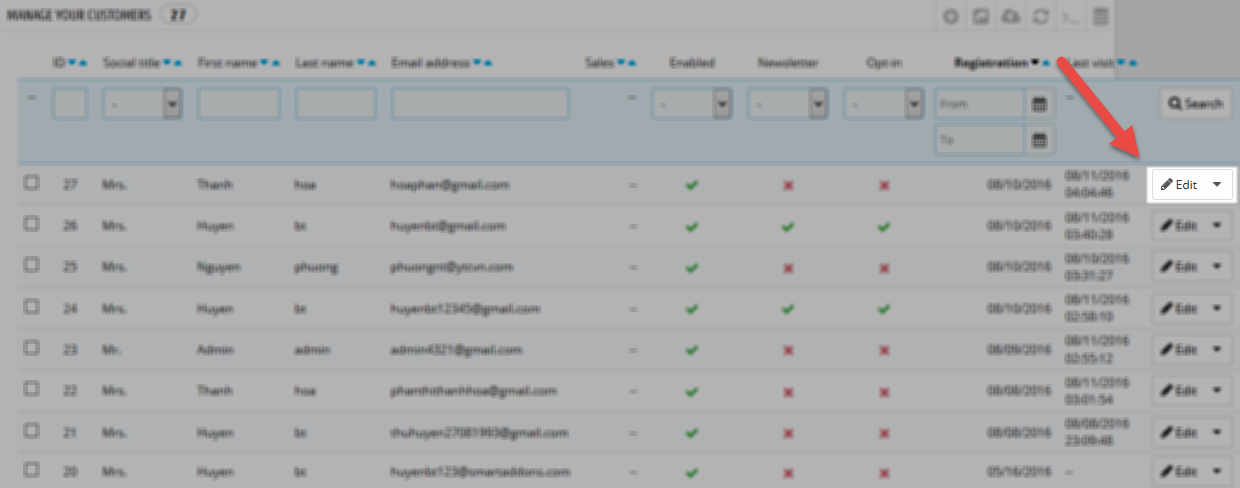
- Step 2: In the Administrator page, please navigate to Customers >> find your account to edit
- Step 3: After that tick check box “Customer” and Save
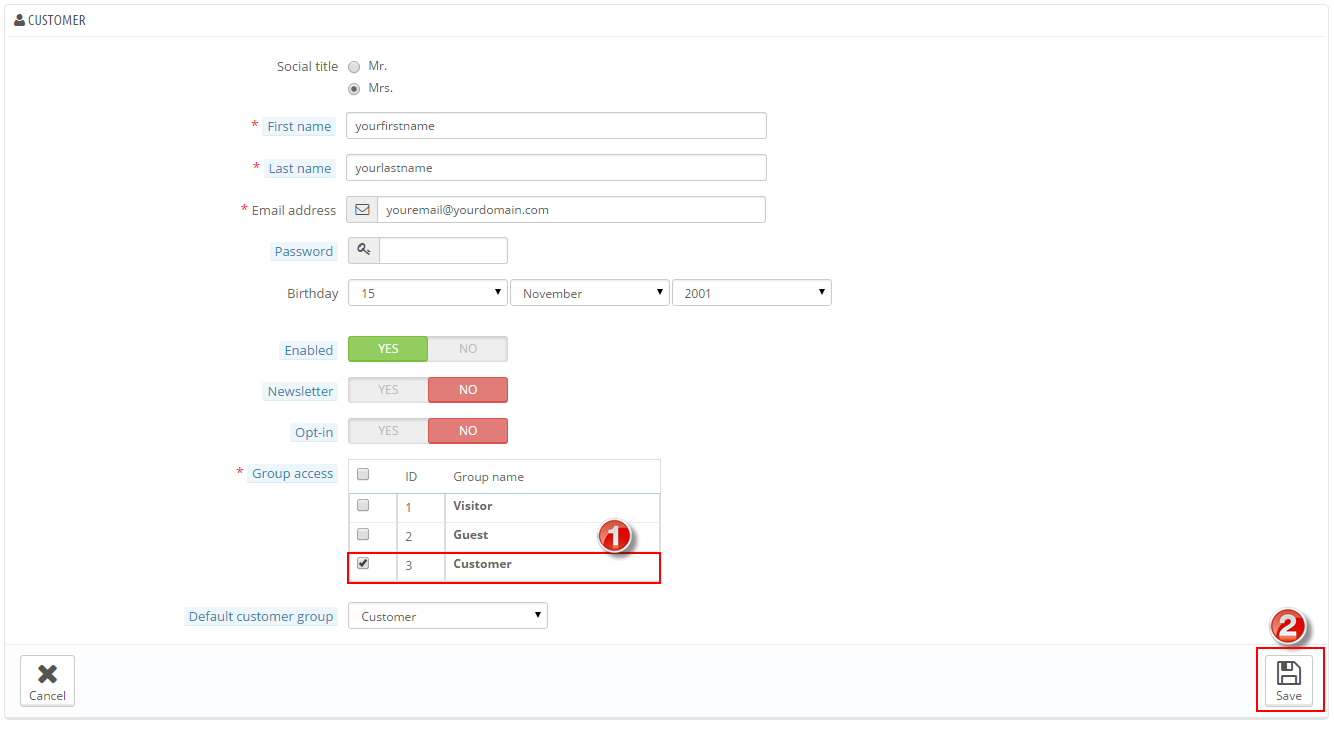
- Step 4: Navigate to Modules >> Modules >> Search ” SP Theme Configurator” module >> click “Configure” button to configure the main elements of your theme
- Step 5: Go to the Frontend to view changes.
10SUPPORT – Back to top
Thank you so much for purchasing this theme. If you have any questions that are beyond the scope of this help file, please send us via: Support Tickets System
Thanks so much!