1 Installation - Back to top
- Firstly, you must install Prestashop version 1.6.x. Please Click Here to read more about How To Install Prestashop version 1.6.x
- Secondly, when you are ready to install SP Product Tab, please follow 5 steps as following:
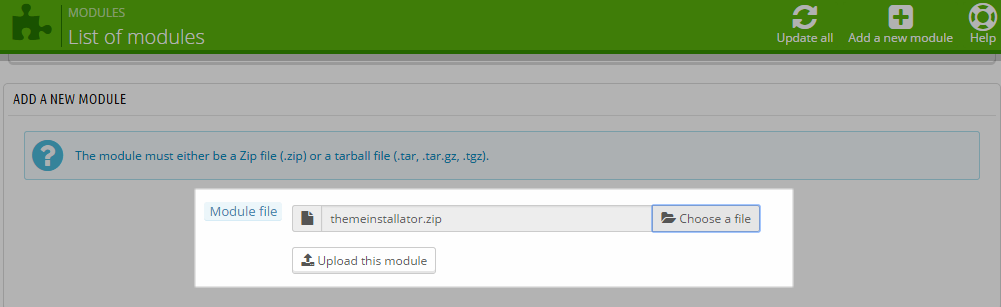
Step 1: Login to your Prestashop admin panel and go to Back Office >> Modules and Services >> Modules and Services . At the top of the page, click the Add a new module button.

Step 2: Click "Choose a file" button to select your module .zip file named as "sp_product_tabs_p1.6-res_v1.0.0.zip" that you have downloaded, then click "Upload this module" button.
Step 3: The new module will be located in the module list. Please search the name of module and click on the Install button to install the module.

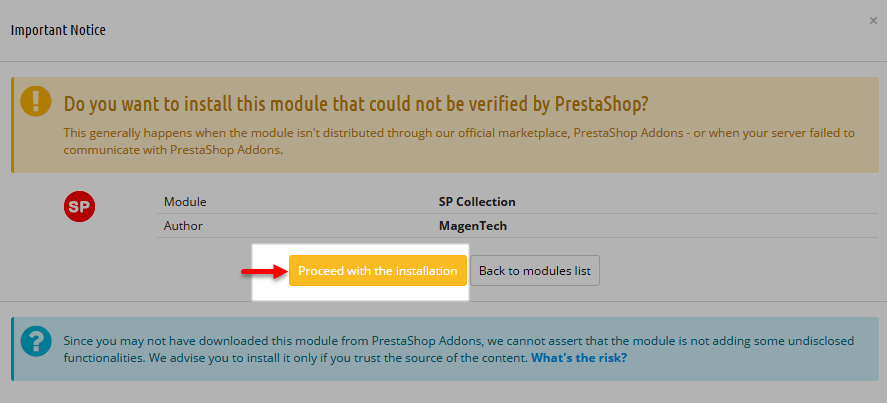
Step 4:When seeing a notification message as following, please click "Proceed with the installation" button to finish the installation process:
Step 5: When the uploading process is done, you will see the message denoting that:"Module(s) installed successfully". Please click "Edit" button to configure this module.

2 Configuration - Back to top
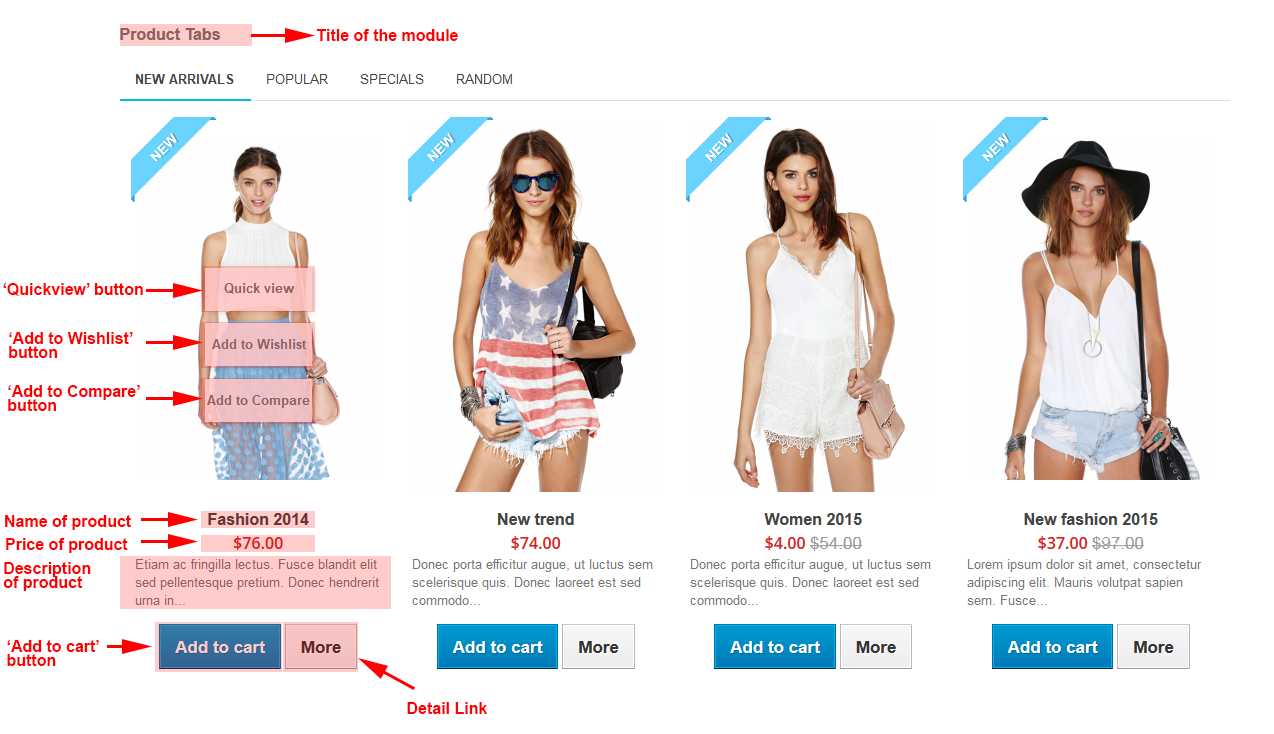
You could see the appearance of SP Product Tab module as following:
To configure this module, please find the module that you have completely installed in the module list and start setting its options.
Let's look at the parameters in detail:
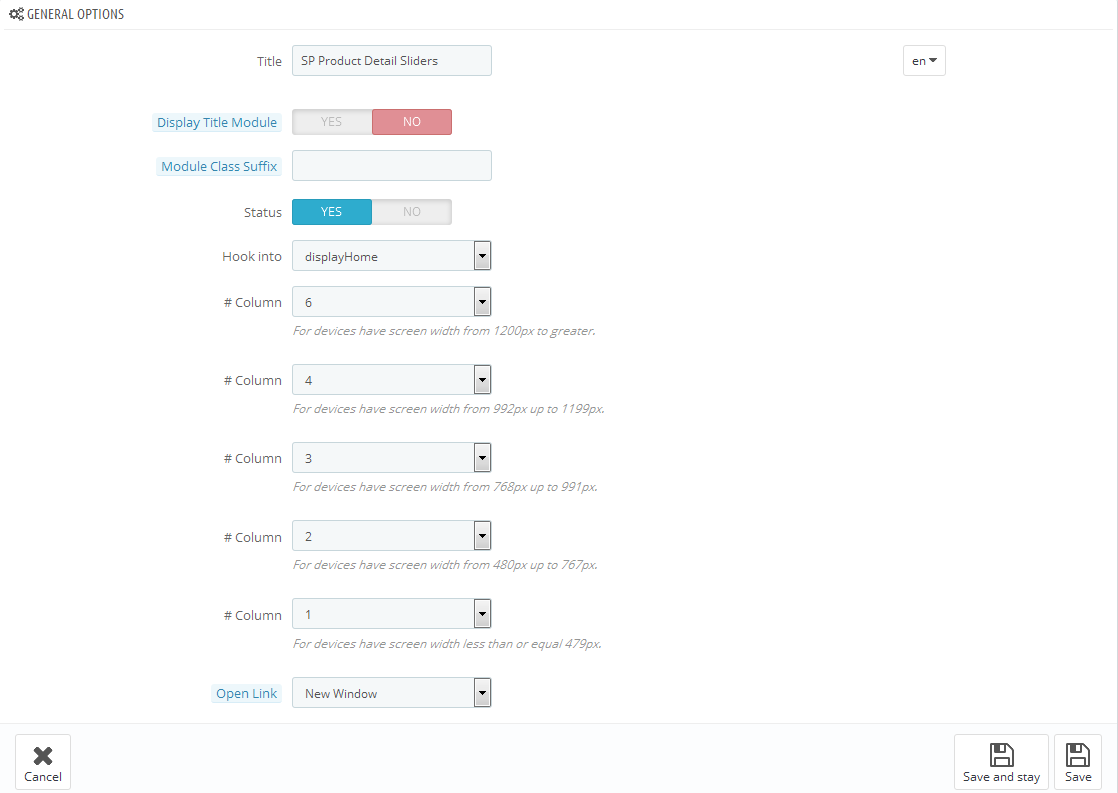
- Title - Enter the title of the module.
- Module Class Suffix - Enter the suffix which is applied to the CSS class of module. This allows to style an individual module easily.
- Display Title Module - Allow to show/hide title of the module.
- Status - Allow to enable/disable the status of the module.
- Hook into - Select Hook into in the list box. Please click Here to read more How To Create Custom CMS Hook Page.
- Select Tabs - Allow to select the product tabs having products that you want to show
- Limit - Enter the quantity of images you want to display in each tab, for example: When you enter number ’4′ here, four images will be displayed in each tab
- Column - Enter the quantity of columns you want to display
- Size image (W x H) - Allow to sellect the size image from the dropdown menu.
- Display Name - Allow to display the product names in the module
- Name Maxleghth - Allow to set the maximum number of characters allowed in the name area
- Display Description - Allow to display the description of each product.
- Description Maxlength - Allow to set the maximum number of characters allowed in the description area
- Display Price - Allow to display the product price.
- Display Add to Cart Button - Allow to display Add to Cart Button button
- Display Quick View Button - Allow to display Quick View button
- Display Add to Wishlist Button - Allow to display Add to Wishlist button
- Display Add to Compare Button - Allow to display Add to Compare button
- Display Detail Link - Allow to display Detail Link of each product
3SUPPORT - Back to top
Thank you so much for using this extension, your support is truly appreciated. If you have any questions that are beyond the scope of this document, please feel free to contact us via our Support Tickets System