1 SYSTEM REQUIREMENT – Back to top
At the basic level, this theme will require the following conditions:
- Compatible with Magento Community Edition 1.7.x; 1.8.x and 1.9.x (the latest version : Magento 1.9.2.2 , require: php 5.4 and Memory_limit no less than 256Mb)
Note:This package is upgraded to Magento Version 1.9.2.2
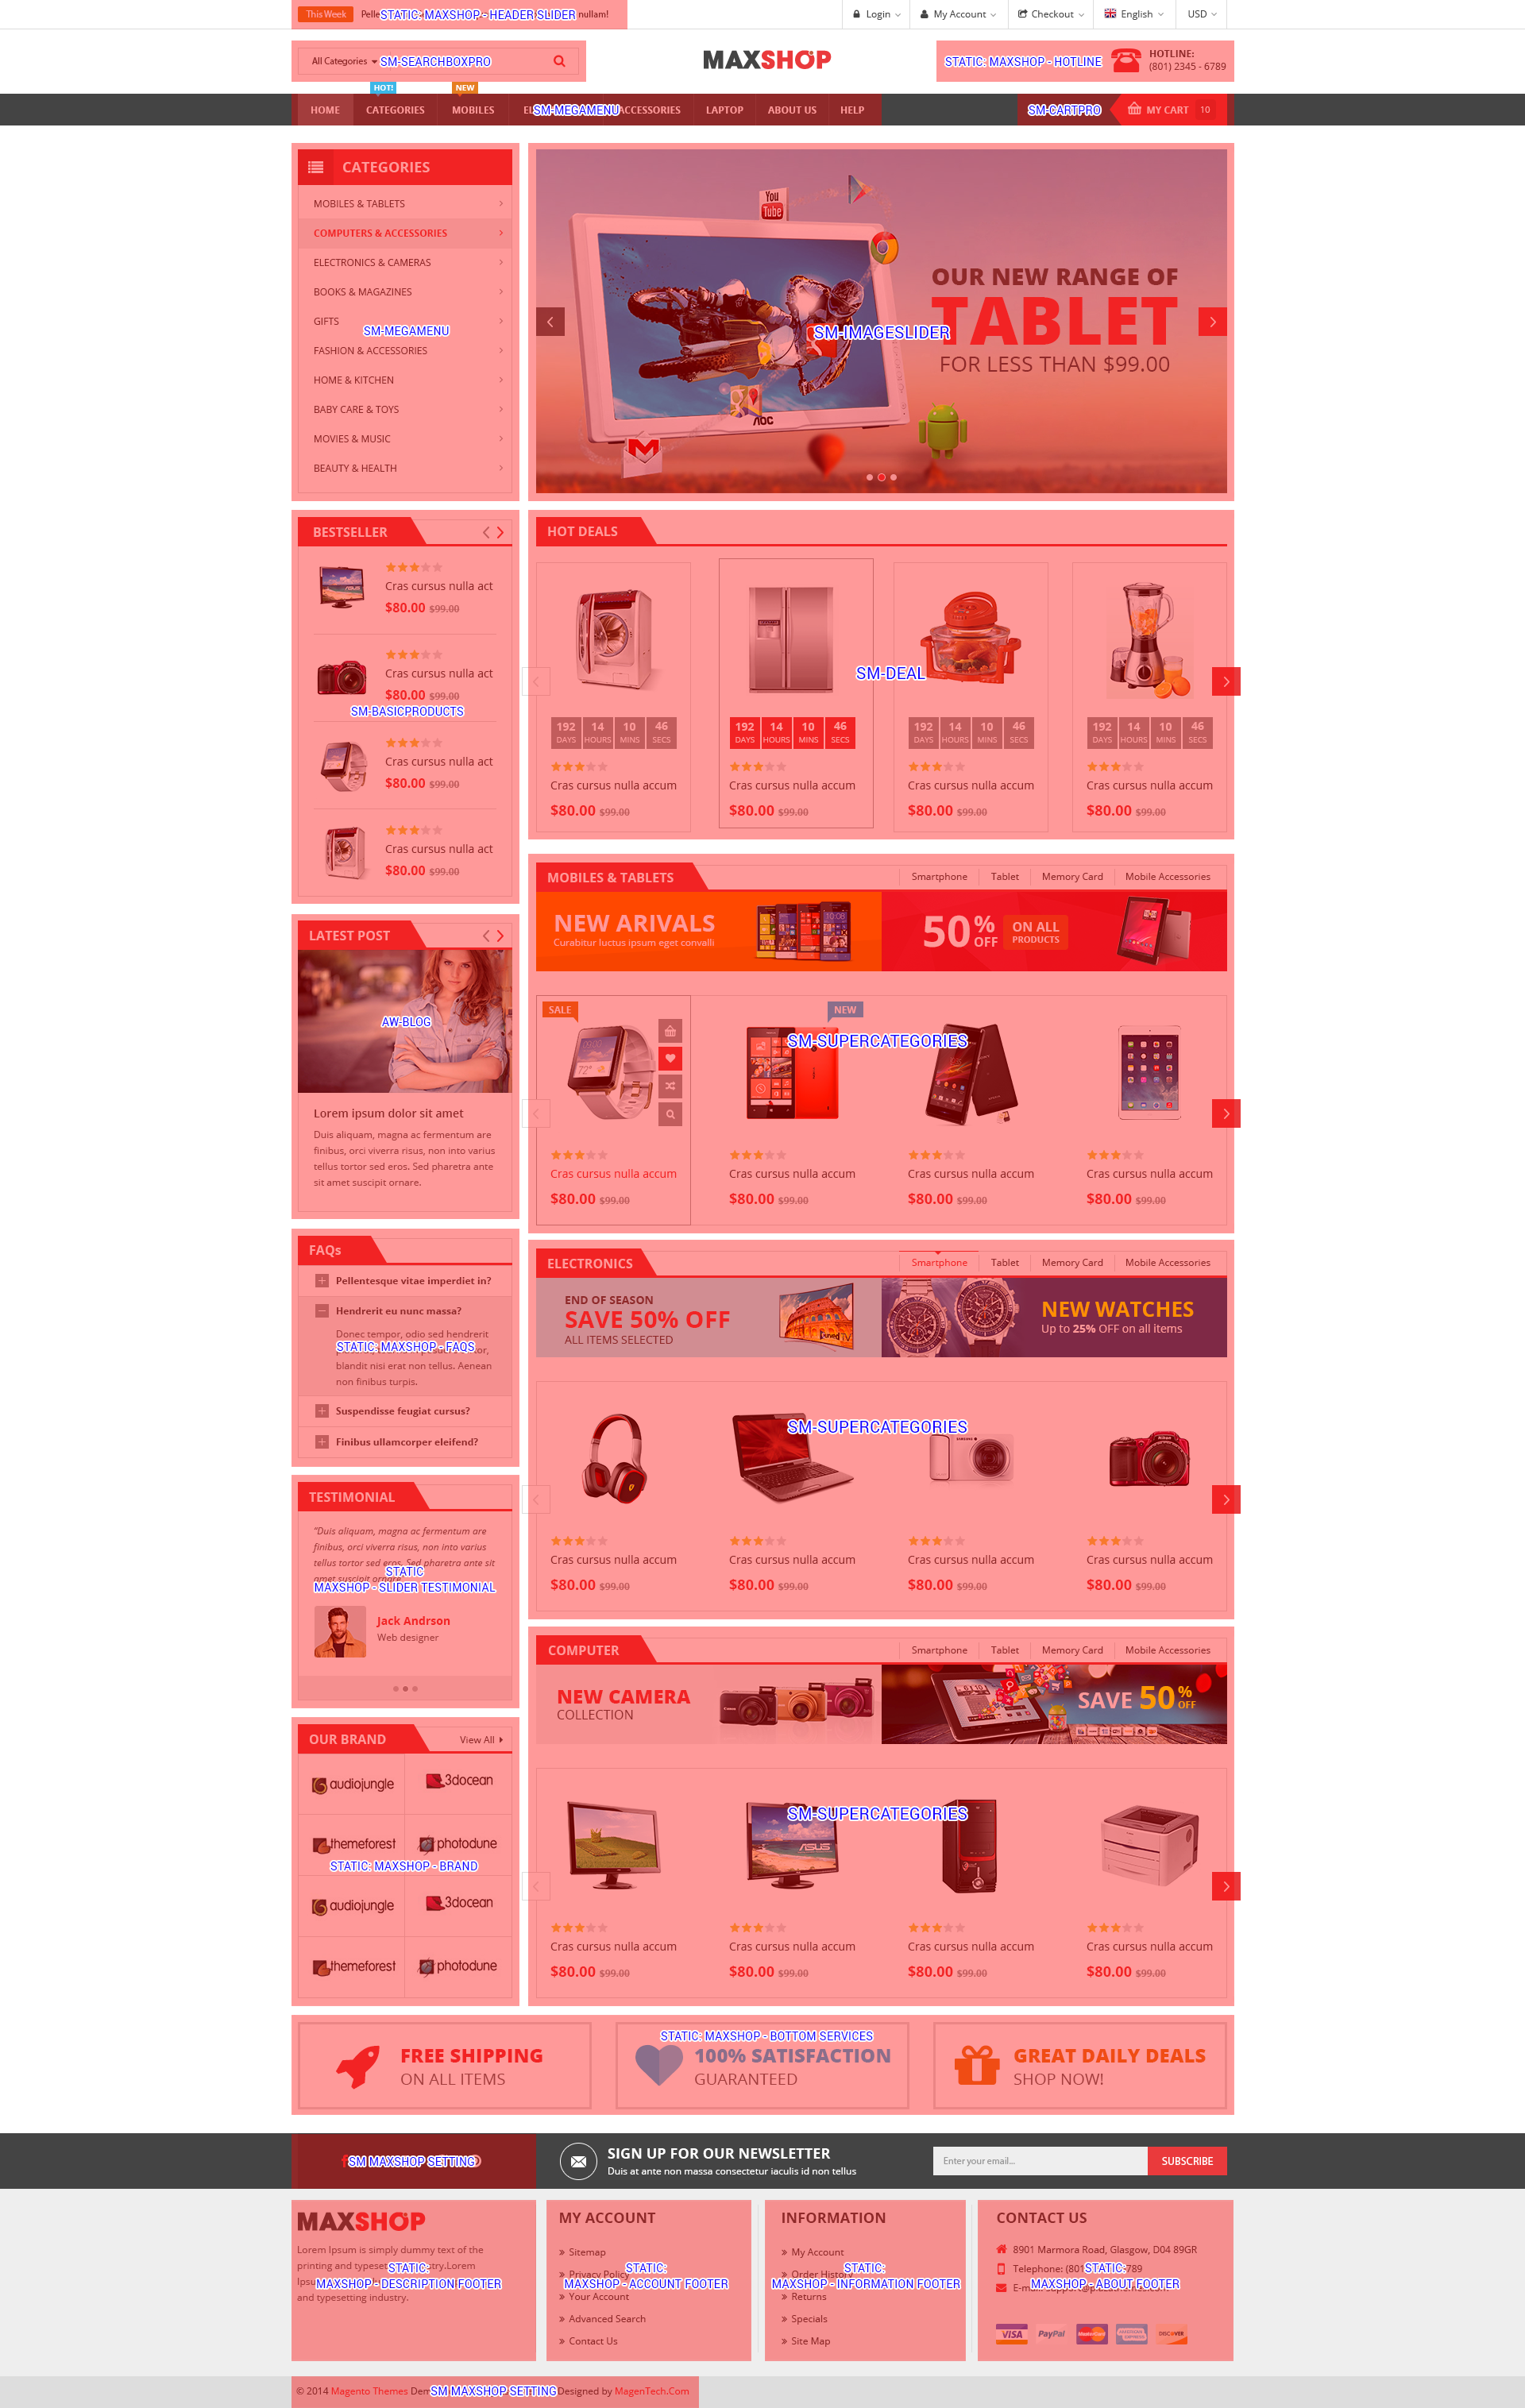
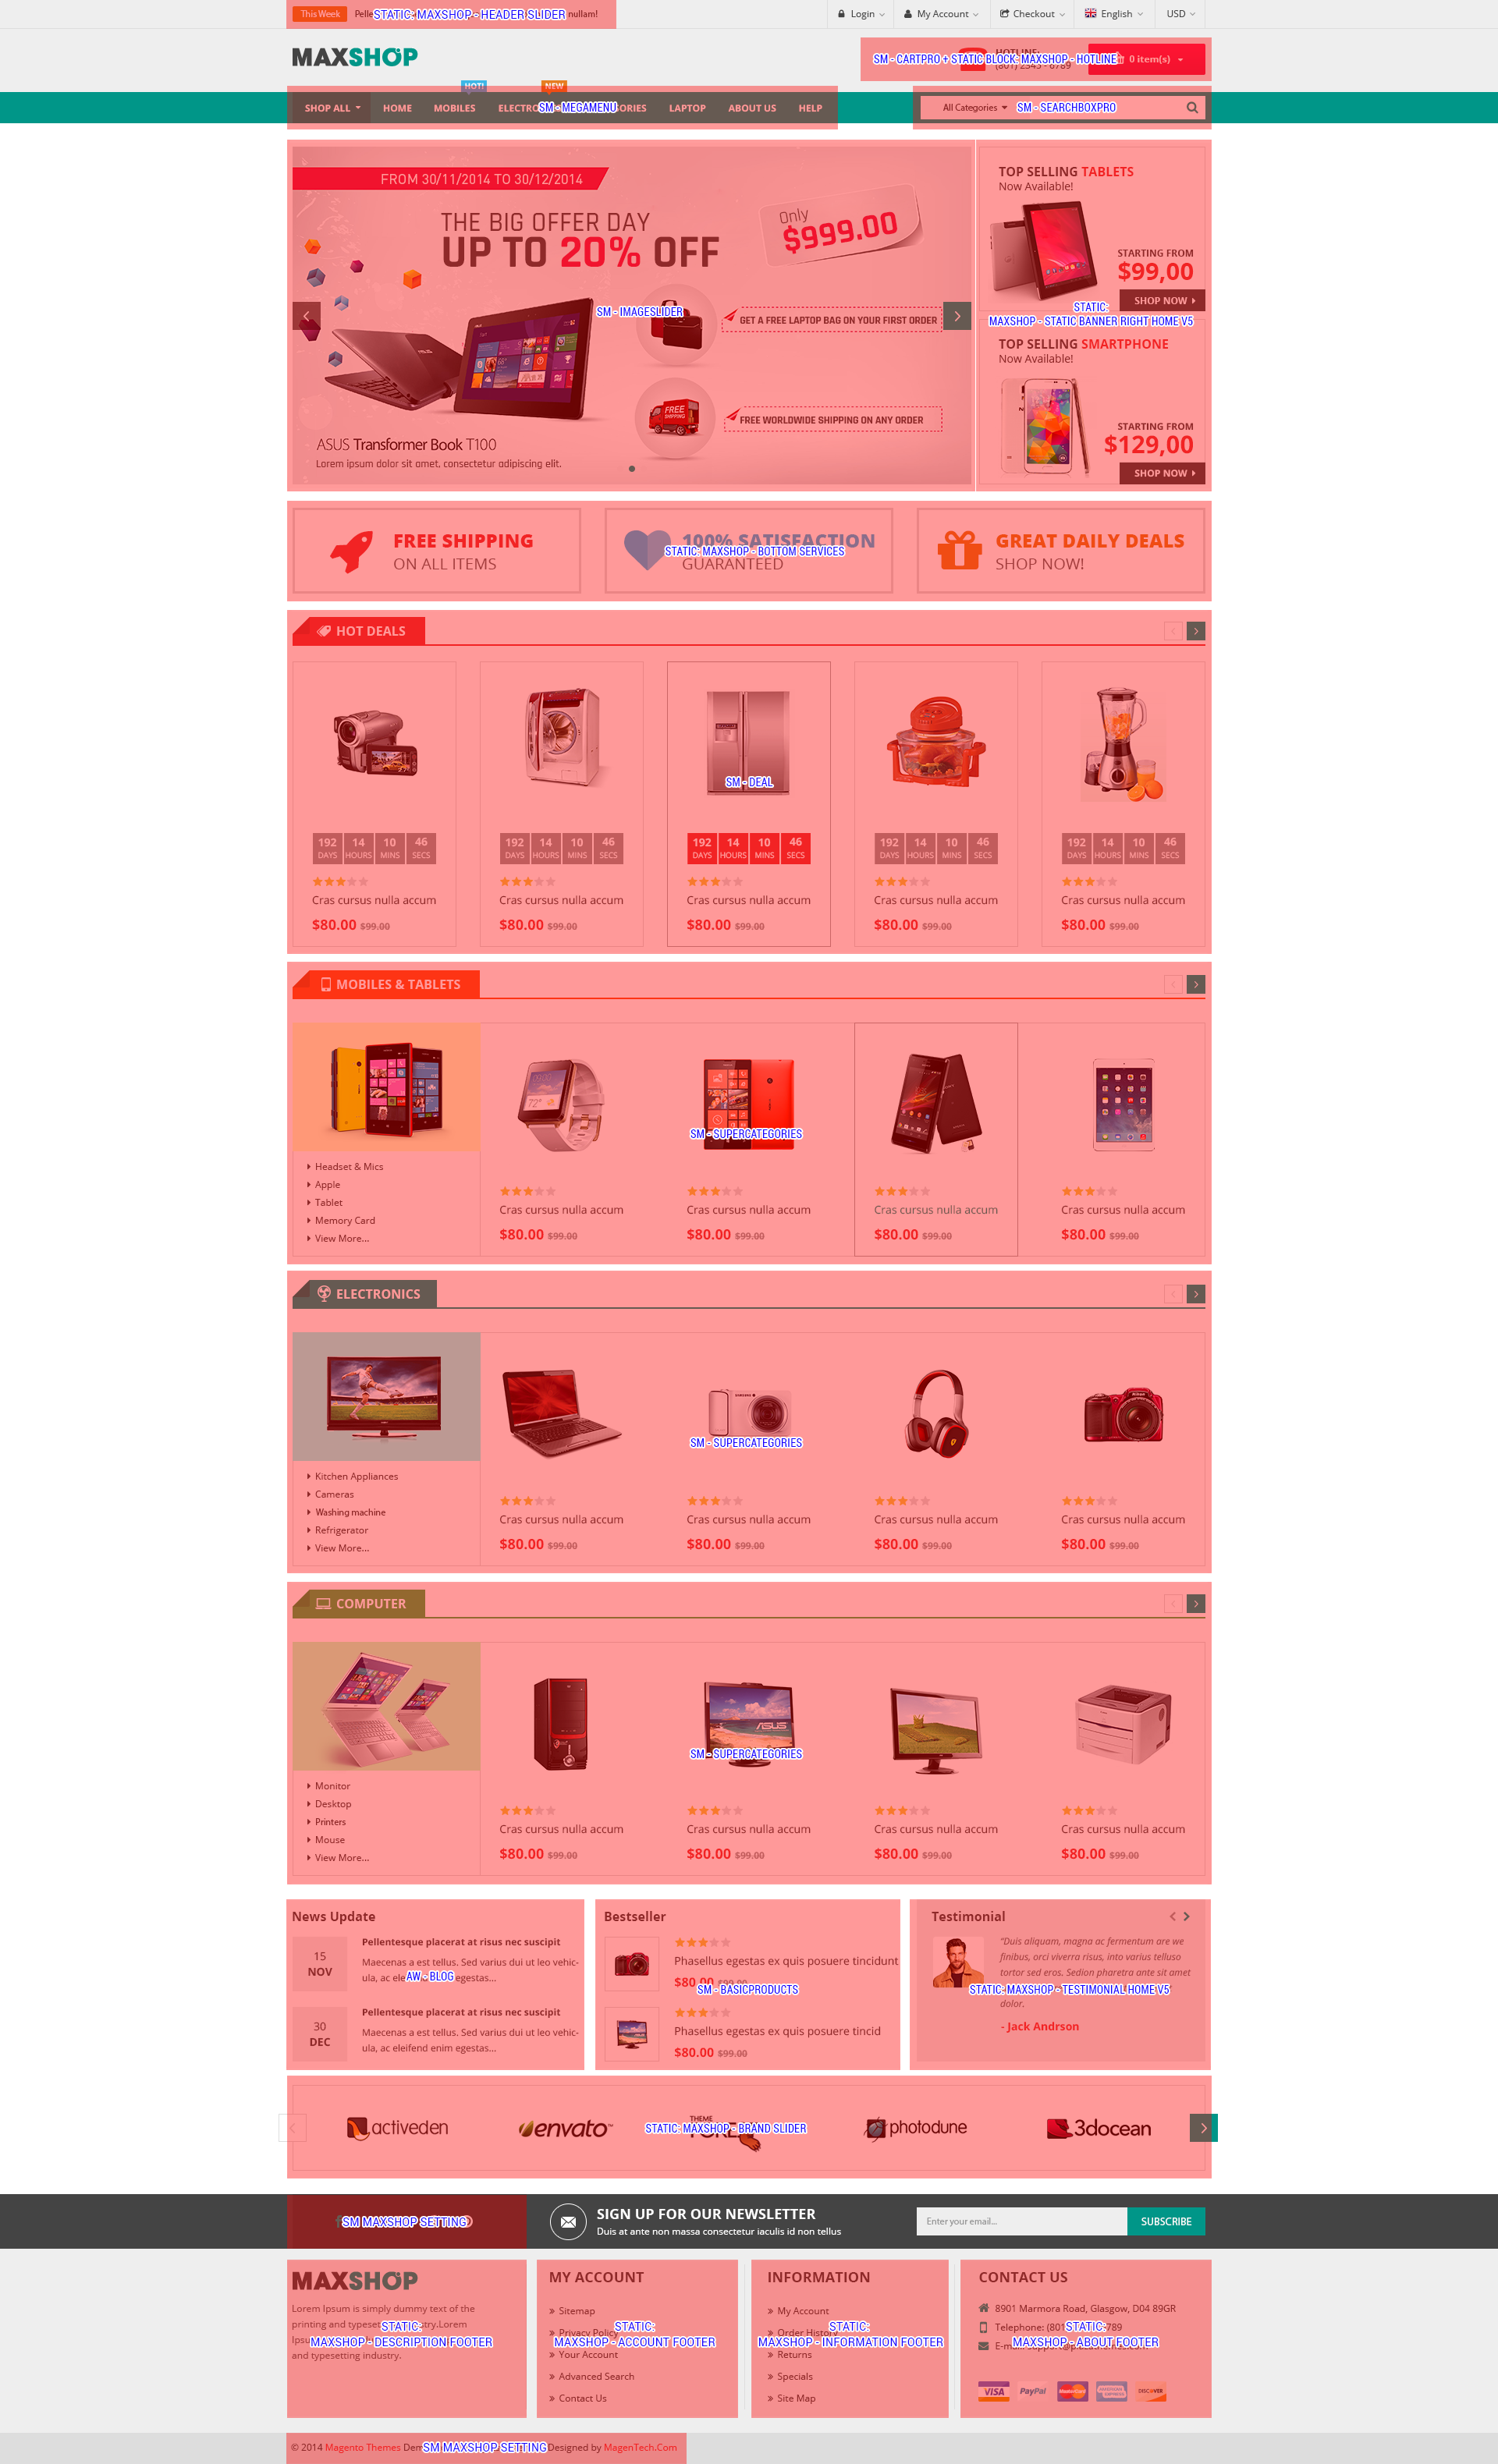
2LAYOUT POSITION – Back to top
3INSTALLATION – Back to top
There are two ways to install a Magento Theme:
- Install quickstart: By using this package, you will set the theme exactly as our Demo with sample data.
- Install Manual (included of Theme installation package): You will need only be using the zipped files “Theme” folders.
Please Note that in our Theme package included all of extensions.
3.1 Quickstart Installation :
Magentech provides SM Quickstart package for each theme which aims to ease the installation for users. It will help you save much time of installing and configuring if you plan to start your site from the beginning. Please following steps below:
- Step 1: Download the quickstart package
- Step 2: Extract and Upload the whole Quickstart package to your server. In Quickstart folder you will see the extracted folder that include all sample data
- Step 3: Create a Database for your Magento

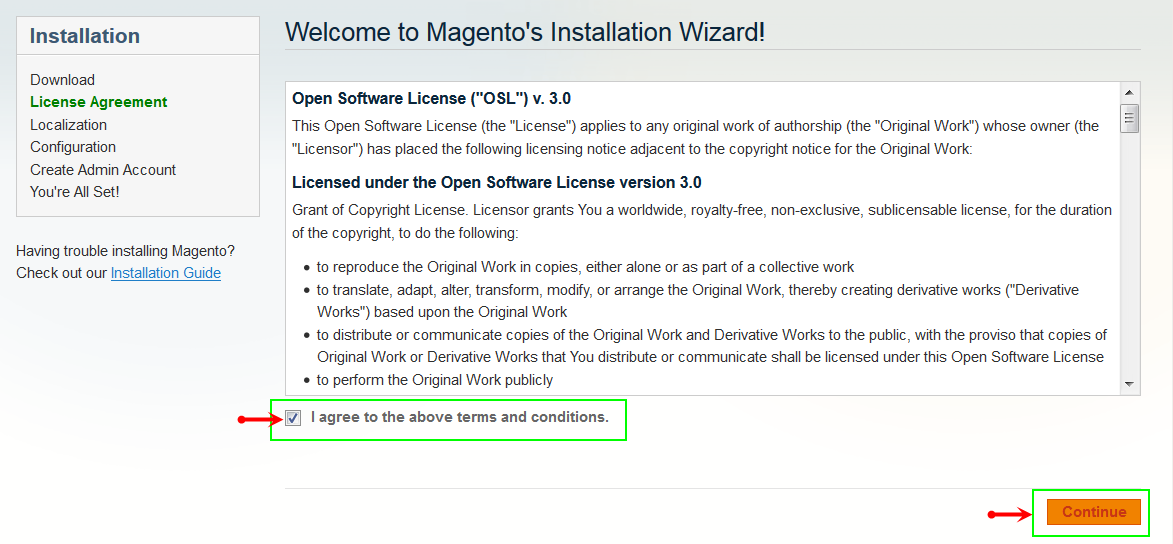
- Step 4: Start installation by opening browser and navigate to your URL (where the Quickstart uploaded) to load default Magento installer. Please follow each step of the Installer so that the installation process can be set.
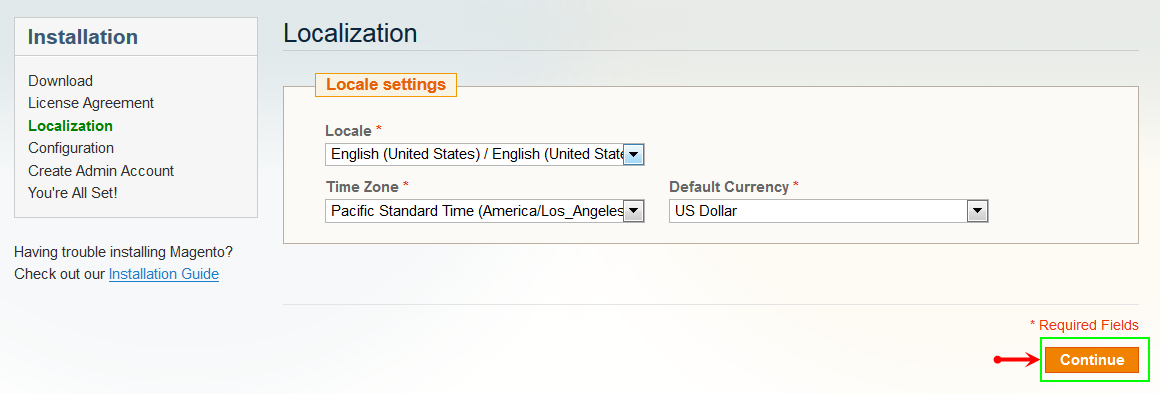
- Step 5: Locale Settings. Please fill fully into Required Fields (“Locale; Time Zone and Default Currency”.)
-
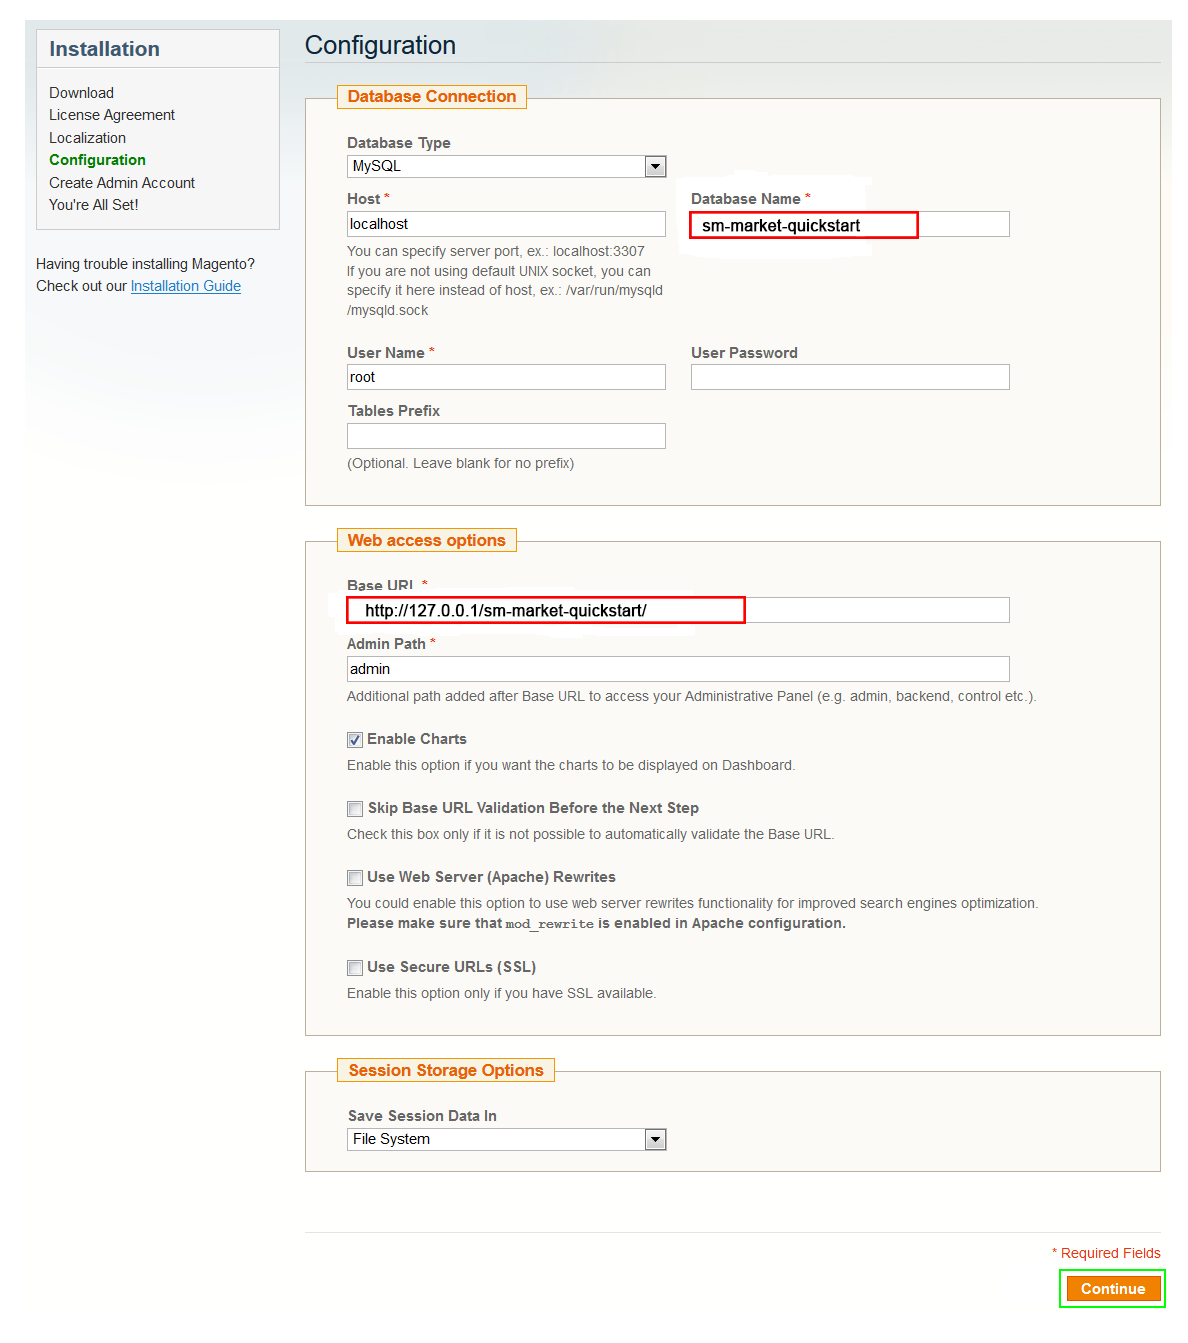
Step 6: In the Configuration step, input the required fields as below.
- Do not use “localhost” in URL, otherwise you could not log in to your Admin area (you should use your local IP in case of installing on your computer).
- Leave Tables prefix field blank.
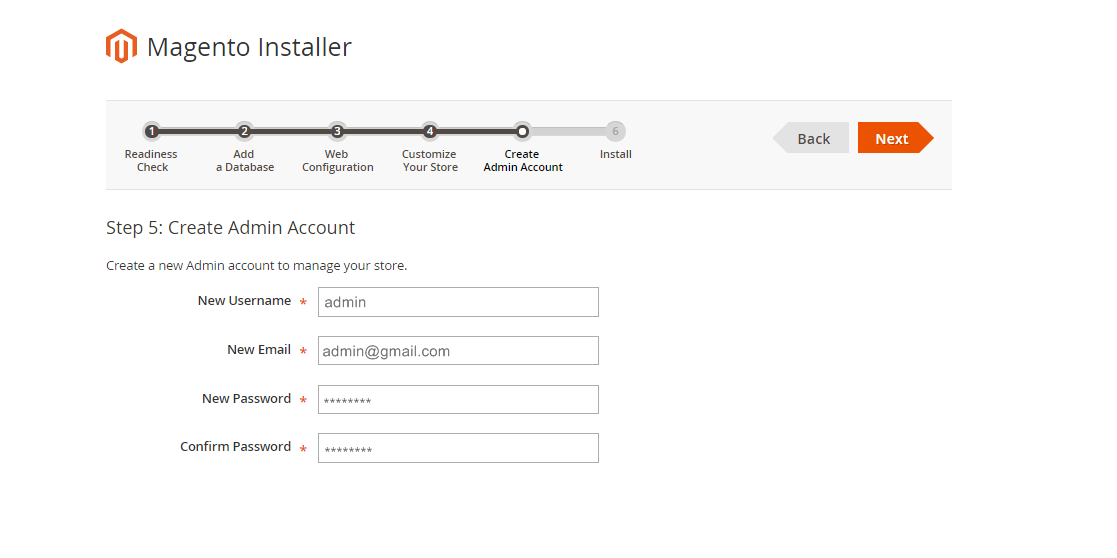
- Step 7: Create Admin Account. Please fill fully into Required Fields (“First Name; Last Name; Email; Username; password and confirm password”.)
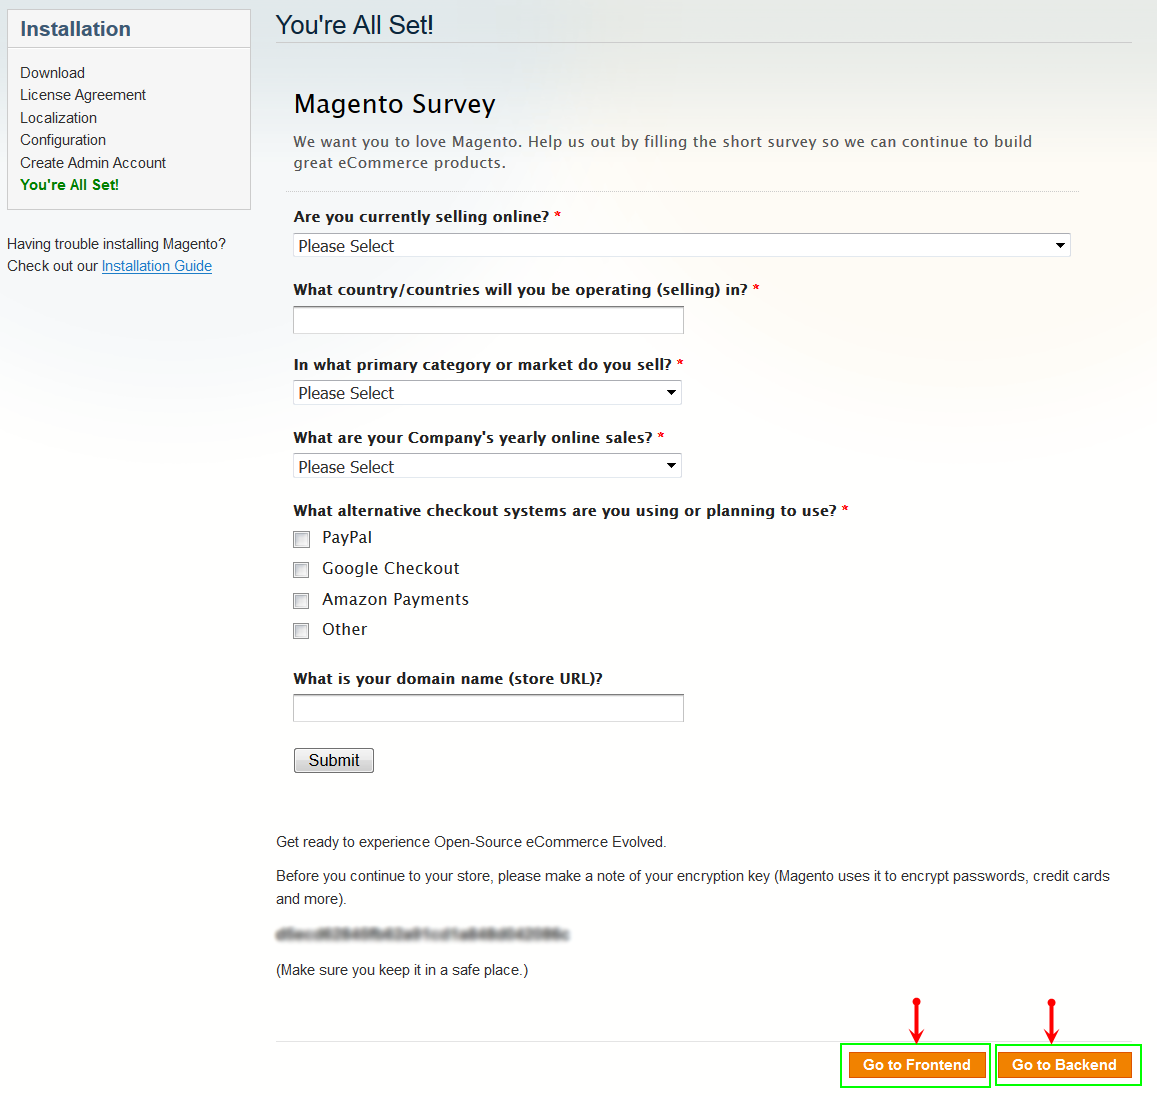
- Step 8: Finish Installation and now you can Go to Frontend or Go to Backend.
3.2 Manual Installation
Theme Installation
Please install Magento extension Theme in advance of any other installations to avoid unexpected conflicts that may occur.
-
Step 1: Copy folders skin and app to your site root folder. The overwritten folders should have a directory layout like this:
{docroot} /magento/
app/
index.php
js/
lib/
LICENSE.txt
media/
pear/
skin/
var/ - Step 2: Log in to your Admin Panel (e.g. Access Magento Admin area: https://yourdomain/index.php/admin/). Log out and log in back.
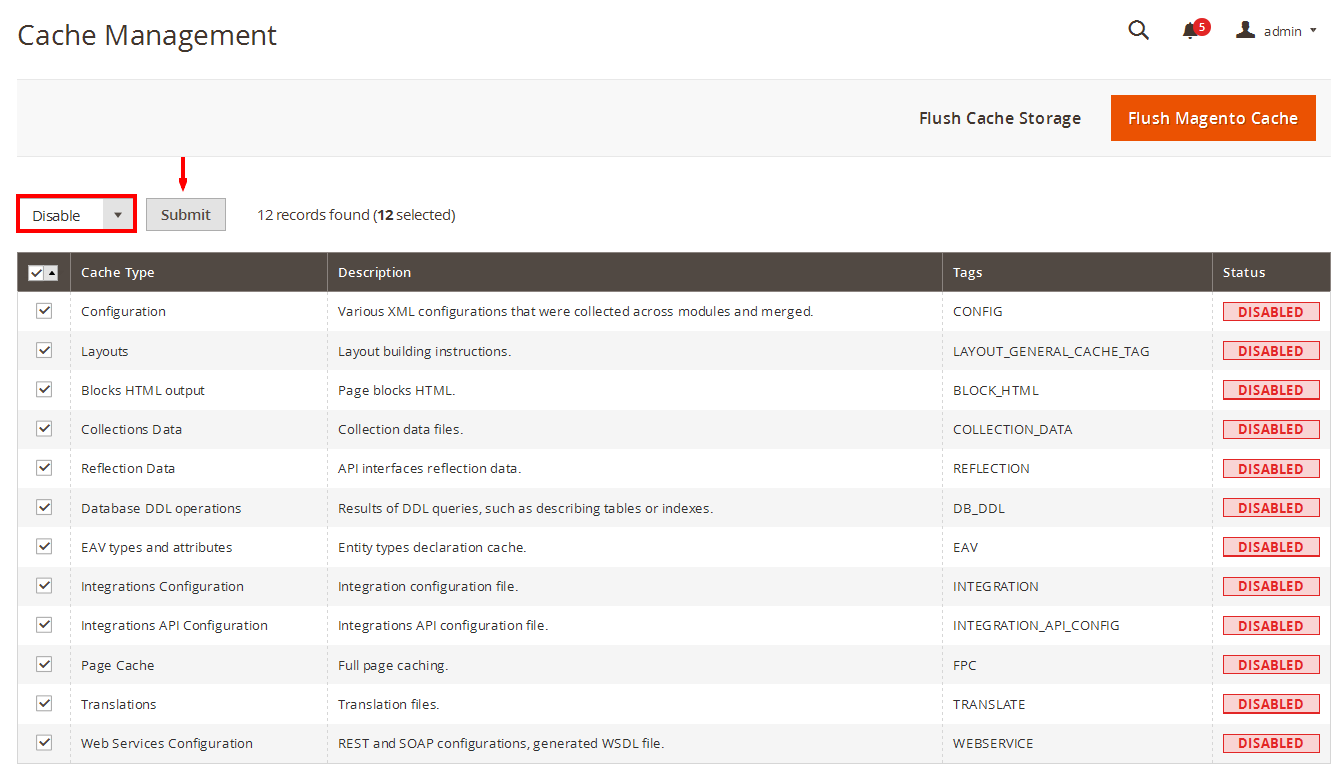
- Step 3: Navigate to System >> Cache Management, Select All the cache types, take Action as Refresh and Submit.
- Step 4: Navigate to System >> Configuration >> Design tab (in the left hands column).
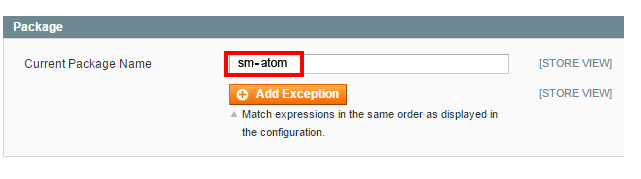
- Step 5: In Package tab, input “Current Package Name” field with the actual theme name.
- Step 6: You can also change the settings for Header .
- Step 7: Click Save Config button to finish.
4CONFIGURATION – Back to top
4.1 Configure pages
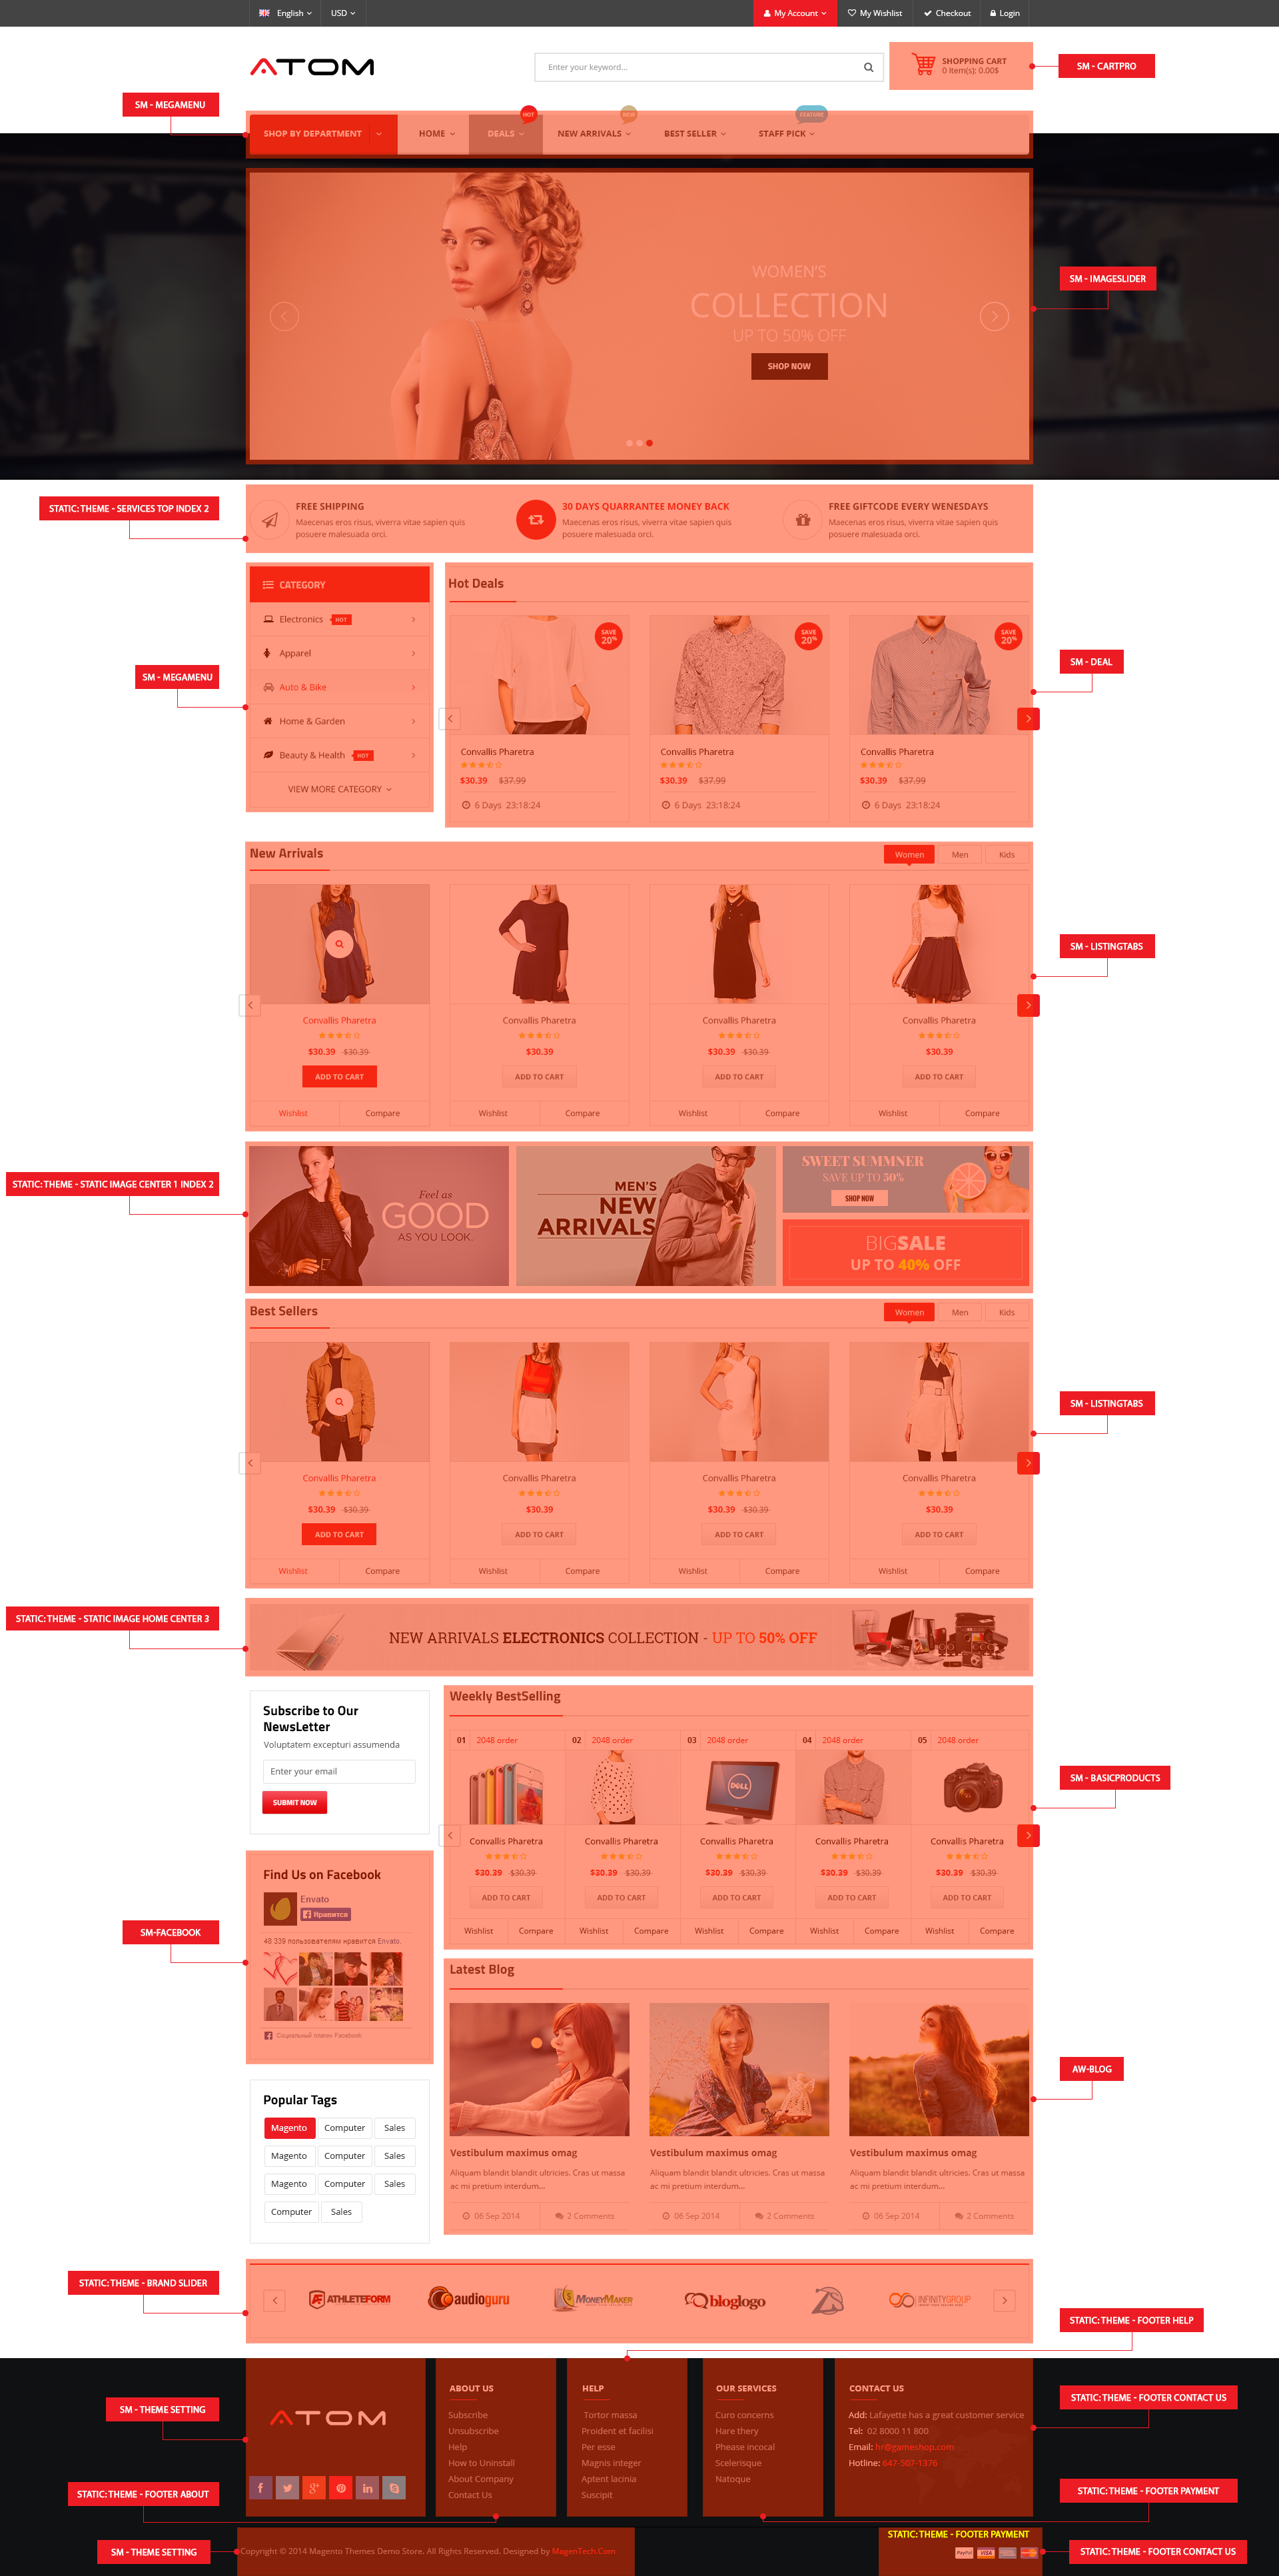
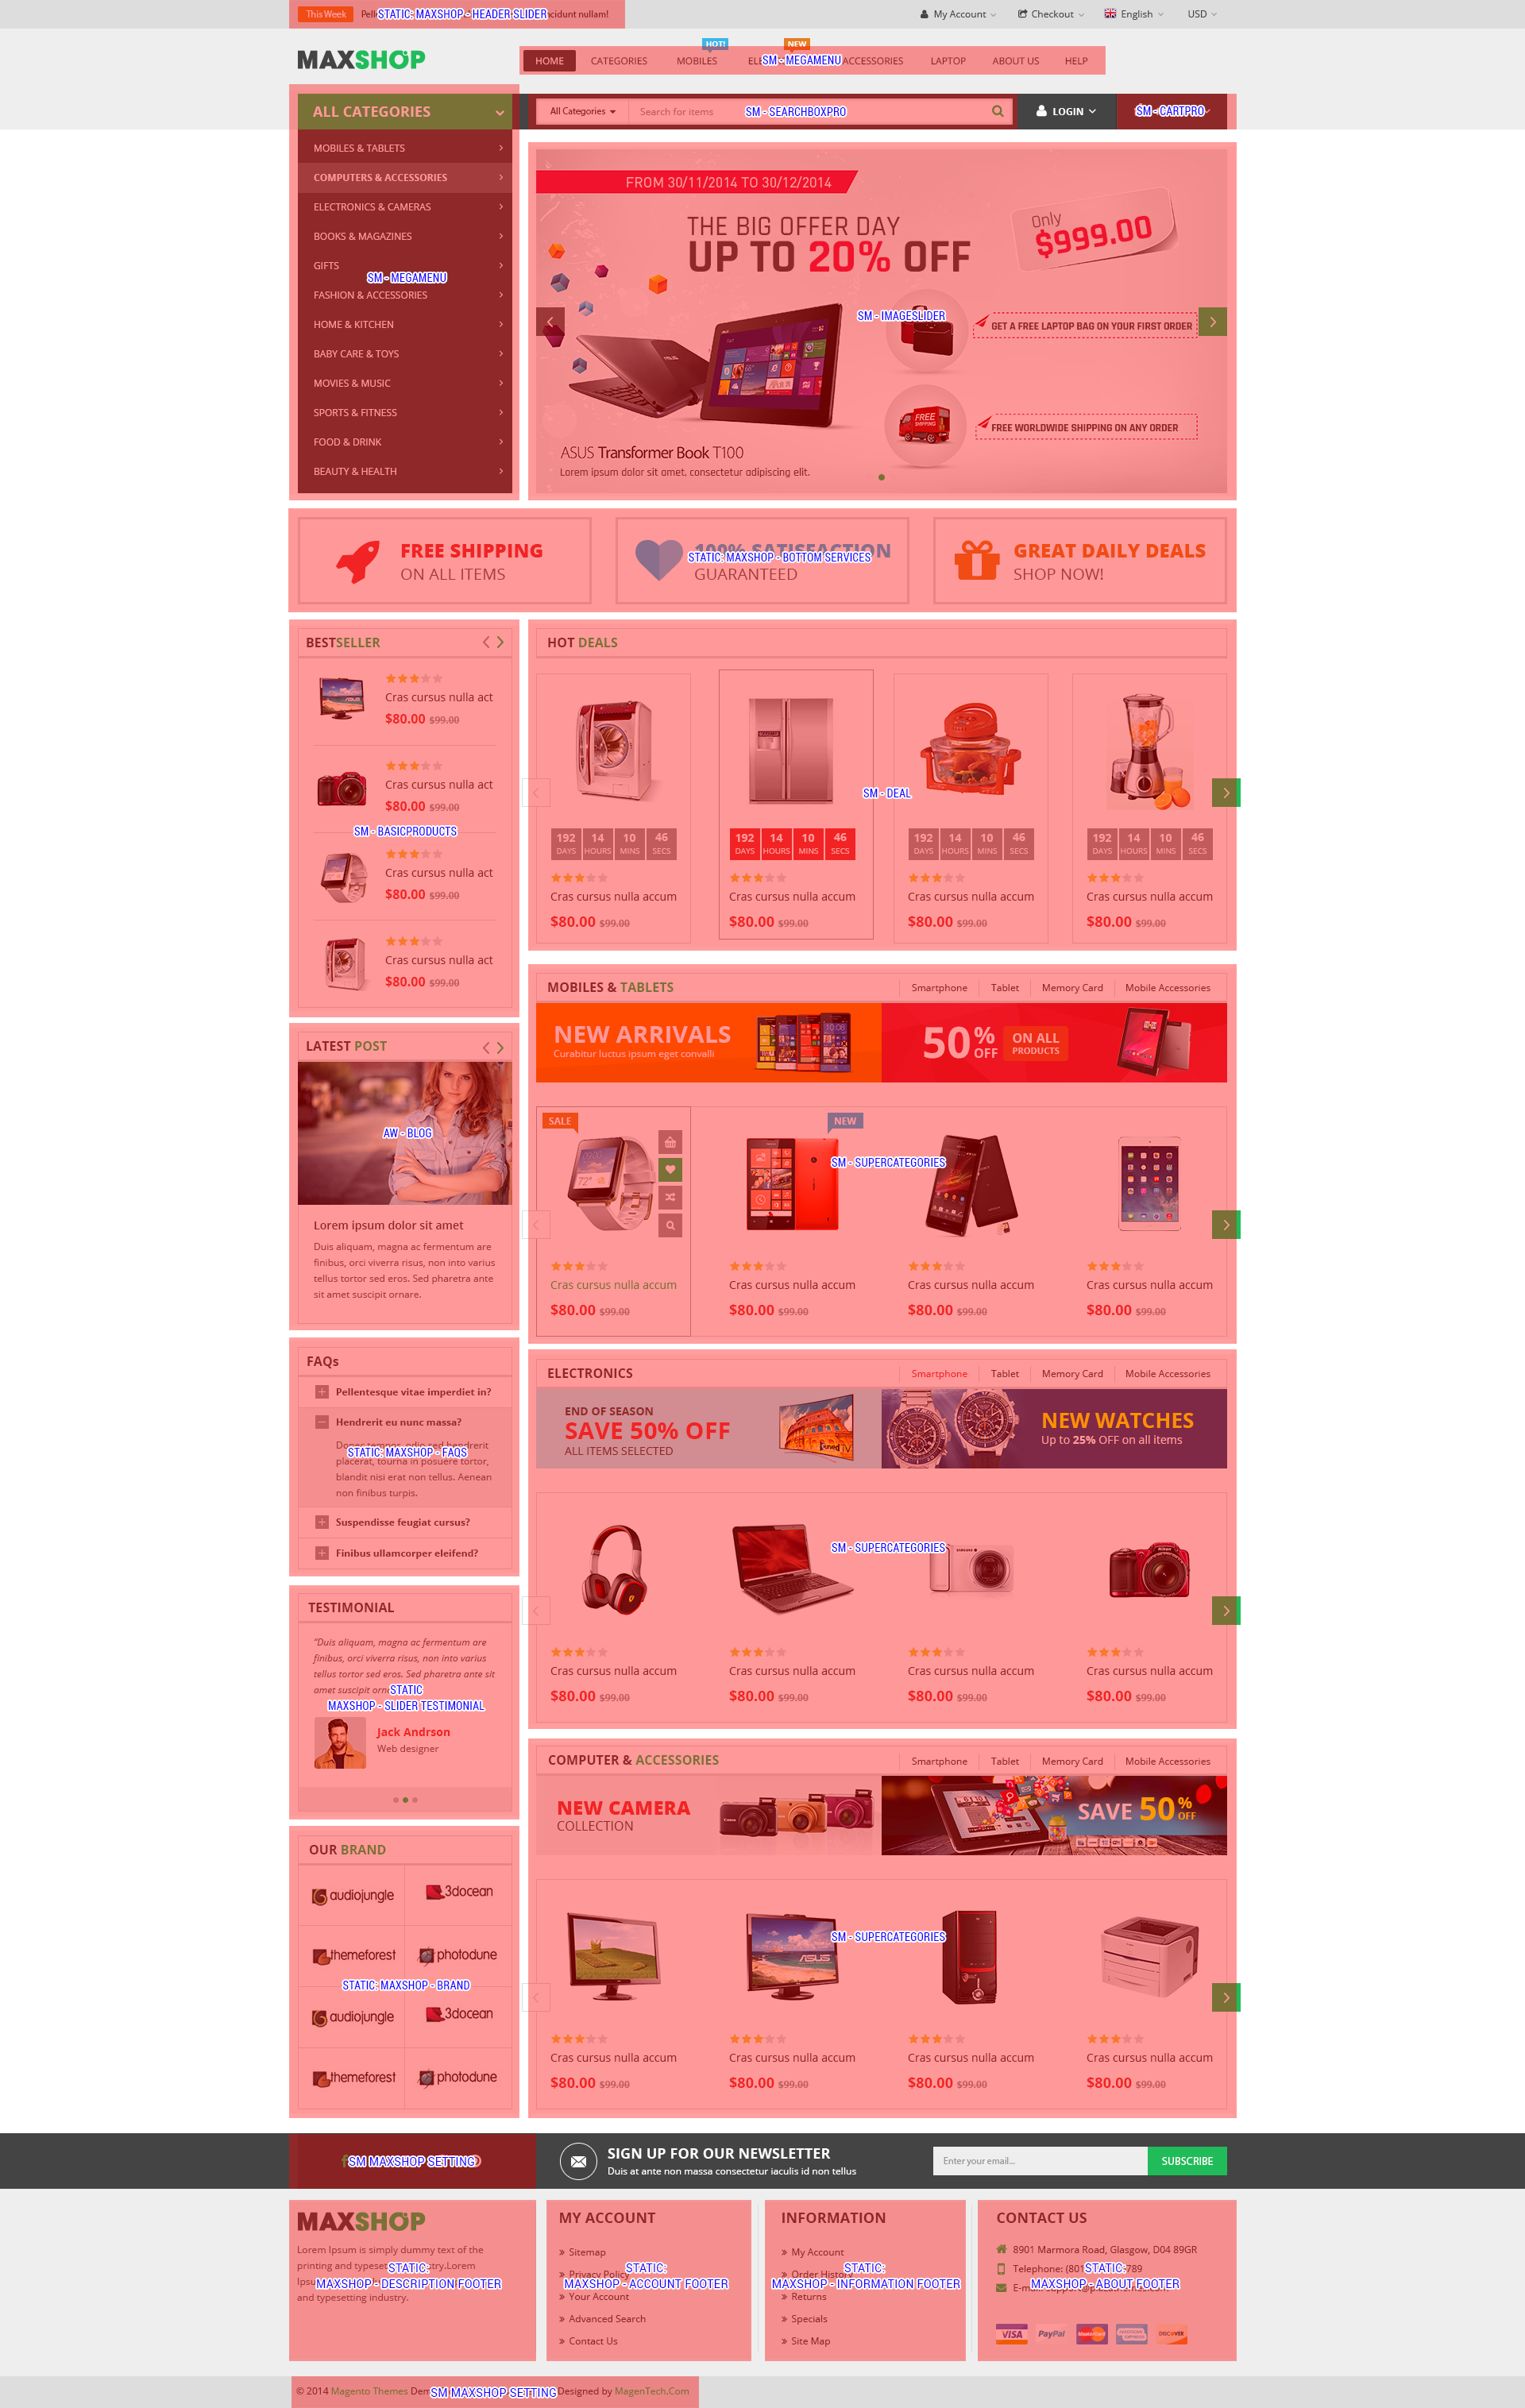
4.1.1 Homepage Style 1
Detailed layout of Home Style 1:
To configure this page, in the Admin Panel, navigate to CMS >> Pages. Create a new page in Page Management section.
- Page Information Tab: Please click to see the Backend Settings.
- Content Tab: Please click to see the Backend Settings .
- Design Tab: Please click to see the Backend Settings .
Copy and paste the following code into the Layout Update XML field of Design tab :
|
1
2
3
4
5
6
7
8
9
10
11
12
13
14
15
16
17
18
19
20
21
22
23
24
25
26
27
28
29
30
31
32
33
34
35
36
37
38
39
40
41
42
43
44
45
46
47
48
49
50
51
52
53
54
55
56
57
58
59
60
61
62
63
64
65
66
67
|
<reference name="left">
<block type="megamenu/list" name="megamenu.list.theme" as="megaMenuLeft">
<action method="setConfig">
<values>
<group_id>2</group_id>
<theme>2</theme>
</values>
</action>
</block>
<block type="basicproducts/list" name="basicproducts.list.default" template="sm/basicproducts/left-products.phtml"/>
<block type="blog/blog" name="latest-blog" template="aw_blog/latest-blog.phtml"></block>
<block type="cms/block" name="block-faqs">
<action method="setBlockId"><block_id>faqs</block_id></action>
</block>
<block type="cms/block" name="block-client-say">
<action method="setBlockId"><block_id>slider-client-say</block_id></action>
</block>
<block type="cms/block" name="brand-logo">
<action method="setBlockId"><block_id>brand-left</block_id></action>
</block>
</reference>
<reference name="content">
<block type="imageslider/list" name="imageslider.list.default" template="sm/imageslider/default.phtml">
</block>
<block type="deal/list" name="deal.list.default" template="sm/deal/default.phtml"></block>
<block type="supercategories/list" name="supercategories.list.1" template="sm/supercategories/default.phtml"></block>
<block type="supercategories/list" name="supercategories.list.2" template="sm/supercategories/default.phtml">
<action method="_setConfig">
<values>
<product_category>5</product_category>
<static_id>des-super-cat-2</static_id>
<filter_order_by>top_rating</filter_order_by>
<product_order_dir>DESC</product_order_dir>
</values>
</action>
</block>
<block type="supercategories/list" name="supercategories.list.3" template="sm/supercategories/default.phtml">
<action method="_setConfig">
<values>
<product_category>92</product_category>
<static_id>des-super-cat-3</static_id>
<filter_order_by>most_viewed</filter_order_by>
<product_order_dir>DESC</product_order_dir>
</values>
</action>
</block>
</reference>
<reference name="bottom_block_home">
<block type="cms/block" name="bottom-service">
<action method="setBlockId"><block_id>bottom-service</block_id></action>
</block>
</reference>
|
4.1.2 Home Style 2
Detailed layout of Home Style 2:
To configure this page, in the Admin Panel, navigate to CMS >> Pages. Create a new page in Page Management section.
- Page Information Tab: Please click to see the Backend Settings.
- Content Tab: Please click to see the Backend Settings .
- Design Tab: Please click to see the Backend Settings .
Copy and paste the following code into the Layout Update XML field of Design tab:
|
1
2
3
4
5
6
7
8
9
10
11
12
13
14
15
16
17
18
19
20
21
22
23
24
25
26
27
28
29
30
31
32
33
34
35
36
37
38
39
40
41
42
43
44
45
46
47
48
49
50
51
52
53
54
55
56
57
58
59
60
61
62
63
|
<reference name="top_block_home">
<block type="imageslider/list" name="imageslider.list.default" template="sm/imageslider/default.phtml"></block>
<block type="cms/block" name="top-static-image">
<action method="setBlockId"><block_id>top-static-image</block_id></action>
</block>
</reference>
<reference name="left">
<block type="basicproducts/list" name="basicproducts.list.default" template="sm/basicproducts/left-products.phtml"/>
<block type="blog/blog" name="latest-blog" template="aw_blog/latest-blog.phtml"></block>
<block type="cms/block" name="block-faqs">
<action method="setBlockId"><block_id>faqs</block_id></action>
</block>
<block type="cms/block" name="block-client-say">
<action method="setBlockId"><block_id>slider-client-say</block_id></action>
</block>
<block type="cms/block" name="brand-logo">
<action method="setBlockId"><block_id>brand-left</block_id></action>
</block>
</reference>
<reference name="content">
<block type="deal/list" name="deal.list.default" template="sm/deal/default.phtml"></block>
<block type="supercategories/list" name="supercategories.list.1" template="sm/supercategories/default.phtml"></block>
<block type="supercategories/list" name="supercategories.list.2" template="sm/supercategories/default.phtml">
<action method="_setConfig">
<values>
<product_category>5</product_category>
<static_id>des-super-cat-2</static_id>
<filter_order_by>top_rating</filter_order_by>
<product_order_dir>DESC</product_order_dir>
</values>
</action>
</block>
<block type="supercategories/list" name="supercategories.list.3" template="sm/supercategories/default.phtml">
<action method="_setConfig">
<values>
<product_category>92</product_category>
<static_id>des-super-cat-3</static_id>
<filter_order_by>most_viewed</filter_order_by>
<product_order_dir>DESC</product_order_dir>
</values>
</action>
</block>
</reference>
<reference name="bottom_block_home">
<block type="cms/block" name="bottom-service">
<action method="setBlockId"><block_id>bottom-service</block_id></action>
</block>
</reference>
|
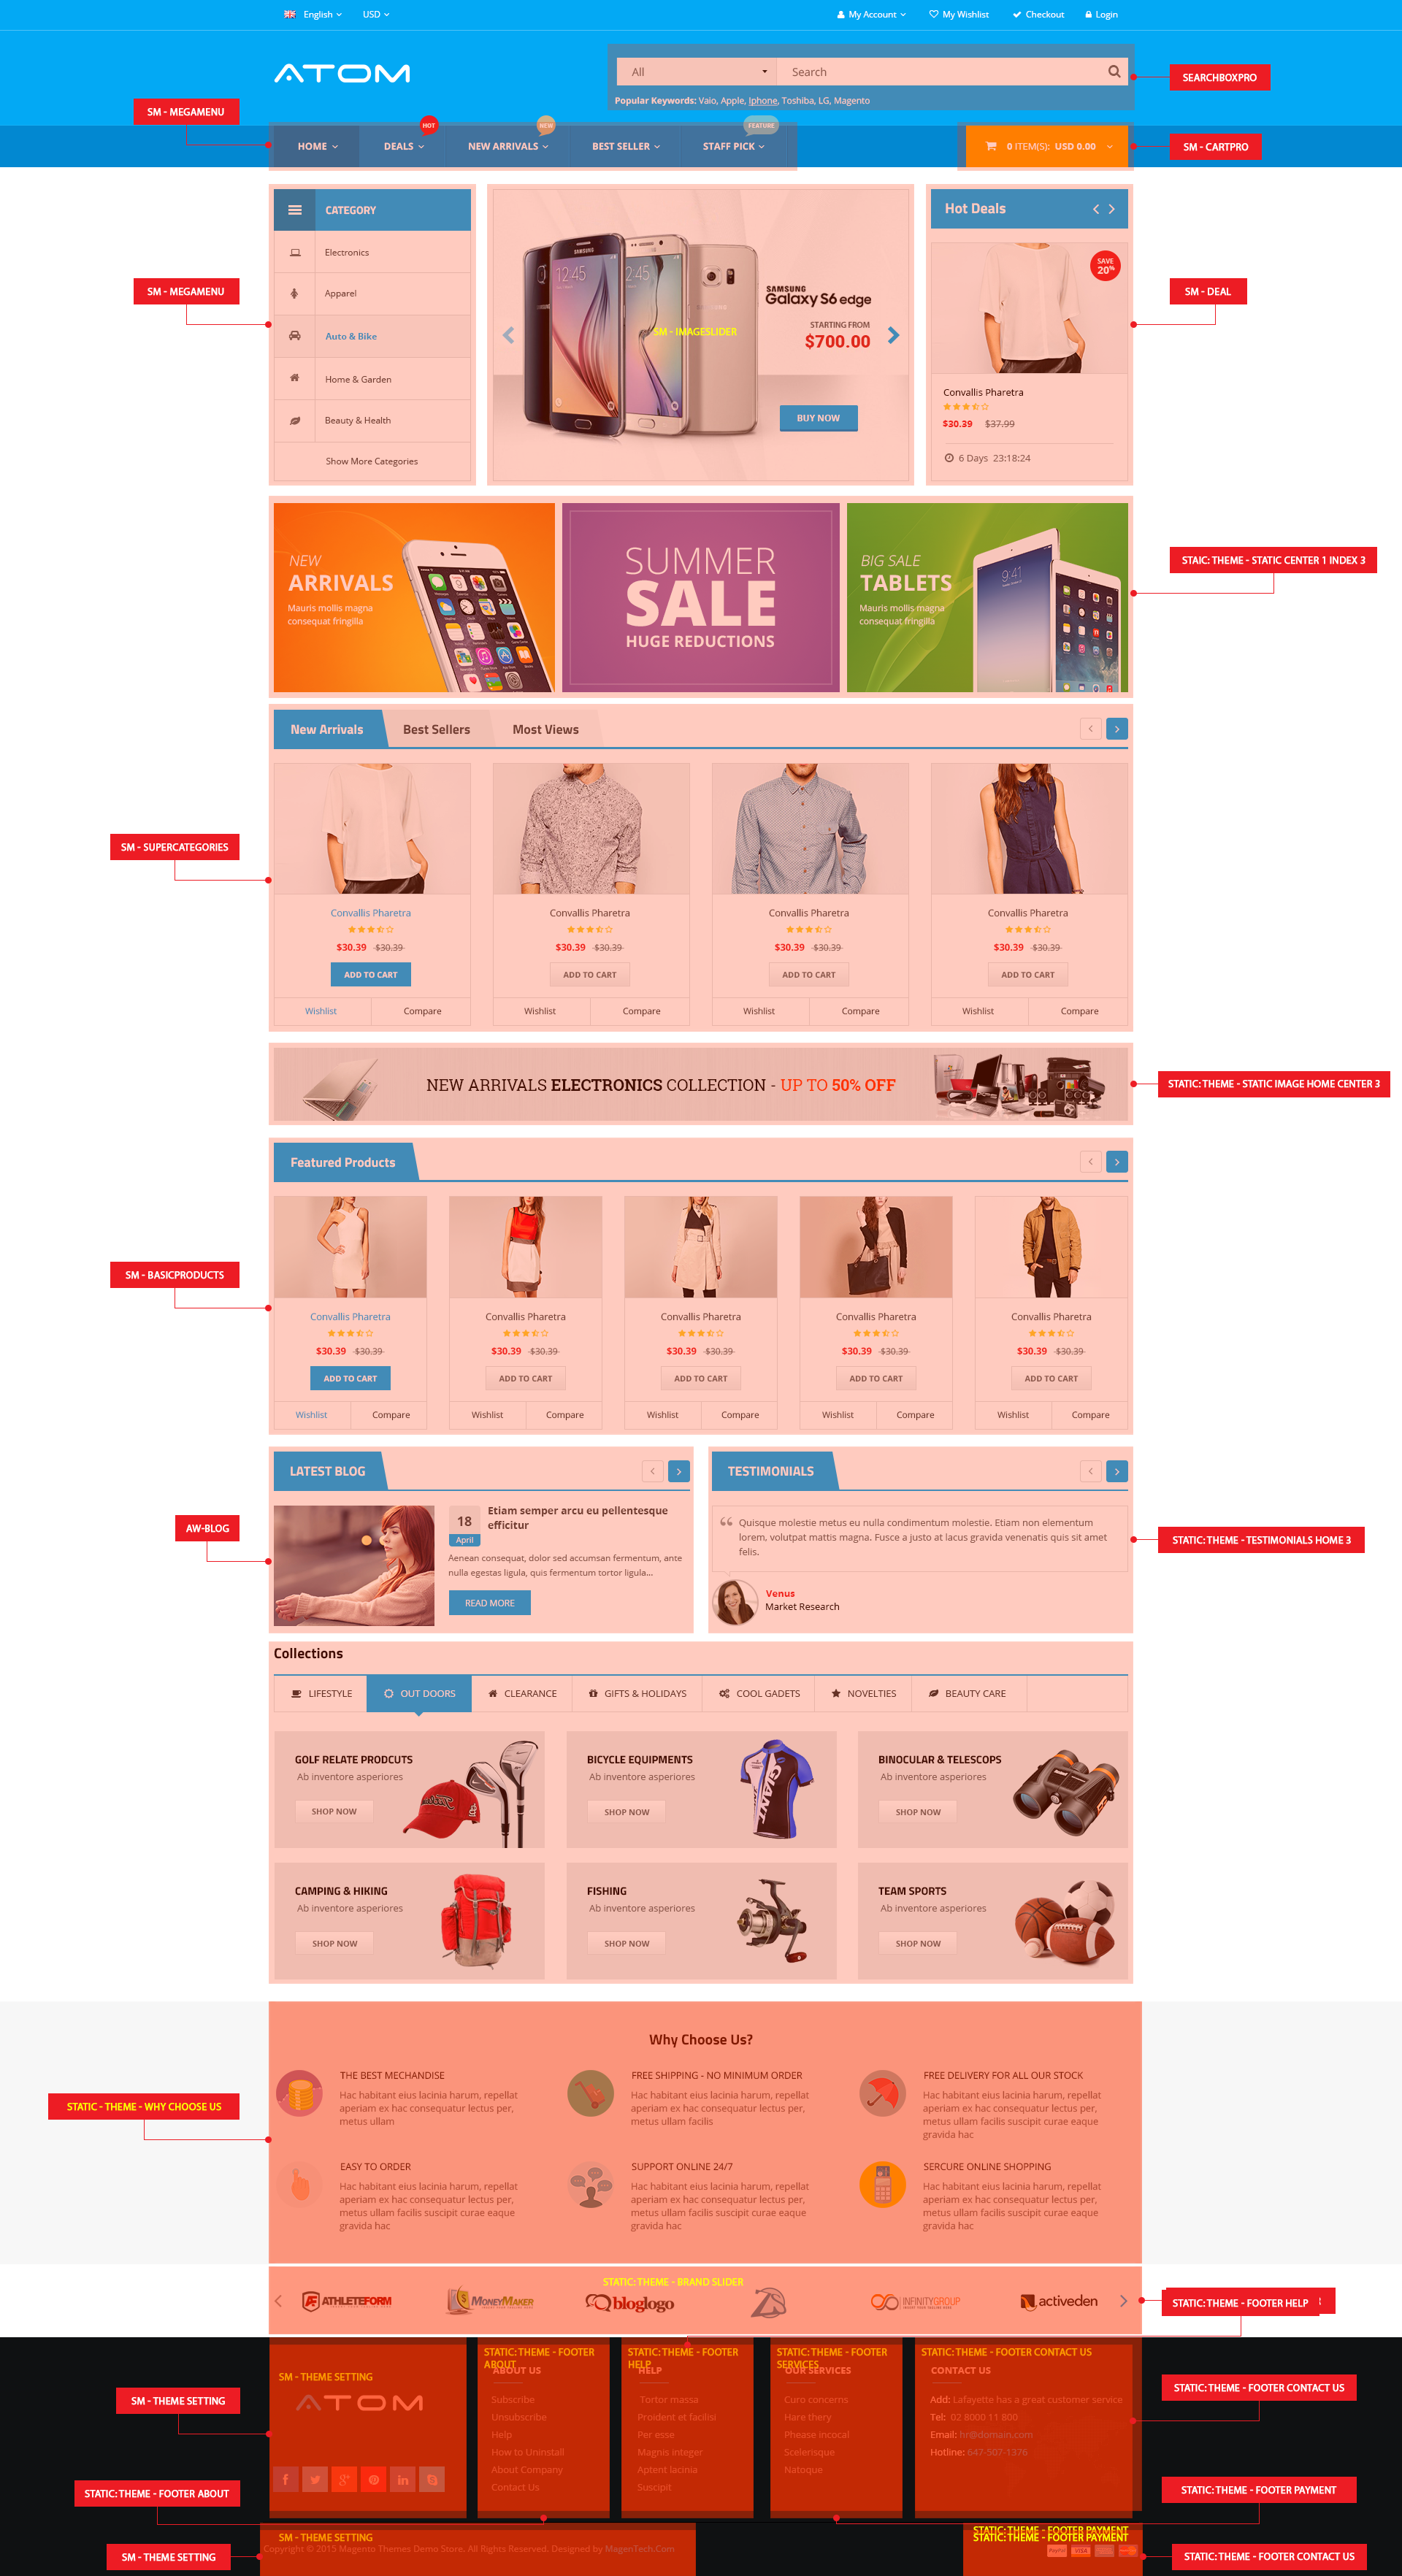
4.1.3 Home Style 3
Detailed layout of Home Style 3:
To configure this page, in the Admin Panel, navigate to CMS >> Pages. Create a new page in Page Management section.
- Page Information Tab: Please click to see the Backend Settings.
- Content Tab: Please click to see the Backend Settings .
- Design Tab: Please click to see the Backend Settings .
Copy and paste the following code into the Layout Update XML field of Design tab:
|
1
2
3
4
5
6
7
8
9
10
11
12
13
14
15
16
17
18
19
20
21
22
23
24
25
26
27
28
29
30
31
32
33
34
35
36
37
38
39
40
41
42
43
44
45
46
47
48
49
50
51
52
53
54
55
56
57
58
59
60
61
62
63
|
<reference name="top_block_home">
<block type="imageslider/list" name="imageslider.list.default" template="sm/imageslider/default.phtml">
</block>
<block type="cms/block" name="banner-right">
<action method="setBlockId"><block_id>static-banner-right</block_id></action>
</block>
<block type="cms/block" name="bottom-service">
<action method="setBlockId"><block_id>bottom-service</block_id></action>
</block>
</reference>
<reference name="right">
<block type="basicproducts/list" name="basicproducts.list.default" before="-" template="sm/basicproducts/left-products.phtml"/>
<block type="blog/blog" name="latest-blog" template="aw_blog/latest-blog.phtml"></block>
<block type="cms/block" name="block-faqs">
<action method="setBlockId"><block_id>faqs</block_id></action>
</block>
<block type="cms/block" name="block-client-say">
<action method="setBlockId"><block_id>slider-client-say</block_id></action>
</block>
<block type="cms/block" name="static-image-right">
<action method="setBlockId"><block_id>st-image-home-right</block_id></action>
</block>
</reference>
<reference name="content">
<block type="deal/list" name="deal.list.default" template="sm/deal/default.phtml"></block>
<block type="supercategories/list" name="supercategories.list.1" template="sm/supercategories/default.phtml"></block>
<block type="supercategories/list" name="supercategories.list.2" template="sm/supercategories/default.phtml">
<action method="_setConfig">
<values>
<product_category>5</product_category>
<static_id>des-super-cat-2</static_id>
<filter_order_by>top_rating</filter_order_by>
<product_order_dir>DESC</product_order_dir>
</values>
</action>
</block>
<block type="supercategories/list" name="supercategories.list.3" template="sm/supercategories/default.phtml">
<action method="_setConfig">
<values>
<product_category>92</product_category>
<static_id>des-super-cat-3</static_id>
<filter_order_by>most_viewed</filter_order_by>
<product_order_dir>DESC</product_order_dir>
</values>
</action>
</block>
</reference>
<reference name="bottom_block_home">
<block type="cms/block" name="brand-slider">
<action method="setBlockId"><block_id>brand-slider</block_id></action>
</block>
</reference>
|
4.1.4 Home Style 4
Detailed layout of Home Style 4:
To configure this page, in the Admin Panel, navigate to CMS >> Pages. Create a new page in Page Management section.
- Page Information Tab: Please click to see the Backend Settings.
- Content Tab: Please click to see the Backend Settings .
- Design Tab: Please click to see the Backend Settings .
Copy and paste the following code into the Layout Update XML field of Design tab:
|
1
2
3
4
5
6
7
8
9
10
11
12
13
14
15
16
17
18
19
20
21
22
23
24
25
26
27
28
29
30
31
32
33
34
35
36
37
38
39
40
41
42
43
44
45
46
47
48
49
50
51
52
53
54
55
56
|
<reference name="top_block_home">
<block type="imageslider/list" name="imageslider.list.default" template="sm/imageslider/default.phtml">
</block>
<block type="cms/block" name="bottom-service">
<action method="setBlockId"><block_id>bottom-service</block_id></action>
</block>
</reference>
<reference name="left">
<block type="basicproducts/list" name="basicproducts.list.default" template="sm/basicproducts/left-products.phtml"/>
<block type="blog/blog" name="latest-blog" template="aw_blog/latest-blog.phtml"></block>
<block type="cms/block" name="block-faqs">
<action method="setBlockId"><block_id>faqs</block_id></action>
</block>
<block type="cms/block" name="block-client-say">
<action method="setBlockId"><block_id>slider-client-say</block_id></action>
</block>
<block type="cms/block" name="brand-logo">
<action method="setBlockId"><block_id>brand-left</block_id></action>
</block>
</reference>
<reference name="content">
<block type="deal/list" name="deal.list.default" template="sm/deal/default.phtml"></block>
<block type="supercategories/list" name="supercategories.list.1" template="sm/supercategories/default.phtml"></block>
<block type="supercategories/list" name="supercategories.list.2" template="sm/supercategories/default.phtml">
<action method="_setConfig">
<values>
<product_category>5</product_category>
<static_id>des-super-cat-2</static_id>
<filter_order_by>top_rating</filter_order_by>
<product_order_dir>DESC</product_order_dir>
</values>
</action>
</block>
<block type="supercategories/list" name="supercategories.list.3" template="sm/supercategories/default.phtml">
<action method="_setConfig">
<values>
<product_category>92</product_category>
<static_id>des-super-cat-3</static_id>
<filter_order_by>most_viewed</filter_order_by>
<product_order_dir>DESC</product_order_dir>
</values>
</action>
</block>
</reference>
|
4.1.5 Home Style 5
Detailed layout of Home Style 5:
To configure this page, in the Admin Panel, navigate to CMS >> Pages. Create a new page in Page Management section.
- Page Information Tab: Please click to see the Backend Settings.
- Content Tab: Please click to see the Backend Settings .
- Design Tab: Please click to see the Backend Settings .
Copy and paste the following code into the Layout Update XML field of Design tab:
|
1
2
3
4
5
6
7
8
9
10
11
12
13
14
15
16
17
18
19
20
21
22
23
24
25
26
27
28
29
30
31
32
33
34
35
36
37
38
39
40
41
42
43
44
45
46
47
48
49
50
51
52
53
54
55
56
57
58
59
|
<reference name="content">
<block type="imageslider/list" name="imageslider.list.default" template="sm/imageslider/default.phtml"></block>
<block type="cms/block" name="banner-right">
<action method="setBlockId"><block_id>st-image-home-right-v5</block_id></action>
</block>
<block type="cms/block" name="bottom-service">
<action method="setBlockId"><block_id>bottom-service</block_id></action>
</block>
<block type="deal/list" name="deal.list.default" template="sm/deal/default.phtml"></block>
<block type="supercategories/list" name="supercategories.list.1" template="sm/supercategories/default-v2.phtml"></block>
<block type="supercategories/list" name="supercategories.list.2" template="sm/supercategories/default-v2.phtml">
<action method="_setConfig">
<values>
<product_category>5</product_category>
<static_id>img-super-2-h5</static_id>
<filter_order_by>top_rating</filter_order_by>
<product_order_dir>DESC</product_order_dir>
</values>
</action>
</block>
<block type="supercategories/list" name="supercategories.list.3" template="sm/supercategories/default-v2.phtml">
<action method="_setConfig">
<values>
<product_category>92</product_category>
<static_id>img-super-3-h5</static_id>
<filter_order_by>most_viewed</filter_order_by>
<product_order_dir>DESC</product_order_dir>
</values>
</action>
</block>
</reference>
<reference name="bottom_block_home">
<block type="blog/blog" name="latest-blog" template="aw_blog/latest-blog-h5.phtml"></block>
<block type="basicproducts/list" name="basicproducts.list.default.bottom" template="sm/basicproducts/products-bottom.phtml">
<action method="_setConfig">
<values>
<product_source>ids</product_source>
<product_ids>891,899</product_ids>
</values>
</action>
</block>
<block type="cms/block" name="client-say-bottom">
<action method="setBlockId"><block_id>testimonial-h5</block_id></action>
</block>
<block type="cms/block" name="brand-slider">
<action method="setBlockId"><block_id>brand-slider</block_id></action>
</block>
</reference>ce>
|
4.2 Configure Header Style
SM Maxshop support 5 Header Styles: “Header Default“, “Header 2″, “Header 3, Header 4 and Header 5″. In the Admin Panel, please navigate to SM Maxshop Settings >> in General Settings tab, find Header Style Parameter and select Header Style that you want to display.
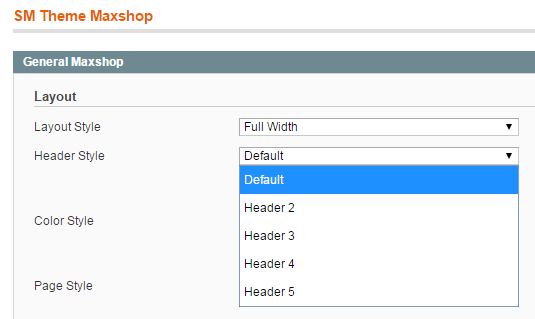
Please go to the frontend to view the changes!
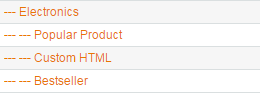
4.3 Configure Mega Menu
- Firstly, You need to create Menu group. In Admin Panel, navigate to SM Mega Menu >> Menu Manager >> Add group (add 2 groups: “Default Category” - have id 1 and “Megamenu Left” - have id 2).
- Secondly, navigate to SM Mega Menu >> Configuration
- Thirdly, In order to add menu items, Go to SM Mega Menu >> Menu items Manager to create menu items as below.
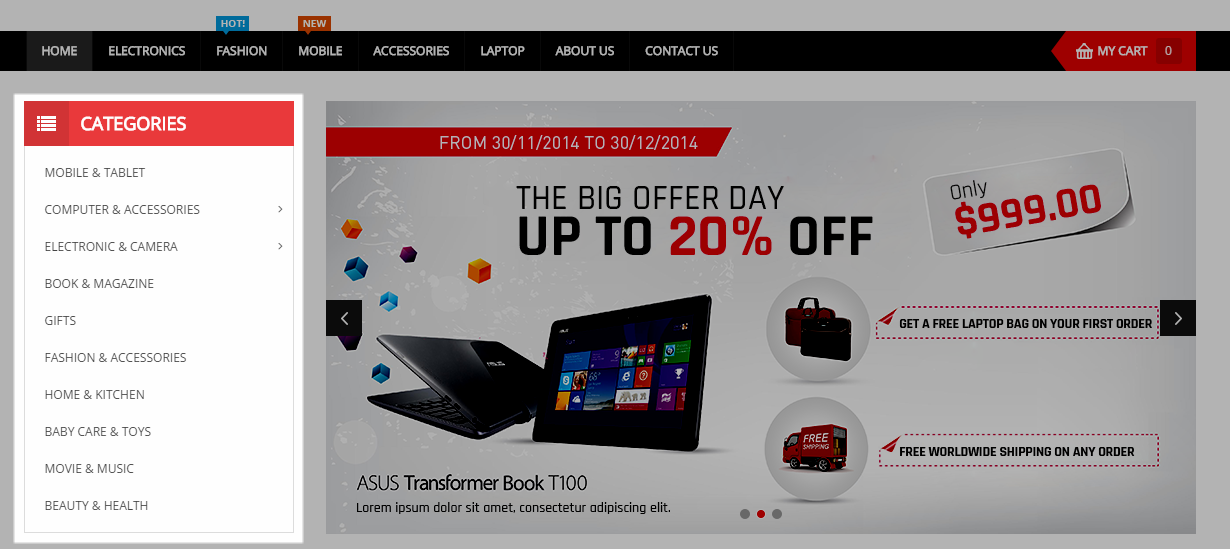
With Horizontal Menu:
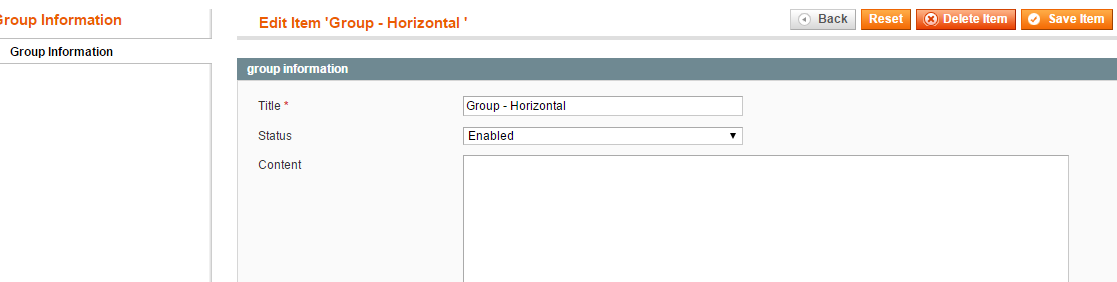
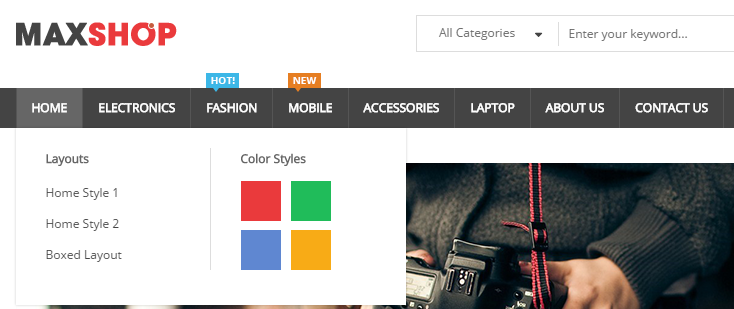
HOME MENU
Frontend Appearance
Link show Home Menu’s backend. Please click Here to view.
Copy and paste the following code into the Content field:
|
1
2
3
4
5
6
7
8
9
10
11
12
13
14
15
16
17
18
19
20
|
<div class="home-wrapper-item">
<div class="item-feature layout-block">
<div class="title-item-feature"><h2>Layouts</h2></div>
<ul>
<li><a title="Home Style 1" href="{{store url="?___store=default&___from_store=french"}}">Home Style 1</a></li>
<li><a title="Home Style 2" href="{{store url="?___store=french&___from_store=default"}}">Home Style 2</a></li>
<li><a title="Boxed Layout" href="{{store url="?___store=hungary&___from_store=english"}}">Boxed Layout</a></li>
</ul>
</div>
<div class="item-feature color-block">
<div class="title-item-feature"><h2>Color Styles</h2></div>
<ul>
<li class="red"><a title="Red" href="{{store url="?___store=cameroon&___from_store=default"}}">Red</a></li>
<li class="green"><a title="Green" href="{{store url="?___store=argentina&___from_store=default"}}">Green</a></li>
<li class="blue"><a title="Blue" href="{{store url="?___store=german&___from_store=default"}}">Blue</a></li>
<li class="orange"><a title="Orange" href="{{store url="?___store=brazil&___from_store=default"}}">Orange</a></li>
</ul>
</div>
</div>
|
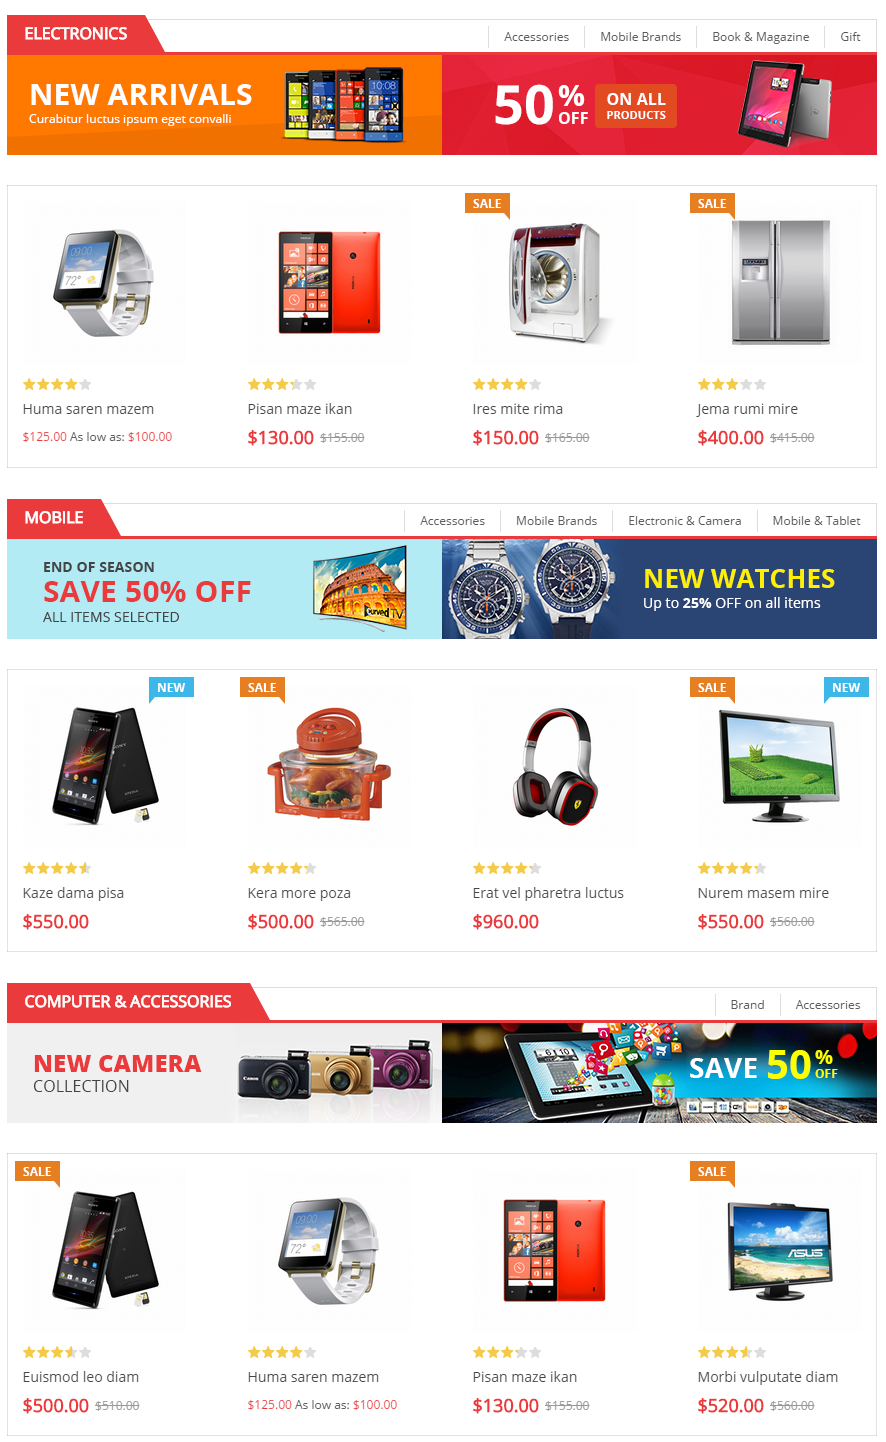
ELECTRONICS MENU
Frontend Appearance
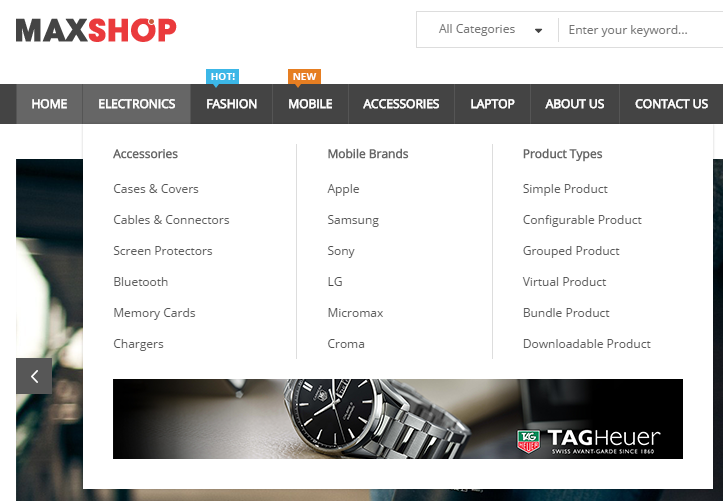
Tree of Electronics menu:
- Item: “Electronics” Item - Menu Backend Settings
- Item: “Accessories” Item - Menu Backend Settings
- Item: “Cases & Covers” Item - Menu Backend Settings
- Item: “Mobile Brands” Item - Menu Backend Settings
- Item: “Product Types” Item - Menu Backend Settings
- Item: “Static Image” Item - Menu Backend Settings
ABOUT US MENU
Frontend Appearance
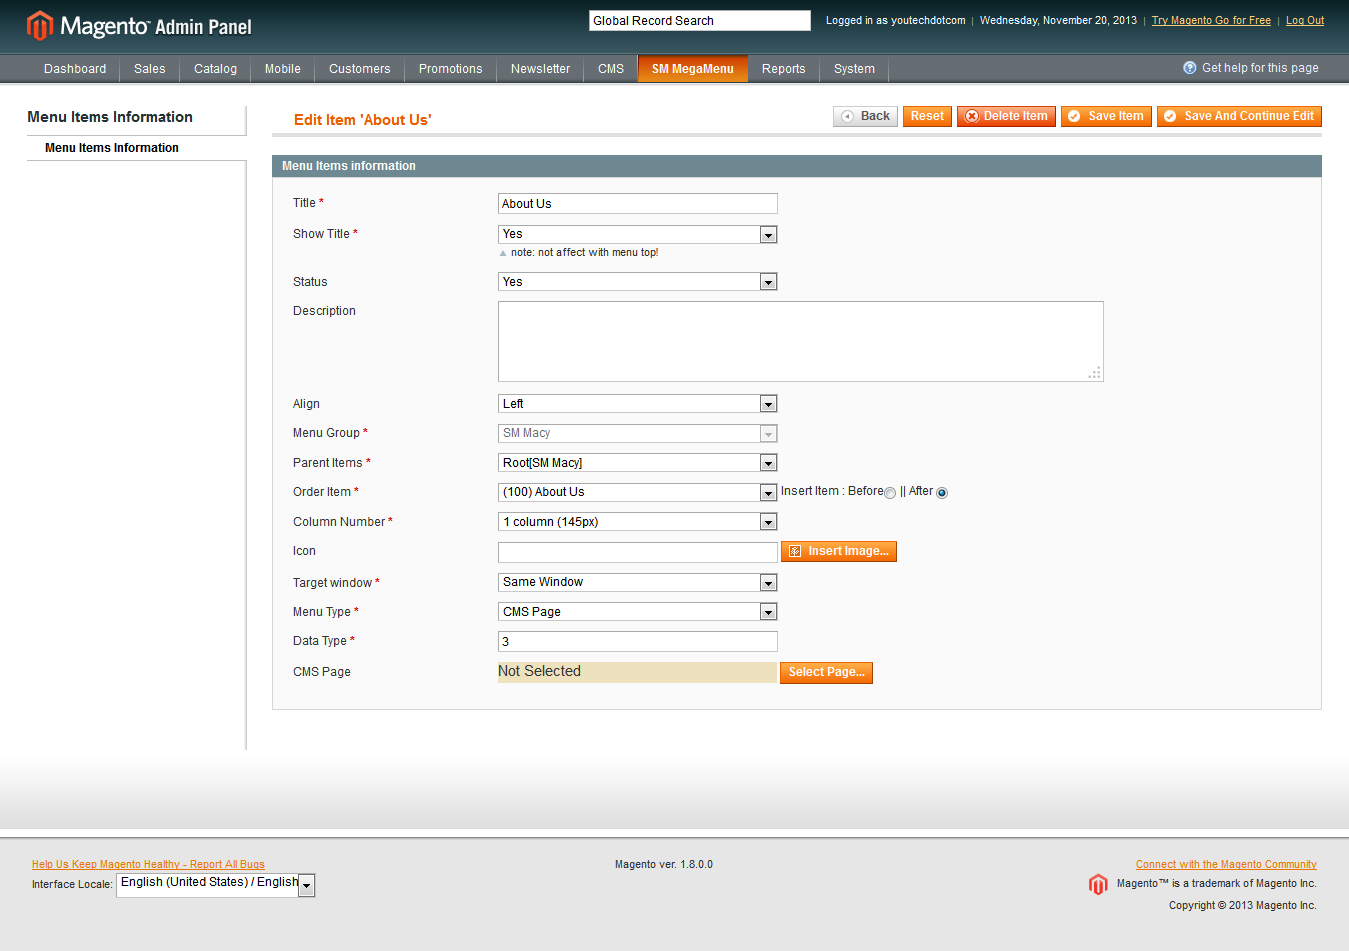
Backend Settings
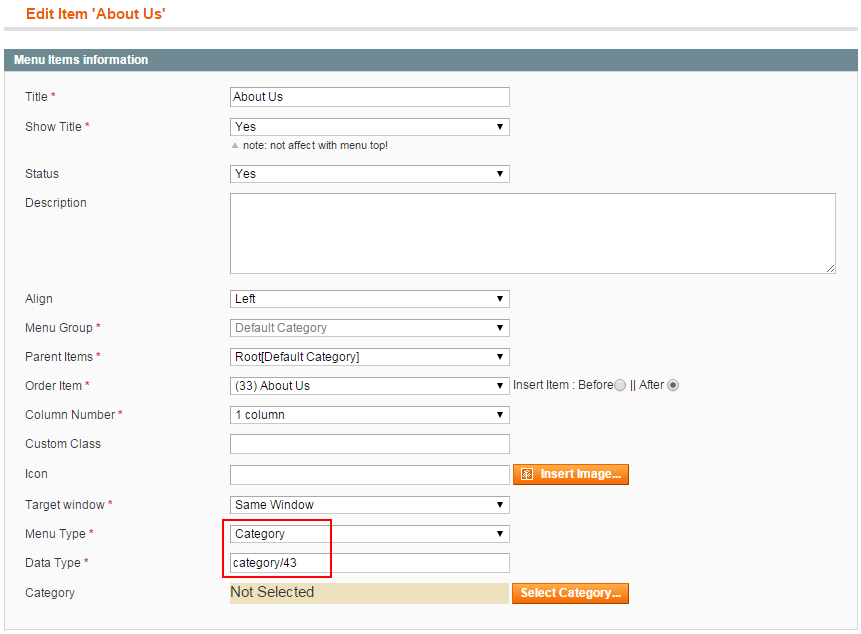
Data Type: “category/43″. To config, please go to
Catalog >> Categories Manager >> About Us
CONTACT US MENU
Frontend Appearance

Backend Settings
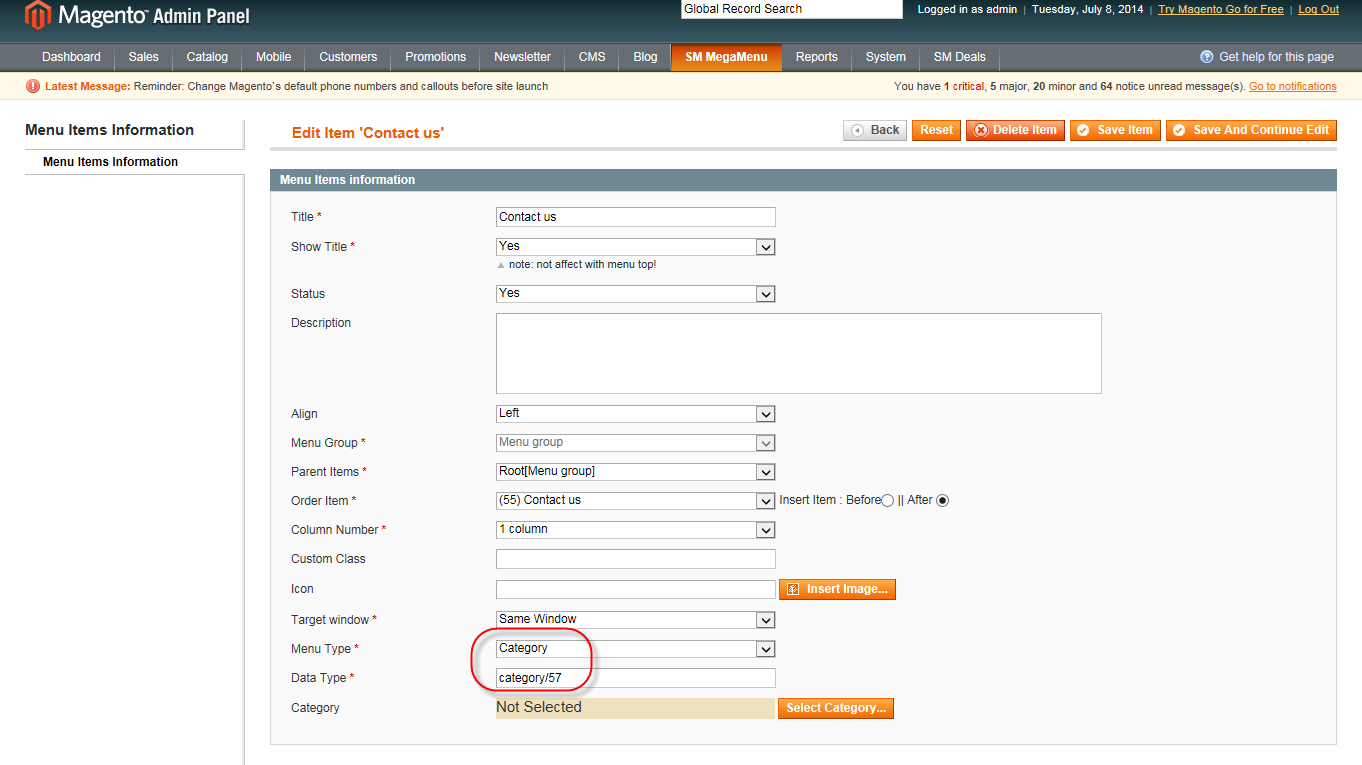
Data Type: “category/44″. To config, please go to Catalog >> Categories Manager >> Contact Us
Custom Layout Update of Custom Design:
|
1
2
3
4
5
6
7
|
<reference name="content">
<block type="core/template" name="contactForm" template="contacts/form.phtml">
<block type="cms/block" name="info-store">
<action method="setBlockId"><block_id>info-store</block_id></action>
</block>
</block>
</reference>
|
With Vertical Menu:
COMPUTER & ACCESSORIES MENU
Frontend Appearance
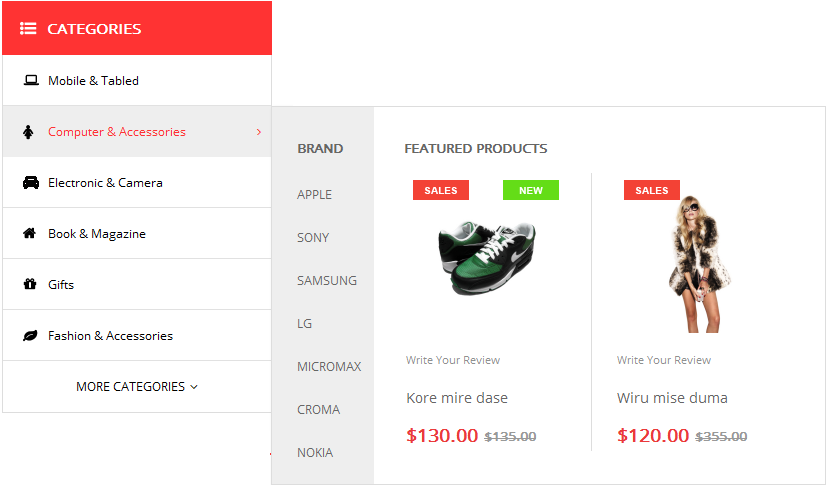
Tree of Computer & Accessories menu:
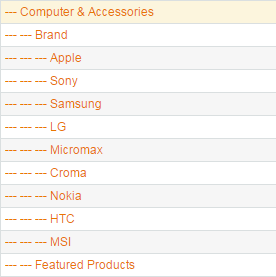
- Item: “Computer & Accessories” Item - Menu Backend Settings
- Item: “Brand” Item - Menu Backend Settings
- Item: “Apple” Item - Menu Backend Settings
- Item: “Featured Products” Item - Menu Backend Settings
Copy and paste the following code into the Content field:
|
1
|
<div class="megamenu-product">{{block type="basicproducts/list" template="sm/basicproducts/product-megamenu.phtml" basicproducts_title_text="" product_source="ids" product_ids="892,893" cat_title_display="0" category_title_max_characs="50" product_description_display="0" product_price_display="1" product_reviews_count="1" product_addcart_display="0" product_addwishlist_display="0" product_addcompare_display="0" product_readmore_display="0" imgcfg_from_product_image="1" imgcfg_width="160" imgcfg_height="160"}}</div>
|
ELECTRONIC & CAMERA MENU
Frontend Appearance
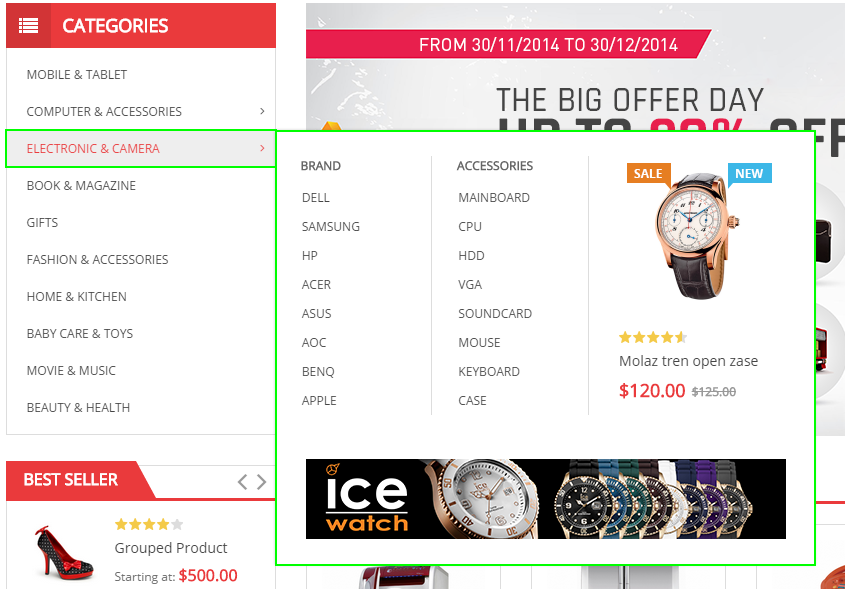
Tree of Electronic & Camera menu:
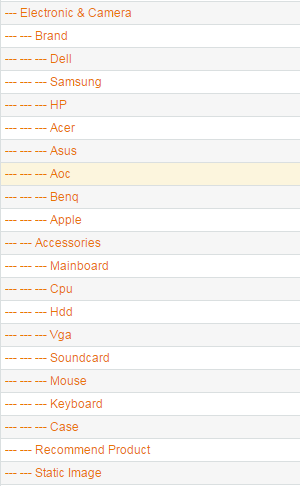
- Item: “Brand” Item - Menu Backend Settings
- Item: “Accessories” Item - Menu Backend Settings
- Item: “Recommend Product” Item - Menu Backend Settings
- Item: “Static Image” Item - Menu Backend Settings
4.4 Configure Extensions
List of Extensions are used in SM Market Theme:
- SM Search Box Pro Module : Click Here to view tutorial
- SM Cart Pro Module : Click Here to view tutorial
- SM Image Slider Module : Click Here to view tutorial
- SM Dynamic Slideshow : Click Here to view tutorial
- SM Basic Products
- SM Deal Module : Click Here to view tutorial
- SM Super Categories : Click Here to view tutorial
- SM Mega Menu: Click Here to view tutorial
I. SM Search Box Pro
- Position: SM Search Box Pro
- Frontend

- Backend of SM Search Box Pro: Click Here
II. SM Cart Pro
- Position: SM Cart Pro
- Frontend
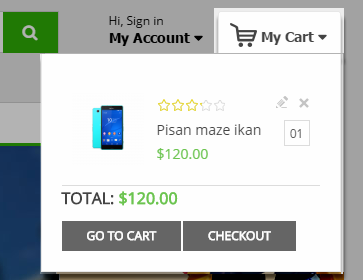
- Backend of SM Cart Pro: Click Here
III. SM Image Slider
- Position: SM Image Slider
- Frontend
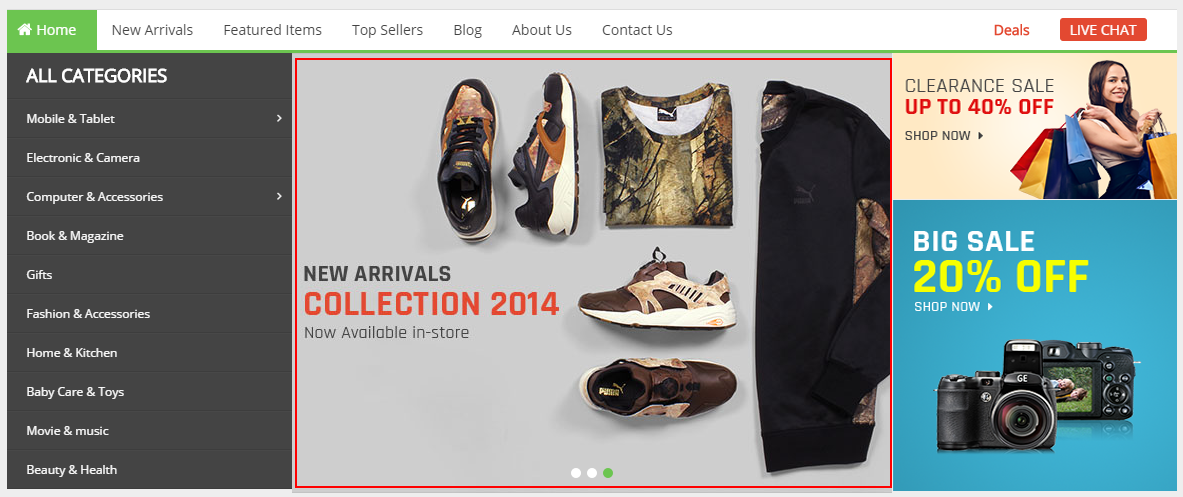
- Backend of SM Image Slider: Click Here
IV. SM Basic Products
- Position: SM Basic Products
- Frontend
- Backend of SM Basic Products: Click Here
VI. SM Deals
- Position: SM Deals
- Frontend
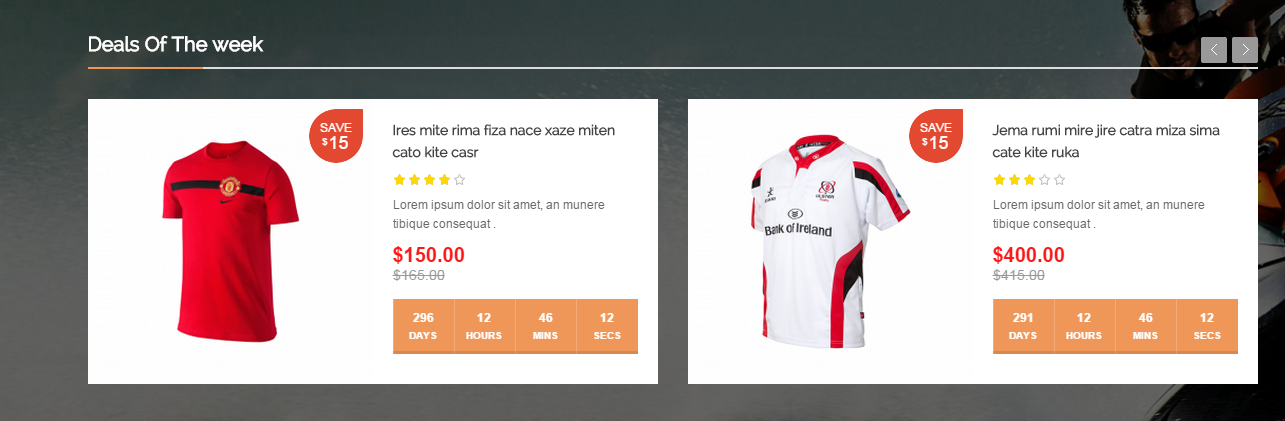
- Backend of SM Deals: Click Here
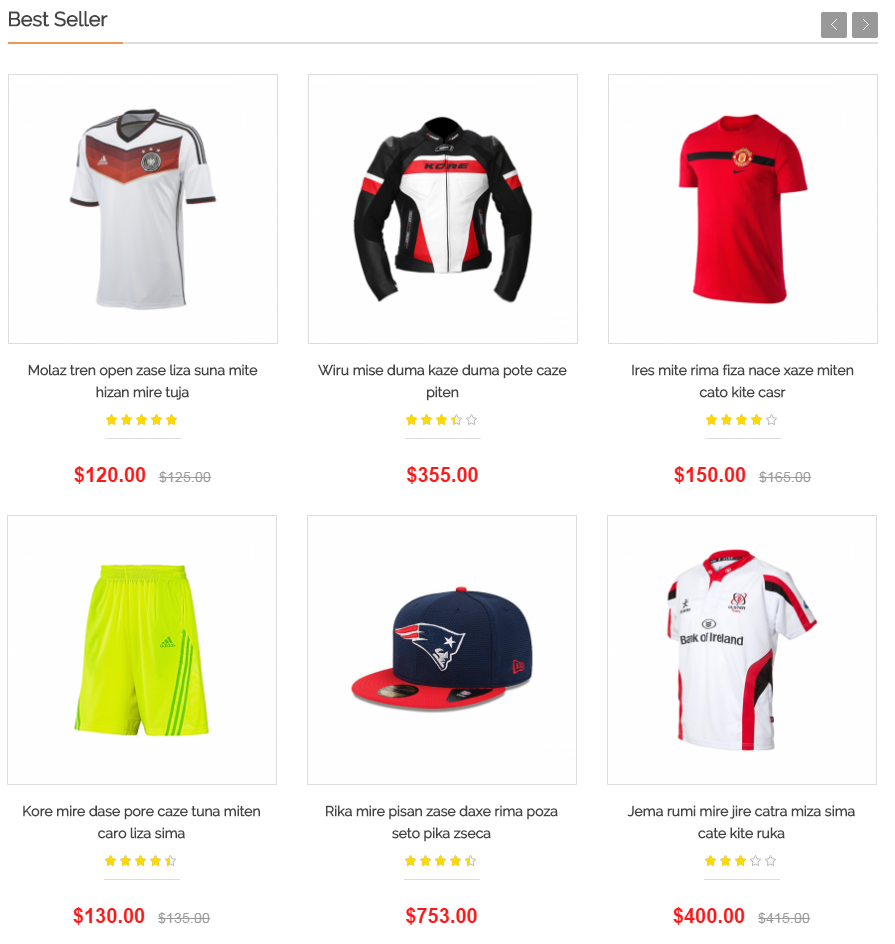
VII. SM Super Categories
- Position: SM Super Categories
- Frontend
- Backend of SM Super Categories: Click Here
- To config this position, please navigate to CMS >> Pages >> Home page, navigate to Design tab and paste code as below:
|
1
2
3
4
5
6
7
8
9
10
11
12
13
14
15
16
17
18
19
20
21
22
23
24
25
26
|
<reference name="content">
<block type="supercategories/list" name="supercategories.list.1" template="sm/supercategories/default.phtml"></block>
<block type="supercategories/list" name="supercategories.list.2" template="sm/supercategories/default.phtml">
<action method="_setConfig">
<values>
<product_category>5</product_category>
<static_id>des-super-cat-2</static_id>
<filter_order_by>top_rating</filter_order_by>
<product_order_dir>DESC</product_order_dir>
</values>
</action>
</block>
<block type="supercategories/list" name="supercategories.list.3" template="sm/supercategories/default.phtml">
<action method="_setConfig">
<values>
<product_category>92</product_category>
<static_id>des-super-cat-3</static_id>
<filter_order_by>most_viewed</filter_order_by>
<product_order_dir>DESC</product_order_dir>
</values>
</action>
</block>
</reference>
|
4.5 Configure blocks
The SM Maxshop has static blocks in the Theme:
- Maxshop - Header Slider
- Maxshop - Hotline
- Maxshop - FAQs
- Maxshop - Slider Testimonial
- Maxshop - Brand
- Maxshop - Bottom Services
- Maxshop - Description Footer
- Maxshop - Account Footer
- Maxshop - Infomation Footer
- Maxshop - About Footer
To create static blocks, go to CMS >> Static Blocks >> Add new block
Maxshop - Header Slider
Frontend

Link show Backend of Maxshop - Header Slider.
Content Code of Maxshop - Header Slider:
|
1
2
3
4
5
6
7
8
9
10
11
12
13
14
15
16
17
18
19
20
21
22
23
24
25
26
27
28
29
|
<div class="label-offer-slider">
This Week
</div>
<div class="offer-wrapper">
<div class="offer-header">
<ul id="offer-slider">
<li class="item"><a title="Offer" href="#">Pellentesque elementum aliquam libero sed tincidunt nullam!</a></li>
<li class="item"><a title="Offer" href="#">Pellentesque elementum aliquam libero sed tincidunt nullam!</a></li>
<li class="item"><a title="Offer" href="#">Pellentesque elementum aliquam libero sed tincidunt nullam!</a></li>
<li class="item"><a title="Offer" href="#">Pellentesque elementum aliquam libero sed tincidunt nullam!</a></li>
<li class="item"><a title="Offer" href="#">Pellentesque elementum aliquam libero sed tincidunt nullam!</a></li>
</ul>
<script type="text/javascript">// <![CDATA[
jQuery(document).ready(function($) {
$("#offer-slider").owlCarousel({
autoPlay: true,
navigation : false,
pagination: false,
slideSpeed : 300,
paginationSpeed : 400,
singleItem:true
});
});
// ]]></script>
</div>
</div>
|
Maxshop - Hotline
Frontend

Link show Backend of Maxshop - Hotline.
Content Code of Maxshop - Hotline:
|
1
2
3
4
|
<div class="hot-lilne-wrapper">
<h2>HOT LINE:</h2>
<a href="tel:+123456789" title="Call: (801) 2345 - 6789">(801) 2345 - 6789</a>
</div>
|
Maxshop - FAQs
Frontend
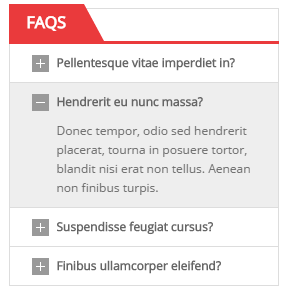
Link show Backend of Maxshop - FAQs.
Content Code of Maxshop - FAQs:
|
1
2
3
4
5
6
7
8
9
10
11
12
13
14
15
16
17
18
19
20
21
22
23
24
25
26
27
28
29
30
31
32
33
34
35
36
37
38
39
40
41
42
43
44
45
46
47
48
49
50
51
52
53
54
55
56
57
58
59
60
61
62
63
64
65
66
|
<div class="block faqs-block">
<div class="block-title">
<strong>
<span>FAQs</span>
</strong>
</div>
<div class="block-content">
<div class="faq-wrapper">
<div class="faq-item">
<div class="accordion" id="section1"><span>Pellentesque vitae imperdiet in?</span></div>
<div class="container-accordion">
<div class="content">
Donec tempor, odio sed hendrerit placerat, tourna in posuere tortor, blandit nisi erat non tellus. Aenean non finibus turpis.
</div>
</div>
</div>
<div class="faq-item">
<div class="accordion" id="section2"><span>Hendrerit eu nunc massa?</span></div>
<div class="container-accordion">
<div class="content">
Donec tempor, odio sed hendrerit placerat, tourna in posuere tortor, blandit nisi erat non tellus. Aenean non finibus turpis.
</div>
</div>
</div>
<div class="faq-item">
<div class="accordion" id="section3"><span>Suspendisse feugiat cursus?</span></div>
<div class="container-accordion">
<div class="content">
Donec tempor, odio sed hendrerit placerat, tourna in posuere tortor, blandit nisi erat non tellus. Aenean non finibus turpis.
</div>
</div>
</div>
<div class="faq-item">
<div class="accordion" id="section4"><span>Finibus ullamcorper eleifend?</span></div>
<div class="container-accordion">
<div class="content">
Donec tempor, odio sed hendrerit placerat, tourna in posuere tortor, blandit nisi erat non tellus. Aenean non finibus turpis.
</div>
</div>
</div>
</div>
</div>
<script type="text/javascript">
jQuery(document).ready(function($) {
$('.accordion').accordion_snyderplace({
defaultOpen: 'section2',
speed: 'fast',
animateOpen: function (elem, opts) { //replace the standard slideUp with custom function
elem.next().slideFadeToggle(opts.speed);
},
animateClose: function (elem, opts) { //replace the standard slideDown with custom function
elem.next().slideFadeToggle(opts.speed);
}
});
//custom animation for open/close
$.fn.slideFadeToggle = function(speed, easing, callback) {
return this.animate({opacity: 'toggle', height: 'toggle'}, speed, easing, callback);
};
});
</script>
</div>
|
Maxshop - Slider Testimonial
Frontend
Link show Backend of Maxshop - Slider Testimonial.
Content Code of Maxshop - Slider Testimonial:
|
1
2
3
4
5
6
7
8
9
10
11
12
13
14
15
16
17
18
19
20
21
22
23
24
25
26
27
28
29
30
31
32
33
34
35
36
37
38
39
40
41
42
43
44
45
46
47
48
49
50
51
52
53
54
55
56
57
58
59
60
61
62
63
64
65
66
67
68
69
70
71
72
73
74
75
76
77
78
79
80
|
<div class="block client-say">
<div class="block-title">
<strong>
<span>Testimonial</span>
</strong>
</div>
<div class="block-content">
<div class="client-say-slider">
<div class="item item-client-say">
<div class="client-comment">
"Duis aliquam, magna ac fermentum are finibus, orci viverra risus, non into varius tellus tortor sed eros. Sed pharetra ante sit amet suscipit ornare"
</div>
<div class="client-say-info">
<div class="image-client">
<a href="#" title="Jack Andrson"><img src="{{media url="wysiwyg/image-client/img-client-1.png"}}" alt="Image Client" /></a>
</div>
<div class="name-client">
<h2><a href="#" title="Jack Andrson">Jack Andrson</a></h2>
<p>Web designer</p>
</div>
</div>
</div>
</div>
</div>
<script>
jQuery(document).ready(function($) {
var owl_client = $(".client-say-slider");
owl_client.owlCarousel({
itemsCustom : [
[0, 1],
[480, 1],
[768, 1],
[992, 1],
[1200, 1]
],
slideSpeed : 300,
stopOnHover: true,
paginationSpeed : 400,
autoPlay:false,
pagination: true,
});
});
</script>
</div>
|
Maxshop - Brand
Frontend
Link show Backend of Maxshop - Brand.
Content Code of Maxshop - Brand:
|
1
2
3
4
5
6
7
8
9
10
11
12
13
14
15
16
17
18
19
20
21
22
23
24
25
26
|
<div class="block block-brand">
<div class="block-title">
<strong>
<span>Our Brand</span>
</strong>
<a class="view-all-brand" href="#" title="View All">View All</a>
</div>
<div class="block-content">
<div class="brand-wrapper">
<ul>
<li><a href="#" title="Brand"><img src="{{media url="wysiwyg/brand-image/brand-logo-1.png"}}" alt="Brand Logo" /></a></li>
<li><a href="#" title="Brand"><img src="{{media url="wysiwyg/brand-image/brand-logo-2.png"}}" alt="Brand Logo" /></a></li>
<li><a href="#" title="Brand"><img src="{{media url="wysiwyg/brand-image/brand-logo-3.png"}}" alt="Brand Logo" /></a></li>
<li><a href="#" title="Brand"><img src="{{media url="wysiwyg/brand-image/brand-logo-4.png"}}" alt="Brand Logo" /></a></li>
</ul>
</div>
</div>
</div>
|
Maxshop - Bottom Services
Frontend

Link show Backend of Maxshop - Bottom Services.
Content Code of Maxshop - Bottom Services:
|
1
2
3
4
5
6
7
8
9
10
11
12
13
|
<ul class="list-services">
<li class="item-service col-lg-4 col-md-4 col-sm-4">
<a href="#" title="Free Shipping"><img src="{{media url="wysiwyg/static-image-home/free-shipping.png"}}" alt="Free Shipping" /></a>
</li>
<li class="item-service col-lg-4 col-md-4 col-sm-4">
<a href="#" title="Guaranteed"><img src="{{media url="wysiwyg/static-image-home/guaranteed.png"}}" alt="Guaranteed" /></a>
</li>
<li class="item-service col-lg-4 col-md-4 col-sm-4">
<a href="#" title="Deal"><img src="{{media url="wysiwyg/static-image-home/deal.png"}}" alt="Deal" /></a>
</li>
</ul>
|
Maxshop - Description Footer
Frontend
Link show Backend of Maxshop - Description Footer.
Content Code of Maxshop - Description Footer:
|
1
|
<p>Lorem Ipsum is simply dummy text of the printing and typesetting industry.Lorem Ipsum is simply dummy text of the printing and typesetting industry.</p>
|
Maxshop - Account Footer
Frontend
Link show Backend of Maxshop - Account Footer.
Content Code of Maxshop - Account Footer:
|
1
2
3
4
5
6
7
8
9
10
11
12
|
<div class="footer-title">
<h2>MY ACCOUNT</h2>
</div>
<div class="content-block-footer">
<ul>
<li><a title="Sitemap" href="#"><span class="icon-double-angle-right"> </span>Sitemap</a></li>
<li><a title="Privacy Policy" href="#"><span class="icon-double-angle-right"> </span>Privacy Policy</a></li>
<li><a title="Your Account" href="{{store url="customer/account/"}}"><span class="icon-double-angle-right"> </span>Your Account</a></li>
<li><a title="About Us" href="{{store url="about-us.html"}}"><span class="icon-double-angle-right"> </span>About Us</a></li>
<li><a title="Contact Us" href="{{store url="contact-us.html"}}"><span class="icon-double-angle-right"> </span>Contact Us</a></li>
</ul>
</div>
|
Maxshop - Information Footer
Frontend

Link show Backend of Maxshop - Information Footer.
Content Code of Maxshop - Information Footer:
|
1
2
3
4
5
6
7
8
9
10
11
12
|
<div class="footer-title">
<h2>INFORMATION</h2>
</div>
<div class="content-block-footer">
<ul>
<li><a title="My Account" href="#"><span class="icon-double-angle-right"> </span>My Account</a></li>
<li><a title="Order History" href="#"><span class="icon-double-angle-right"> </span>Order History</a></li>
<li><a title="Returns" href="#"><span class="icon-double-angle-right"> </span>Returns</a></li>
<li><a title="Specials" href="#"><span class="icon-double-angle-right"> </span>Specials</a></li>
<li><a title="Site Map" href="#"><span class="icon-double-angle-right"> </span>Site Map</a></li>
</ul>
</div>
|
Maxshop - About Footer
Frontend
Link show Backend of Maxshop - About Footer.
Content Code of Maxshop - About Footer:
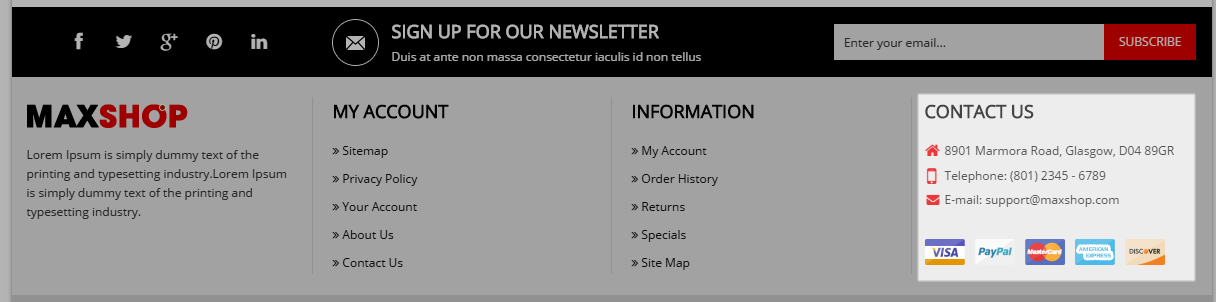
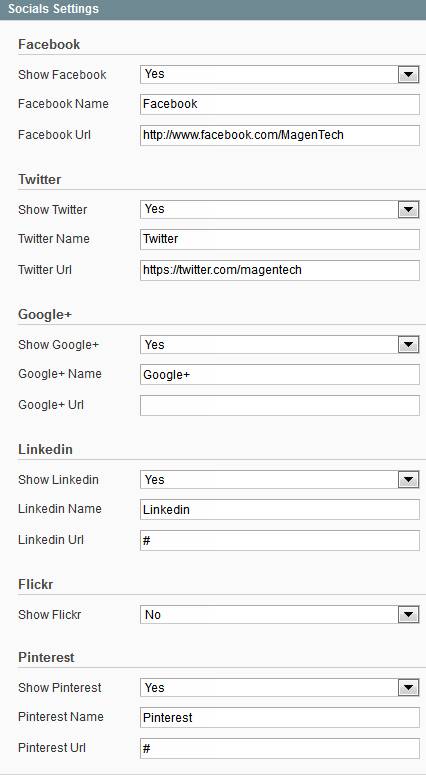
4.6 How To Enable/Disable Social setting & Custom Copyright in admin
Frontend Appearance
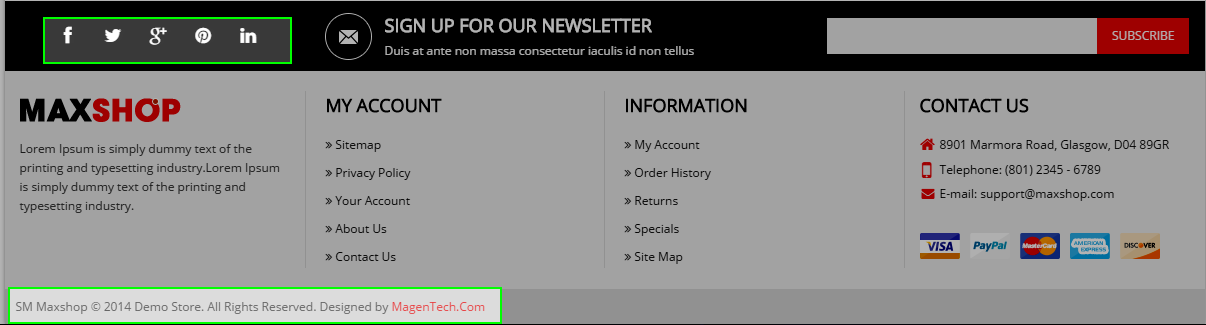
In the Administrator page, Please navigate to System >> Configuration >> find SM Maxshop to configure the “Social setting” & “Custom Copyright” parameter as image below:

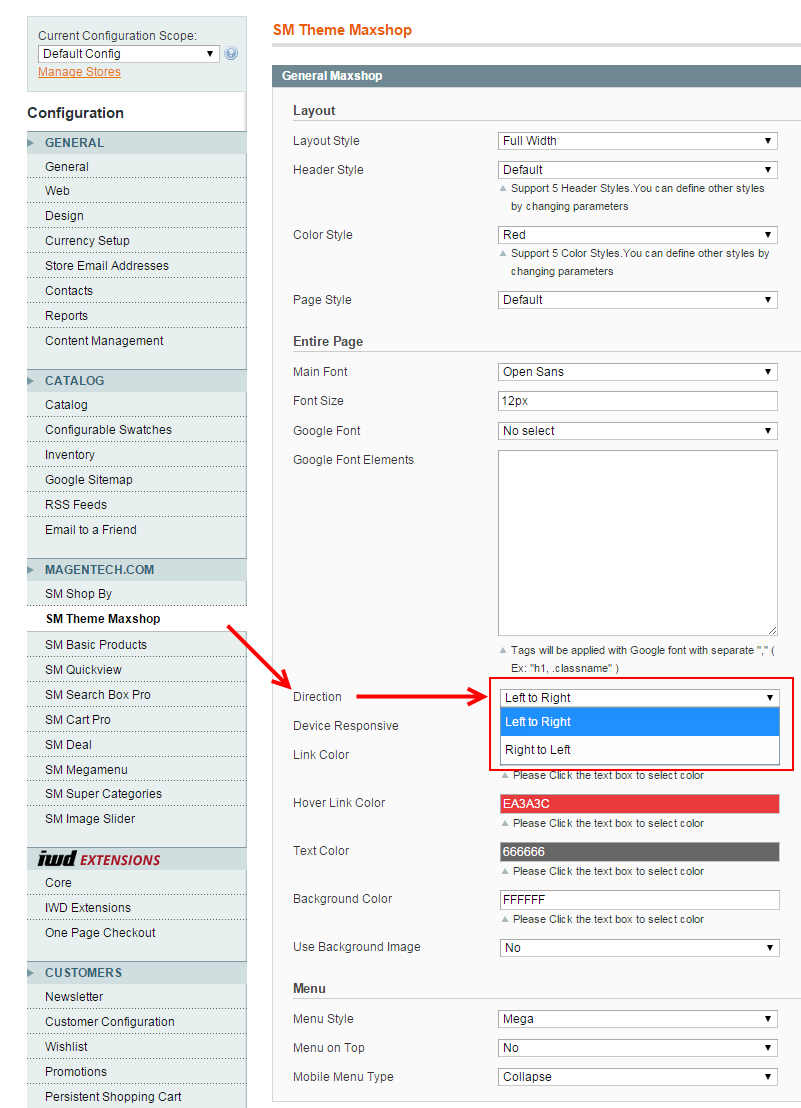
4.7 Configure RTL/LTR Theme Direction
In your Administrator page, please navigate System >> Configuration >> SM Theme Maxshop (in your left hands column) >> In the General Maxshop >> navigate to Direction >> selecting “Left To Right/Right To Left” >> press “Save config” button.
4.8 Configure Swatches
Please go Here to readmore How To Create Configurable Swatches in Magento EE 1.14.1 and Magento CE 1.9.1
- Note: Please click Here to view more about How To Set Default Language and Currency in Magento
5SUPPORT – Back to top
Thank you so much for purchasing this theme. If you have any questions that are beyond the scope of this help file, please send us via: Support Tickets System
Thanks so much!